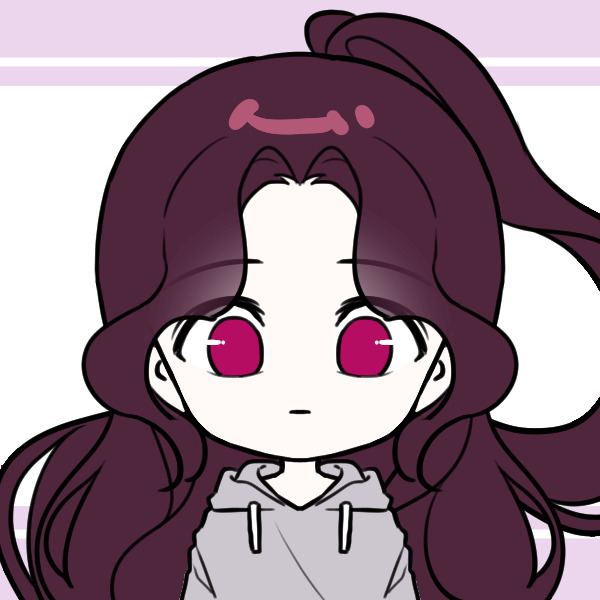
That character has defeated monsters, survived impossible plot twists, and maintained flawless hair through several explosions. Now comes the truly dangerous challenge: drawing them without accidentally giving them one enormous eye, a tiny hand, and a sword shaped like a bent pool noodle.
Learning how to draw your favorite anime or manga character is an excellent way to practice observation, figure construction, facial expressions, line art, and digital coloring. You do not need expensive equipment or mysterious artistic powers. You need a reference, a repeatable process, and enough patience to accept that the first sketch may look like the character’s distant cousin.
Why Drawing an Existing Character Is Great Practice
Creating fan art gives you a clear visual target. Instead of inventing every detail from scratch, you can study how professional artists simplify anatomy, arrange facial features, design costumes, and communicate personality through shape.
Copying an image for private study can help beginners understand how a finished illustration is constructed. The goal, however, should be active analysis rather than mindless tracing. Ask why the head has a particular shape, why the hair points in certain directions, and which details make the character recognizable. Repetition strengthens drawing skills when each attempt includes observation and correction.
Recognition Depends on More Than the Face
A convincing character drawing usually combines several identifying features:
- A recognizable silhouette
- Distinctive hair, clothing, or accessories
- Consistent facial proportions
- A pose that matches the character’s personality
- Signature colors, symbols, weapons, or visual effects
You can draw a beautifully rendered face and still miss the likeness if the hairstyle, posture, or costume language feels wrong. Character design relies heavily on line, shape, color, texture, space, and valuethe same foundational elements used throughout visual art.
Choose a Useful Reference Image
Start with one clear reference showing the angle and expression you intend to draw. A front-facing portrait is easier than a spinning aerial attack viewed from below, especially when you are still negotiating peace with perspective.
Official character sheets, manga panels, promotional illustrations, and clean animation stills are generally more useful than blurry screenshots. Gather two or three supporting references for details that are hidden in the main image, such as the back of a jacket, the shape of a weapon, or the direction of a hairstyle.
Study the Reference Before Touching the Pencil
Spend a minute identifying the largest relationships:
- How much of the canvas does the figure occupy?
- Is the head tilted, turned, or foreshortened?
- Which shoulder sits higher?
- Where does the body’s weight rest?
- What is the darkest area of the design?
- Which feature attracts attention first?
Using references is not evidence of artistic weakness. It is a practical method for studying poses, anatomy, clothing, lighting, and perspective. Experienced illustrators regularly collect visual references rather than asking their memory to perform acrobatics on command.
Prepare Your Drawing Tools
Traditional Supplies
For a pencil drawing, you need only paper, a pencil, an eraser, and an optional fineliner. A harder pencil can create pale construction lines, while a softer pencil is useful for darker accents and shading. Smooth paper makes clean inking easier; textured paper creates a looser, more organic result.
Digital Supplies
A tablet and pressure-sensitive stylus are convenient but not mandatory. You can draw with a mouse, touchscreen, or inexpensive tablet using software such as Krita, MediBang Paint, ibisPaint, Adobe Fresco, or Clip Studio Paint.
Digital layers make revisions much less painful. Keep the rough sketch, clean line art, flat colors, shadows, highlights, and background on separate layers. This arrangement lets you correct the hair without erasing half the face, which is one of civilization’s quieter achievements.
Step 1: Build the Pose With Gesture
Do not begin with the eyelashes. Start with the action.
Draw a loose line of action running through the head, spine, and supporting leg. Add simple marks for the shoulders, hips, arms, and legs. At this stage, your character may resemble an energetic stick figure. That is exactly what you want.
Gesture drawing captures rhythm, weight, balance, and direction before details stiffen the pose. It also helps communicate a story: confidence might push the chest forward, exhaustion may curve the spine, and suspicion can pull the head back while the eyes remain fixed on a target.
Match the Character’s Energy
A cheerful hero might use an open pose with separated limbs and an upward rhythm. A quiet strategist may appear controlled and compact. A villain can lean forward, dominate the frame, or use sharp angles that create visual tension.
Exaggeration is welcome, but the pose should remain balanced. Imagine where the character’s center of gravity falls. Unless they are flying, falling, or enjoying a dramatic anime entrance, their weight must be supported by something.
Step 2: Construct the Head and Body
Turn the gesture into three-dimensional forms. Use a sphere for the skull, a tapered block for the jaw, a rib-cage shape for the chest, and a simplified box or bowl for the pelvis. Arms and legs can begin as cylinders connected by small joint markers.
This structure prevents the common problem of drawing attractive details on a body that does not occupy believable space. Anime anatomy is stylized, but stylization works best when it grows from an understanding of basic form.
Use Head Units, Not Rigid Rules
Realistic adult figures are often studied using approximate head-length measurements, but anime and manga proportions vary enormously. A serious action character may be seven or eight heads tall, while a chibi design may be only two or three.
Measure the character in your reference instead of forcing every design into one formula. Compare the head with the torso, legs, shoulders, and hands. The objective is internal consistency, not obedience to an imaginary proportion police department.
Step 3: Draw the Anime or Manga Face
Begin with the complete head shape before adding individual features. Draw a vertical centerline that follows the direction of the face, then add horizontal guides for the eyes, nose, and mouth. When the head turns, these guidelines curve around the form rather than remaining perfectly straight.
Drawing the eyes first and trying to build the skull around them often creates an unbalanced face. Establishing the head, centerline, and facial angle first gives every feature a shared structure.
Eyes
Anime eyes are simplified designs, not random oversized ovals. Observe the upper-lid angle, iris size, pupil placement, eyelash thickness, and amount of visible white. A tiny change in the eyebrow or upper lid can shift the expression from calm to furious surprisingly quickly.
Nose and Mouth
Many manga styles indicate the nose with a short line, shadow, or small wedge. The mouth may be equally minimal, but its position still depends on the angle of the head. Keep these features aligned with the centerline.
Expression
Study the eyebrows, eyelids, cheeks, mouth corners, and jaw together. Emotion is a coordinated performance. A smiling mouth beneath angry eyebrows may create either complex acting or the unmistakable expression of someone who has just developed a revenge plan.
Step 4: Construct the Hair as Large Shapes
Anime hair is one of the strongest identifying features, yet beginners often draw it strand by strand. That approach creates visual spaghetti.
First establish the skull. Then draw the outer mass of the hairstyle, followed by the bangs, side sections, and major locks. Consider where the hair begins, how it grows away from the scalp, and how gravity or movement affects its direction.
Group strands into purposeful shapes. Use smaller flyaway hairs only near the end. Manga and semi-realistic hair tutorials commonly emphasize large forms, directional flow, controlled highlights, and selective detail rather than giving every strand an individual résumé.
Step 5: Add Clothing, Props, and Signature Details
Place clothing over the constructed body instead of replacing the body with a mysterious fabric-shaped object. Think about where cloth stretches, hangs, folds, or bunches around joints.
Prioritize the details that define the character. A headband, scar, coat collar, earring, emblem, glove, or weapon may matter more than twenty tiny seams. Test the silhouette by temporarily filling the figure with black. A strong character should remain readable even when interior details disappear.
Shape language can reinforce personality. Rounded forms tend to feel soft or approachable, squares can suggest strength and stability, and sharp triangular forms may communicate danger or speed. These associations are tools rather than laws, so combine them thoughtfully.
Step 6: Create Clean, Expressive Line Art
Lower the opacity of your rough sketch or place a clean sheet over it. Ink with longer, deliberate strokes rather than repeatedly scratching at the same edge.
Vary the line weight. Thicker lines can emphasize the outer contour, overlapping forms, deep shadows, or areas close to the viewer. Thinner lines work well for facial details, highlights, fabric patterns, and distant objects. Controlled variation makes line art feel lively and separates forms without requiring heavy shading.
Rotate the Canvas
Traditional artists rotate the paper, and digital artists should rotate the canvas. Your wrist produces some curves more comfortably than others. There is no medal for inking an awkward jawline upside down while refusing to move the page.
Step 7: Apply Flat Colors and Cel Shading
Place clean base colors beneath the line-art layer. Separate skin, hair, eyes, clothing, and accessories when possible. Before shading, check that the color palette resembles the reference and that the character remains readable at thumbnail size.
For classic anime-style coloring, choose one main light direction and create simple shadow shapes. Common shadow locations include beneath the bangs, under the chin, inside sleeves, beneath overlapping clothing, and on the side of the body facing away from the light.
Avoid using pure black for every shadow. A darker, slightly shifted version of the local color often produces a richer result. Add highlights selectively to the eyes, hair, metal, glossy fabric, or magical effects. The highlight should describe the material rather than landing everywhere like decorative confetti.
Step 8: Review and Correct the Drawing
Flip the canvas horizontally. This simple check makes proportion errors easier to notice because your brain sees the image from a fresh viewpoint. Also zoom out, inspect the silhouette, and compare major landmarks with the reference.
Ask these questions:
- Does the pose feel balanced and energetic?
- Are both eyes aligned with the head angle?
- Does the hair sit around the skull?
- Are the hands and feet appropriate for the perspective?
- Do overlapping forms remain clear?
- Is the face still recognizable at a small size?
- Does the lighting remain consistent?
Correct the largest problem first. Perfect eyelashes cannot rescue a head that is leaning away from its own neck.
Common Mistakes When Drawing Anime Characters
Tracing Without Studying
Tracing can demonstrate contour placement, but it teaches little when you do not analyze the forms underneath. Redraw the image afterward without tracing and compare the result.
Using Symbols Instead of Forms
An eye is not merely a familiar icon. It wraps around a head. Hair has volume. A hand changes shape when it turns. Build three-dimensional objects before simplifying them into a style.
Finishing Too Early
Many beginners carefully render the first sketch instead of testing alternatives. Try several small pose thumbnails before choosing one. Five rough experiments can save an hour of polishing the least interesting composition.
Hiding Difficult Parts
Conveniently placing both hands behind the character’s back is acceptable once. Repeating the strategy in every drawing may cause viewers to suspect your entire cast is hiding stolen cookies.
How to Practice Without Losing Motivation
Divide practice into manageable sessions. On one day, draw heads from several angles. On another, study hands, expressions, hairstyles, costumes, or action poses. Alternate focused exercises with complete fan-art projects so technical training does not drain all the fun from the hobby.
Keep old drawings. They may become embarrassing evidence, but they are also reliable proof of progress. Redrawing the same character after one month or six months can reveal improvements that are difficult to notice from day to day.
A Realistic Drawing Experience: From Blank Page to Finished Character
The following composite experience reflects what many beginners encounter while learning to draw a favorite anime or manga character.
The session begins with unreasonable confidence. The reference looks simple: one face, one jacket, one dramatic hairstyle. Ten minutes later, the sketch contains three rejected heads and an arm that appears to have escaped from a different drawing.
The breakthrough comes after abandoning the details. Instead of drawing the eyes again, the artist makes a tiny thumbnail and reduces the pose to one curved action line. The shoulders tilt. The hips move in the opposite direction. Suddenly the character stands with personality rather than waiting stiffly for an identification photograph.
The head is rebuilt as a sphere and jaw. A centerline reveals why the earlier eyes looked wrong: the face was turning right while the features were facing forward. Correcting that one relationship improves the likeness more than twenty minutes of eyelash repair.
Hair causes the next struggle. The first attempt includes dozens of separate spikes, each apparently pursuing a private career. The artist erases them and draws one large silhouette around the skull. Three major clumps define the bangs, side hair, and back mass. Only then are smaller locks added. The hairstyle finally resembles an intentional design rather than an electrical emergency.
During inking, the artist discovers that clean lines are not produced by moving painfully slowly. A few confident strokes look better than hesitant scratches. Some lines overshoot. Others wobble. Digital undo helps, but repeating one curve fifty times quickly becomes its own villain arc. Rotating the canvas and using the whole forearm produces smoother results.
Flat colors create another surprise. The drawing looks less impressive before it looks more impressive. Without shadows, the face seems empty and the clothing appears pasted together. A single shadow beneath the bangs, another beneath the chin, and a larger shape across the jacket restore depth. Small highlights in the eyes bring the expression to life.
Then the canvas is flipped. One eye rises alarmingly, the chin slides sideways, and the sword leans at an angle that no responsible blacksmith would approve. This moment feels cruel, but it is useful. The artist fixes the major problems instead of pretending the flip never happened.
The finished illustration is not identical to the official artwork. The hands remain slightly awkward, and the coat folds are simpler than the reference. Yet the character is recognizable, the pose has energy, and the drawing communicates the intended mood. More importantly, the artist now knows exactly what to practice next.
That is the valuable experience hidden inside fan art. Finishing one picture is satisfying, but learning to diagnose proportion, gesture, shape, and color creates skills that transfer to every future character. Progress rarely arrives as one spectacular leap. It appears through dozens of small corrections: a better head angle, a cleaner silhouette, a more confident line, and one hand that finally looks as though it belongs to a human.
Conclusion
To draw your favorite anime or manga character successfully, work from large decisions to small ones. Choose strong references, capture the gesture, construct the head and body, simplify the hair, identify signature details, and refine the image with expressive line art and controlled color.
Your first attempt does not need to look ready for publication. It needs to teach you something. Study the mistakes, finish the drawing, and try again. Eventually, the character who once emerged from your sketchbook looking mildly cursed will begin to resemble the hero, rival, wizard, detective, or snack-obsessed sidekick you intended.