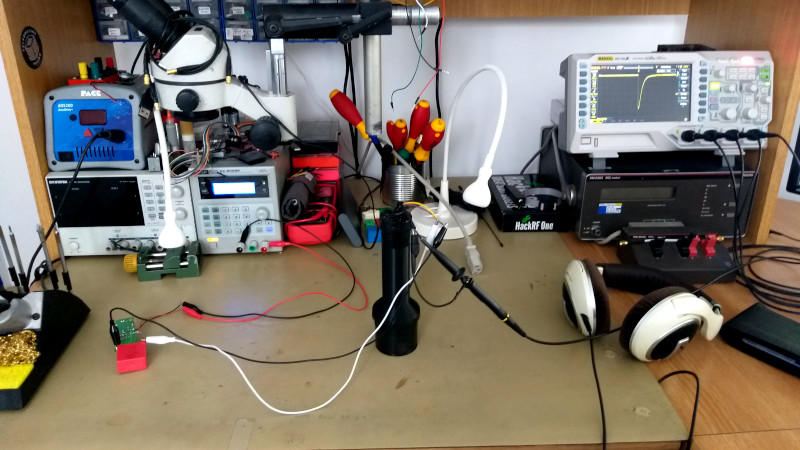
A Geiger counter is the celebrity of radiation detection. It clicks dramatically, looks slightly suspicious on a workbench, and makes every banana feel like it has a secret identity. But in the world of serious homemade radiation sensing, the scintillation detector is the quieter overachiever. A well-built DIY scintillation detector can be amazingly sensitive, especially to gamma radiation, and it can do more than simply announce that “something radioactive is nearby.” With the right parts and careful setup, it can begin to show how energetic those radiation events are.
The title “DIY Scintillation Detector Is Mighty Sensitive” points to a fascinating corner of hobby electronics where physics, optics, high-voltage design, and patient tinkering all meet for coffee. Instead of relying on a gas-filled Geiger-Müller tube, a scintillation detector uses a material that flashes when ionizing radiation deposits energy inside it. Those flashes are tiny, fast, and invisible to the naked eye, but a photomultiplier tube or silicon photomultiplier can turn them into electrical pulses that electronics can count, display, or analyze.
For makers, educators, and science fans, that is a deliciously nerdy promise: a homemade radiation detector that is not merely reactive, but observant. It can detect natural background radiation, compare low-level sources, and even form the beginning of a simple gamma spectroscopy setup. Of course, it also comes with a few serious responsibilities. Radiation safety is not a playground, high voltage is not a party trick, and sodium iodide crystals are not something to treat like loose candy. The reward, however, is a project that feels like building a tiny physics lab in a box.
What Is a Scintillation Detector?
A scintillation detector is a radiation detector built around a scintillator, a material that emits light when struck by ionizing radiation. In many gamma-ray detectors, the scintillator is thallium-doped sodium iodide, often written as NaI(Tl). When a gamma photon interacts with the crystal, it transfers energy to electrons in the material. As those electrons return to lower-energy states, the crystal releases small flashes of visible light. Those flashes are called scintillations.
The light does not do much by itself. It needs a highly sensitive light sensor. Traditional scintillation detectors use a photomultiplier tube, commonly called a PMT. A PMT converts faint light into electrons and then multiplies those electrons through a chain of internal dynodes. The result is a measurable electrical pulse. Modern designs may use a silicon photomultiplier, or SiPM, which performs a similar job in a compact solid-state package and typically uses much lower voltage than a PMT.
That simple chainradiation, crystal flash, light sensor, electrical pulseis the heart of the device. Add a power supply, signal conditioning, shielding from stray light, and a display or data logger, and suddenly your bench has a surprisingly sensitive window into the invisible world.
Why DIY Builders Love Scintillation Detectors
DIY scintillation detector projects attract hobbyists because they sit in the sweet spot between “challenging” and “actually possible.” You do not need a national laboratory to understand the basic concept, but you do need enough care to handle optics, noise, grounding, signal levels, and calibration. In other words, it is the kind of project that rewards patience and punishes sloppy wiring with mysterious behavior. Naturally, makers love it.
Compared with many simple Geiger counter builds, a scintillation detector can be more sensitive to gamma radiation because a dense scintillator crystal offers a larger interaction volume. A larger crystal gives incoming photons more material to interact with, increasing the chances that a radiation event becomes a detectable flash. That is one reason a 2-inch NaI(Tl) scintillator paired with a good photomultiplier can make a basic Geiger counter look like it is still waking up from a nap.
Another attraction is energy information. A Geiger-Müller tube is excellent for counting events, but it generally does not tell you much about the energy of each event. A scintillation detector can produce pulses whose heights relate to the energy deposited in the crystal. Feed those pulses into suitable electronics or a multichannel analyzer, and the detector can become a basic gamma spectrometer. That means it may not only detect radiation, but help distinguish one gamma-emitting source from another.
Scintillation Detector vs. Geiger Counter
Both scintillation detectors and Geiger counters detect ionizing radiation, but they do it in very different ways. A Geiger counter uses a gas-filled tube with high voltage across its electrodes. When radiation enters the tube and ionizes the gas, the detector produces a pulse. The result is the familiar clicking sound associated with radiation surveys. It is simple, rugged, and wonderfully dramatic.
A scintillation detector uses light instead of gas ionization as the first signal. That makes it more complex, but also more flexible. The scintillator material can be chosen for different types of radiation. NaI(Tl) is widely used for gamma detection. Zinc sulfide is often associated with alpha detection. Plastic scintillators can be useful for beta particles and fast timing applications. The material matters, because not every scintillator is sensitive to every type of radiation in the same way.
The practical difference for a hobbyist is this: a Geiger counter is often easier to build and interpret, while a scintillation detector can be more sensitive and more informative. If your goal is a simple warning device, a Geiger counter may be enough. If your goal is to explore faint background changes, compare gamma sources, or learn spectroscopy, a scintillation detector is the more interesting rabbit hole. It is also a rabbit hole with high-voltage rails, so bring respect.
The Key Parts of a DIY Scintillation Detector
1. The Scintillator Crystal
The scintillator is the star of the show. In many DIY projects, that star is a sealed NaI(Tl) crystal. Sodium iodide doped with thallium is popular because it has high light output and works well for gamma-ray detection. It is also hygroscopic, meaning it can absorb moisture from the air. That is why NaI(Tl) crystals are typically sealed in protective metal housings with optical windows. If moisture gets inside, performance can degrade, and the crystal may become cloudy or damaged.
For a homemade detector, a surplus scintillator probe is often the most practical path. Building a crystal assembly from scratch is not beginner-friendly. Buying a sealed scintillator and treating it gently is a much better idea than pretending your kitchen table is an optical materials lab.
2. The Light Sensor
A photomultiplier tube remains a classic choice. PMTs are extremely sensitive, fast, and capable of detecting very weak flashes. The trade-off is that many PMTs need a carefully regulated high-voltage supply, often hundreds to over a thousand volts depending on the tube. The current may be low, but the danger is real. A good enclosure, proper insulation, discharge procedures, and cautious testing are not optional decorations.
Silicon photomultipliers offer a modern alternative. They are compact, robust, and operate at much lower voltages. They are also attractive for portable designs. However, they have their own quirks, including dark noise, temperature sensitivity, and limited active area compared with larger PMTs. For small crystals and compact experiments, an SiPM can be wonderful. For larger surplus NaI(Tl) probes, a PMT may still be the easier match.
3. The High-Voltage or Bias Supply
If the detector uses a PMT, the power supply must be clean and stable. Noise from the supply can masquerade as signal noise, which is like inviting a drummer into a library and then complaining about the acoustics. Low ripple, good filtering, careful grounding, and shielding all matter. Famous low-noise high-voltage designs are popular references among electronics hobbyists because PMTs reward quiet power.
For SiPM designs, the bias voltage is lower but still important. Small changes in bias can affect gain and detection behavior. Temperature compensation may also be useful if the detector is expected to work consistently across different environments.
4. Signal Processing Electronics
The pulses from the light sensor need to be shaped, amplified, counted, or digitized. A simple counter can record counts per minute. A more advanced system can measure pulse height and sort events by energy. That is where pulse amplifiers, comparators, microcontrollers, oscilloscopes, audio interfaces, and multichannel analyzers enter the picture.
For a first build, it is wise to start simple: prove that the detector sees background radiation and responds to known safe test items. After that, improvements can come in layers. Better shielding, better pulse shaping, cleaner power, and more careful calibration can turn a “yes, it clicks” gadget into a surprisingly educational instrument.
Why Sensitivity Is the Big Deal
When people say a DIY scintillation detector is mighty sensitive, they usually mean it can register low levels of radiation more effectively than a small basic Geiger counter. This is especially noticeable with gamma radiation. A large scintillator crystal can intercept more gamma photons than a small detector tube, and a good PMT can amplify the resulting flashes into clear pulses.
That sensitivity changes the experience of using the detector. Background radiation is no longer an occasional click. It becomes a steady stream of measurable events. Move the detector near certain minerals, old luminous items, potassium-rich materials, or calibration check sources used legally and safely in educational settings, and the count rate may shift noticeably. The detector begins to reveal that the world is not silent; it is quietly sparkling with natural radiation.
Sensitivity also creates new challenges. A very sensitive detector can respond to environmental changes, electronic noise, light leaks, cable movement, and poor grounding. It may detect cosmic rays and natural background fluctuations. It may also detect your sloppy enclosure design, which is humbling but educational. The instrument becomes honest in a way that makes debugging both frustrating and addictive.
Safety First: Radiation and High Voltage Are Not Props
A DIY scintillation detector should be approached as an educational instrument, not as an excuse to collect questionable radioactive material. Natural background radiation, safe demonstration sources, and legal educational samples are enough for meaningful learning. Never open sealed sources. Never scrape, crush, heat, or inhale unknown materials. Never buy suspicious radioactive items because an online listing looked “science-y.” That is how a hobby becomes paperwork with unpleasant lighting.
Radiation safety is built around time, distance, and shielding. Minimize time near unnecessary sources, maximize distance, and use appropriate shielding when needed. Alpha particles can be stopped by very light materials, but they can be hazardous if inhaled or ingested. Beta particles may require plastic shielding. Gamma rays are more penetrating and may require dense shielding such as lead or substantial concrete depending on energy and intensity.
High voltage deserves equal respect. PMT supplies can produce dangerous voltages even when current is limited. Capacitors can hold charge after power is switched off. A safe build includes insulated connectors, enclosed wiring, bleeder resistors where appropriate, strain relief, clear labeling, and a habit of measuring before touching. The best DIY radiation detector is the one that teaches physics without teaching emergency medicine.
What Can You Detect With a Homemade Scintillation Detector?
A sensitive scintillation detector can detect natural background radiation, which comes from cosmic rays, terrestrial materials, radon decay products, and naturally occurring radionuclides such as potassium-40. This is one of the most rewarding first tests because it proves the detector is alive without needing any dramatic source.
Common educational demonstrations may include comparing background in different locations, measuring how count rate changes with distance from a safe check source, or observing how shielding changes the reading. Some hobbyists also use harmless household comparisons, such as potassium-containing salt substitutes, though results depend heavily on detector size, geometry, shielding, and measurement time. The point is not to panic about ordinary objects. The point is to learn that radiation measurement is statistical, contextual, and often less Hollywood than expected.
With spectroscopy-capable electronics, a NaI(Tl) scintillation detector can show peaks associated with gamma energies. Energy calibration typically requires known reference lines and careful setup. NaI(Tl) does not provide the razor-sharp resolution of high-purity germanium detectors, but it is far more accessible and plenty useful for learning the basics of gamma spectra.
Common Build Challenges
Light Leaks
The detector is trying to measure tiny flashes inside a crystal. Room light is a bully by comparison. Even a small light leak can swamp the signal or increase noise. A dark, sealed optical path between scintillator and sensor is essential. Black tape may help during prototyping, but a proper light-tight enclosure is better.
Electrical Noise
Noise can come from power supplies, digital electronics, poor grounding, long cables, or nearby equipment. Shielded cables, short signal paths, clean power rails, and thoughtful grounding reduce headaches. If the detector behaves differently when you move your hand nearby, it may be less of a radiation instrument and more of an accidental theremin.
Calibration Drift
PMT gain can change with voltage and temperature. SiPM behavior can also shift with temperature. If you want repeatable measurements, you need stable operating conditions or compensation. For casual counting, this may not matter much. For spectroscopy, it matters a lot.
Over-Interpreting Results
Radiation counts follow statistics. A short measurement can mislead you. Longer counting times improve confidence. Background subtraction, consistent geometry, and repeated trials are essential if you want comparisons to mean anything. In radiation measurement, impatience is basically a noise source wearing shoes.
How a DIY Scintillation Detector Becomes a Learning Tool
The beauty of a DIY scintillation detector is that it teaches several disciplines at once. From physics, you learn how ionizing radiation interacts with matter. From electronics, you learn about amplification, pulse detection, high voltage, filtering, and noise. From optics, you learn why coupling surfaces, light-tight enclosures, and reflective wrapping matter. From data analysis, you learn that counts are statistical and that pretty graphs still need careful interpretation.
It is also a reminder that “DIY” does not mean “cheap toy.” A homemade detector can be a serious instrument when assembled thoughtfully. A surplus scintillator, a carefully powered PMT, and clean signal electronics can outperform many simple hobby radiation counters in sensitivity. The project does not need to be fancy to be meaningful. It needs to be stable, safe, and understood.
Practical Experience: Lessons From Building and Using a Sensitive DIY Scintillation Detector
The first real lesson from working with a DIY scintillation detector is that sensitivity is both the prize and the prankster. On paper, the design looks straightforward: connect a scintillator to a light sensor, power the sensor, amplify the pulses, and count them. In practice, the detector will happily respond to things you did not realize you built into the system. A loose ground, a noisy converter, a microscopic light leak, or a cable that acts like an antenna can all make the project seem haunted. It is not haunted. It is just honest.
One of the most useful habits is to test in stages. First, verify the power supply without the detector connected. Then check the sensor response in darkness. Then connect the scintillator and look at pulses on an oscilloscope if available. Do not jump straight to a final enclosure and expect perfection. That is how you create a beautiful mystery box with three screws you can no longer reach.
The second lesson is that mechanical design matters more than many beginners expect. The optical coupling between the scintillator window and the PMT or SiPM needs to be stable. Air gaps, poor alignment, and pressure changes can reduce light transfer or make readings inconsistent. A 3D-printed enclosure can work very well, but it should hold components firmly without stressing fragile glass or crystal housings. Foam, brackets, and careful tolerances can make the difference between “promising prototype” and “why did the count rate change when I sneezed?”
The third lesson is that background measurement is not boring. At first, you may want to test the detector on something exciting. But background data is where you learn the personality of the instrument. Count for one minute, then ten minutes, then an hour. Watch how the average settles. Move the detector to different rooms. Try a basement, a countertop, a window, or a higher floor. The changes may be small, but they teach you how measurement time and environment affect results.
The fourth lesson is to resist dramatic conclusions. A higher count rate does not automatically mean danger. It may mean a different geometry, a longer measurement, a nearby dense material, radon variation, or simple statistical fluctuation. A scintillation detector is a sensitive instrument, not a panic machine. Treat it like a scientific tool: record conditions, repeat measurements, compare against background, and avoid turning every click into a conspiracy documentary.
The fifth lesson is that shielding experiments are surprisingly educational. Place safe shielding materials between the detector and a known low-level educational source and observe the change. Try distance changes. Keep the setup consistent. The goal is not to build a bunker on your desk. The goal is to see how radiation type, energy, distance, and material interact. Even simple experiments can make textbook explanations feel real.
Finally, a good DIY scintillation detector teaches humility. It makes invisible events visible, but it also exposes every weak assumption in the build. You learn that clean power matters. Darkness matters. Geometry matters. Patience matters. Documentation matters. The project may begin as “I want a more sensitive radiation detector,” but it often becomes something better: a compact lesson in how real instruments are made, tested, doubted, improved, and finally trusted. That is the true charm of the mighty sensitive scintillation detector. It does not just measure radiation. It measures your craftsmanship.
Conclusion
A DIY scintillation detector is one of the most rewarding projects in amateur science electronics because it combines real physics with real engineering. It can be more sensitive than a basic Geiger counter, especially for gamma radiation, and it can open the door to pulse analysis and entry-level gamma spectroscopy. The core idea is elegant: radiation creates tiny flashes in a scintillator, a PMT or SiPM converts those flashes into electrical pulses, and the electronics turn invisible events into countable data.
But the project deserves respect. The best builds are not just sensitive; they are safe, stable, light-tight, well-grounded, and carefully tested. For hobbyists, teachers, and curious makers, that is exactly what makes the detector so compelling. It is not a magic box. It is a small scientific instrument you can understand from the inside out.