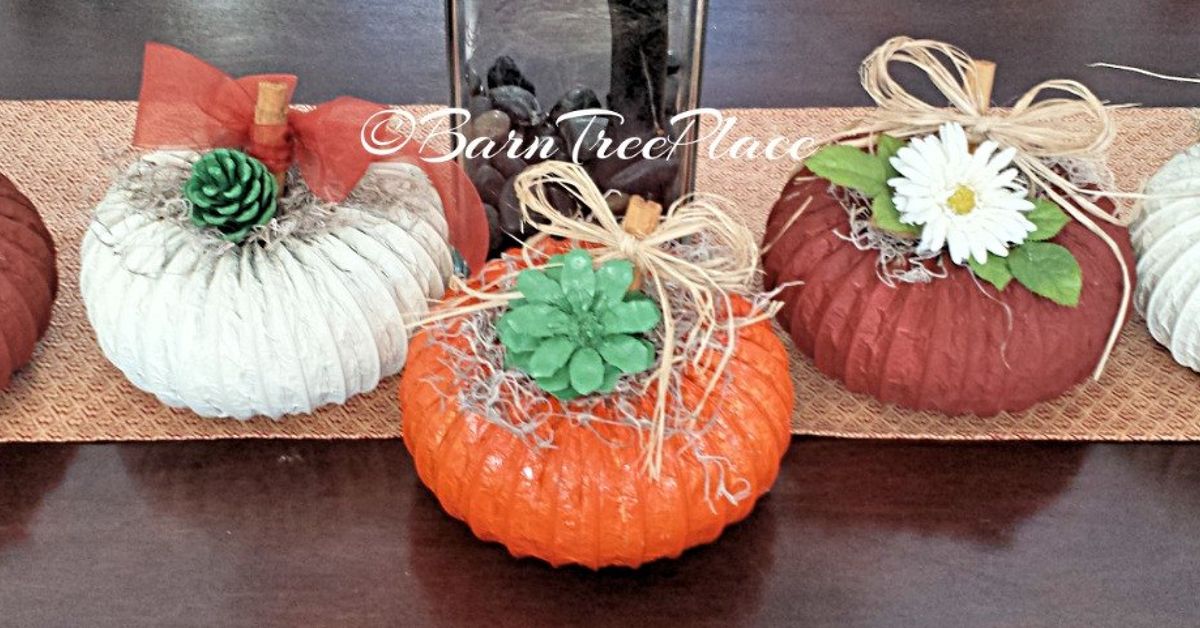
Few decorations announce fall as confidently as a pumpkin. Place one on a porch step and suddenly the house looks ready for cider, sweaters, and at least one decorative blanket nobody is allowedoky, playful, rustic, modern, or gloriously weirdsometimes all before lunch.
You do not need advanced crafting skills or a garage full of power tools. With paint, paper, fabric, natural materials, and a little planning, ordinary pumpkins can become personalized fall decorations for the porch, mantel, dining table, or entryway. This guide covers no-carve projects, painted designs, traditional carving, reusable alternatives, styling techniques, and practical ways to keep your creations looking fresh.
Why Make Your Own Pumpkin Decorations?
Store-bought fall decor is convenient, but homemade pieces have personality. A hand-painted pumpkin can match your home’s exact color palette. A monogrammed pumpkin can welcome guests. A collection of silly animal pumpkins can keep children entertained while giving the family group chat something new to discuss.
DIY projects also allow you to control cost and waste. You can reuse leftover paint, ribbon, yarn, fabric scraps, pressed leaves, old sweaters, and faux pumpkins from previous seasons. Real pumpkins bring natural texture and color, while foam, wood, fabric, and papier-mâché versions can be stored and displayed year after year.
No-carve decorating is especially useful at the beginning of fall because an intact pumpkin generally stays attractive longer than one that has been cut. It also avoids sharp tools, making painting, stickers, decoupage, and craft-foam designs more suitable for family activities. ion>
Choose the Right Pumpkin for the Project
For Painting and Decoupage
Look for a pumpkin with firm skin, an intact stem, and no soft patches, deep cuts, or bruises. A relatively smooth surface makes it easier to paint fine lines, attach paper, or apply a stencil. Wipe away soil with a slightly damp cloth and allow the pumpkin to dry completely before decorating. Water-based acrylic craft paint offers good control for detailed designs, while spray paint provides quick, even coverage for an all-over base color. >For Carving
Choose a firm pumpkin with a stable, flat bottom. A broad, smooth face gives you room for a stencil, lettering, or a classic jack-o’-lantern expression. Match the pumpkin to the design: medium pumpkins are manageable for simple faces, while larger ones provide space for detailed scenes and layered carving. >For Stacking and Porch Displays
Flat heirloom varieties work well in towers because they sit more securely than round pumpkins. Mix large anchor pumpkins with medium and miniature gourds, but keep the color palette controlled. White, sage, tan, and pale blue create a calm modern display; orange, burgundy, mustard, and deep green produce a traditional harvest look. ion>
Essential Supplies for DIY Pumpkin Decor
You will not need everything on this list for every project, but a small decorating station keeps the process organized:
- Real or faux pumpkins in several sizes
- Acrylic craft paint, chalk-style paint, or spray paint
- Foam brushes and small detail brushes
- Paint pens or washable markers
- Painter’s tape, reusable stencils, and letter stickers
- Decoupage medium and tissue paper or decorative napkins
- Ribbon, yarn, lace, felt, fabric scraps, and craft foam
- Pressed leaves, dried flowers, pinecones, and small twigs
- Craft glue or a low-temperature glue gun
- A pumpkin carving kit for adult-supervised projects
- Battery-powered tea lights or LED string lights
- Newspaper, kraft paper, or a reusable drop cloth
Set up on a stable table with good lighting. Protect the surface before opening paint or glitter, because glitter follows its own laws of physics and may remain in your home until spring.
Easy No-Carve DIY Pumpkin Decor Ideas
1. Modern Color-Block Pumpkins
Apply painter’s tape around the pumpkin to divide it into geometric sections. Paint each area in a limited palette, such as cream, terracotta, olive, and charcoal. Allow every coat to dry before removing or repositioning the tape. Paint the stem metallic gold or leave it natural for contrast.
2. Tissue-Paper Decoupage Pumpkins
Cut tissue paper or decorative napkins into leaves, dots, flowers, or abstract shapes. Brush a thin layer of decoupage medium onto the pumpkin, position the paper, and gently smooth it with the brush. Add another light coat over the top. Small wrinkles contribute handmade texture, so do not wrestle the paper as though it owes you money. >3. Pressed-Flower Pumpkins
Use dried flowers or pressed leaves to create a botanical pumpkin that works from September through Thanksgiving. Arrange the pieces before gluing so you can balance the shapes and colors. A white, pale green, or muted orange pumpkin provides an attractive background for delicate natural materials.
4. Plaid and Striped Pumpkins
Paint broad vertical stripes first, let them dry, and then add horizontal lines in a contrasting shade. Slightly uneven brushwork makes plaid designs feel warm and handmade rather than factory-perfect. For a simpler version, wrap a pumpkin with strips of flannel, burlap, or ribbon.
5. Monogram and House-Number Pumpkins
Paint a pumpkin in a solid color and apply a large letter, family name, short seasonal phrase, or house number with a stencil. These personalized pumpkins are especially useful near the front door. Choose a high-contrast combination, such as white lettering on navy or black lettering on cream, so the design is easy to read from the sidewalk. >6. Yarn-Wrapped Pumpkins
Wrap miniature faux pumpkins with yarn, securing the beginning and end with a small amount of glue. Chunky cream yarn creates a cozy knitted appearance, while bright colors produce playful mantel decor. This is also a useful way to repurpose short yarn leftovers that are too small for a larger project. >7. Animal and Character Pumpkins
Turn pumpkins into cats, foxes, owls, woodland creatures, or friendly monsters. Paint the base color, then attach felt ears, paper wings, craft-foam noses, or oversized googly eyes. Keep detachable pieces large when crafting with young children, and supervise the use of glue guns and small accessories. >8. Metallic and Gilded Pumpkins
Gold, copper, bronze, and silver finishes can turn inexpensive pumpkins into sophisticated table decorations. Cover the entire pumpkin with metallic paint, highlight only the stem, or add loose brushstrokes over a matte base. Metallic details pair well with black, navy, ivory, forest green, and dusty rose. >9. Disco Pumpkins
For decor that looks ready to host its own dance party, paint a faux pumpkin silver and cover it with small self-adhesive mirror tiles. Faux pumpkins are preferable for this project because the tiles take time to apply and the finished piece can be reused. Place the pumpkin where natural light or string lights can create reflections. ion>
Creative Carved and Etched Pumpkin Ideas
Start With a Template
Sketch your idea on paper before touching the pumpkin. Tape the finished pattern to the surface and transfer the lines by making small holes along the design. Simple shapes, generous spacing, and wider connecting sections are less likely to break than extremely thin details. >Try Etching Instead of Cutting Through
Etching removes the outer skin while leaving part of the pumpkin wall intact. When the pumpkin is lit, the thinner areas glow softly. This technique is useful for leaves, lettering, stars, lace-inspired patterns, and shaded faces. It also creates visual detail without requiring every line to become an open hole.
Create a Drilled Constellation
Paint the pumpkin dark blue or black, mark a constellation, and drill small holes for stars. Vary the hole sizes to create depth. Battery-powered lights placed inside will shine through the pattern, producing a cleaner and more modern alternative to a traditional face. >Use Safer Lighting
Battery-operated tea lights and LED strings create a warm glow without an open flame. They also produce less heat, which may help prevent the pumpkin from drying out as quickly. Keep cords, battery compartments, and lights protected from rain when decorating outdoors. Adults should handle knives, saws, drills, and carving tools. Children can select patterns, scoop seeds with a spoon, paint surrounding areas, or decorate a separate no-carve pumpkin.
How to Style Pumpkin Decor Around the Home
Front Porch
Begin with two or three large pumpkins to anchor the arrangement. Add medium pumpkins, miniature gourds, baskets, lanterns, mums, ornamental cabbage, dried grasses, or a wooden crate. Vary the height instead of arranging everything in one flat row. A restrained color palette helps a large porch display look intentional rather than like a pumpkin delivery truck overturned nearby. >Mantel
Use miniature pumpkins alongside books, candlesticks, framed art, leaves, and garland. Repeat two or three colors across the mantel to connect the pieces. If the fireplace is used, keep combustible decorations well away from heat and open flame.
Dining Table
Arrange small pumpkins down the center of the table with eucalyptus, dried leaves, pinecones, or battery-powered candles. Keep the centerpiece low enough for guests to see one another. Place cards can be attached to miniature pumpkins with ribbon or inserted into a small slit in a faux stem.
Kitchen and Entryway
A bowl of miniature gourds is an easy seasonal accent. For a more structured vignette, combine one medium pumpkin, a vase of branches, and a framed fall print. Odd-numbered groups usually look relaxed and balanced without appearing overly symmetrical.
How to Help Pumpkin Decor Last Longer
Keep real pumpkins in a cool, shaded, well-ventilated location. Strong afternoon sun and excessive heat can speed deterioration. Avoid clustering pumpkins so tightly that moisture becomes trapped between them, and check the undersides regularly for soft areas. Elevating outdoor pumpkins slightly can improve airflow and protect wood or concrete from moisture. elay carving until closer to the date when you plan to display the finished jack-o’-lantern. In warm climates, a carved pumpkin may decline quickly, while an intact painted pumpkin can serve as decor earlier in the season. LED lighting is preferable to a candle because it does not add flame or concentrated heat. utdoor decorations should be protected from heavy rain and extreme weather. Painted faux pumpkins are the most dependable choice for exposed locations or projects you hope to reuse next year.
Reuse, Compost, or Repurpose Your Pumpkins
At the end of the season, remove paint, glue, glitter, candles, pins, and synthetic decorations before deciding what to do with a real pumpkin. Clean, untreated pumpkins may be composted according to local guidelines. Fresh, food-safe varieties that were never carved or exposed to unsafe materials may also be used in appropriate recipes, but decorative pumpkins should never be assumed edible after weeks outdoors.
An unpainted pumpkin can also become a temporary planter. Cut an opening, remove the seeds and pulp, and insert a small nursery pot rather than filling the pumpkin directly with wet soil. The hidden pot makes watering easier and allows the plant to be removed when the pumpkin begins to soften. aux pumpkins can be repainted, wrapped in new fabric, or updated with removable embellishments. Choosing a neutral base color makes future transformations easier.
Experience Notes: What a Real Pumpkin-Decorating Weekend Teaches You
A successful DIY pumpkin decor session rarely begins with everyone calmly following a flawless plan. It usually begins with too many supplies on the table, one missing paintbrush, and somebody insisting that the pumpkin needs a tiny cowboy hat. That unpredictability is part of the appeal, but several practical lessons consistently make the experience better.
The first lesson is to prepare the pumpkins before the decorating enthusiasm reaches full speed. Cleaning and drying them in advance prevents paint from sliding over dust or damp skin. It also helps to label separate areas for wet paint, finished pumpkins, and undecorated pumpkins. Without those zones, someone will eventually place a sleeve, phone, or snack on a freshly painted surface.
The second lesson is to limit the palette. Setting out every paint color sounds generous, but it can turn a coordinated project into what might politely be called “experimental camouflage.” Four or five compatible colors still provide plenty of creative freedom. A neutral base, two autumn shades, one dark accent, and one metallic color can support dozens of different designs while allowing the finished pumpkins to look like a collection.
Drying time is another quiet troublemaker. Many ambitious designs fail because the next layer is applied too soon. Thin coats dry more evenly than one heavy coat, and several projects can be rotated through the painting station. While one pumpkin dries, work on a second. This simple rhythm keeps everyone busy without creating fingerprints, smears, or accidental abstract art.
Projects also become more enjoyable when they match the maker’s patience. Young children usually prefer large brushes, stickers, foam shapes, and bold faces. Older children and adults may enjoy stencils, lettering, decoupage, etching, or detailed patterns. Giving everyone the same difficult project often produces one impressive pumpkin and several abandoned gourds looking emotionally unavailable.
Porch styling brings another lesson: fewer carefully placed objects often make a stronger impression than dozens of unrelated decorations. Start with the largest pumpkins and containers, then step back before adding smaller items. Photographs taken from the sidewalk can reveal empty areas, awkward spacing, or a pumpkin tower that appears to be planning an escape.
Finally, perfection is not the goal. Pumpkins have grooves, bumps, scars, tilted stems, and irregular shapes. Those features can guide the design rather than interfere with it. A crooked stem may become a witch’s nose. A flat side may be ideal for lettering. A deeply ribbed pumpkin may already have the structure needed for stripes. The best DIY pumpkin decor works with the natural object instead of trying to make every surface behave like a blank sheet of paper.
The lasting value of the project is not simply the finished decoration. It is the small seasonal ritual: choosing pumpkins, making a mess, laughing at the strange results, and placing the final collection where everyone can enjoy it. Even the pumpkin that looks less like a fox and more like a confused potato has earned its place on the porch.
Conclusion
DIY pumpkin decor can be as simple as a painted monogram or as elaborate as a carved constellation, stacked porch installation, or reusable fabric collection. Begin with healthy pumpkins, choose techniques suited to the location and age group, and build the display around a consistent palette. Use no-carve projects early in the season, save fresh carving for closer to Halloween, and rely on LEDs for a safer glow.
Most importantly, let the pumpkins have personality. Fall decorating should feel warm and creative, not like an entrance exam for professional crafters. A few thoughtful materials and one free afternoon are enough to transform a humble gourd into decor worth displaying.