A plain wagon is useful. It hauls pumpkins, snacks, tired toddlers, parade supplies, and occasionally the emotional baggage of parents who said, “This will only take an hour.” But with a little PVC pipe, tulle, foam board, zip ties, and twinkling LED lights, that humble wagon can become something much more dramatic: a glowing Cinderella carriage worthy of a fairy godmother with a glue gun.
This DIY light up Cinderella carriage from a wagon is a magical project for Halloween, birthday parties, princess photoshoots, trunk-or-treat events, school parades, and neighborhood strolls. The best part is that you do not need a workshop full of power tools or a royal treasury. The frame can be built with lightweight PVC pipe or flexible hoops, the body can be dressed with fabric and foam board, and the sparkle comes from battery-operated LED lights.
The goal is simple: create a carriage that looks enchanting, stays lightweight, remains easy to pull, and does not permanently destroy the wagon. Because yes, after the ball is over, you may still need that wagon to carry juice boxes and folding chairs.
What Is a DIY Light Up Cinderella Carriage Wagon?
A Cinderella carriage wagon is a decorated kids’ wagon transformed into a fairytale coach. Instead of building a carriage from scratch, you use an existing wagon as the base and add a removable decorative frame around it. Most versions use a round or oval top to mimic Cinderella’s pumpkin carriage, soft fabric to create a dreamy canopy, and LED string lights to make the whole thing glow after sunset.
This project is especially popular for Halloween princess costumes because it turns the wagon into part of the outfit. A child dressed as Cinderella, a fairy princess, or a royal guest can ride comfortably while the wagon becomes the “carriage.” It is also a smart option for little kids who get tired halfway through trick-or-treating. Their feet get a break, and the adults get compliments. Everybody wins.
Project Overview
- Estimated time: 3 to 6 hours, depending on detail level
- Skill level: Beginner to intermediate
- Best for: Halloween, birthdays, parades, princess parties, photoshoots
- Main materials: Wagon, PVC pipe, zip ties, foam board, fabric, LED lights
- Recommended lighting: Battery-operated LED fairy lights or mini string lights
- Biggest rule: Keep everything lightweight, removable, and secure
Materials You’ll Need
You can customize the supply list based on the wagon size and the look you want. A classic blue-and-silver Cinderella palette feels instantly recognizable, while white, gold, lavender, or blush pink can make the carriage softer and more modern.
Basic Supplies
- One sturdy wagon or stroller wagon
- 1/2-inch or 3/4-inch PVC pipe
- PVC elbows, T-connectors, or cross connectors
- Pool noodles or pipe insulation for soft, rounded edges
- Zip ties in clear, white, or matching colors
- Foam board or corrugated cardboard
- Tulle, organza, sheer curtain panels, or lightweight fabric
- Battery-operated LED fairy lights or mini string lights
- Metallic spray paint or acrylic craft paint
- Ribbon, faux flowers, adhesive gems, or glitter accents
- Command-style hooks, hook-and-loop fastener strips, or removable clips
- Scissors, craft knife, measuring tape, pencil, and hot glue gun
Optional Decorative Extras
- Foam “wheels” for decorative carriage wheels
- Crown or pumpkin-shape cutouts
- Battery-operated puck lights for the seat area
- Outdoor-safe clear tape for weather protection
- Small pillow or cushion for comfort
- Reflective tape for visibility during evening events
Choosing the Right Wagon
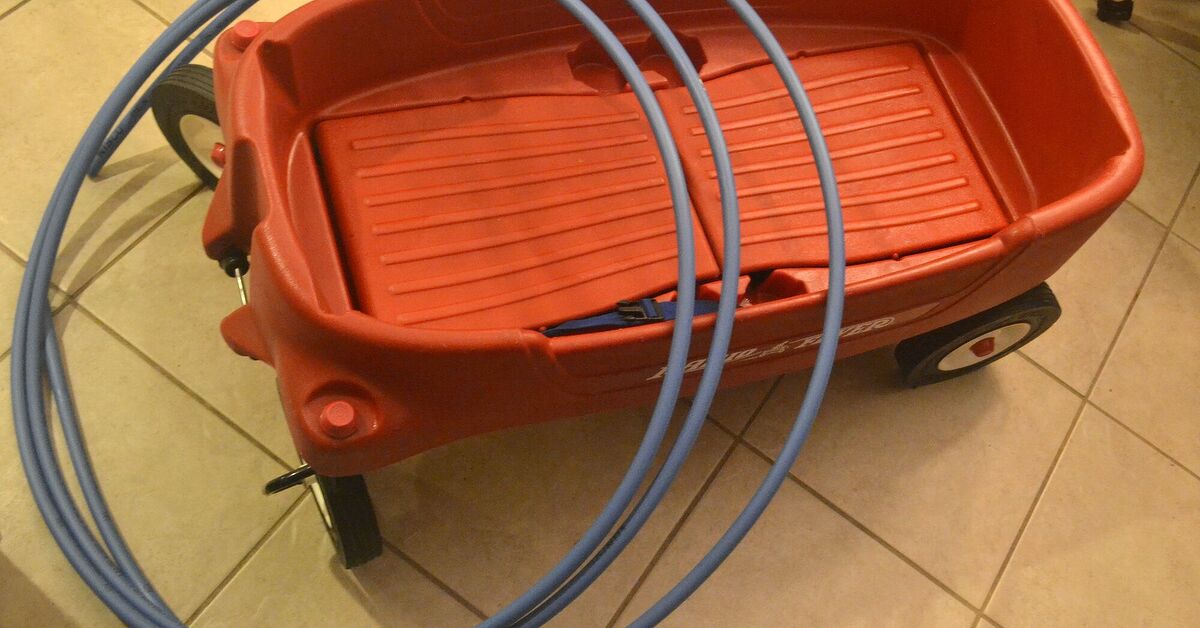
The best wagon for this DIY carriage is sturdy, clean, easy to pull, and large enough for the child or display items it will carry. A classic red wagon works beautifully, but fabric-sided stroller wagons are also popular because they usually offer more interior space and higher sides.
Before decorating, check the wagon’s weight limit, wheel condition, handle, brakes if it has them, and seat belts if it is designed for children. Decorations should never interfere with the wheels, handle, seat belts, folding mechanism, or the child’s ability to sit safely. The carriage should look magical, not like it was assembled by a raccoon during a power outage.
Safety First: Sparkle Responsibly
Because this project may involve children, evening use, and electrical decorations, safety matters as much as style. Use LED lights instead of hot incandescent bulbs because LEDs stay cooler and are better suited for close-contact decorative projects. Choose battery-operated lights when possible so you do not have cords dragging behind the wagon like a very sad royal tail.
Inspect all lights before attaching them. Do not use strands with exposed wires, cracked battery boxes, loose bulbs, or signs of overheating. Keep battery packs secured outside the child’s reach, and avoid small loose decorations that could become choking hazards for younger children. If the wagon will be used outdoors, choose lights labeled for indoor/outdoor use and protect battery compartments from moisture.
Also remember that this is a decorative project, not a structural upgrade. Do not attach heavy boards, sharp wire, glass ornaments, or anything that could fall onto the rider. Keep visibility open so the child can see out and adults can see in.
Step-by-Step: How to Make a Light Up Cinderella Carriage From a Wagon
Step 1: Clean and Measure the Wagon
Start by wiping down the wagon and removing loose accessories. Measure the length, width, and height of the wagon body. Write these numbers down before heading to the hardware store. Guessing measurements is how you end up standing in the PVC aisle whispering, “This feels carriage-sized,” which is not a recognized unit of measurement.
Decide how tall the carriage should be. For most kids’ wagons, a top height of 36 to 48 inches from the wagon floor creates a good carriage shape without making it too top-heavy. Leave enough room for the child to sit comfortably and for an adult to reach inside if needed.
Step 2: Build the Main PVC Arch
The easiest structure is a simple arched frame. Cut two equal lengths of PVC pipe for the side arches. Bend or connect them over the wagon so they form a rounded carriage roof. Depending on the pipe thickness and wagon size, you can use flexible PVC, elbows, or straight pieces joined into a curved-looking frame.
Attach the frame to the wagon using zip ties or removable hook-and-loop straps. Do not drill into the wagon unless you are comfortable making permanent changes. Keep the attachment points low and secure. The frame should not wobble when the wagon moves.
Step 3: Add the Carriage Shape
To make the wagon look more like Cinderella’s pumpkin carriage, add a round or oval outline on each side. You can create this with flexible PVC, pool noodles, hula hoops, foam pipe insulation, or sturdy wire covered with foam. The side circles are what give the carriage its fairytale silhouette.
Attach the circles to the main frame with zip ties. Cover the ties with ribbon or flowers later so the finished project looks polished. If you use pool noodles, slice them carefully and slip them over the PVC to create a soft, padded, rounded appearance. This also makes the frame look fuller and more cartoonishly magical, which is exactly the point.
Step 4: Create Decorative Wheels
Real wagon wheels will still do the rolling, but oversized decorative carriage wheels make the design instantly recognizable. Cut four large wheels from foam board or cardboard. Use a dinner plate, bucket lid, or round tray as a template. Cut smaller circles from the center, then add spokes with strips of foam board, craft sticks, or painted cardboard.
Paint the wheels silver, gold, white, or metallic blue. Attach them to the outside of the wagon with removable strips, zip ties, or tape. Make sure they do not touch the ground or interfere with the actual wheels. These wheels are there for drama, not transportation. Think Broadway set piece, not engineering department.
Step 5: Paint and Wrap the Frame
If you want a clean, royal finish, paint the PVC frame before adding fabric. Metallic silver, pearl white, soft blue, or champagne gold all work well. Spray paint is convenient for plastic and craft materials, but always use it outdoors or in a well-ventilated area and allow pieces to dry fully before assembly.
If painting is not ideal, wrap the PVC with ribbon, tulle, garland, or metallic tape. Ribbon wrapping takes longer, but it hides connector joints and gives the carriage a softer look. Secure the ends with hot glue or clear tape, keeping glue blobs away from areas children may touch.
Step 6: Add Fabric for the Fairytale Canopy
Drape tulle, organza, or sheer fabric over the top arch to create a dreamy canopy. Gather it at the front and back with ribbon so it frames the rider without blocking airflow or visibility. For a pumpkin carriage style, leave the sides partially open and emphasize the oval frame.
Lightweight fabric is best because heavy fabric can pull the frame sideways. If you are using the carriage for nighttime trick-or-treating, avoid fabric that hangs too close to the wheels or drags on the ground. A carriage train sounds elegant until it catches under a tire.
Step 7: Install the LED Lights
Now comes the magic. Wrap LED fairy lights around the side circles, top arch, and front frame. For a classic Cinderella glow, use warm white or cool white lights. For a more whimsical princess look, add soft blue or color-changing LEDs.
Secure the light strands every few inches with clear zip ties, floral wire, or small clips. Do not wrap wires too tightly because that can strain the cord. Place the battery pack in a pouch, small box, or hidden corner where an adult can reach it easily. Test the lights before final decorating. Testing after everything is wrapped is a classic DIY tragedy with sequins.
Step 8: Add the Interior Seat
Make the inside comfortable with a small cushion, blanket, or pillow. Choose fabrics that coordinate with the carriage colors. If the wagon has built-in seat belts, keep them accessible and usable. Do not cover them with fabric or decorations.
You can also add a small “royal step” detail with foam board or a glittery sign on the side. Popular sign ideas include “Princess Express,” “Bibbidi Bobbidi Boo,” “Royal Carriage,” or “Pumpkin Coach No. 1.” Keep signs soft, lightweight, and securely attached.
Step 9: Decorate the Exterior
Finish the carriage with faux flowers, adhesive gems, ribbons, bows, stars, butterflies, or mini pumpkins. Place the biggest decorations at the top and sides, not near the wheels or handle. A few well-placed accents usually look better than covering every inch. Cinderella had style. She did not hot-glue the entire craft aisle to her vehicle.
For a more elegant look, use one main color and two accent colors. For example, combine white tulle, silver wheels, and blue ribbon. For a warmer pumpkin carriage, use gold, ivory, and pale orange. For a birthday party, match the carriage to the party theme.
Step 10: Do a Test Pull
Before the big event, pull the wagon around the driveway, hallway, or yard. Check for wobbling, slipping decorations, dragging fabric, or lights that shift. Turn corners. Stop and start. Gently shake the frame. If something flops, fix it now rather than during a parade while a princess is waving to her subjects.
Design Ideas for Different Occasions
Halloween Princess Carriage
Use blue and silver fabric, glowing white lights, and a Cinderella costume. Add reflective tape or extra lights near the lower wagon frame to improve visibility during trick-or-treating.
Birthday Party Carriage
Use pastel tulle, faux flowers, and a birthday banner across the back. This makes a beautiful entrance prop, photo booth feature, or gift table decoration.
Trunk-or-Treat Carriage
Pair the wagon with a decorated car trunk. Use the wagon as the royal coach and the car as the castle backdrop. Add cardboard castle towers, a blue tablecloth “moat,” and treat baskets shaped like pumpkins.
Parade or School Event Carriage
Keep the design extra secure and lightweight. Use fewer dangling elements, stronger zip ties, and a simplified frame. Add the child’s name or class theme to the back panel.
Common Mistakes to Avoid
Making the Frame Too Tall
A tall carriage looks dramatic in photos but can become unstable when pulled. Keep the height reasonable and the materials light.
Blocking the Handle
The wagon still needs to function as a wagon. Keep the handle clear so the adult pulling it can steer easily.
Using Too Much Heavy Decor
Foam board, fabric, and ribbon are your friends. Wood panels, glass ornaments, and heavy metal pieces are not.
Forgetting Battery Access
Hide the battery pack, but do not bury it under six layers of tulle. You should be able to switch the lights on and off quickly.
Waiting Until Event Day
Build the carriage at least one day early. This gives paint time to dry and gives you time to fix the inevitable “why is this leaning?” moment.
Budget-Friendly Tips
This project can be surprisingly affordable if you reuse what you already have. Old sheer curtains can become carriage fabric. Cardboard from shipping boxes can become decorative wheels. Leftover holiday lights can be reused if they are LED, battery-operated, and in good condition. Ribbon from gift wrapping can cover zip ties. Even pool noodles from summer can become carriage trim.
If you need to buy supplies, focus your budget on the wagon, lights, and frame. Decorative extras can be simple. A clean shape with beautiful lighting often looks better than a crowded carriage full of random sparkle. In DIY, restraint is sometimes the difference between “fairytale coach” and “craft drawer explosion.”
How to Store the Carriage After the Event
If you build the frame as a removable piece, storage becomes much easier. Cut zip ties carefully, remove the side circles, and store the fabric in a labeled bag. Wrap the lights around a piece of cardboard so they do not tangle. Keep foam wheels flat behind a closet door or under a bed.
For families who attend Halloween events every year, label each piece and take photos of the finished carriage before disassembling it. Next year, you will thank yourself. Future you deserves nice things.
Real-Life Experience: What Making a DIY Light Up Cinderella Carriage Teaches You
The first thing you learn when making a DIY light up Cinderella carriage from a wagon is that “simple” and “magical” are not always the same timeline. The idea sounds easy: attach a few hoops, add fabric, wrap lights, done. Then you discover that fabric has opinions, zip ties have sharp little tails, and LED strands somehow become tangled even when you personally watched them sit peacefully on the table.
The best experience tip is to build in layers. Start with structure, then softness, then sparkle. When people rush straight to glitter and lights, the carriage may look pretty for five minutes but fall apart the first time the wagon turns a corner. A strong PVC or hoop frame is the secret hero of the project. Nobody at the party will say, “Wow, excellent load distribution,” but they will notice if the carriage roof slowly sinks like a tired soufflé.
Another important lesson is that symmetry matters less than charm. Handmade projects do not need factory perfection. If one side of the carriage is slightly rounder than the other, most people will never notice, especially once the lights are on. The glow hides a lot. Fairy lights are basically concealer for crafts.
Working with children nearby can also turn the project into a memory, not just a decoration. Let kids choose ribbon colors, hand you zip ties, pick flower placement, or name the carriage. They may not be able to cut PVC, but they can absolutely serve as creative directors with very strong opinions. Do not be surprised if the original Cinderella carriage becomes a unicorn moon carriage, rainbow pumpkin coach, or “sparkle wagon for snacks.” Honestly, all are valid.
One of the most satisfying moments is the first night test. When the lights switch on and the frame glows, the whole project suddenly feels worth it. The wagon stops looking like a wagon and starts looking like something that should arrive with theme music. That is also when you notice small practical fixes: a fabric panel that needs another clip, a battery pack that needs a better hiding spot, or a wheel decoration that needs to move higher.
The final lesson is to keep comfort in mind. A beautiful carriage is fun, but a comfortable rider makes the night smoother. Add a cushion, leave room for a blanket, keep airflow open, and make sure the child can climb in and out safely. The real magic is not just the glowing carriage; it is the fact that your little princess, prince, fairy, or pumpkin coach passenger gets to enjoy the event without tired feet and dramatic sidewalk negotiations.
Conclusion
A DIY light up Cinderella carriage from a wagon is one of those projects that delivers big visual impact without requiring professional building skills. With a sturdy wagon, a lightweight frame, soft fabric, decorative wheels, and LED lights, you can create a glowing fairytale centerpiece for Halloween, birthdays, parades, or princess-themed celebrations.
The key is to keep the build safe, removable, and practical. Secure the frame well, use cool LED lighting, avoid heavy materials, protect battery packs, and test the wagon before the event. Once the lights come on, even simple materials can look magical. And if a few zip ties are hiding under ribbon? That is not a flaw. That is fairy godmother engineering.
Note: Always follow the wagon manufacturer’s safety instructions, supervise children during use, and remove or adjust decorations that interfere with seating, steering, visibility, wheels, or restraints.