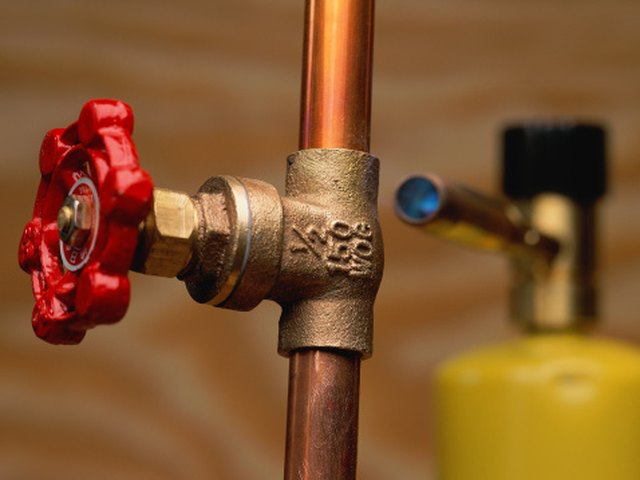
Walk into the plumbing aisle looking for a copper adapter, and you may feel as if the fittings are playing a tiny brass-and-copper guessing game. Male adapter. Female adapter. Sweat end. MIP. FIP. Cup. Thread. It sounds like plumbing is trying to become a secret society with better water pressure.
The good news is simple: the difference between a copper male and a female adapter comes down mostly to the threaded end. A copper male adapter has external threads on one side. A copper female adapter has internal threads on one side. Both are commonly used to transition copper tubing to threaded plumbing components such as valves, water heater connections, shower bodies, hose bibbs, pumps, and other fittings.
That one differencethreads on the outside versus threads on the insidechanges how the adapter connects, where it is used, how it is sealed, and what part it should be paired with. Choose correctly, and the job looks clean. Choose incorrectly, and you may spend the afternoon making a second trip to the hardware store, which is a traditional plumbing ritual but not a necessary one.
What Is a Copper Adapter?
A copper adapter is a plumbing fitting used to connect copper tube to another type of connection. Most commonly, it joins a copper sweat, solder, press, or push-to-connect side to a threaded pipe connection. In plain language, it lets copper pipe talk to a part that speaks “threaded fitting.”
One end of the adapter is designed for copper tubing. In traditional plumbing, that end is often a sweat cup, meaning the copper tube slides into the fitting and is soldered in place. In newer systems, the copper side may be a press connection or a push-to-connect connection. The other end is threaded, either male or female.
Common markings include:
- SWT or C: Sweat/copper cup connection for copper tubing.
- MIP, MPT, or MNPT: Male pipe thread, meaning the threads are on the outside.
- FIP, FPT, or FNPT: Female pipe thread, meaning the threads are on the inside.
- CTS: Copper tube size, often used for copper, CPVC, and PEX-compatible push fittings.
For example, a fitting labeled 1/2 in. SWT x 1/2 in. MIP usually means one side solders to 1/2-inch copper tube and the other side has 1/2-inch male pipe threads. A fitting labeled 3/4 in. SWT x 3/4 in. FIP solders to 3/4-inch copper tube and accepts a 3/4-inch male threaded part.
The Main Difference: Male Threads vs. Female Threads
The easiest way to remember the difference is this: a male adapter threads into something; a female adapter receives something threaded into it.
What Is a Copper Male Adapter?
A copper male adapter has a copper tube connection on one end and external pipe threads on the other. The threaded end sticks out and screws into a female threaded opening.
You might use a copper male adapter when connecting copper pipe to:
- A female threaded valve
- A female threaded shower valve body
- A female threaded pump port
- A female threaded tank connection
- A female threaded union or coupling
In the plumbing aisle, male adapters are often labeled as C x MIP, SWT x MPT, or copper x male adapter. The “male” part does not refer to the copper tube side. It refers to the threaded side.
What Is a Copper Female Adapter?
A copper female adapter has a copper tube connection on one end and internal pipe threads on the other. The threaded opening accepts a male threaded component.
You might use a copper female adapter when connecting copper pipe to:
- A male threaded nipple
- A male threaded hose bibb
- A male threaded water heater connector
- A male threaded pressure gauge
- A male threaded fixture connection
Female adapters are commonly labeled as C x FIP, SWT x FPT, or copper x female adapter. Think of the threaded side as a small copper doorway. A male threaded part walks into it. Politely, with sealant.
Quick Comparison: Copper Male Adapter vs. Female Adapter
| Feature | Copper Male Adapter | Copper Female Adapter |
|---|---|---|
| Thread location | Threads are on the outside | Threads are on the inside |
| Connects to | Female threaded fittings | Male threaded fittings |
| Common label | SWT x MIP, C x MPT, MNPT | SWT x FIP, C x FPT, FNPT |
| Typical use | Threading copper into valves, pumps, or female ports | Receiving nipples, hose bibbs, gauges, or male threaded parts |
| Seal method | Thread sealant or PTFE tape on male threads | Sealant is applied to the mating male threads |
| Copper side | Usually sweat, press, or push connection | Usually sweat, press, or push connection |
Why the Thread Direction Matters
Thread direction is not a tiny detail. It is the entire reason the adapter exists. A male threaded adapter cannot connect directly to another male threaded part unless you add a coupling. A female adapter cannot connect directly to another female threaded opening unless you add a nipple. Plumbing parts are like puzzle pieces: two tabs do not make a socket, no matter how confidently you tighten them.
Most threaded copper adapters in U.S. plumbing use NPT-style pipe threads. NPT threads are tapered, which means the threads get slightly tighter as they are screwed together. This helps create a mechanical seal when paired with the right thread sealant. The threads do much of the gripping, while PTFE tape or pipe joint compound helps fill tiny gaps and reduce the chance of leaks.
The copper sweat side is different. It is not sealed with thread tape. It is joined by solder, press force, or a push-to-connect mechanism depending on the adapter type. Mixing up the sealing methods is a classic beginner mistake. Tape belongs on threads, not inside a solder cup. Flux belongs on cleaned copper surfaces for soldering, not on pipe threads like frosting on a very disappointing cupcake.
Common Types of Copper Adapters
Sweat Copper Male Adapter
A sweat copper male adapter has a solder cup on one end and male threads on the other. It is one of the most common transition fittings in residential plumbing. The copper tube is cleaned, fluxed, inserted, heated, and soldered. The male threaded end then connects to a female threaded fitting.
Sweat Copper Female Adapter
A sweat copper female adapter has a solder cup on one end and female threads on the other. It is used when the part you need to attach has male threads. This is common around hose bibbs, pipe nipples, and certain fixture connections.
Press Copper Adapters
Press adapters perform the same transition but use a press tool rather than solder. They are popular with professionals because they avoid open flame, reduce installation time, and work well in tight or finished spaces. Press male adapters still have male threads. Press female adapters still have female threads. The adapter’s “gender” does not change just because the copper side is installed differently.
Push-to-Connect Adapters
Push-to-connect adapters are designed to connect quickly to copper, CPVC, PEX, or similar compatible tubing, depending on the product rating. One end pushes onto the tube, while the other end is either male or female threaded. These fittings are useful for repairs, cramped spaces, and situations where soldering would be awkward or risky.
How to Choose the Right Adapter
Choosing between a copper male adapter and a copper female adapter is easier when you start from the part you are connecting to. Do not begin by staring at a wall of fittings and hoping one winks at you. Begin with the existing connection.
Step 1: Identify the Threaded Part
Look at the valve, fixture, appliance, or pipe nipple you need to connect. If it has internal threads, you need a male adapter. If it has external threads, you need a female adapter.
Example: A shower valve has a female threaded port. To connect copper tube to it, you may need a copper male adapter. A hose bibb has male threads. To connect copper tube to it, you may need a copper female adapter.
Step 2: Match the Size
Do not assume the copper tube size and thread size are always the same. Many adapters are 1/2-inch x 1/2-inch or 3/4-inch x 3/4-inch, but reducing adapters exist. You may see fittings such as 3/4-inch copper sweat x 1/2-inch male pipe thread. Read both sides of the label carefully.
Step 3: Match the Connection Method
If you are soldering, choose a sweat adapter. If your system uses press fittings, choose a press adapter compatible with your press tool and jaws. If you are making a quick repair with approved tubing, a push-to-connect adapter may be appropriate. The copper side must match your installation method, while the threaded side must match the part it connects to.
Step 4: Confirm Potable Water Approval
For drinking water systems, use fittings marked lead-free and approved for potable water. Modern plumbing fittings used in potable water applications are typically designed to meet lead-free requirements, but it is still smart to check packaging, markings, and local code requirements.
Installation Basics for Sweat Copper Adapters
For a traditional soldered copper adapter, preparation matters more than brute force. A clean joint is a happy joint. A dirty joint is a tiny future fountain.
Cut and Deburr the Pipe
Cut the copper tube squarely using a tubing cutter. After cutting, remove burrs from the inside and outside edges. Burrs can restrict flow, interfere with fitting depth, and create turbulence inside the pipe.
Clean the Pipe and Fitting
Use an abrasive cloth or fitting brush to clean the outside of the copper tube and the inside of the adapter cup. The goal is bright, clean metal. Solder does not like dirt, oxidation, grease, or fingerprints. It is picky, but in fairness, it is being asked to keep water inside a wall for the next few decades.
Apply Flux
Apply a thin, even coat of plumbing flux to the cleaned surfaces. Flux helps remove oxidation and allows solder to flow into the joint. More flux is not better. Excess flux can create mess and may contribute to corrosion problems if left inside the system.
Heat and Solder the Joint
Insert the pipe fully into the adapter, heat the fitting evenly, and apply solder at the joint. The heat should draw solder into the cup by capillary action. Once the solder flows around the joint, remove heat and let the fitting cool naturally. Wipe away excess flux after soldering.
Thread the Adapter Correctly
Use thread sealant or PTFE tape on male pipe threads. For a male adapter, apply sealant to the adapter’s male threads before threading it into a female fitting. For a female adapter, apply sealant to the male threaded part that screws into it. Avoid overtightening. Copper and brass fittings are strong, but they are not asking to be treated like lug nuts on a monster truck.
Common Mistakes to Avoid
Buying the Wrong Thread Gender
This is the classic mistake. If the part you are connecting to has female threads, buy a male adapter. If it has male threads, buy a female adapter. When in doubt, take a photo of the connection or bring the old part to the store.
Confusing Copper Tube Size With Pipe Thread Size
Copper tube sizing and threaded pipe sizing can be confusing because nominal sizes do not always match actual measured dimensions. Always read the fitting label, not just the tape measure.
Soldering Too Close to Thread Sealant
If you solder after applying thread tape or pipe dope, heat can damage the sealant. In many cases, it is better to solder the adapter first, let it cool, clean the joint, and then make the threaded connection.
Using the Wrong Adapter for the System
Water supply, hydronic heating, refrigeration, gas, and drainage systems can have different requirements. A copper fitting that is fine for one use may not be approved for another. Always match the fitting to the application and local plumbing code.
Overtightening Female Adapters
Female threaded fittings can split if a male threaded part is forced too deeply or tightened aggressively. Tighten enough to seal, not enough to prove a personal point to the plumbing gods.
Which One Is Stronger?
A copper male adapter is not automatically stronger than a copper female adapter, and a female adapter is not automatically more reliable than a male adapter. Strength depends on the fitting material, manufacturing standard, connection method, installation quality, system pressure, temperature, and whether the fitting is approved for the application.
When installed correctly, both male and female copper adapters can provide long-lasting service. The bigger risk is not the adapter gender itself. The bigger risk is poor preparation, mismatched threads, insufficient solder flow, overheating, cross-threading, or using a fitting that is not rated for the job.
Practical Examples
Example 1: Connecting Copper Pipe to a Female Valve Port
You have a valve with a female threaded inlet. Your copper tube needs to connect to that valve. The correct choice is usually a copper male adapter: sweat or press on the copper side, male threads into the valve.
Example 2: Connecting Copper Pipe to a Male Hose Bibb
You are installing an outdoor hose bibb with male threads. The correct choice is usually a copper female adapter: copper tube into the sweat cup, hose bibb threads into the female side.
Example 3: Transitioning to a Threaded Nipple
A steel or brass nipple has male threads on both ends. If copper tube needs to connect to one end of that nipple, a copper female adapter is typically the right match.
Example 4: Connecting to a Female Threaded Pump
If a small pump or mechanical component has a female threaded port, a copper male adapter may be used to transition from copper tubing to the pump connection, assuming the fitting material and system rating are appropriate.
Male vs. Female Adapter: A Simple Buying Rule
Here is the easiest rule: look at the part you are connecting to, then buy the opposite thread.
- If the existing part has inside threads, buy a male adapter.
- If the existing part has outside threads, buy a female adapter.
That rule solves most adapter confusion. The rest is sizing, material approval, and installation method.
Field Experience: Lessons From Real-World Adapter Confusion
The difference between a copper male and female adapter sounds small until you are kneeling under a sink, holding the wrong fitting, and realizing the store closed twelve minutes ago. Anyone who has worked around plumbing long enough has met this moment. It is character-building in the same way stepping in a puddle with socks on is character-building.
One practical lesson is to never shop by memory alone. A homeowner may look at a valve, think “half-inch copper,” and confidently buy a 1/2-inch copper male adapter. Then they get home and discover the valve already has male threads, which means the male adapter is about as useful as a screen door on a submarine. A quick photo of the connection can prevent that entire comedy.
Another field lesson is that the adapter’s shape tells a story. A male adapter has threads you can see and touch on the outside. A female adapter has threads tucked inside the opening. When you train your eye to spot that difference, the plumbing aisle becomes less mysterious. It still has too many tiny bins, but at least they stop looking like identical copper mushrooms.
Experienced installers also learn to think about assembly order. For example, if you are soldering a copper male adapter near a valve, too much heat can damage internal seals or nearby components. Sometimes the better move is to solder the adapter onto a short piece of copper first, let it cool, and then thread it into the valve. In tight spaces, a press or push-to-connect adapter may be safer and cleaner because it avoids open flame.
Thread sealing is another area where experience matters. People often wrap PTFE tape in the wrong direction, use too much tape, or apply sealant to the wrong side. Tape should go on male threads in the direction that keeps it from unraveling as the fitting is tightened. Too little sealant may leak. Too much can bunch up, crack fittings, or contaminate the system. The goal is a neat seal, not a winter coat for the threads.
Overtightening is one of the most common rookie errors with female adapters. Because the female side receives a tapered male thread, the connection gets tighter as it turns. More turning does not always mean more sealing. At some point, it means stress. A split female adapter can create a slow leak that hides until the cabinet floor swells or the wall develops a suspicious soft spot. Snug, aligned, and sealed is better than heroic and cracked.
There is also a real-world difference between repair work and new installation. In new work, you can plan the adapter location, pipe length, and tool clearance. In repair work, you inherit whatever adventure the last person left behind. You may find a male adapter where a female adapter would have made more sense, old pipe dope packed like dried oatmeal, or a fitting installed so close to framing that only a raccoon with a wrench could reach it. In these cases, patience and correct identification save time.
The best habit is to dry-fit everything before permanent installation. Lay out the copper tube, adapter, valve, nipple, or fixture connection. Confirm the threads match. Confirm the pipe seats fully. Confirm you have room to tighten the threaded joint without twisting the copper line into modern art. A two-minute dry fit can prevent a two-hour leak hunt.
In short, the copper male adapter and copper female adapter are simple parts with important jobs. The male adapter reaches out with external threads. The female adapter receives with internal threads. Once you understand that, the rest of the decision becomes practical: match the opposite thread, match the size, choose the right copper connection method, use approved materials, and install it cleanly. Plumbing may still test your patience, but at least the adapters will no longer be the villains of the story.
Conclusion
The difference between a copper male and a female adapter is mainly the threaded end. A copper male adapter has external threads and connects to female threaded fittings. A copper female adapter has internal threads and connects to male threaded fittings. Both are essential transition fittings that allow copper tubing to connect with valves, fixtures, appliances, pumps, and other threaded components.
To choose the right one, identify the part you are connecting to, buy the opposite thread type, match the size, confirm the connection method, and use fittings approved for the application. Whether you solder, press, or push-connect the copper side, proper preparation and sealing make the difference between a reliable installation and a leak that waits until the worst possible time to introduce itself.