Note: This DIY candle project involves hot wax and candles, so it is best done with adult supervision, a heat-safe workspace, and common sense wearing its nicest shoes. The goal is a pretty, budget-friendly decorative finishnot a science fair called “What Happens If I Ignore Fire Safety?”
Why Crayon-Dipped Ombre Candles Are the $5 Craft That Looks Like a Boutique Find
There is something suspiciously satisfying about turning a plain white candle into a colorful ombre candle that looks like it wandered out of a fancy gift shop. Even better? You can make a set of crayon-dipped ombre candles for around $5 if you already have a few basic supplies at home. Old crayons, leftover candle wax, thrifted jars, and plain taper candles suddenly become the stars of a budget craft project that feels stylish instead of “I found this in the junk drawer and panicked.”
The beauty of this project is its simplicity. You are not making a complicated scented candle from scratch, testing wick sizes like a candle scientist, or building a tiny wax empire in your kitchen. Instead, you are using melted wax and small amounts of crayon color to dip the outside of finished candles, creating soft gradients, bold color blocks, or playful layered tones. The result is a custom candle with a handmade look, perfect for party tables, seasonal decor, handmade gifts, dorm-room styling, or a low-cost weekend craft.
Before we dive in, let’s clear up one important point: crayons are fun for decorative dipping, but they are not the best professional candle dye. Crayons contain pigments that may not dissolve the same way candle dyes do, and too much crayon can interfere with how a candle burns. That is why this guide focuses on light exterior dipping, small amounts of color, and smart safety habits. In other words, we want “charming ombre candle,” not “smoky little wax volcano.”
What Are Crayon-Dipped Ombre Candles?
Crayon-dipped ombre candles are plain candles that are dipped into colored melted wax to create a gradual fade from one shade to another. “Ombre” simply means the color transitions from light to dark, dark to light, or one hue into another. Think sunset pink fading into coral, ocean blue melting into turquoise, or soft lavender deepening into plum.
The “crayon-dipped” part comes from using small pieces of crayon to tint wax for the dipping layer. Because crayons are inexpensive and often already sitting in a drawer somewhere, they are popular for budget DIY projects. If you have broken crayons from childhood, a school supply bin, or that one lonely orange crayon no one seems emotionally attached to, this project gives them a second career.
Are These Candles for Burning or Decorating?
They can be decorative candles, gift candles, or occasional-use candles, but they should be made thoughtfully. If you use too much crayon in the wax, the pigment can affect the wick and burn quality. For the safest and cleanest result, use a small amount of crayon only in the outer dipping wax, keep the wick clean, and avoid coating the candle so heavily that wax runs over the top or covers the wick area.
If you want candles designed for regular burning, professional candle dye is the better option. If you want colorful, low-cost table decor with a handmade twist, crayon-dipped ombre candles are a very fun little project.
Supplies You Need for a $5 Ombre Candle Project
The final cost depends on what you already own, but this is one of those crafts where the supply list is refreshingly humble. No gold-plated glue gun required.
Basic Materials
- Plain white taper candles, votives, or small pillar candles
- Old crayons in similar color families
- Leftover candle wax, soy wax flakes, or plain paraffin wax
- Clean tin cans or heat-safe glass jars for melting colors
- A saucepan for a double boiler
- Wooden stir sticks or disposable spoons
- Wax paper or parchment paper
- Tongs or heat-safe gloves
- A thermometer, if available
Budget Breakdown
A realistic budget might look like this: $1.25 for plain candles from a discount store, $1.25 for a small pack of crayons if you do not have old ones, $1.25 to $2 for wax or leftover candle pieces, and a few cents for wax paper. If you already have crayons and leftover candle wax, your cost drops faster than your motivation after opening a complicated instruction manual.
For the prettiest ombre effect, choose three crayons from the same color family. For example, try pale pink, coral, and red; sky blue, teal, and navy; or yellow, orange, and burnt orange. You can also make a modern monochrome candle by using just one crayon color and dipping the candle multiple times at different depths.
How to Make Crayon-Dipped Ombre Candles
This method focuses on dipping finished candles, not pouring new container candles. That keeps the project easier, cheaper, and more beginner-friendly.
Step 1: Prepare a Safe Workspace
Cover your table with wax paper or parchment paper. Place your candles, crayons, stir sticks, and melting containers within reach. Keep paper towels nearby, but keep loose paper away from heat. Work in a well-ventilated area and make sure children and pets are not in the splash zone. Hot wax is not a toy, no matter how cheerful the crayon colors look.
Step 2: Peel and Break the Crayons
Remove the paper wrappers from your crayons and break them into small pieces. Smaller pieces melt faster and blend more evenly into the wax. Start with less crayon than you think you need. You can always add more color, but you cannot politely ask a candle to un-become neon purple.
Step 3: Melt Wax Using a Double Boiler
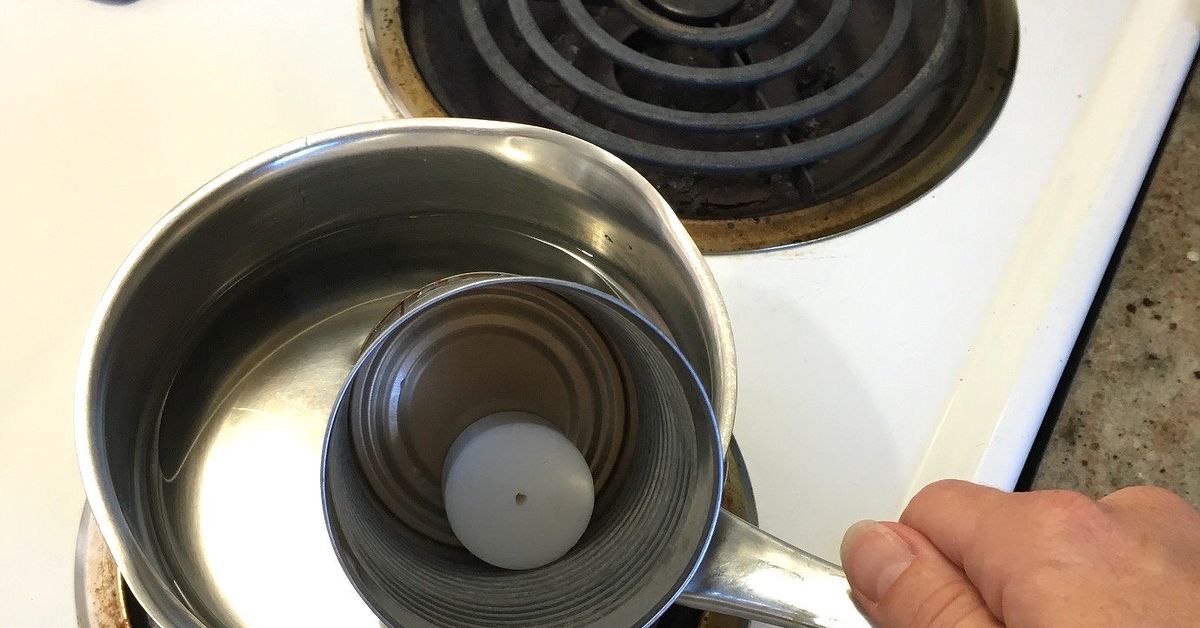
Fill a saucepan with a few inches of water and place a clean tin can or heat-safe jar inside it. Add candle wax to the can, then warm the water gently so the wax melts indirectly. A double boiler helps prevent scorching and gives you better control than blasting wax with direct heat.
Once the wax has melted, add a small piece of crayon and stir. For dipping, you do not need a lot of pigment. The wax should look tinted but still fluid. If it becomes sludgy, grainy, or too thick, you may have added too much crayon.
Step 4: Dip the Candle for the First Color Layer
Hold the candle by the top, keeping the wick away from the melted color. Dip the bottom third of the candle into the colored wax, then lift it slowly and let extra wax drip back into the container. Place the candle on wax paper or hold it upright for a few moments until the wax begins to set.
For a soft ombre look, dip quickly and lightly. For a stronger color, dip again after the first layer cools. Multiple thin dips usually look cleaner than one dramatic dunk that says, “I panicked and made a wax boot.”
Step 5: Create the Ombre Fade
To build the gradient, dip the candle again, but not as deeply. For example, if the first dip covered the bottom third, the second dip might cover only the bottom quarter. The third dip might touch just the bottom inch. This creates a darker color at the base and a softer fade upward.
You can also use multiple shades. Start with the lightest color and dip higher on the candle. Then use a medium shade slightly lower. Finish with the darkest shade at the base. This technique creates a polished gradient that looks much more expensive than it is.
Step 6: Let the Candles Cool Completely
Place the candles on wax paper and let them cool fully before handling. Keep them away from drafts while they set. If you want a smoother finish, gently rotate the candle while the wax is still slightly warm so drips do not build up on one side.
Design Ideas for Crayon-Dipped Ombre Candles
Sunset Ombre
Use yellow, orange, coral, and red for a warm sunset effect. These colors work beautifully for summer dinner parties, outdoor tables, birthdays, or cheerful kitchen decor. Pair them with simple glass holders and let the colors do the flirting.
Ocean Fade
Try pale blue, turquoise, and deep blue for a beach-inspired candle. This palette feels calm, fresh, and clean. It is a great option for bathrooms, coastal decor, or anyone who wants their home to whisper “vacation” while their laundry pile screams “reality.”
Minimalist Neutrals
Use gray, beige, soft brown, or muted sage for a more grown-up look. Neutral ombre candles fit modern interiors, fall tablescapes, and holiday displays without looking too crafty. They are proof that crayons can behave themselves when properly supervised.
Party Brights
For birthdays or festive events, go bold with pink, purple, lime, turquoise, or rainbow layers. Birthday candles, mini tapers, and small votives look especially cute with bright dipped bases. These are excellent for party favors, as long as you include a simple candle safety reminder if guests plan to burn them.
Safety Tips You Should Not Skip
Candle crafts are fun, but they involve heat and flame. That means safety belongs in the project, not in the “oops, next time” category.
Use a Heat-Safe Surface
Always set candles on stable, heat-resistant holders. Do not burn them directly on wood, plastic, paper, or decorative fabric. Your table runner may be beautiful, but it does not need a fire-based personality arc.
Keep the Wick Clean
Do not dip the wick or coat the top of the candle in colored wax. Keep the color on the sides and lower portion of the candle. Before burning, trim the wick to about one-quarter inch. A properly trimmed wick helps control flame size and reduces soot.
Burn Only Under Supervision
Never leave a burning candle unattended. Keep candles away from curtains, books, plants, party decorations, and anything else that can catch fire. Avoid placing candles near fans, open windows, or air vents because drafts can cause uneven burning.
Use Less Crayon Than You Want To
Crayons are colorful, but more crayon is not always better. Too much pigment can make the wax thick, uneven, and less suitable for burning. For decorative dipped candles, a tiny piece of crayon can often tint enough wax for several candles.
Common Mistakes and Easy Fixes
The Wax Looks Clumpy
If the wax looks clumpy, the crayon may not be fully melted or you may have used too much. Keep the wax warm and stir slowly. If it still looks gritty, add more plain wax to dilute the pigment.
The Color Is Too Pale
Dip the candle more than once instead of adding a huge chunk of crayon. Layering gives you more control and a smoother finish.
The Candle Has Drips
Drips can look artistic, but if you want a cleaner finish, lift the candle slowly after dipping and rotate it gently while the wax sets. You can also scrape away thick drips with a craft knife once the candle is cool.
The Colors Look Muddy
Stick with neighboring colors on the color wheel. Pink and red blend nicely. Blue and green are friends. Purple and yellow, however, may create a shade best described as “mystery bruise.”
Best Occasions for DIY Ombre Candles
Crayon-dipped ombre candles are surprisingly versatile. Use soft pink candles for Valentine’s Day, orange and gold for Thanksgiving, red and green for Christmas, pastel colors for Easter, or school-color combinations for graduation parties. They also make inexpensive bridesmaid gifts, teacher gifts, housewarming presents, and handmade party favors.
For a polished gift, tie three taper candles with cotton ribbon and add a small tag that says “Hand-dipped with care.” If the candles are mainly decorative, say so. Honesty is charming, especially when it prevents someone from treating your handmade candle like a commercial luxury candle tested by a lab in a white coat.
Can You Sell Crayon-Dipped Candles?
If you plan to sell candles, use professional candle materials, proper labeling, and thorough burn testing. Decorative crayon-dipped candles may be fine as personal crafts, but selling candles comes with real safety responsibilities. You need to understand wick performance, wax behavior, flame height, container safety, labeling rules, and how additives affect burning.
For casual home crafting, this project is a creative way to reuse materials. For business, switch to candle dye made specifically for wax and test every design carefully.
Extra Experience: What I Learned Making Crayon-Dipped Ombre Candles for $5
The first lesson from making crayon-dipped ombre candles is that confidence is good, but patience is better. I once assumed I could dip a candle once, pull it out, and immediately have a flawless boutique-style gradient. Instead, I created something that looked like a candle wearing uneven rain boots. Not terrible, but definitely not ready for a lifestyle magazine photo shoot.
The real trick is using thin layers. A quick dip gives the candle a whisper of color. A second dip deepens the base. A third dip creates that rich ombre finish everyone wants. When I stopped trying to force the color in one round, the candles looked smoother, softer, and much more expensive.
Another helpful discovery: similar colors are your best friends. A pink-to-red candle looked romantic and polished. A blue-to-teal candle looked calm and beachy. But when I tried combining purple, orange, and green, the final shade looked like soup from a cartoon swamp. Creative? Yes. Elegant? Only if your theme is “haunted vegetable garden.”
I also learned that old candles are useful, but they need sorting. Mixing leftover scented candles with random colors can create strange results. A little vanilla wax with coral color is lovely. Peppermint wax mixed with brown crayon and lavender wax, however, smells like a holiday party got lost in a thrift store. If you are reusing wax, try to keep scents mild or skip scented wax entirely.
Temperature matters more than beginners expect. If the wax is too hot, the dip can be thin and translucent. If it cools too much, it gets thick and lumpy. The sweet spot is warm enough to stay liquid but cool enough to cling lightly to the candle. A thermometer helps, but you can also watch the texture. Smooth and fluid is good. Chunky and stubborn is not.
One of the best tricks is to test on a short candle first. Before dipping a full set for a dinner table, test your color on a small votive or the bottom of one taper. This saves time, wax, and emotional damage. Nobody wants to discover after six candles that the “soft peach” crayon actually dries as “traffic cone with ambition.”
For gift-making, presentation changes everything. Three inexpensive dipped candles tied with simple twine can look handmade in the best possible way. Add a kraft paper tag, a sprig of dried rosemary, or a tiny note, and suddenly your $5 craft has entered its artisan era. The recipient does not need to know you made it while wearing pajama pants and negotiating with a saucepan of wax.
My final experience-based tip is simple: make more than you think you need. Once the wax is melted, dipping extra candles takes only a few minutes. You can experiment with different depths, color combinations, and finishes. Some candles will become gifts, some will decorate your table, and one may become the “practice candle” that quietly lives in a drawer. Every DIY project deserves one humble little witness.
Conclusion
Crayon-dipped ombre candles for $5 are a fun, affordable, and surprisingly stylish DIY project. They let you reuse old crayons, refresh plain candles, and create custom decor without spending boutique-candle money. The secret is to use crayons lightly, focus on decorative dipping, build color in thin layers, and follow basic candle safety from start to finish.
Whether you are making colorful party candles, handmade gifts, seasonal decorations, or just rescuing broken crayons from a forgotten drawer, this project proves that creativity does not need a luxury budget. Sometimes all you need is a plain candle, a little wax, a tiny piece of crayon, and the willingness to say, “Yes, I absolutely meant for that ombre fade to look artsy.”