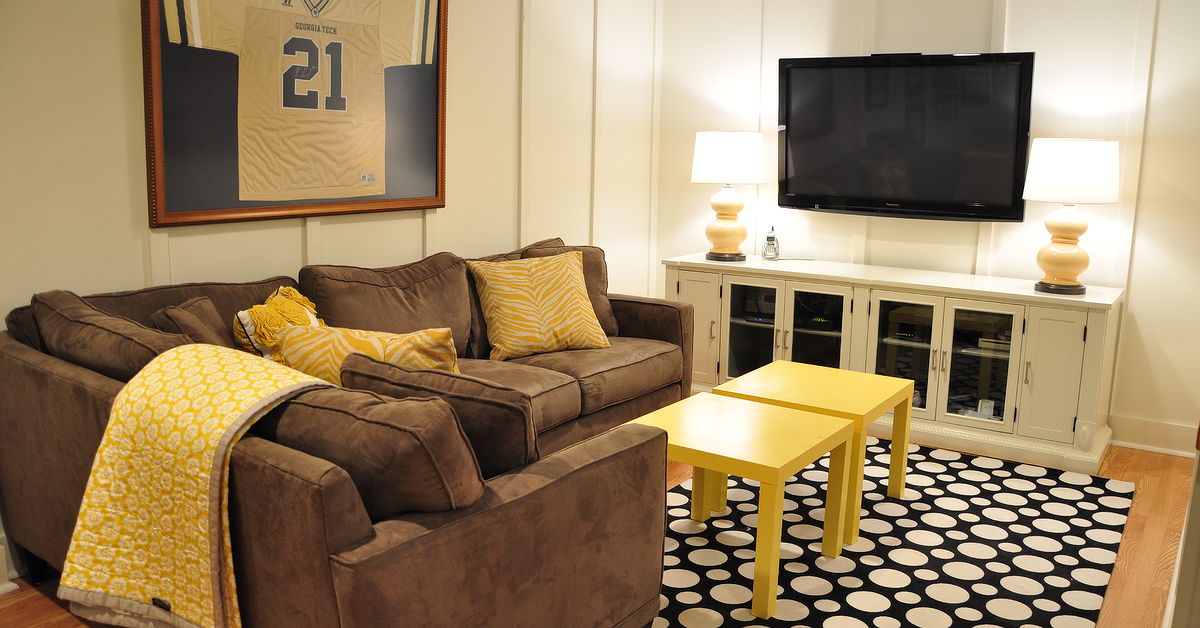
Renovating a basement is one of those home projects that sounds simple until the basement reminds you it lives underground. Upstairs rooms worry about paint colors and throw pillows. Basements worry about moisture, radon, egress, low ceilings, mystery pipes, and whether that tiny spider has been paying rent. Still, a well-planned complete DIY basement renovation can turn unused square footage into a family room, guest suite, home office, gym, hobby space, or the coziest movie cave on the block.
The secret is not starting with drywall. The secret is starting with the boring stuff: water, air, safety, structure, code, insulation, and smart material choices. Once those are handled, the fun partsflooring, lighting, storage, paint, and furnitureactually last. Think of it like baking a cake: if the foundation is soggy, nobody cares how cute the frosting is.
This guide walks through the entire process, from planning and moisture control to framing, insulation, flooring, lighting, finishing touches, and real-world DIY lessons. Whether your basement is currently a concrete bunker with laundry machines or a semi-finished space begging for a glow-up, here is how to renovate it the right way.
Why a DIY Basement Renovation Is Worth Considering
A basement renovation can add usable living space without expanding the footprint of your home. That is a major advantage because the walls, roof, and foundation already exist. Instead of building outward, you are unlocking square footage that has been quietly sitting below your feet, possibly storing holiday decorations from 2009.
Common basement renovation ideas include a media room, guest bedroom, playroom, home gym, workshop, office, laundry upgrade, wet bar, or rental-style living area where allowed by local regulations. The most successful basement remodels start with a purpose. Before buying materials, decide how the space should function day to day.
Ask These Questions Before You Start
Will the basement be used daily or occasionally? Do you need a bathroom? Will anyone sleep there? Is natural light important? Do you need sound control for a theater or music room? Will the design need to hide mechanical systems while keeping them accessible? These answers affect layout, permits, electrical planning, plumbing, insulation, and egress requirements.
A complete DIY basement renovation is not just decoration. It is a construction project. Some tasks are friendly to careful DIYers, while othersmajor electrical work, plumbing tie-ins, structural changes, gas lines, egress window cutting, and HVAC changesusually require licensed professionals. Smart DIY is not doing everything yourself. Smart DIY is knowing which parts you should not do yourself unless you enjoy expensive surprises.
Step 1: Inspect the Basement Before Designing Anything
Before you sketch a layout, inspect the basement like a detective with a flashlight and mild trust issues. Look for water stains, musty smells, cracks, efflorescence, peeling paint, rust on metal, damp carpet, warped trim, and condensation on pipes or walls. If the basement has had flooding, seepage, or repeated humidity problems, solve those issues first.
Moisture is the boss battle of basement remodeling. If you cover damp walls with studs, insulation, and drywall, you may create a hidden mold hotel. Not the boutique kind. The bad kind.
Simple Moisture Checks
Start with visual clues. White powder on concrete can indicate mineral deposits left by evaporating water. Dark stains may suggest old leaks. A musty smell often points to excess moisture even when surfaces look dry. You can also tape a small square of plastic sheeting to a concrete wall or floor and check after a couple of days. Moisture behind the plastic may indicate vapor coming through the concrete; moisture on the room side may indicate indoor humidity and condensation.
Use a moisture meter if you are checking framing, trim, or suspect areas. Also inspect exterior grading, gutters, downspouts, window wells, and foundation drainage. Many basement water problems begin outside, where rainwater is politely invited toward the foundation instead of away from it.
Step 2: Fix Water, Humidity, and Drainage First
No flooring, drywall, or paint can compensate for an active water problem. Before finishing the basement, make sure gutters are clean, downspouts discharge away from the foundation, soil slopes away from the house, window wells drain correctly, and foundation cracks are properly repaired. If water enters during heavy rain, you may need professional waterproofing, exterior drainage improvements, an interior drainage system, or a sump pump with a backup power option.
For humidity, a basement dehumidifier can help maintain comfort, but it should not be used as a magic wand for leaks. A dehumidifier controls air moisture; it does not fix poor drainage, cracked walls, or groundwater pressure. Aim for a basement that stays dry before you install finished materials.
Choose Flood-Smart Materials
Basements are below grade, so choose materials that tolerate occasional moisture better than traditional upstairs finishes. Luxury vinyl plank, ceramic or porcelain tile, sealed concrete, rubber flooring, and moisture-rated engineered products are common choices. Solid hardwood is usually a poor fit below grade because moisture swings can cause expansion, cupping, or gaps.
Use mold-resistant drywall where appropriate, especially in laundry areas, bathrooms, or spaces with higher humidity. Avoid placing untreated wood directly against concrete. Concrete can move moisture, and wood is not famous for enjoying that relationship.
Step 3: Test for Radon Before Closing Walls
Radon is a naturally occurring radioactive gas that can enter homes through soil and foundation openings. Basements are often the first place homeowners test because they are closest to the ground. Testing before renovation is smart because mitigation work is often easier and less disruptive before walls and floors are finished.
You can use a short-term radon test kit or hire a certified radon professional. If levels are elevated, mitigation may involve sealing openings and installing an active soil depressurization system. Do this early, not after you have installed new flooring, trim, built-ins, and a couch that took three adults and one emotional support pizza to carry downstairs.
Step 4: Check Permits, Codes, and Egress Requirements
Local building codes vary, so contact your building department before starting. Permits are commonly required for electrical work, plumbing, structural changes, bedrooms, bathrooms, and major basement finishing. Even if you are doing much of the work yourself, inspections protect your safety and help prevent problems when selling the home later.
If your finished basement includes a sleeping room, emergency escape and rescue openings are usually required. That often means an egress window or exterior door that meets code standards for size, opening height, window well access, and safe exit. Do not guess here. “It looks big enough” is not a code strategy.
Plan Around Mechanical Access
Basements often contain furnaces, water heaters, electrical panels, shutoff valves, cleanouts, ductwork, sump pumps, and plumbing lines. Your renovation should keep these accessible. Use access panels, utility rooms, removable ceiling tiles, or carefully planned soffits. Future-you will deeply appreciate present-you when a plumber does not have to cut into your brand-new feature wall.
Step 5: Create a Basement Layout That Works
A great basement layout respects the existing conditions. Low ceilings, beams, columns, ductwork, and stair placement may limit options, but they can also help define zones. For example, a beam can separate a media area from a game table. A support column can become part of a built-in shelf, bar, or half-wall. A weird nook can become storage instead of a daily reminder that houses enjoy puzzles.
Place noisy activities away from bedrooms or offices. Put plumbing-heavy areas such as bathrooms or wet bars near existing drain and supply lines when possible. Keep laundry functional with room for sorting, folding, ventilation, and access to shutoffs. If natural light is limited, use open sight lines and lighter finishes to prevent the space from feeling like a fashionable cave.
Basement Zones to Consider
A family-friendly basement might include a TV wall, durable flooring, toy storage, a small snack area, and flexible seating. A home office needs outlets, task lighting, sound control, and a background suitable for video calls. A gym needs ventilation, rubber flooring, mirror placement, and ceiling clearance. A guest suite may require egress, privacy, heating and cooling, and bathroom access.
Step 6: Frame Walls the Right Way
Basement wall framing should account for moisture, insulation, electrical runs, and imperfect concrete walls. Many DIYers frame new stud walls slightly away from the foundation rather than attaching drywall directly to concrete. Pressure-treated lumber is commonly used for bottom plates where wood contacts concrete. Metal framing is another option because it is straight, stable, and resistant to rot.
Before framing, mark mechanical access points, window locations, planned outlets, switches, plumbing, and built-ins. It is much easier to adjust framing before drywall than after. Drywall has a way of making forgotten mistakes feel very permanent.
Do Not Trap Moisture in the Wall
Basement insulation and vapor control must be climate-appropriate. Rigid foam board, closed-cell spray foam, mineral wool, and fiberglass systems can all be used in different assemblies, but the key is allowing the wall to manage moisture safely. Avoid creating a double vapor barrier that traps moisture inside the wall cavity. When in doubt, follow local code, manufacturer instructions, and building-science guidance for your climate zone.
Step 7: Insulate and Air Seal for Comfort
Basements can feel cold because concrete walls and slabs connect to the ground. Proper insulation improves comfort, reduces drafts, and helps the finished space feel like part of the home instead of a storage annex with ambitions.
Pay special attention to rim joists, where air leaks are common. Air sealing these areas before insulating can reduce drafts and condensation risk. Use compatible sealants, rigid foam, spray foam, or other approved materials according to code and manufacturer guidance. Some foam products require thermal or ignition barriers, so do not leave materials exposed unless they are rated for that use.
Ceiling Insulation and Sound Control
If sound transfer is a concern, add mineral wool or fiberglass batts between ceiling joists before drywall or a drop ceiling. This can reduce noise between floors, especially in media rooms, playrooms, and home gyms. For better results, combine insulation with resilient channels, acoustic sealant, solid-core doors, and thoughtful layout choices.
Step 8: Plan Electrical, Lighting, and HVAC Early
Basements need layered lighting because natural light is often limited. A single ceiling fixture in the center of the room will make the basement feel like an interrogation scene. Use recessed lights, sconces, pendants, under-cabinet lighting, task lamps, and accent lighting to create warmth and depth.
Plan outlets generously. Think about TVs, routers, gaming systems, exercise equipment, desk setups, chargers, lamps, dehumidifiers, and holiday decorations. Electrical work must meet code, and many areas require GFCI and AFCI protection. Hire a licensed electrician where required or whenever the work goes beyond your training.
Heating, Cooling, and Ventilation
A finished basement should be comfortable year-round. Extending existing HVAC may be possible, but it must be sized and balanced correctly. Sometimes a ductless mini-split, electric baseboard, radiant floor system, or dedicated ventilation strategy makes more sense. Bathrooms and laundry areas need proper exhaust to the outdoors, not into a ceiling cavity where moisture can throw a private party.
Step 9: Choose the Best Basement Ceiling
Basement ceilings must balance appearance with access. Drywall looks polished and can make the basement feel like an upstairs room, but it limits access to pipes, wires, and ducts. A drop ceiling provides easy access and can hide mechanical systems, though it may reduce ceiling height. Painting exposed joists, ducts, and pipes can create an industrial look while preserving access and maximizing height.
If your ceiling is low, use slim recessed lighting, light paint colors, and simple trim. Avoid bulky fixtures in traffic paths. Nobody wants a basement where tall guests have to duck like they are entering a medieval tavern.
Step 10: Install Flooring That Belongs Below Grade
Basement flooring should be durable, comfortable, and moisture-aware. Luxury vinyl plank is popular because it is attractive, DIY-friendly, and water-resistant. Tile is extremely durable and moisture-resistant, though it can feel cold without rugs or radiant heat. Sealed concrete can be budget-friendly and modern. Carpet tiles may work in dry basements and are easier to replace than wall-to-wall carpet if damage occurs.
Before installing flooring, repair cracks, level uneven areas, and test for moisture. Follow manufacturer requirements for vapor barriers, underlayment, acclimation, and installation over concrete. Skipping subfloor preparation is the renovation equivalent of wearing fancy shoes with wet socks: technically possible, but nobody wins.
Step 11: Drywall, Paint, Trim, and Built-Ins
Once inspections are complete and insulation is installed, drywall transforms the basement from construction zone to actual room. Use moisture-resistant drywall in areas where it makes sense, and keep drywall slightly above the slab to reduce the risk of wicking moisture from the floor. Finish seams carefully, sand with dust control, prime properly, and choose washable paint with a finish appropriate for the room.
For color, lighter neutrals often work well because basements receive less daylight. That does not mean everything must be beige enough to apologize. Deep accent walls, warm whites, soft greens, smoky blues, and earthy tones can all work when balanced with good lighting.
Storage Makes the Renovation Feel Complete
Basements often serve as storage zones, so plan storage intentionally. Add built-ins under stairs, cabinets around mechanical areas, closed storage for seasonal items, floating shelves, benches with hidden compartments, and labeled utility closets. The goal is to avoid finishing a beautiful basement only to fill it with plastic bins like a warehouse with throw pillows.
Step 12: Add Furniture, Decor, and Comfort
Furniture should fit the basement’s scale and traffic flow. Sectionals work well for media rooms, but measure stairways before buying. Many homeowners have learned the hard way that “free delivery” does not mean “physics has been suspended.” Modular furniture is often a safer choice for tight stairs.
Add area rugs, curtains, acoustic panels, art, plants, mirrors, and warm lighting to soften the space. Use moisture-safe decor choices and avoid storing valuables directly on the floor. If the basement is used by kids or pets, choose washable fabrics and durable finishes. If it is used by adults for movie nights, choose cup holders. This is not required by code, but it should be.
Common DIY Basement Renovation Mistakes to Avoid
Finishing Before Fixing Moisture
This is the biggest mistake. Drywall and flooring should come after moisture control, not before. Covering a water problem does not solve it; it just gives the problem privacy.
Ignoring Permits
Unpermitted work can create safety risks, insurance headaches, and resale issues. Always verify local requirements for electrical, plumbing, bedrooms, bathrooms, egress, and structural work.
Choosing the Wrong Flooring
Solid hardwood and moisture-sensitive materials are risky below grade. Choose flooring designed for basement conditions and follow installation instructions exactly.
Forgetting Access Panels
Hide mechanical systems beautifully, but keep valves, cleanouts, junction boxes, and equipment accessible. Future repairs should not require demolition therapy.
Under-Lighting the Space
Basements need more lighting layers than upstairs rooms. Combine general, task, and accent lighting for a finished look.
Real-World Experience: Lessons From a Complete DIY Basement Renovation
The biggest lesson from a complete DIY basement renovation is that the work happens in phases, and each phase has a personality. Demolition is loud and oddly satisfying. Planning is calm until you realize every pipe, duct, and outlet has an opinion. Framing makes the space feel exciting. Drywall makes it feel real. Sanding drywall makes you question your life choices. Painting restores hope. Flooring brings joy. Trim reminds you that walls are not as straight as they pretended to be.
One practical experience worth sharing is to create a renovation binder or digital folder before buying materials. Include measurements, photos of walls before they are closed, receipts, permits, product manuals, paint colors, flooring specs, electrical plans, and inspection notes. Take photos of every wall after wiring and plumbing are installed but before drywall goes up. Months later, when you want to mount shelves or troubleshoot an outlet, those photos become treasure maps.
Another useful lesson is to build in more time for prep than you expect. Cleaning concrete, patching cracks, sealing gaps, moving utilities, checking moisture, leveling floors, and planning transitions may not look dramatic on social media, but they determine whether the finished basement feels professional. A basement renovation rewards patience. Rush the invisible parts and the visible parts will eventually tattle.
Budgeting also needs a cushion. Even careful DIYers run into surprises: a hidden leak, outdated wiring, an uneven slab, a too-low duct, a window that needs repair, or framing lumber that costs more than expected. A contingency fund of 10 to 20 percent is not pessimism; it is emotional insulation. Also, rent or borrow specialty tools when possible. A drywall lift, rotary hammer, laser level, wet saw, or flooring cutter can save hours and reduce frustration.
Comfort details matter more than many homeowners expect. A basement can be technically finished but still feel unfinished if it lacks warmth, layered lighting, soft surfaces, and storage. Add dimmers. Use lamps. Choose a rug large enough to anchor the seating area. Add doors or curtains to hide utility zones. Install shelves where clutter naturally collects. Use warm bulbs instead of harsh lighting that makes everyone look like they are waiting at the DMV.
The best DIY approach is to divide the project into what you can confidently do and what deserves a professional. Many homeowners can handle painting, flooring, trim, shelving, basic framing, and design planning. Licensed trades should handle complicated electrical, plumbing, HVAC, structural changes, gas work, and code-sensitive egress installations. Paying professionals for critical tasks does not make the project less DIY. It makes it less likely to become a cautionary tale.
Finally, design the basement for real life, not just the reveal photo. Leave room for storage. Choose materials that can handle kids, pets, humidity, movie snacks, laundry traffic, or workout equipment. Keep mechanical access simple. Make the stairs safe and well-lit. Add enough outlets. Think about where the vacuum will plug in, where guests will put coats, and where board games will go after everyone promises to play them again “soon.” A successful basement renovation is not just beautiful on day one. It is still practical, comfortable, and dry years later.
Conclusion: Build the Basement You Will Actually Use
A complete DIY basement renovation is one of the most rewarding home improvement projects because it can turn neglected square footage into a useful, comfortable extension of your home. The key is doing the project in the right order: inspect, dry, test, permit, plan, frame, insulate, wire, light, finish, and furnish.
Do not let the excitement of paint colors distract from moisture control, radon testing, egress, electrical safety, and mechanical access. Those details are not glamorous, but they are what make the finished basement safe, durable, and worth the effort. Once the foundation of the project is right, you can create almost any kind of space: a family room, office, gym, guest suite, craft studio, game room, or quiet retreat where the laundry machines are no longer the main attraction.
Note: This article is based on current U.S. basement renovation best practices from building science, indoor air quality, flood-risk, electrical safety, code, and home improvement guidance. Always verify local building codes, permit requirements, and product instructions before starting work.