Let’s be honest: every do-it-yourselfer eventually reaches the same glorious, slightly ridiculous moment. The paint has dried. The caulk line is finally straight enough to stop haunting your dreams. The thrifted mirror looks like it came from a boutique instead of the back corner of someone’s garage. And suddenly, a tiny voice whispers, “Take the picture. Post the before-and-after. Let the people gasp.”
That is the spirit behind “Cause sometimes, I like to show off….” It is not about bragging in the obnoxious, “please clap for my towel ring” kind of way. It is about celebrating effort, creativity, budget-friendly problem-solving, and the oddly powerful joy of turning a neglected corner of your home into a place that makes you pause and grin. In the world of DIY home projects, showing off is often just another word for sharing inspiration.
A good home makeover tells a story. The “before” photo says, “This room had potential, but also possibly a vendetta.” The “after” photo says, “Look what planning, patience, and three emergency hardware-store runs can do.” Whether it is a half-bath remodel, a small bathroom makeover, a painted vanity, a weekend wall treatment, or a full room refresh, the transformation is worth documenting. Not because everything must be perfect, but because progress deserves a little spotlight.
Why We Love Showing Off DIY Projects
Home improvement is personal. You are not just replacing fixtures or choosing paint colors; you are shaping how your daily life feels. A brighter bathroom can make rushed mornings less chaotic. Better storage can save your sanity. A bold wallpaper choice can turn a tiny powder room into the most dramatic room in the house, which is hilarious because it is also the room where people go to wash their hands and question your candle collection.
Showing off a finished project satisfies several very human needs. First, it marks completion. DIY work can stretch from “quick weekend project” to “why is the vanity still in the hallway three weeks later?” A reveal photo is a finish line. Second, it helps others learn. Before-and-after home remodels give readers ideas they can adapt, from keeping the existing plumbing layout to repainting cabinets instead of replacing them. Third, it builds confidence. Every finished project proves that skill grows by doing, messing up, fixing the mistake, and pretending the mistake was “custom texture.”
Showing Off Is Not the Same as Showing Up with Ego
There is a difference between celebrating a project and turning every conversation into a TED Talk about your grout choices. Healthy showing off says, “I worked hard, and I’m excited to share what helped.” Annoying showing off says, “Please admire my superior caulk bead while I ignore your existence.” The best DIY content feels generous. It gives the reader the wins, the failures, the costs, the tools, the timing, and the honest “I would not do this part again unless bribed with tacos.”
That honesty is what makes home improvement blogs, tutorials, and social posts so useful. A polished reveal is fun, but the messy middle is where the learning happens. People want to know which paint covered in two coats, which peel-and-stick tile was surprisingly forgiving, which light fixture made the room feel larger, and which step required a professional because electricity is not a personality test.
The Power of the Before-and-After
Before-and-after photos work because they compress a story into a single glance. They help readers see scale, color, layout, light, texture, and mood. A written description can say, “The bathroom felt dated,” but a photo of yellowed walls, tired flooring, and a mirror that looks like it once judged disco outfits says it faster.
For SEO and reader engagement, before-and-after content is gold. Searchers often look for practical phrases such as small bathroom remodel ideas, DIY bathroom makeover, budget home improvement, and before and after bathroom remodel. These keywords match real intent: people want proof that change is possible without needing a mansion, a television crew, or a checking account with Olympic-level stamina.
What Makes a DIY Reveal Worth Sharing?
A strong reveal includes more than a pretty final image. It explains the problem, the plan, the constraints, the choices, and the payoff. For example, imagine a half bath that starts with builder-grade fixtures, beige walls, poor lighting, and no personality beyond “mildly clean.” The makeover might include a moody paint color, a framed mirror, a new faucet, upgraded cabinet hardware, a small shelf above the toilet, and a better light fixture. None of those changes require moving plumbing, but together they can make the room feel intentional.
The most helpful posts also explain why certain decisions were made. Keeping the existing layout saves money because plumbing and electrical changes can quickly inflate a budget. Refinishing a vanity may cost less than replacing it. White fixtures can be budget-friendly and easy to match. Better lighting can make a small space feel larger. Storage can reduce visual clutter, which is design-speak for “hide the backup toilet paper before guests arrive.”
How to Show Off a Home Project the Right Way
If you want to share your DIY home project online, think like both a storyteller and a helpful neighbor. Your goal is not just to say, “Look what I did.” Your goal is to say, “Look what is possible, and here is how you can avoid the parts where I nearly cried into a drop cloth.”
1. Start with the Real Problem
Every good project begins with a pain point. Maybe the bathroom lacked storage. Maybe the room felt dark. Maybe the old vanity looked like it had been personally offended by modern design. Name the problem clearly. Readers relate to problems more than perfection.
2. Share Your Budget Honestly
Budget transparency builds trust. A “budget makeover” means very different things to different people. One person’s budget is $200 and leftover paint. Another person’s budget is $5,000 and a carefully labeled spreadsheet. Break down major costs when possible: paint, fixtures, hardware, lighting, flooring, tools, and professional help. Always include a cushion for surprises, because walls are basically mystery boxes with drywall.
3. Explain What You Did Yourself
DIY does not mean doing absolutely everything alone while refusing help like a stubborn raccoon. It means understanding which tasks fit your skills and which ones require a pro. Painting, swapping hardware, installing shelves, adding decor, replacing a mirror, or refinishing furniture can be realistic DIY tasks for many homeowners. Plumbing, electrical work, structural changes, and ventilation upgrades may require licensed professionals depending on local codes and project scope.
4. Include Mistakes and Fixes
The internet already has enough fake perfection. Readers appreciate reality. If you measured wrong, say so. If the first paint color looked like sadness in a can, say so. If you installed a shelf slightly crooked and then styled it with a plant because plants forgive everything, say so. Mistakes make the project more useful and more human.
5. Photograph the Details
Take wide shots, close-ups, and progress images. A wide shot shows the full transformation. Detail shots show hardware, tile, lighting, texture, and styling. Progress shots prove the final result did not appear by magic while you were drinking iced coffee. Natural light helps, but clean surfaces, straight angles, and uncluttered backgrounds matter just as much.
DIY Bathroom Makeovers: Small Room, Big Drama
Bathrooms are perfect spaces for dramatic DIY transformations because they are usually smaller than kitchens and living rooms. A small footprint means fewer materials, faster visual impact, and more courage to try bold choices. A powder room can handle dark paint, patterned wallpaper, vintage art, brass hardware, or a quirky mirror because guests spend only a few minutes there. It is the ideal room for design bravery with a lock on the door.
Budget-friendly bathroom updates often include painting walls, upgrading lighting, replacing the mirror, adding open shelving, installing new towel bars, changing cabinet pulls, refreshing caulk, styling with baskets, or swapping a faucet. If the vanity is in good condition, painting it can stretch the budget. If the tub is structurally sound but ugly, refinishing may be worth exploring. If the layout works, keeping it can prevent expensive plumbing changes.
Example: A Half-Bath Glow-Up
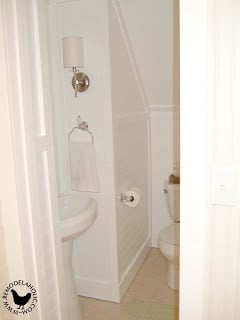
Picture a small half bath with plain walls, a basic mirror, and a vanity that technically works but emotionally contributes nothing. A smart makeover might begin with a deep green or navy wall color. Next comes a framed mirror to replace the builder-grade sheet mirror. Then a modern light fixture adds warmth. A small floating shelf brings in storage and personality. New hardware ties the look together. Finally, a framed print, a small plant, and a nice hand towel make the room feel finished.
The final reveal feels impressive because each small change supports the next. That is the secret of a good DIY makeover: not one giant expensive move, but a series of thoughtful upgrades that agree with each other. When the room finally looks cohesive, yes, you should show it off. You earned that tiny parade.
When Showing Off Inspires Others
One of the best parts of sharing DIY projects is the ripple effect. Someone sees your painted vanity and realizes their own bathroom does not need a full demolition. Someone sees your thrifted mirror and starts checking secondhand stores. Someone sees your open shelving and finally organizes the avalanche under the sink. Your project becomes permission for someone else to begin.
This is why the DIY community thrives on sharing. Home improvement can feel intimidating, especially for beginners. Power tools, measurements, materials, and project costs can make people freeze before they start. A relatable post lowers the barrier. It says, “I am not a professional designer with a secret warehouse of marble. I am a person with a plan, a budget, and possibly paint on my elbow.”
The Best Kind of Show-Off Content Gives Credit
Great DIY creators also credit inspiration. If a blog, designer, neighbor, tutorial, or friend sparked an idea, mention it. Showing off does not shrink when you share the spotlight; it becomes more trustworthy. Home design is a conversation, not a solo concert performed entirely on a miter saw.
Practical Tips Before You Start Your Own Show-Off Project
Before you begin a DIY makeover worthy of a reveal, slow down and plan. Measure your room. Photograph the space. List what bothers you most. Decide what must stay and what can change. Check whether your project affects plumbing, electrical, ventilation, or structure. Price materials before you commit. Read reviews. Build a cushion into your budget. Protect floors and nearby rooms before demolition. And please, for the love of baseboards, label your screws.
Also consider your timeline realistically. A project that looks quick online may have involved drying time, backordered fixtures, surprise repairs, and several emotional negotiations with a stubborn wall anchor. Plan for delays. Break the work into stages. Celebrate milestones. If the only thing you finish on day one is removing the old towel bar without damaging the wall, congratulations. That is still progress.
Know When to Call a Professional
DIY pride is wonderful, but safety is better. If your bathroom remodel involves moving plumbing lines, adding outlets, replacing ventilation, repairing water damage, changing load-bearing elements, or handling unknown wiring, consult a licensed professional. A beautiful reveal is less exciting if it comes with leaks, code issues, or a light switch that now controls the neighbor’s garage.
How to Write a DIY Post That People Actually Read
If you are publishing your project online, structure matters. Start with the finished result or a strong teaser. Then show the “before.” Explain the goal and budget. Walk through the steps with clear headings. Add product categories without overloading readers with unnecessary shopping links. Include lessons learned. End with a confident reveal and a friendly invitation for readers to try their own version.
For search engines, use natural phrases that match reader intent: DIY bathroom makeover, budget bathroom remodel, small bathroom ideas, before and after home project, home improvement tips, and easy DIY upgrades. Do not stuff keywords into every sentence. Search engines are smart enough to notice, and readers are smart enough to leave.
Experiences Related to “Cause sometimes, I like to show off….”
Every DIY person has a “show off” story. Mine begins, as many noble tales do, with a bathroom that was aggressively average. It had beige walls, a basic mirror, a tired vanity, and lighting that made everyone look like they had just read bad news. Nothing was broken, exactly. That was the problem. The room was functional enough to avoid urgency but boring enough to quietly drain joy every time someone walked in.
The plan started small: paint the walls, change the mirror, and replace the hardware. Simple. Innocent. Foolishly optimistic. The first lesson arrived when the old mirror came down and revealed paint ghosts, wall scars, and one mysterious patch that looked like a previous homeowner had repaired drywall using hope and pancake batter. Suddenly, the “quick refresh” had entered its character-building era.
After patching and sanding, I chose a bold paint color. At first, it looked terrifying in the can. In the room, though, it became the exact kind of drama a small bathroom can handle. That is one of the joys of compact spaces: they let you take risks without committing your entire home to a mood. The new mirror added shape. The light fixture warmed the space. Cabinet hardware made the vanity look intentional instead of forgotten. A floating shelf gave the room a place for a small plant, a candle, and one decorative object that served no purpose except to say, “Yes, adults live here.”
The best moment was not the final photo. It was the first time someone opened the door and said, “Wait, this is the same bathroom?” That sentence is the DIY equivalent of a standing ovation. It makes the sanding dust, awkward angles, and repeated trips to the hardware store feel worth it. Suddenly, showing off does not feel vain. It feels like sharing proof that effort can change the way a home feels.
Another experience came from helping a friend update a rental bathroom without upsetting the landlord or the deposit. We used removable wallpaper, a tension rod shelf, peel-and-stick hooks, a framed mirror leaned securely over the existing one, and fresh textiles. No plumbing moved. No tile was harmed. No one had to explain anything to a property manager named Gary. The transformation was temporary, affordable, and surprisingly stylish. When my friend posted the reveal, several renters commented that they had assumed they could not improve their bathrooms at all. That is the beauty of showing off: it can turn one person’s experiment into someone else’s starting point.
The third lesson came from a project that did not go smoothly. A painted vanity looked great for about two days before the finish started scratching. The problem was not the paint; it was the prep. The surface had not been cleaned, sanded, and primed properly. The second attempt took longer and looked better. That failed first try became the most useful part of the story because it helped others avoid the same mistake. A perfect reveal may get admiration, but an honest reveal gets trust.
So yes, sometimes it is perfectly fine to show off. Show off the room you rescued. Show off the shelf you built. Show off the budget you respected. Show off the mistake you fixed. Show off the courage it took to begin. DIY confidence is not about pretending every project is flawless. It is about recognizing that a home becomes more meaningful when your hands, ideas, and persistence are part of the story.
Conclusion: Go Ahead, Take the After Photo
“Cause sometimes, I like to show off….” is more than a playful title. It captures the heart of DIY culture: pride, creativity, generosity, and the joy of transformation. A finished project is not just a new bathroom, a painted vanity, or a refreshed hallway. It is evidence that you paid attention to your space and cared enough to improve it.
The best kind of showing off is useful, honest, and inviting. It celebrates the win while sharing the work behind it. It gives readers ideas they can adapt to their own homes. It proves that budget-friendly home improvement can still feel stylish, personal, and deeply satisfying. So when the final screw is tightened and the room is clean enough for photos, go ahead. Open the door, find the good light, and take the shot. Your home worked hard for that glow-up. So did you.