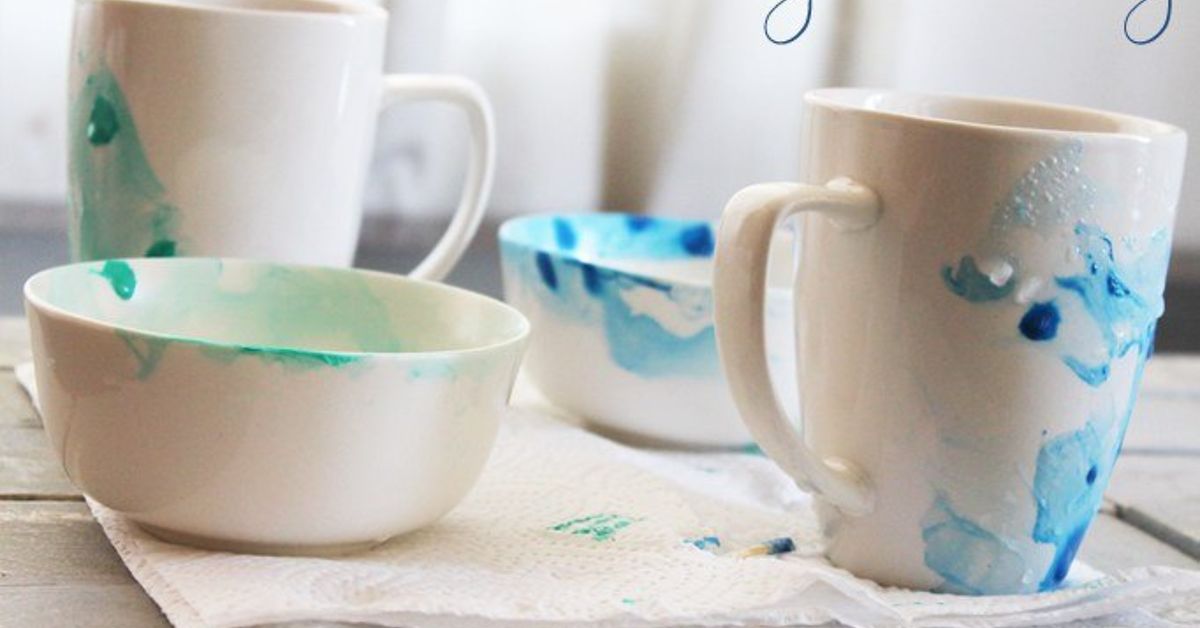
There are two kinds of people in the morning: those who need coffee, and those who become legally recognizable only after coffee. Either way, a beautiful personalised mug makes the ritual better. It is small, useful, affordable, and surprisingly emotional. A plain ceramic cup can become a birthday gift, a desk accessory, a teacher thank-you, a bridesmaid favor, a family keepsake, or a cheerful reminder that your cat is, in fact, the boss of the house.
The best part? You do not need to own a pottery studio, wear a linen apron, or know what “kiln-fired” means. With the right blank mug, a clean surface, a simple design plan, and the proper paint or transfer method, you can create DIY personalised mugs that look thoughtful instead of “I made this at midnight with questionable scissors.” This guide covers practical techniques, design ideas, safety tips, finishing methods, and real-life lessons from making custom mugs at home.
Why DIY Personalised Mugs Make Such Great Gifts
A personalised mug works because it combines beauty with daily use. Unlike a novelty gift that disappears into a drawer, a mug has a job. It holds coffee, tea, cocoa, soup, pens, makeup brushes, tiny succulents, or emergency chocolate. Add a name, monogram, date, quote, photo-inspired illustration, pet doodle, or inside joke, and it becomes more than drinkware. It becomes a tiny ceramic billboard that says, “I know you.”
DIY personalised mugs are also budget-friendly. You can start with inexpensive white ceramic mugs, thrifted stoneware, or blank sublimation mugs. Depending on your method, you may need paint markers, ceramic paint, adhesive vinyl, transfer sheets, sealant, rubbing alcohol, painter’s tape, and a standard oven or mug press. Compared with many store-bought personalized gifts, the cost per mug can be low while the sentimental value stays high.
Choosing the Right Mug Blank
The mug you choose matters. A smooth, glazed ceramic mug is usually easiest for beginners because paint markers and vinyl adhere more predictably to a clean surface. White mugs show color beautifully, while cream, black, pastel, and speckled mugs create a more boutique look. Straight-sided mugs are best for wraps, vinyl decals, and mug-press projects because the design lies flatter. Curved or tapered mugs can still work, but alignment becomes a bit like negotiating with a sleepy octopus.
Best Mug Types for DIY Projects
Glazed ceramic mugs are ideal for paint pens, stencils, hand lettering, and adhesive vinyl. They are widely available and easy to customize.
Sublimation-compatible mugs are designed for heat-transfer projects using sublimation ink or infusible ink systems. These are best if you want bright, professional-looking designs that bond into the coating.
Unglazed ceramic mugs can be painted, but they are often decorative unless finished with food-safe, manufacturer-recommended materials. Always check the product label.
Vintage or unknown mugs can look charming, but use caution. Older or imported ceramics may have glazes that are not ideal for food use. If you are unsure whether a mug is food-safe, turn it into a planter or pencil cup instead of a daily coffee mug.
Supplies You Need for Beautiful Personalised Mugs
Before you begin, gather everything in one place. This prevents the classic DIY tragedy: realizing your sealant is missing while your wet glitter mug sits on the table looking like a disco ball sneezed.
- Plain ceramic mugs or sublimation-ready mug blanks
- Rubbing alcohol and lint-free cloth
- Pencil, paper, and design template
- Painter’s tape or masking tape
- Oil-based paint markers or ceramic paint pens
- Small detail brushes or sponge daubers
- Adhesive vinyl and transfer tape, if using decals
- Dishwasher-safe decoupage sealer, if appropriate for your design
- Oven, baking sheet, or mug press depending on the method
- Cotton swabs for cleanup
Step-by-Step: How to Make a DIY Personalised Mug
Step 1: Clean the Mug Thoroughly
Wash the mug with soap and water, dry it completely, then wipe the outside with rubbing alcohol. This removes oils, fingerprints, sticker residue, and mysterious kitchen dust. Do not skip this step. Paint and vinyl stick better to a clean surface, and your future self will not have to ask why the letter “M” peeled off Aunt Melissa’s mug after one enthusiastic wash.
Step 2: Plan the Design Before You Touch the Mug
Sketch your idea on paper first. Decide where the name, quote, illustration, or pattern should sit. For a classic look, place a name or monogram opposite the handle. For a right-handed coffee drinker, position the design so it faces outward when held in the right hand. For left-handed recipients, flip the placement. This tiny detail makes the gift feel custom in a way people notice.
Step 3: Keep Designs Away From the Rim
For safety and comfort, avoid placing paint, marker, vinyl, glitter, or sealant on areas that touch the mouth or beverage. Keep decorative materials below the drinking rim and away from the inside of the mug unless the product is specifically labeled safe for food-contact surfaces. A beautiful mug should not come with a side order of “hmm, should I be drinking from this?”
Step 4: Apply Your Design
Use slow, light strokes. If you are hand lettering, write with a pencil guide or use painter’s tape as a baseline. If you are using dots, florals, stars, stripes, or confetti patterns, start with fewer marks than you think you need. You can always add more, but removing extra paint can become a miniature crime scene.
Step 5: Let It Dry
Follow the instructions on your paint, marker, vinyl, or sealer. Many ceramic paints and paint markers need drying time before curing. Rushing the process is the easiest way to smudge a design that was almost perfect. Give the mug time to dry in a dust-free spot, preferably somewhere pets cannot investigate with their tails.
Step 6: Cure or Seal the Mug Properly
Some paints are heat-set in a home oven. Some sealers require a long curing period before washing. Mug-press or sublimation projects require compatible materials and heat settings. The rule is simple: follow the manufacturer’s directions for the exact product you are using. “Close enough” is a fine philosophy for taco toppings, not for curing decorated drinkware.
Popular DIY Personalised Mug Methods
1. Paint Marker Mugs
Paint marker mugs are beginner-friendly and excellent for names, doodles, stars, hearts, flowers, teacher quotes, wedding dates, and family jokes. Oil-based paint markers often perform better on glazed surfaces than regular permanent markers, but always check the product label. Keep artwork on the exterior only, away from the rim. After decorating, let the design dry and cure as directed.
2. Ceramic Paint and Brush Designs
Ceramic paint is great for painterly designs such as florals, abstract brushstrokes, fruit patterns, stripes, and colorful handles. Use thin coats instead of one gloopy layer. Sponge daubers can create polka dots, scallops, or soft color blocks. Painter’s tape helps create crisp lines, but remove the tape carefully before paint fully hardens to avoid lifting the edge.
3. Vinyl Decal Mugs
Adhesive vinyl is a clean option for names, monograms, bold quotes, and simple graphics. Cut the design with a craft cutter or buy pre-cut letters. Apply with transfer tape, burnish firmly, and let the adhesive bond before washing. Vinyl mugs are best hand-washed unless the vinyl brand states otherwise. They are perfect for gift baskets, office mugs, party favors, and “this is my coffee, do not touch” declarations.
4. Cricut or Mug Press Projects
If you want a polished, store-quality finish, a mug press with compatible mugs and transfer materials is hard to beat. Designs can include names, monograms, patterns, illustrations, and wraparound art. The mug must be compatible with the transfer system, and the design should sit flat against the mug surface. This method is excellent for batches, such as bridal party gifts, corporate favors, or matching family holiday mugs.
5. Decoupage Photo-Style Mugs
Decoupage can create sweet keepsake mugs using printed designs, decorative paper, or photo-inspired layouts. Use a dishwasher-safe decoupage formula when appropriate, apply thin coats, and allow the full cure time before use. Keep the design below the rim and avoid the interior. This method is lovely for Mother’s Day, Father’s Day, memorial gifts, grandparent presents, and pet-themed mugs.
Beautiful Personalised Mug Ideas
Minimalist Name Mug
Write the recipient’s name in small script near the lower third of the mug. Add one tiny heart, star, leaf, or smiley face. This works beautifully on white, beige, or matte-look mugs. It feels modern, calm, and expensive, even if you made it next to a sink full of dishes.
Birth Flower Mug
Pair a name with the recipient’s birth flower. For example, use daisies for April, roses for June, or marigolds for October. Keep the flower illustration simple: one stem, two leaves, and a few petals. Add the birth month beneath the name for a sweet keepsake.
Pet Portrait Mug
You do not need to draw a museum-level portrait. A cartoon outline of the pet’s ears, nose, and signature expression is enough. Add the pet’s name and a phrase like “Fueled by fur and coffee” or “Official treat manager.” Pet mugs are nearly impossible to dislike, unless the pet is judging your craftsmanship from across the room.
Couple or Friendship Mug Set
Create two mugs that relate to each other without being identical. Try “Coffee” and “Cream,” “Big Spoon” and “Little Spoon,” or two halves of a shared inside joke. Use matching colors or mirrored designs for a cohesive set.
Teacher Appreciation Mug
Personalise a mug with the teacher’s name, subject, or classroom phrase. Fill it with tea bags, coffee pods, pens, sticky notes, or a gift card. The mug becomes both packaging and present, which is the kind of efficiency that deserves applause.
Holiday Cocoa Mug
Use snowflakes, candy canes, gingerbread shapes, stars, or evergreen branches. Add the recipient’s name in red, green, gold, navy, or silver. Fill the mug with cocoa packets, marshmallows, chocolate spoons, or peppermint sticks for a cozy handmade gift.
Design Tips for a Professional-Looking Finish
First, limit your color palette. Two or three colors usually look more elegant than twelve colors having a loud meeting. Second, leave white space. Empty space makes a design look intentional. Third, repeat one visual element, such as dots, leaves, stars, or tiny hearts, to make the mug feel cohesive. Fourth, use symmetry when you are unsure. A centered monogram, a wreath around a name, or a band of dots near the bottom always looks tidy.
For hand lettering, choose short words. “Nana,” “Dad,” “Breathe,” “Coffee First,” and “Best Teacher” fit better than a full paragraph about someone’s emotional support latte. If you want to use a quote, place it on the side opposite the handle and keep the font simple.
Common DIY Mug Mistakes and How to Avoid Them
Using the Wrong Marker
Regular permanent markers may fade or wash away from glazed ceramic. Choose products meant for glass, ceramic, or multi-surface crafting, and read the instructions carefully.
Decorating the Drinking Rim
Keep paint, sealers, glitter, and vinyl away from the rim and interior unless the product specifically allows food-contact use. The safest and most comfortable design zone is the exterior body of the mug below the lip.
Washing Too Soon
Many finishes need curing time. A mug may feel dry after a few hours but still not be ready for water, soap, or dishwasher heat. Let the finish cure fully before gifting or using.
Expecting Every DIY Mug to Be Dishwasher-Proof
Some decorated mugs are top-rack dishwasher safe after curing, while others are hand-wash only. When in doubt, include a small care card that says, “Hand wash gently; do not microwave unless materials are microwave-safe.” It sounds fancy and prevents heartbreak.
How to Package a Personalised Mug as a Gift
Presentation turns a DIY mug into a complete gift. Add tissue paper, kraft crinkle paper, ribbon, or a small tag. Fill the mug with treats or themed extras. For a tea lover, add herbal teas, honey sticks, and a tiny spoon. For a coffee fan, add single-serve coffee, chocolate, and biscotti. For a coworker, add desk snacks and sticky notes. For a self-care gift, add bath salts, lip balm, and a calming tea bag.
If shipping the mug, protect it with bubble wrap or honeycomb paper, then place it inside a sturdy box with cushioning on all sides. Mugs are small but dramatic when broken. No one wants to receive a package that sounds like ceramic maracas.
Care Instructions for DIY Personalised Mugs
Care depends on the materials used, but gentle handling extends the life of most handmade mugs. Hand wash with mild soap and a soft sponge. Avoid abrasive scrubbers, soaking, and extreme temperature changes. Do not microwave mugs decorated with metallic paint, metallic vinyl, glitter, or materials not labeled microwave-safe. If the mug is decorative only, say so clearly on a tag.
A simple care card can read: “Handmade with love. Hand wash only. Avoid soaking, harsh scrubbing, and microwave use unless confirmed safe.” This protects your work and makes the gift feel more professional.
Personal Experience: What I Learned Making Beautiful Personalised Mugs
The first time I made a personalised mug, I had the confidence of a professional artist and the planning skills of a raccoon in a craft aisle. I bought a plain white mug, grabbed a marker, and started writing directly on the surface. No sketch. No guide. No cleaning with alcohol. Just vibes. The result was a mug that said “Coffee Queen” in letters that slowly slid downhill, as if the word “Queen” had given up halfway through the morning.
That mug taught me lesson number one: layout matters. Now I sketch every design on paper first. Even a rough pencil box showing the handle, rim, and design area helps. I also use painter’s tape to create a straight baseline for lettering. It takes two minutes and saves twenty minutes of staring at a crooked name while whispering, “Maybe it has personality.”
Lesson number two: simple designs often look best. My favorite mug was not the most complicated one. It was a cream mug with a small black monogram, three tiny gold dots beneath it, and a short message hidden near the handle. It looked elegant because it had breathing room. When you are decorating a mug, the blank space is not empty; it is part of the design. Let the mug breathe. It has been through enough. It holds Monday coffee.
Lesson number three: make the mug match the person, not just the holiday. A Christmas mug with snowflakes is cute, but a Christmas mug with someone’s dog wearing a badly drawn Santa hat is unforgettable. A teacher mug with apples is nice, but a teacher mug with the phrase the class hears every day is better. Personalisation is strongest when it feels specific. Names are great. Inside jokes are gold.
Lesson number four: curing time is not a suggestion. I once washed a mug too early because it looked dry. The design did not vanish completely, but it faded enough to look like an ancient artifact from the Lost Civilization of Impatience. Since then, I let mugs sit longer than I think they need. If a product says to cure for days or weeks, I respect that timeline. Handmade gifts should arrive fully ready, not halfway through their emotional development.
Lesson number five: always include care instructions. People assume mugs are dishwasher-safe because most regular mugs are. A handmade mug, however, may need gentler treatment depending on the materials. A small tag prevents confusion and makes the gift look intentional. I like writing, “Made by hand, so please treat it like royalty: hand wash only.” It gets the point across and gives the mug a little personality.
My biggest experience-based tip is to make one test mug before creating a full set. Try your marker, paint, vinyl, or sealer on a practice mug and see how it behaves. Does the paint streak? Does the vinyl lift near curves? Does the gold look elegant or like a pirate sneezed? Testing saves supplies, time, and emotional damage.
Most of all, DIY personalised mugs are fun because they are imperfect in a charming way. A handmade line may wobble slightly. A dot may be larger than its dot friends. A flower may look less like a rose and more like a cheerful cabbage. That is okay. The goal is not factory perfection. The goal is a useful, beautiful, personal object that makes someone smile when they reach for their morning drink.
Conclusion
Beautiful personalised mugs are one of the easiest DIY gifts to make, but they still reward patience, planning, and the right materials. Start with a clean, food-safe mug. Choose a method that fits your skill level, whether that is paint markers, ceramic paint, vinyl decals, decoupage, or a mug press. Keep decorations away from the rim and interior, follow curing instructions, and package the finished mug with a thoughtful care card.
Whether you are making one mug for your best friend or twenty mugs for a party, the secret is the same: make it personal, keep it clean, and do not underestimate the power of a tiny inside joke on ceramic. A handmade mug may be small, but in the right hands, it becomes a daily reminder of love, laughter, caffeine, and your impressive ability to turn a blank cup into a keepsake.