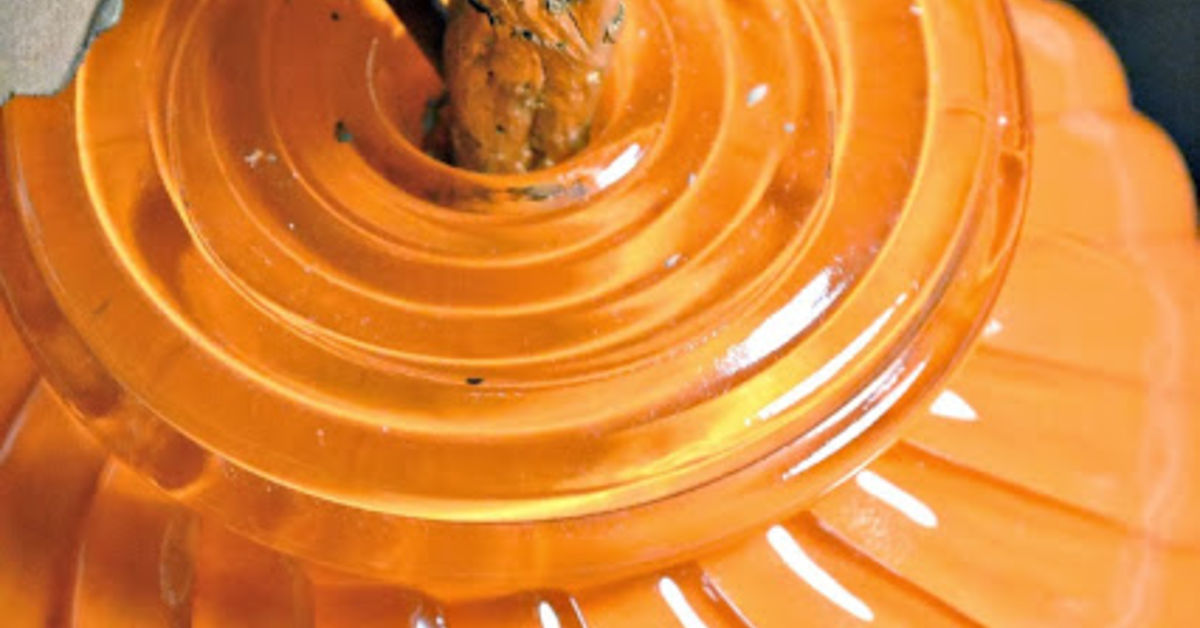
An old glass lamp globe is not exactly the most glamorous object at a thrift store. It usually sits on a dusty shelf looking like a salad bowl that lost its confidence. Yet with orange paint, a makeshift stem, and a little creative nerve, that forgotten piece of lighting hardware can become a wonderfully eccentric fall decoration known as a Glass Globe Junky Punky.
The phrase “Junky Punky” is a playful name rather than an established crafting term. It describes a pumpkin made from salvaged junkin this case, the rounded glass globe from an outdated lamp or ceiling fixture. An early version of the project transformed an old lamp globe by painting its interior orange, allowing the color to show through the glass while preserving the glossy exterior. The result was part pumpkin, part vintage curiosity, and entirely more interesting than another mass-produced plastic gourd.
This project is simple enough for a beginner, flexible enough for an experienced crafter, and strange enough to become the decoration everyone asks about. Best of all, it gives an unwanted household object a second life instead of sending it directly to the trash.
What Is a Glass Globe Junky Punky?
A Glass Globe Junky Punky is an upcycled decorative pumpkin created from a round or ribbed glass light-fixture shade. The globe supplies the pumpkin’s body, while salvaged hardware, sticks, knobs, wire, leaves, or other odds and ends form the stem and decorative details.
The design works because many vintage lamp globes already resemble pumpkins. They are rounded, slightly flattened, and often molded with vertical ridges. Once the glass takes on an orange tint, the original purpose of the object almost disappears. What once covered a light bulb suddenly looks as though it escaped from a delightfully odd country pumpkin patch.
Why “Junky” Is a Compliment
In this project, “junky” does not mean careless, dirty, or poorly made. It refers to the use of discarded materials with visible history. A rusty washer, chipped cabinet knob, bent spring, furniture finial, or weathered scrap of wood can be more visually interesting than a perfect new craft-store accessory.
The small scratches and irregularities give the finished pumpkin character. It does not need to look as if it rolled off a factory conveyor belt. In fact, the moment it becomes too polished, it begins losing some of its Junky Punky charm.
Why the Glass Globe Matters
Glass adds depth that painted wood, foam, or plastic cannot quite duplicate. When the inside of a clear or translucent globe is painted, the outer surface remains glossy. Light reflects across the glass while the color appears to sit beneath it, creating a richer finish than ordinary exterior paint.
Textured glass is especially effective. Swirls, ribs, bubbles, and frosted patterns distort the orange underneath, making the pumpkin appear layered and handmade. Clear globes create a brighter, candy-like effect, while milk-glass globes produce a softer farmhouse look.
Why Upcycled Fall Decorations Are Worth Making
Upcycling keeps usable materials in circulation and can reduce the amount of household waste that requires disposal. The U.S. Environmental Protection Agency places source reduction and reuse ahead of recycling in its materials-management hierarchy because extending an object’s useful life can avoid the need to process it as waste.
There is also a practical advantage: thrifted lamp globes are often inexpensive. Some can be found at architectural salvage stores, flea markets, yard sales, reuse centers, or even in the back of a garage where they have been quietly collecting cobwebs since the first season of a television show nobody remembers.
Upcycling also makes every project different. Two people can follow the same basic method and produce pumpkins with completely different personalities. One might look rustic and traditional. Another might resemble a glamorous disco squash. A third may accidentally look like an orange spaceship, which is not necessarily a failure.
Materials for a Glass Globe Junky Punky
The exact supply list depends on the globe and the style you want, but the following materials provide a useful starting point:
- One clean glass lamp or ceiling-fixture globe
- Orange paint suitable for glass or decorative craft use
- Rubbing alcohol and a lint-free cloth
- A foam brush, soft paintbrush, or spray-paint setup
- A wood finial, short stick, cabinet knob, cork, or salvaged metal piece for the stem
- Artificial leaves, dried vines, raffia, ribbon, wire, or springs
- An adhesive rated for glass and the stem material
- Protective gloves and a covered work surface
- An optional battery-operated tea light or LED light string
Choose materials by shape rather than by their original purpose. A drawer pull can become a stem. A curled spring can become a vine. A rusty weight can become a pedestal. The best Junky Punky supplies are often objects that make you pause and say, “I have no idea what this is, but I am emotionally unable to throw it away.”
How to Make a Glass Globe Junky Punky
Step 1: Inspect the Glass
Check the globe carefully for cracks, sharp chips, loose fragments, or hairline fractures. Run a gloved hand cautiously around the rim. Do not use a damaged globe, especially if you plan to place any kind of light inside it.
If the globe is still attached to a wired fixture, switch off the circuit at the breaker before removing it. Electrical restoration and decorative crafting are different jobs; anyone uncertain about old wiring should leave that portion to a qualified professional. Vintage light fixtures can be reused safely, but deteriorated wiring and unfamiliar connections require caution.
Step 2: Wash and Degrease the Surface
Wash the globe with warm water and a small amount of dish soap. Remove dust, grease, adhesive residue, and the mysterious film that seems to settle on every object stored in a basement.
Allow the glass to dry completely. Then wipe the painting surface with rubbing alcohol and a lint-free cloth. Avoid touching the cleaned area afterward because fingerprints can interfere with paint adhesion.
Step 3: Decide Whether to Paint Inside or Outside
Painting the inside creates the signature Glass Globe Junky Punky effect. The outer glass remains glossy and protects the color from routine handling. Interior paint also emphasizes molded patterns and gives the pumpkin a luminous appearance.
Painting the outside produces a more opaque, matte, or chalky finish. It may be preferable when using a frosted globe or when you want a heavily aged farmhouse style.
Whichever method you choose, use a product labeled for glass or one whose manufacturer specifically lists glass as a compatible surface. Paint formulas, drying times, and curing instructions vary, so the product label should overrule any generic online advice. Painting guides likewise recommend cleaning the surface thoroughly and following the chosen paint manufacturer’s directions.
Step 4: Apply Thin Coats of Orange Paint
For brush-on paint, add a small amount inside the globe and spread it in thin, even layers with a foam brush. Rotate the globe as you work. Avoid heavy puddles, especially around the bottom, because thick paint can wrinkle, drip, or remain soft long after your patience has left the building.
For spray paint, work outdoors or in a properly ventilated area and follow all label precautions. Apply several light passes rather than one dramatic orange avalanche. Allow each coat to dry as directed before adding another.
A single uneven coat can create an attractive translucent effect. Two or three coats usually provide stronger color. If you want the pumpkin to glow, stop before the finish becomes completely opaque.
Step 5: Create the Stem
Set the dry globe on a stable surface and experiment with possible stems. A weathered branch gives the pumpkin a natural look. A brass finial feels elegant. A rusty bolt creates an industrial mood. A wine cork says, “I crafted responsibly after dinner.”
The stem should visually balance the globe without making it top-heavy. If the opening is wide, mount the stem on a washer, small wood disk, jar lid, or decorative plate that covers the hole.
Step 6: Attach the Stem Securely
Use an adhesive designed to bond glass to the material you selected. Clean both contact surfaces, apply only the necessary amount, and stabilize the pieces while they cure.
Some multipurpose craft adhesives bond glass to wood, ceramic, and metal but may require 24 to 72 hours to cure fully. Temperature and humidity can change the curing time, so rushing the bond is an excellent way to watch your pumpkin’s stem roll across the table during dinner.
Step 7: Add Leaves and Curly Vines
Tuck artificial leaves, dried tendrils, raffia, thin wire, or a small spring around the stem. To make a wire vine, wrap craft wire around a pencil and slide it off to create a spiral.
Keep the embellishments restrained enough that the glass remains the star. One leaf and one curl are often more effective than attaching the entire contents of a floral department.
Step 8: Add an Optional Glow
A battery-operated tea light or short LED string can make the orange glass glow from within. Similar upcycled globe projects use flameless lights to turn discarded fixture shades into ghosts, snow scenes, pumpkins, and oversized holiday ornaments.
Use only cool, battery-operated lighting that fits without pressure against the glass. Avoid open flames. The U.S. Consumer Product Safety Commission regularly recommends battery-operated candles as a safer alternative when fire is a concern.
Creative Variations to Try
The Rusty Farmhouse Pumpkin
Use muted burnt-orange paint, a weathered wood stem, a rusty washer, and a strip of torn linen. Lightly sponge brown paint around the ridges to create age and depth. Display the pumpkin on reclaimed wood beside dried leaves or wheat stems.
The Mercury-Glass Punky
Apply a reflective or mirror-effect finish to selected areas inside clear glass, then layer translucent orange over it. Mirror-effect products are commonly designed for application to the reverse side or interior of clear glass, where they can create a reflective appearance.
The finished piece will sparkle under ambient light and look suspiciously expensive despite beginning life in a box marked “Free Stuff.”
The Jack-O’-Lantern Globe
Add a simple face to the outside with removable vinyl, glass paint, or a paint marker. Place a battery-operated light inside and let the textured glass soften the expression. A crooked smile usually looks better than a perfectly symmetrical one because pumpkins, unlike passport photos, benefit from personality.
The White Ghost Pumpkin
Use white or cream paint instead of orange, then add a dark stem and trailing gauze. This version works for Halloween without committing the room to bright orange. It can also remain on display through Thanksgiving if you avoid adding a face.
The Botanical Display
Skip the light and turn the opening upward. Add dried stems, faux berries, or preserved leaves. Make sure the globe is stable and do not fill it with water unless you know the shade is watertight and intended to hold liquid.
Common Mistakes and How to Avoid Them
Using a Cracked Globe
Paint does not repair structural damage. A cracked globe can break during handling, curing, storage, or temperature changes. Retire damaged glass rather than trying to turn danger into décor.
Skipping Surface Preparation
Dust, oil, and fingerprints can make paint bead or peel. Washing and degreasing take only a few minutes and are far less annoying than stripping away a failed finish.
Applying One Heavy Coat
Thick paint tends to run toward the bottom of a globe. Thin coats provide better control and allow the glass texture to remain visible.
Handling the Project Before It Cures
Dry paint is not always cured paint, and a stem that feels attached may still shift under pressure. Follow the longest recommended cure time before decorating, lighting, or storing the pumpkin.
Using Real Candles
A decorative light globe is not automatically a candle-safe container. Paint, adhesive, artificial leaves, and salvaged embellishments may react badly to heat. Flameless LEDs deliver the glow without asking your fire extinguisher to participate in the craft.
How to Style a Glass Globe Junky Punky
Place a single pumpkin on a stack of old books, a wood riser, or a metal scale. The glass provides enough visual interest that it does not require a crowded arrangement.
For a larger display, group three globes of different sizes and vary the orange shades. Use one transparent finish, one matte finish, and one metallic finish. Repeating the basic form keeps the grouping cohesive while the different surfaces prevent it from looking like a pumpkin committee meeting.
A lighted Glass Globe Junky Punky works well on an entry table, covered porch, dining-room buffet, or mantel. Keep it away from unstable edges, direct heat, active cooking areas, small children, and pets that believe all round objects were created for pushing onto the floor.
My Experience Making a Glass Globe Junky Punky
The most memorable part of making a Glass Globe Junky Punky was not painting it. It was learning to look at an ordinary object differently. The globe I used had been sitting in a donation pile among mismatched hardware and outdated lighting parts. At first glance, it looked useless. At second glance, it looked slightly pumpkin-shaped. By the third glance, I was carrying it home like an archaeologist who had discovered the lost royal squash of an ancient civilization.
Cleaning the globe revealed details I had not noticed in the store. The glass had subtle vertical ribs and tiny bubbles trapped beneath the surface. Those imperfections became the best part of the project because they broke up the orange color and made it appear deeper. A new, perfectly smooth globe probably would have looked cleaner, but it would not have had the same personality.
My first mistake was applying too much paint. I poured in what seemed like a reasonable amount, rotated the globe, and watched a thick orange river collect at the bottom. I tried turning it upside down, which merely encouraged the river to choose another destination. Eventually, I wiped out the excess and started again with several thin coats. That slower method created a much better translucent finish.
Choosing the stem took longer than painting the pumpkin. I tested a twig, a drawer knob, a wine cork, and a small brass lamp part. The twig looked too ordinary. The knob looked as though the pumpkin was wearing a tiny doorknob hat. The brass piece was perfect because it connected the decoration to the globe’s former life as part of a lamp.
I added a rusty washer beneath the stem and curled a short piece of wire around a pencil to make a vine. The wire was slightly crooked, but straightening it made the design feel too deliberate. I put the crooked curl back. That decision taught me an important rule of junk-style decorating: an imperfection can become a feature once you stop apologizing for it.
When the adhesive cured, I placed a battery-operated light inside and turned off the room lights. The orange paint softened the LEDs, and the ridged glass projected faint lines across the table. It no longer looked like a recycled lamp shade. It looked warm, handmade, and surprisingly elegantalthough “elegant” may be a generous word for an object wearing a rusty washer.
The finished piece also became an easy conversation starter. Guests wanted to know where it came from, how it was painted, and whether “Junky Punky” was an official style. I explained that the name captured the whole idea: take something unwanted, add color and humor, and let the object become stranger and better than it was before.
The project changed the way I browse thrift stores. Instead of searching only for finished decorations, I now look for useful shapes. A glass shade can become a pumpkin. A metal funnel can become a hat. A cabinet knob can become a stem. Not every piece of junk needs to be saved, of course; otherwise the garage eventually develops its own municipal government. But occasionally, an overlooked object deserves one more chance to be interesting.
Conclusion
A Glass Globe Junky Punky is proof that successful fall décor does not require expensive supplies or flawless craftsmanship. It begins with a discarded lamp globe and becomes a pumpkin through color, texture, and imagination.
The project is affordable, customizable, and suitable for many decorating styles. It can be rustic, spooky, glamorous, minimalist, or cheerfully weird. More importantly, it encourages a creative habit that reaches beyond seasonal crafts: before throwing something away, pause long enough to consider what else its shape might become.