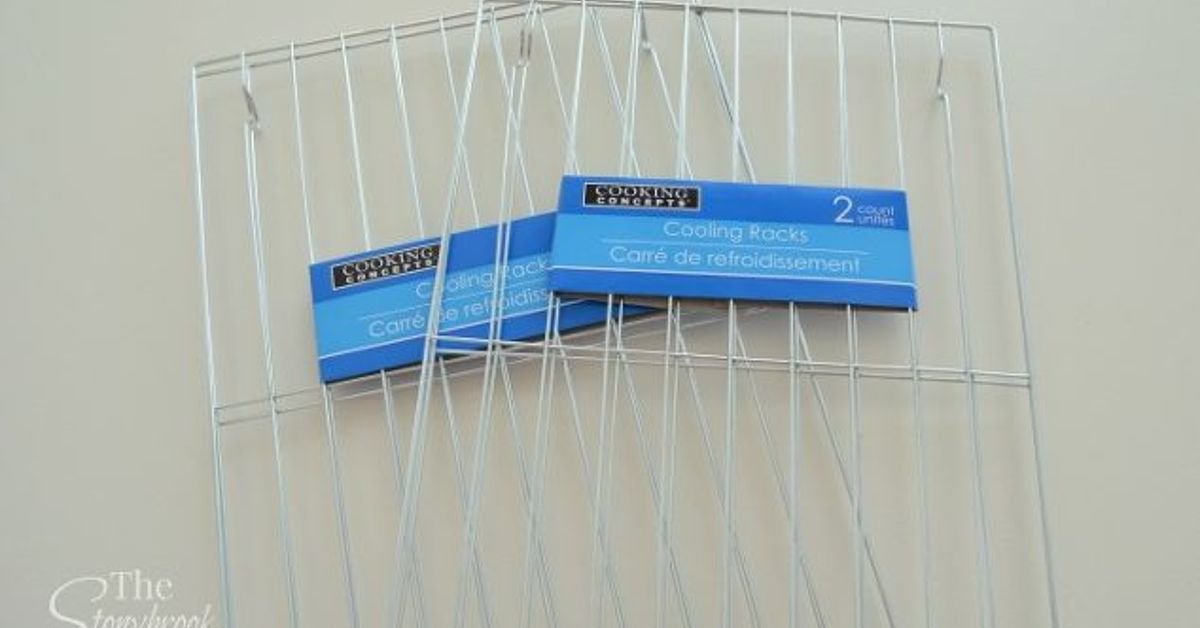
A wire cooling rack is supposed to spend its life under cookies, quietly preventing soggy bottoms and asking for no applause. Yet one inexpensive rack, a pair of pliers, and a few careful bends can transform that humble baking accessory into a slim kitchen shelf for spices, seasoning packets, recipe cards, or sink supplies.
The concept is wonderfully simple: bend the outer sections of a lightweight cooling rack upward to create a shallow trough. The middle becomes the shelf floor, while the raised sections keep containers from falling forward or backward. Close the open ends with wire or zip ties, mount the rack securely, and suddenly unused vertical space becomes useful storage.
This is not custom cabinetry. It will not make your pantry resemble a celebrity chef’s television set. It can, however, stop paprika from hiding behind cinnamon for six months, which is a meaningful contribution to civilization.
Why this cheap cooling rack kitchen hack works
Basic cooling racks are made from thin metal wires joined at regular intervals. Their original purpose is to elevate baked and fried foods so air can circulate underneath, allowing steam to escape. That same open-wire construction makes an inexpensive rack lightweight, easy to see through, and often flexible enough to reshape with ordinary hand tools.
Once folded, the rack solves several kitchen organization problems. It moves small items into unused vertical space, keeps labels visible, and prevents jars from forming unstable stacks. Its shallow profile also discourages overloading. The result is less “mystery cabinet” and more “I found the cumin before the onions burned.”
The organizer can hang inside a pantry door, on the side of a cabinet, against a wall, or on a magnetic refrigerator panel. The ideal location is close to the food-preparation area but protected from stove heat, direct sunlight, steam, and sink splashes.
What you need
- One lightweight wire cooling rack
- Needle-nose or combination pliers
- Work gloves and eye protection
- A ruler or tape measure
- Floral wire, utility wire, or small zip ties
- Hooks, screws, or anchors rated for the completed load
- Optional rubber caps, felt pads, binder clips, labels, or S-hooks
A low-cost ladder-style rack is often easier to bend than a heavy stainless-steel baking rack. Grid-style racks provide additional cross-support, but their numerous welds can make folding more difficult. Avoid racks with rust, peeling coatings, loose joints, sharp burrs, or damaged wires.
How to fold a wire cooling rack into a spice shelf
1. Measure the location first
Decide where the organizer will hang and measure the available width, height, and clearance. A pantry-door rack must not strike shelves, hinges, or containers when the door closes. A refrigerator-mounted rack should not interfere with handles, ventilation, or the person performing a midnight cheese inspection.
Place the rack horizontally on a sturdy surface and mark two parallel bend lines. A useful design has a center floor approximately 3 to 4 inches deep, with taller wire sections on both sides. The shelf should be deep enough to support one row of jars without encouraging a second invisible row behind it.
2. Make the first bend
Put on gloves. Brace the rack against the edge of a workbench or a straight board. Grip it near the marked line with pliers and bend the wires gradually across the entire width.
Do not force one corner completely upward before working on the rest. This can twist the frame and break welds. Move from one side to the other in small increments until the section reaches roughly a 90-degree angle.
3. Form the second side
Repeat the process at the second marked line, bending in the same direction. The rack should now resemble a long, shallow U-shaped trough. Set it on a counter to check whether the center is level and the sides are reasonably straight.
The shelf does not need factory-perfect angles, but it should not rock, twist, or spread under light pressure. Adjust it slowly with pliers rather than trying to correct everything with one heroic bend.
4. Close the open ends
Most folded racks remain open at both ends. Wrap floral wire around the front and back rails to create small barriers that stop jars and packets from sliding out. Small zip ties work as well, although they create a more utilitarian appearance.
Turn cut wire ends inward and cover any exposed points with rubber caps or protective tubing. Inspect every bend for cracked coatings, broken welds, or sharp metal. The goal is to organize dinner, not add “urgent tetanus consultation” to the weekly schedule.
5. Test the organizer before mounting
Place the finished shelf on a table and load it with the exact items you plan to store. Check for bowing, spreading sides, weak joints, or rolling containers. If the center dips, reduce the load or add another support point.
This test is particularly important when using glass spice jars. Eight small jars may not look heavy, but their combined weight can expose weaknesses that were invisible when the shelf was empty.
6. Mount it for the actual load
Calculate the approximate weight of the rack and its contents. Adhesive hooks must be compatible with the mounting surface and rated for more than the expected load. Clean the surface and follow the manufacturer’s waiting period before adding weight.
For permanent installation, fastening into wall studs or solid wood provides the strongest support. Where that is not possible, use anchors designed for the wall material and intended load. Use at least two mounting points to prevent rotation. A pantry-door organizer may benefit from two additional lower fasteners to reduce bouncing when the door moves.
Do not drive ordinary screws into the thin face of a hollow-core door and assume they will support several glass jars. Use hardware specifically designed for hollow doors or attach the organizer only where solid internal framing is confirmed.
The smartest places to use the finished rack
Inside a pantry door
This location keeps spices visible while hiding the organizer when the pantry closes. Store frequently used, lightweight jars in a single row. When installing several racks, leave enough vertical room to lift containers out comfortably.
On a wall near the preparation area
A wall-mounted spice shelf can speed up meal preparation, but it should not sit directly above or beside the stove. Heat, light, air, and moisture gradually weaken the aroma, color, and flavor of dried seasonings. Place the rack within reach of the counter rather than inside the hottest cooking zone.
On the refrigerator
Magnetic hooks can create a no-drill organizer for seasoning packets, tea, coffee filters, wrapped snacks, or lightweight spice containers. Confirm that the refrigerator panel is magnetic and that the rack will not block a door, handle, vent, or walkway.
Beside the sink
A rust-resistant folded rack can hold brushes, reusable cloths, gloves, and dry sponges. Allow wet items to drain and clean the wire regularly. Spices should live elsewhere; oregano has many talents, but surviving a daily steam bath is not one of them.
What to storeand what to keep elsewhere
The folded cooling rack works best with lightweight, frequently used items. Suitable choices include small spice jars, seasoning envelopes, tea packets, recipe cards, measuring spoons, parchment clips, silicone tools, small brushes, and wrapped snacks.
Avoid canned goods, large oil bottles, heavy glass containers, or valuable breakable items unless the organizer and mounting hardware are engineered for the load. Keeping one category on each rack creates a clearer workflow than building a miscellaneous wire nest.
Do not place unwrapped food directly on a rack that has been bent, cut, glued, spray-painted, or fitted with non-food-safe materials. Once converted into an organizer, retire it from oven use and direct food contact. A multipurpose tool is clever; mystery paint chips in a brownie are not.
Common mistakes that make the hack less brilliant
Using an expensive oven-safe rack
Heavy stainless-steel racks are designed to resist warping. That is excellent during roasting and inconvenient during amateur metal forming. Save the premium rack for chicken wings and use a flexible budget model for this project.
Installing it directly beside the stove
Although the location feels convenient, heat and steam can reduce spice quality. Grease also settles on exposed jars and wires. A nearby preparation wall or pantry door is usually a better choice.
Trusting tiny hooks with too much weight
Every spice jar feels light when held alone. Together, they become a small, fragrant wrecking ball. Follow hardware ratings, include the shelf’s weight, and leave a safety margin rather than treating the stated maximum as a personal challenge.
Creating an overly deep shelf
A deep organizer invites multiple rows of containers. The rear jars then disappear, recreating the original problem on a wall. A shallow shelf that displays one row is normally more useful.
Ignoring damaged edges
Bending can crack coatings or expose sharp wire. Inspect the entire organizer, cover hazardous points, and keep it beyond children’s reach if any hard edges remain.
Easy upgrades that keep the project inexpensive
Attach binder clips to the front for recipe cards, meal plans, or shopping lists. Add small S-hooks underneath for measuring spoons. A label strip can give each spice an assigned parking space and reveal immediately when a jar has wandered away.
Spray paint can make mismatched wire, ties, and clips look more cohesive. Choose paint intended for metal and allow it to cure fully. A painted organizer should remain a storage fixture rather than returning to cooking or food-contact duties.
For large collections, build two or three lightly loaded racks instead of one overloaded shelf. Group spices by purpose, such as baking, grilling, everyday savory cooking, and specialty blends. Alphabetical organization also works, provided everyone in the household agrees whether “everything seasoning” belongs under E, S, or “things we shake on absolutely everything.”
Experience notes: what this cooling rack hack is like in real life
Editorial note: The following is a practical composite based on commonly reported DIY outcomes and organizer-use patterns. Individual results will depend on the rack, mounting surface, hardware, and stored items.
The first surprise is that bending the rack is both easier and less elegant than social media makes it appear. The thinner wires usually move with moderate pressure, creating a dangerous burst of confidence. Then the thicker outer frame reaches the workbench edge and refuses to cooperate. The best response is not greater rage. It is slower leverage: brace the rack, work across the bend in small increments, and check the angle repeatedly. A five-minute shortcut can become a twenty-minute repair when one end is folded far ahead of the other.
The second lesson arrives during the load test. Empty, the shelf may look sturdy enough to store cookware for a cruise ship. Add eight glass spice jars, however, and the center can begin to dip. That visual feedback is valuable. It shows whether the span should be shortened, another support point is needed, or the organizer should be reserved for packets and plastic containers.
The most successful version is rarely the rack holding the maximum possible amount. It is the rack holding a manageable row without flexing, rattling, or making the wall hardware reconsider its career.
During the first several days, visibility creates the biggest improvement. Spices that were previously stacked two or three deep become readable at a glance. Meal preparation feels smoother because five jars no longer need to be removed to find one. Duplicate containers also become obvious. Many kitchens apparently contain two open jars of garlic powder and a third unopened jar purchased during a moment of supermarket uncertainty.
Placement matters more than expected. A shelf mounted beside the stove may feel perfect initially, but it can collect grease and expose seasonings to heat. Moving it a few feet toward the preparation counter usually creates a better balance between convenience and storage quality.
Inside a pantry, door swing becomes the main issue. Tall jars may strike fixed shelves, while a loosely mounted organizer can bounce whenever the door closes. Testing the loaded door before final installation prevents most surprises. Additional lower fasteners or small protective bumpers can reduce movement and stop the rack from scratching the door.
Cleaning is straightforward when the organizer is not overloaded. Remove the containers, wipe the wires with mild dish soap and a damp cloth, dry everything thoroughly, and return only clean jars. The open design collects less debris than a solid shelf, although twisted wire closures can trap dust and crumbs. Neat end connections are worth the extra construction time.
After a week, the most useful adjustment is usually removing a few items. Everyday spices stay. Rarely used blends return to a cool, dark cabinet. A recipe card earns a binder clip on the front, and measuring spoons may hang below. The organizer works best as a compact station for frequently used supplies rather than a monument to how much weight cheap wire can hold.
That is why the project feels borderline brilliant. It does not reinvent the kitchen, require expensive equipment, or solve every storage problem. It simply removes one small, repetitive annoyance for the price of a cooling rack and a mildly argumentative session with pliers.
Conclusion: a small bend with a useful payoff
Folding a cheap wire cooling rack into a kitchen shelf is a classic low-cost DIY project: simple materials, visible results, and just enough tool use to make you feel unusually capable before lunch. It succeeds by turning an open wire grid into shallow vertical storage without requiring custom cabinets or an expensive organizer.
The best version is measured before bending, reinforced at the ends, tested under its intended load, and installed with hardware suitable for the mounting surface. Keep the contents light, place spices away from heat and moisture, cover sharp edges, and retire the modified rack from cooking duties.
Done thoughtfully, this odd little shelf can bring order to spices, packets, recipe cards, or sink toolsand give one humble cooling rack a surprisingly productive second act.
Research note: This article synthesizes practical information from U.S. cooking, home-organization, manufacturer, retail, and university-extension resources covering cooling-rack construction, spice storage, vertical organization, and safe mounting practices.