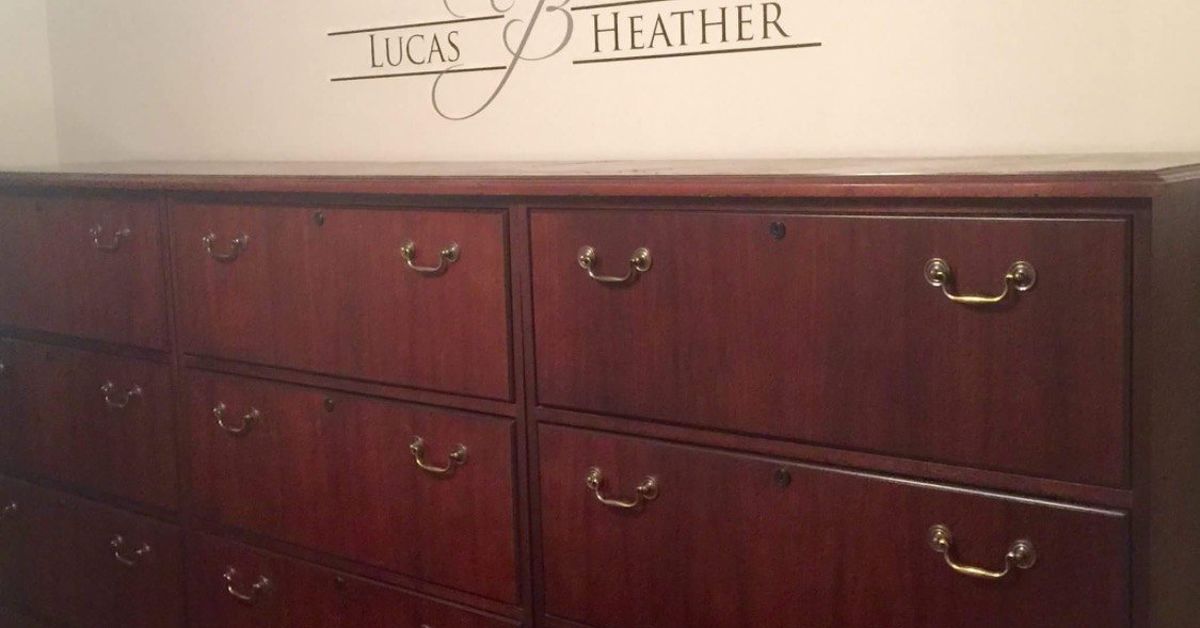
A lateral filing cabinet is rarely invited into a bedroom on purpose. It usually arrives wearing corporate gray, smelling faintly of toner, and looking ready to demand a quarterly report. Yet beneath that office personality is something surprisingly useful: a wide, sturdy cabinet with deep drawers, smooth slides, and enough storage space to handle folded clothes, extra bedding, accessories, or the mysterious collection of charging cables every household accidentally adopts.
Turning a lateral filing cabinet into a dreamy dresser does not require rebuilding it, covering the garage in sawdust, or spending three weekends whispering motivational speeches to a paint sprayer. The basic conversion can genuinely take about five minutes when the cabinet is already clean and functional. Remove the filing components, add simple drawer organizers, soften the top, and style it like bedroom furniture rather than office equipment.
The result is an affordable DIY dresser with industrial durability and a surprisingly polished appearance. Better still, the makeover can remain completely reversible, making it practical for renters, impatient decorators, and anyone whose crafting enthusiasm tends to disappear shortly after opening the toolbox.
Why a Lateral Filing Cabinet Makes a Surprisingly Good Dresser
Unlike a tall vertical file cabinet, a lateral cabinet is usually wide and relatively low. Its proportions resemble a dresser, credenza, media console, or bedroom storage chest. Many models also have full-extension drawers designed to carry heavy folders, so they can feel more substantial than lightweight flat-pack furniture.
The flat top provides room for a mirror, lamp, jewelry tray, folded blanket, or decorative objects. Inside, the broad drawers can hold sweaters, jeans, workout clothes, linens, handbags, and seasonal accessories once the hanging-file rails or follower blocks are removed.
Repurposing furniture this way also follows a useful design principle: evaluate a piece by its shape and storage potential rather than its original label. Furniture makeover guides regularly recommend changing hardware, adding decorative surfaces, and assigning old cabinets new functions instead of automatically replacing them.
The Five-Minute Transformation
What You Need
- One clean, functional lateral filing cabinet
- Pre-cut nonslip shelf liner or washable fabric
- Two or three shallow drawer bins
- A table runner, decorative fabric panel, or thin wood topper
- Felt or rubber pads for the cabinet top
- A tray, lamp, mirror, basket, or small plant
- Optional replacement pulls with matching screw spacing
The secret is preparing the decorative pieces before starting the timer. Do not begin your five-minute makeover by searching the garage for a measuring tape last seen during the previous presidential administration.
Minute 1: Inspect the Cabinet
Open and close every drawer. Confirm that the slides move smoothly, the cabinet sits level, and no sharp metal edges are exposed. Check whether the cabinet has an anti-tip interlock that allows only one drawer to open at a time. Keep that mechanism working; it is a feature, not an obstacle placed there to challenge your creativity.
Remove abandoned folders, labels, paper clips, and keys that no longer serve a purpose. If the cabinet has a lock, decide whether to keep the key somewhere accessible or leave the drawers unlocked for everyday bedroom use.
Minute 2: Remove the Filing Hardware
Many lateral cabinets contain adjustable rails, hanging-file frames, divider bars, or metal follower blocks. Some lift out without tools. Others slide out after releasing a small tab.
Remove only components designed to be adjustable or removable. Do not cut structural brackets or disable the drawer-stop system. Store the filing pieces in a labeled bag so the cabinet can return to office duty later. Reversibility is one of this project’s best qualities, especially if your dreamy bedroom eventually becomes a tax-preparation bunker.
Minute 3: Line and Organize the Drawers
Place pre-cut nonslip liner inside each drawer. The liner quiets the metallic sound, protects clothing from dusty surfaces, and helps lightweight organizers stay in place.
Add shallow bins or fabric boxes to prevent smaller items from roaming around the drawer. One bin can hold socks, another can hold underwear, and another can contain accessories. Larger folded pieces can sit beside them.
Avoid forcing tall stacks into shallow drawers. A file cabinet may be built like a tiny tank, but your favorite sweaters should not be compressed into geological layers.
Minute 4: Soften the Top
A bare metal top says “office supply room.” A warm, textured surface says “intentional bedroom furniture.” Place rubber or felt pads on the cabinet, then add one of the following:
- A thin wood panel cut to the cabinet’s dimensions
- A folded linen runner
- A removable wallpaper-covered board
- A woven mat or decorative fabric panel
- A lightweight tray that covers much of the surface
A loose wood topper should be stable, smooth, and unable to slide. Round or sand sharp corners before use. Do not place an excessively heavy stone slab on the cabinet unless the manufacturer’s load capacity and the supporting structure have been verified.
Minute 5: Style It Like a Dresser
Add a mirror above the cabinet or lean a lightweight framed mirror against the wall where it cannot fall. Place a lamp on one side and a tray on the other. A small plant, candle, framed photograph, or ceramic bowl can complete the arrangement.
Use restraint. The goal is to make the filing cabinet look like bedroom furniture, not to disguise it beneath seventeen decorative pumpkins and a ceramic bird convention.
The One Safety Step You Should Never Skip
Once a filing cabinet is used to store clothing, it effectively begins performing the job of a dresser. Heavy drawers can shift the center of gravity when opened, particularly if several drawers are extended at once.
Secure the cabinet to a wall stud using an appropriate metal furniture anchor or manufacturer-approved restraint. The U.S. Consumer Product Safety Commission recommends anchoring existing furniture and warns that unsecured clothing storage units can create serious tip-over and entrapment hazards.
Place heavier contents in the bottom drawer and lighter items higher up. Never encourage children to climb on open drawers, and do not defeat an existing one-drawer-at-a-time interlock. If the cabinet has damaged slides, a twisted frame, missing stops, or unstable added legs, repair those problems before putting it into service.
How to Make the Cabinet Look Less Like Office Furniture
Change the Hardware
Hardware is furniture jewelry, except it is much less likely to disappear mysteriously before a wedding. Replacing plain pulls with brass, matte-black, wood, leather, or acrylic hardware can instantly change the cabinet’s personality.
Measure the distance between the existing screw holes before buying replacements. Choosing pulls with the same center-to-center measurement turns the update into a quick screwdriver job. If the original hardware is sturdy but unattractive, remove it and repaint it with a finish formulated for metal.
Design and furniture-upcycling experts frequently identify a hardware swap as one of the fastest ways to make inexpensive furniture look more customized and refined.
Add Removable Wallpaper
Peel-and-stick wallpaper can introduce color, pattern, or texture without permanently changing the cabinet. Apply it to recessed drawer panels, the sides, or a removable topper rather than covering every surface.
For the cleanest result, wash and dry the surface first. Measure each panel separately because older cabinets are not always as perfectly symmetrical as they appear. Cut the material slightly oversized, apply it slowly, and trim the edges with a sharp craft knife.
Large patterns make a bold statement, while linen textures, grasscloth effects, small florals, and subtle geometric prints create a quieter look. Drawer-front wallpaper is also a beginner-friendly furniture update that requires no power tools.
Use Color Without Painting the Cabinet
A full paint job is optional. You can introduce color through the top runner, hardware, labels, baskets, art, and surrounding wall. A charcoal cabinet can look sophisticated when paired with warm wood, cream textiles, and aged brass. A beige cabinet can feel intentionally retro beside terracotta, olive green, and walnut accents.
Working with the existing finish is often faster and more convincing than trying to hide it. Industrial metal paired with soft textiles creates contrast, which is usually more interesting than forcing every item in the bedroom to pretend it came from the same furniture set.
The Longer Makeover: Painting a Metal Filing Cabinet
If the original finish is badly scratched, rusted, or permanently committed to government-office beige, paint can produce a dramatic transformation. However, this is no longer a five-minute project. Cleaning, preparation, coating, drying, and curing require patience.
1. Identify the Surface
Determine whether the cabinet is painted steel, powder-coated metal, laminate, veneer, or wood. The correct primer and paint depend on the material. Test a hidden area before coating the entire cabinet.
2. Clean Thoroughly
Remove the drawers and hardware when the cabinet design allows it. Vacuum dust from the corners, then wash the exterior with a suitable degreasing cleaner. Allow every surface to dry completely.
Paint adheres poorly to grease, furniture polish, adhesive residue, and mysterious office grime. Cleaning may be the least glamorous part of the project, but it prevents the finished surface from peeling like a sunburned tourist.
3. Repair Rust and Loose Paint
Use a wire brush, scouring pad, or appropriate sandpaper to remove loose rust and flaking coating. Feather rough edges so they do not show through the new finish. Vacuum or wipe away the residue.
Metal-painting guidance from major paint and home-improvement sources consistently emphasizes removing corrosion, cleaning the surface, using ventilation, and selecting coatings intended for metal.
4. Be Careful With Unknown Old Paint
Do not aggressively sand an old painted cabinet when the coating’s age and composition are unknown. Renovation activities such as sanding and scraping can create hazardous dust when lead-based paint is present. The Environmental Protection Agency recommends minimizing dust, using lead-safe practices, and taking extra precautions with older painted materials.
When in doubt, test the coating or seek professional guidance before disturbing it. No dresser makeover is improved by accidentally turning the laundry room into a hazardous-materials scene.
5. Prime and Paint
Mask drawer slides, locks, labels, and moving parts. Apply a primer recommended for the cabinet’s surface, followed by thin coats of compatible metal paint. Spray paint can provide an even finish on broad metal panels, while a smooth foam roller may be easier to control indoors.
Work in a well-ventilated area and follow the product label for protective equipment, application distance, drying time, recoating, and curing. Manufacturers commonly recommend steady overlapping passes rather than one heavy coat.
6. Allow the Finish to Cure
Dry paint is not necessarily cured paint. A surface may feel dry but remain vulnerable to scratches, dents, fingerprints, and hardware impressions. Follow the coating manufacturer’s curing instructions before reinstalling handles, filling drawers, or styling the top.
Dreamy Dresser Style Ideas
Modern Cottage
Pair a cream, pale gray, or muted green cabinet with a natural wood topper, aged brass pulls, a woven basket, and a small floral arrangement. Choose simple linen drawer liners to keep the effect relaxed rather than overly themed.
Moody Boutique Hotel
Use the cabinet’s charcoal or black finish, then add smoked-glass accessories, warm metallic hardware, a sculptural lamp, and oversized artwork. Folded white linens inside the drawers create a crisp contrast.
Soft Bohemian
Add removable botanical wallpaper to the drawer fronts, a light wood topper, leather pulls, a rounded mirror, and a trailing plant. Keep the pattern concentrated in one area so the cabinet feels collected rather than visually caffeinated.
Industrial Vintage
Celebrate the cabinet’s original material. Clean and preserve the metal finish, add a reclaimed-looking wood top, install dark handles, and use vintage-inspired label cards. Instead of hiding every dent, allow a few marks to tell the cabinet’s previous story.
Playful Kids’ Room
Use removable color blocks or wallpaper panels to identify drawer categories. Add large, easy-to-grip pulls and washable organizers. Anchor the cabinet securely and keep the heaviest items in the lowest drawer.
What to Store in a File-Cabinet Dresser
- Folded T-shirts and workout clothing
- Jeans, shorts, and leggings
- Seasonal accessories
- Bed linens and pillowcases
- Craft supplies
- Handbags and small travel organizers
- Scarves, belts, and hats
- Guest-room essentials
Drawer bins are especially useful for socks, undergarments, jewelry boxes, and toiletries. Avoid storing damp fabrics, open liquids, food, or products that could leak and corrode the metal.
Before placing clothing inside a secondhand cabinet, clean the drawer interiors carefully. Check for odors, rust, lubricant residue, mildew, pests, and sharp projections. A bargain is only a bargain when it does not give your sweaters an unexplained scent called “abandoned records department.”
Common Mistakes to Avoid
Painting Without Surface Preparation
Applying beautiful paint over grease or loose rust produces beautifully colored peeling grease and rust. Clean first, repair the surface, and use products compatible with the cabinet material.
Adding Decorative Legs Without Reinforcement
Lateral filing cabinets are heavy. Attaching delicate legs directly to thin sheet metal can create an unstable base. A properly designed platform may be needed to distribute the load. When structural modifications are uncertain, keep the cabinet on its original base.
Blocking the Drawer Mechanism
Wallpaper, paint, and liners should not interfere with slides, locks, stops, or interlocks. Keep decorative materials away from moving parts.
Overloading the Top
A dresser top does not need to become a storage attic. Keep heavy objects to a minimum, secure mirrors properly, and avoid placing a television on the cabinet unless both pieces can be safely anchored.
Confusing Styling Time With Project Time
The reversible transformation can take five minutes after the cabinet is cleaned and the materials are prepared. A complete refinishing project takes much longer. Paint must dry, adhesives must settle, and structural changes must be tested. The laws of curing time remain stubbornly unimpressed by exciting blog titles.
Conclusion
A lateral filing cabinet can become a dreamy dresser because it already has the most important ingredients: useful proportions, spacious drawers, a flat top, and a sturdy frame. The fastest conversion is not about rebuilding the cabinet. It is about changing how the piece functions and how the eye reads it.
Remove the filing rails, line the drawers, add organizers, soften the top, and style the cabinet with bedroom accessories. Replace the pulls or apply removable wallpaper when you want a stronger visual transformation. For a permanent makeover, clean and prepare the surface correctly, use paint formulated for the material, and allow the finish to cure.
Most importantly, secure the cabinet to the wall and preserve its safety mechanisms. Once those practical details are handled, the former office workhorse can store sweaters, support a mirror, and live quite happily in a bedroom without ever mentioning spreadsheets again.
Experience Notes: Living With a Filing Cabinet Dresser
The first surprise people often encounter is the weight. A lateral filing cabinet may look like a simple two- or three-drawer chest, but moving one can feel like relocating a compact automobile. The smartest experience begins before decorating: empty the drawers, remove them only according to the manufacturer’s design, protect the floor, and recruit help. Trying to slide a loaded steel cabinet across hardwood is a reliable way to create a floor pattern that no interior designer requested.
Once the cabinet is in position, the five-minute transformation feels almost suspiciously easy. A linen runner immediately reduces the office-furniture appearance. A warm lamp changes how the metal finish looks at night, and a wood tray or topper makes the flat surface feel more domestic. Even before changing the hardware, the piece begins to read as a dresser because the surrounding objects provide a new context.
The drawers create the next learning moment. They are usually wider than conventional dresser drawers, which is excellent for jeans, sweaters, and bedding. However, small items can migrate from one side to the other every time the drawer opens. Without organizers, three neatly folded pairs of socks can somehow become an interstate transportation system by morning.
Shallow fabric bins solve the problem better than one large box. Separate organizers can be lifted out, rearranged, or washed. Nonslip liner also makes a noticeable difference by reducing sliding and softening the sound of objects touching metal.
Another useful experience is discovering that perfection is unnecessary. A tiny dent, old label slot, or slightly industrial handle may give the dresser character. When every office detail is covered, the piece can look as though it is wearing a costume. Keeping one or two original features creates a more confident design: yes, this used to guard alphabetical folders, and now it guards pajamas. People contain multitudes; furniture can, too.
The biggest temptation is beginning with paint. A dramatic color promises the most exciting before-and-after photograph, but styling first is usually wiser. Living with the unpainted cabinet for several days reveals whether the height, drawer action, and storage arrangement actually work. It also shows which finish would suit the room. A cabinet that initially appears dull gray may look sophisticated once it is paired with walnut, cream, black, and brass.
If painting eventually becomes the right choice, patience produces a better experience than speed. The cleaning and curing stages are where many rushed projects fail. A finish that feels dry can still be soft enough for a lamp base or drawer pull to leave a permanent mark. Waiting before loading and styling the cabinet is less exciting than unveiling it immediately, but it prevents the makeover from developing decorative fingerprints.
Daily use also highlights the value of retaining the original interlock. Opening one drawer at a time may initially feel inconvenient, especially when putting away laundry. In practice, it encourages quick organization and helps keep the heavy cabinet stable. Anchoring it to the wall adds another layer of reassurance, particularly in rooms used by children or visiting family members.
Over time, the most satisfying part of the project is not that the cabinet looks expensive. It is that an overlooked object becomes genuinely useful. The piece gains a second life without pretending to be something fragile or precious. It still has industrial-strength drawers and an office-grade attitude; it simply wears better accessories now.
That combination of practicality and personality is what makes the makeover memorable. A conventional dresser may arrive ready for the bedroom, but a repurposed filing cabinet brings a story, a little humor, and the pleasure of solving a storage problem with something that already existed.