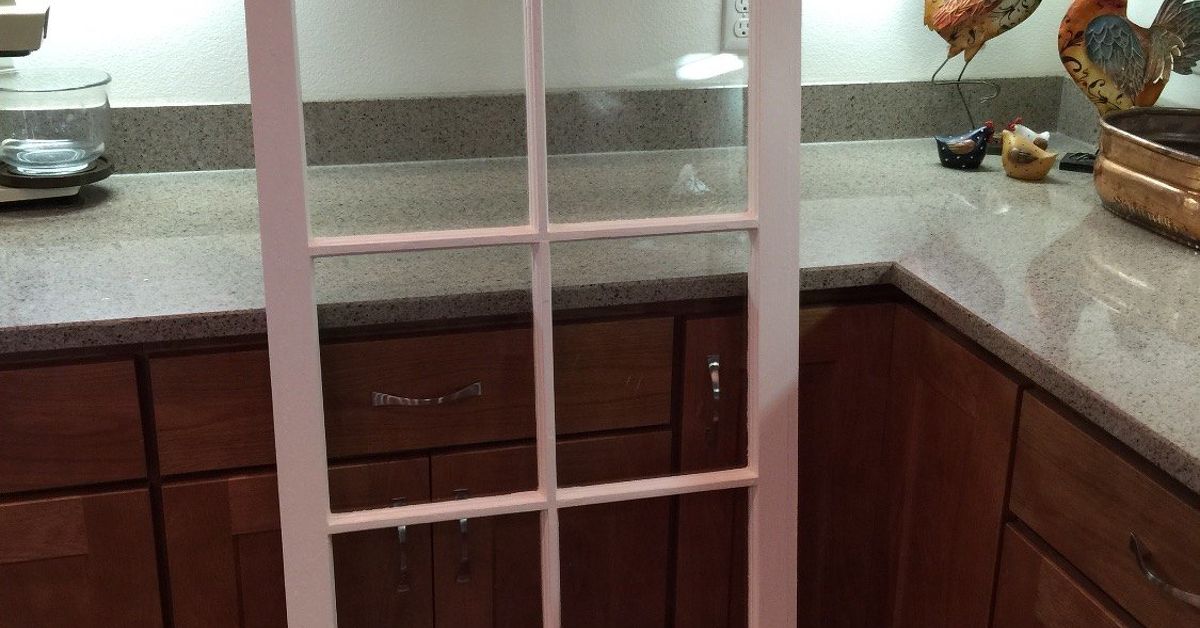
There are two kinds of people in this world: the ones who throw away old windows, and the ones who see a
charming, slightly dusty portal to nostalgia that can hold eight photos of their dog. If you’re here,
congratulationsyou are the second kind (and your dog is about to become a gallery-worthy icon).
Repurposing a vintage window as a picture frame is one of those DIY projects that looks like you paid a
boutique shop an alarming amount of moneywhen really you just combined “architectural salvage” with
“I refuse to let this cool old thing die.” It’s farmhouse. It’s eclectic. It’s “I have taste and also a toolbox.”
Why a Vintage Window Makes a Surprisingly Great Photo Frame
Old window sashes naturally create multiple “frames” (the panes) so you get an instant collage layout without
measuring sixteen rectangles and questioning your life choices. The wood often has beautiful patinasmall nicks,
layered paint, or wavy glass that screams character (politely, from a safe distance).
- Built-in grid: Panes act like ready-made photo slots.
- Texture and depth: Adds dimension compared to a flat poster frame.
- Conversation starter: People will ask where you bought it. You get to say, “I made it.”
- Sustainable decor: Upcycling keeps usable materials out of landfills.
Picking the Right Old Window
Not all vintage windows are created equal. Some are sturdy treasures; others are one gentle sneeze away from
becoming “rustic confetti.” Look for a piece that’s structurally sound, sized for your space, and realistic for your
skill level.
What to Look For
- Solid joints: Wiggle the corners. Minor looseness is fixable; major wobble is a project within a project.
- Manageable weight: Old-growth wood can be heavy. Multi-pane windows can be very heavy.
- Minimal rot: Soft, crumbly areas near the bottom rail are commonavoid severe rot.
- Panes (or no panes) is fine: You can keep glass, replace glass, or skip it entirely and use the openings.
- Layout you like: 4-pane, 6-pane, 8-pane, 12-panepick what matches your photo plan.
Where to Find One in the U.S.
Great sources include architectural salvage shops, flea markets, estate sales, and home improvement reuse centers.
Many people also score windows through local Habitat ReStores, which often carry used building materials.
Safety First: Lead Paint and Old Glass Aren’t Cute
Vintage windows are often from homes built before 1978, which means lead-based paint is a real possibility. Lead
dust is most likely when paint is disturbed by sanding, scraping, or frictionwindows are a common hotspot because
they’re high-wear surfaces. If you suspect lead paint, avoid dry sanding and aggressive scraping. Consider
encapsulating (sealing) the surface instead, or have a trained professional handle lead-safe work practices.
Glass safety matters too. Old panes can crack unexpectedly; wavy glass is gorgeous but not indestructible. Wear
gloves and eye protection, and don’t force stuck glazing or brittle panes like you’re trying to win a strength contest.
Tools and Materials Checklist
You can make this project as simple or as deluxe as you want. Here’s a practical list with flexible options.
Basics
- Vintage window sash (cleaned and checked for stability)
- Mild soap, water, microfiber cloths
- Painter’s tape
- Measuring tape + pencil
- Scissors or craft knife
- Staple gun or small brad nails (optional)
For Backing + Photos
- Foam board, mat board, thin plywood, or hardboard (cut to size)
- Printed photos (matte prints reduce glare)
- Double-sided tape or photo corners
- Optional: cardstock mats for a polished look
For Repairs and Upgrades (Optional)
- Wood glue, clamps, small corner braces
- Glazing points and glazing compound if replacing or securing glass
- Replacement glass or acrylic (plexiglass) cut to size
- Primer/paint or clear sealer (especially if sealing old paint)
Design Choices Before You Start
Decide how you want the photos to live in the window. This is the “measure twice, avoid chaos” moment.
Option A: Photos Behind Glass (Classic Look)
This gives the most “finished” appearance. You’ll mount photos to a backing board behind the panes. If glass is
intact and secure, great. If it’s cracked or missing, you can replace itor use acrylic for a lighter, safer build.
Option B: No Glass, Photos Mounted Behind Open Panes (Rustic + Low-Glare)
Skip the glass entirely and mount photos to a backing board that sits behind the window grid. This avoids glare and
makes changing photos easier. It also avoids wrestling with fragile panes.
Option C: Clip-On Display (Fastest + Most Flexible)
Keep the window as a decorative grid and attach mini clothespins, clips, or small binder clips along the muntins.
Great for seasonal photos, postcards, kids’ art, or holiday cards. Maximum charm, minimum commitment.
Step-by-Step: Turning a Vintage Window into a Picture Frame
1) Clean It Gently (Don’t “Power Wash” Your Way into Regret)
Start with mild soap and water. Use a soft brush for crevices and a microfiber cloth for the flat surfaces. If the
window has flaking paint and you suspect it may be old lead paint, avoid actions that create dust. A damp wipe-down
and sealing coat is often safer than trying to strip it to bare wood.
2) Stabilize the Frame
Tighten loose screws, reinforce wobbly joints with wood glue (clamped until dry), and replace missing hardware as
needed. For badly separated corners, small corner braces on the back can add strength without changing the front
look.
3) Decide: Keep the Patina, Paint It, or Seal It
The easiest “pro-looking” move is often to seal rather than repaint. A clear matte or satin sealer can
lock in the aged finish and reduce flaking. If you paint, prime first and consider a finish that matches your room:
white for farmhouse, black for modern, muted green for cottage, or natural wood for vintage warmth.
4) Handle the Glass (Only If You Need To)
If glass is intact and firmly held in place, you can keep it. If panes are loose, cracked, or missing:
- Replace glass: Have a glass shop cut panes to size (especially for multiple openings).
- Use acrylic: Lighter and less breakablegreat for big pieces or high-traffic areas.
- Secure panes properly: Glazing points and glazing compound are traditional methods for holding glass in old sashes.
5) Measure the Backing Board
Flip the window over and measure the inside dimensions of the frame where a backing board can sit flat. Cut foam
board or thin plywood accordingly. Your goal is a snug fit without bowing.
6) Create Your Photo Layout
Here’s a quick method that saves you from printing seven versions of the same photo “just in case”:
- Measure one pane opening (height and width).
- Decide whether you want a border/mat look (leave 1/4″–1/2″ margin per side).
- Print photos slightly larger than the visible opening if you want full coverage behind muntins.
- Test the layout by placing photos behind the window before attaching anything permanently.
7) Mount Photos to the Backing
Use photo corners if you want to swap images later. For a permanent display, double-sided tape works. If you’re
using mats, attach the mat first, then mount the photo behind the opening.
8) Attach the Backing to the Window
Common ways to secure backing:
- Staples: Fast and strong (best for wood backing or thick foam board).
- Small brad nails: Clean look, easy to remove later.
- Turn buttons or mirror clips: Great for “open/close” access so you can change photos.
- Strong tape: Works for lightweight builds (less ideal for heavy windows).
9) Add Hanging Hardware That Matches the Weight
This is where you respect gravity. A multi-pane old window can be surprisingly heavy, so choose hardware that’s
rated appropriately for your wall type and the piece’s weight.
- D-rings + wire: Common for frames; good for medium weight.
- French cleat: Excellent for heavy or oversized window frames (very secure and level-friendly).
- Stud mounting: If it’s heavy, anchor into studs when possible.
- Adhesive strips: Better for lighter window-frame decor (and always follow brand weight limits).
Styling Ideas: Make It Look Intentional (Not Like You Lost a Window Indoors)
Gallery Wall Anchor
Use the window frame as the “hero” piece and surround it with smaller frames. Keep a consistent color story (all black
and white photos, or all warm-toned prints) to avoid visual noise.
Entryway Memory Grid
Six-pane windows are perfect for family photos, travel shots, or seasonal swaps. If you go with clips, you can refresh
it monthlylike a mini museum that doesn’t require a membership.
Kitchen “Recipe + Photos” Combo
Mix old family recipe cards with photos. It’s sentimental and functional, like your grandma is cheering you on while
you over-season the soup (as tradition demands).
Holiday Card Display
Add twine across the panes and clip holiday cards to it. It’s festive, reusable, and doesn’t require taping paper to
every vertical surface in your home.
Maintenance and Longevity Tips
- Dust gently: Use a microfiber cloth. Avoid harsh sprays on old finishes.
- Check hardware yearly: Tighten screws and inspect wall anchors.
- Mind direct sun: Photos can fade; consider UV-protective glass or rotate prints seasonally.
- Seal flaking finishes: If paint starts to chip, seal it rather than sanding it down.
Common Problems (and How to Fix Them)
“My window is crooked on the wall.”
Heavy pieces often shift if hung on a single point. Consider two hooks, D-rings without wire, or a French cleat to
stabilize. Also confirm your wall hardware is level before hanging.
“The backing board bows.”
Use a stiffer backing (thin plywood or hardboard) or add a center support strip. Foam board can warp in humidity,
especially on large frames.
“Glare is ruining my photos.”
Try matte prints, remove the glass, or use non-glare acrylic. You can also angle lighting away from the display to
minimize reflections.
Conclusion: Your New Favorite “Window” Doesn’t Even Need Curtains
A vintage window picture frame is the kind of DIY that rewards you twice: first when you make it, and again every
time you walk past it and think, “Yeah, I nailed that.” Whether you keep the original patina, repaint it to match your
space, or turn it into a rotating photo display, you end up with a piece that’s personal, sustainable, and genuinely
stylish.
And the best part? This is one window that never leaks cold air, never sticks in summer, and never asks you to
replace the screens. It just hangs there looking impressivelike it’s been doing that its whole life.
Experience Notes: What It’s Actually Like to Make One (The Real-World Version)
If you’ve never worked with an old window before, here’s the truth: the project feels easy right up until you meet
the “mystery layer.” That’s the moment you discover your window has been painted approximately 47 times, and each
layer has its own opinion about whether it wants to stay attached. Most makers quickly learn that chasing “perfect”
can turn a fun upcycle into a three-day saga. The happiest outcomes usually come from deciding early whether you’re
honoring the patina (seal and celebrate) or truly refinishing (prime, paint, accept the mess).
Another common experience: you’ll think the window is “not that heavy” until you lift it with one hand while trying to
mark wall height with the other. Spoiler: it is that heavy. People often end up switching plans midstreammoving
from picture wire to D-rings, or from standard hooks to a French cleatbecause the piece feels more substantial once
you add backing, glass, and hardware. A small, practical win is to temporarily tape paper “templates” on the wall the
same size as the window before committing to placement. It’s a low-effort trick that saves you from the classic DIY
regret of hanging it, stepping back, and realizing it looks like it’s floating toward the ceiling.
Photo sizing is also an unexpectedly emotional journey. Many crafters print photos too small the first time, because
they forget that muntins cover edges. Then they hold the window up, see tiny photos swimming in giant panes, and
suddenly they’re reprinting everything. The smoother path is to test with scrap paper rectangles firstcut to the pane
opening and slid behind the grid. Once you see the “visible area,” the right print size becomes obvious.
If you’re using clips, your experience will be delightfully chaotic in the best way. You’ll start with a neat, curated
set of images, and within a week it becomes a living bulletin board: postcards, invitations, a kid’s drawing, a note
that says “buy coffee,” and one random photo you swear you’ll swap out later. That’s not failurethat’s the charm.
Clip-style windows become a family storytelling wall, and people tend to love them more over time because they’re
always changing.
Lastly, almost everyone has a “pane moment”where they realize glass is the only part of this project that can bite
back. Makers often report that the smartest decision they made was choosing acrylic for large windows or skipping
glass entirely for high-traffic homes. It reduces stress, lowers weight, and makes the piece feel more livable. In the
end, the most satisfying vintage window frames aren’t the most perfect; they’re the ones that look intentional, feel
sturdy, and hold memories you actually want to see every day. And yesafter you finish one, you will start noticing
old windows everywhere like a DIY predator. It’s normal. Welcome to the club.