A bad car odor has an impressive ability to hide. It can lurk beneath a seat, soak into carpet padding, camp inside an air vent, or survive for months in a forgotten gym bag that has apparently developed its own ecosystem. Spraying an air freshener may briefly replace the smell of spoiled milk with “Tropical Thunder,” but the original odor will usually returnnow wearing a coconut hat.
Effective car odor removal starts with finding and eliminating the source. Food, pet accidents, cigarette smoke, mildew, dirty cabin filters, leaking fluids, and contaminated upholstery all require slightly different treatments. The following 12-step process explains how to remove odors from your car without damaging leather, electronics, trim, carpet, or your respiratory system.
Before cleaning, remember that some smells are mechanical warnings rather than housekeeping problems. Gasoline, exhaust, burning rubber, melting plastic, hot brakes, or a sweet coolant-like odor should be inspected promptly. Carbon monoxide itself has no smell, so never assume a vehicle is safe simply because you cannot detect exhaust fumes.
Step 1: Identify What the Odor Smells Like
Do not attack the interior with random cleaners until you have identified the general odor category. Different smells point to different sources:
- Sour or rotten: spoiled food, spilled milk, coffee, fruit, or organic debris.
- Musty or earthy: trapped moisture, mildew, mold, or a wet cabin air filter.
- Smoky: cigarette residue, wildfire smoke, or something overheating.
- Animal-like: pet urine, wet fur, nesting rodents, or a deceased pest.
- Sweet: a possible coolant leak.
- Gasoline or exhaust-like: a fuel, emissions, or exhaust-system problem.
- Burning: overheated brakes, oil on a hot component, electrical wiring, rubber, or a slipping clutch.
Note when the smell appears. An odor that starts only when the air conditioner runs probably involves the HVAC system. One that becomes stronger after driving may come from a fluid leak or hot mechanical component. This simple detective work prevents you from shampooing the seats while the actual culprit quietly lives behind the dashboard.
Step 2: Remove Every Piece of Trash and Loose Debris
Empty the vehicle completely. Remove food wrappers, cups, tissues, child-seat accessories, blankets, reusable shopping bags, sports equipment, and anything stored beneath the seats. Check the trunk, cargo compartments, seat-back pockets, center console, glove compartment, door pockets, and spare-tire well.
Pay special attention to tiny objects. A single French fry can become surprisingly ambitious after three humid weeks. Look along seat rails and beneath floor mats for crumbs, gum, fruit, pet treats, or leaking containers. If the odor improves after the car is emptied, smell each removed item before putting it back.
Step 3: Inspect Hidden Areas for the Source
Use a flashlight to inspect places that are easy to miss. Slide the seats forward and backward, lift removable cargo panels, and examine the edges of the carpet. Check beneath child car seats, where snacks frequently go to retire.
Look for stains, dampness, insect activity, rodent droppings, nesting material, mold spots, and discolored padding. Also inspect the trunk seals, sunroof drains, door seals, and lower carpeting after rain. Hidden moisture can remain beneath an apparently dry surface and continue feeding mold or bacteria.
If flooding or a major water leak soaked the carpet and padding, surface cleaning may not be enough. Porous material can retain contamination deep inside, and severely affected padding may require removal or replacement. Controlling the moisture source is essential; otherwise, the smell will return after every cleaning.
Step 4: Vacuum the Interior Thoroughly
Remove the floor mats and vacuum them separately. Use a crevice attachment along seat seams, seat tracks, carpet edges, pedals, cup holders, and between the console and seats. Vacuum fabric seats slowly in overlapping passes rather than waving the nozzle around like a tiny household lightsaber.
For pet hair, loosen the fibers with a rubber glove, upholstery brush, or specialized pet-hair tool before vacuuming. Do not forget the trunk carpet and cargo-area upholstery. Dirt and organic particles can trap odor-producing oils, moisture, and bacteria even when no obvious stain is visible.
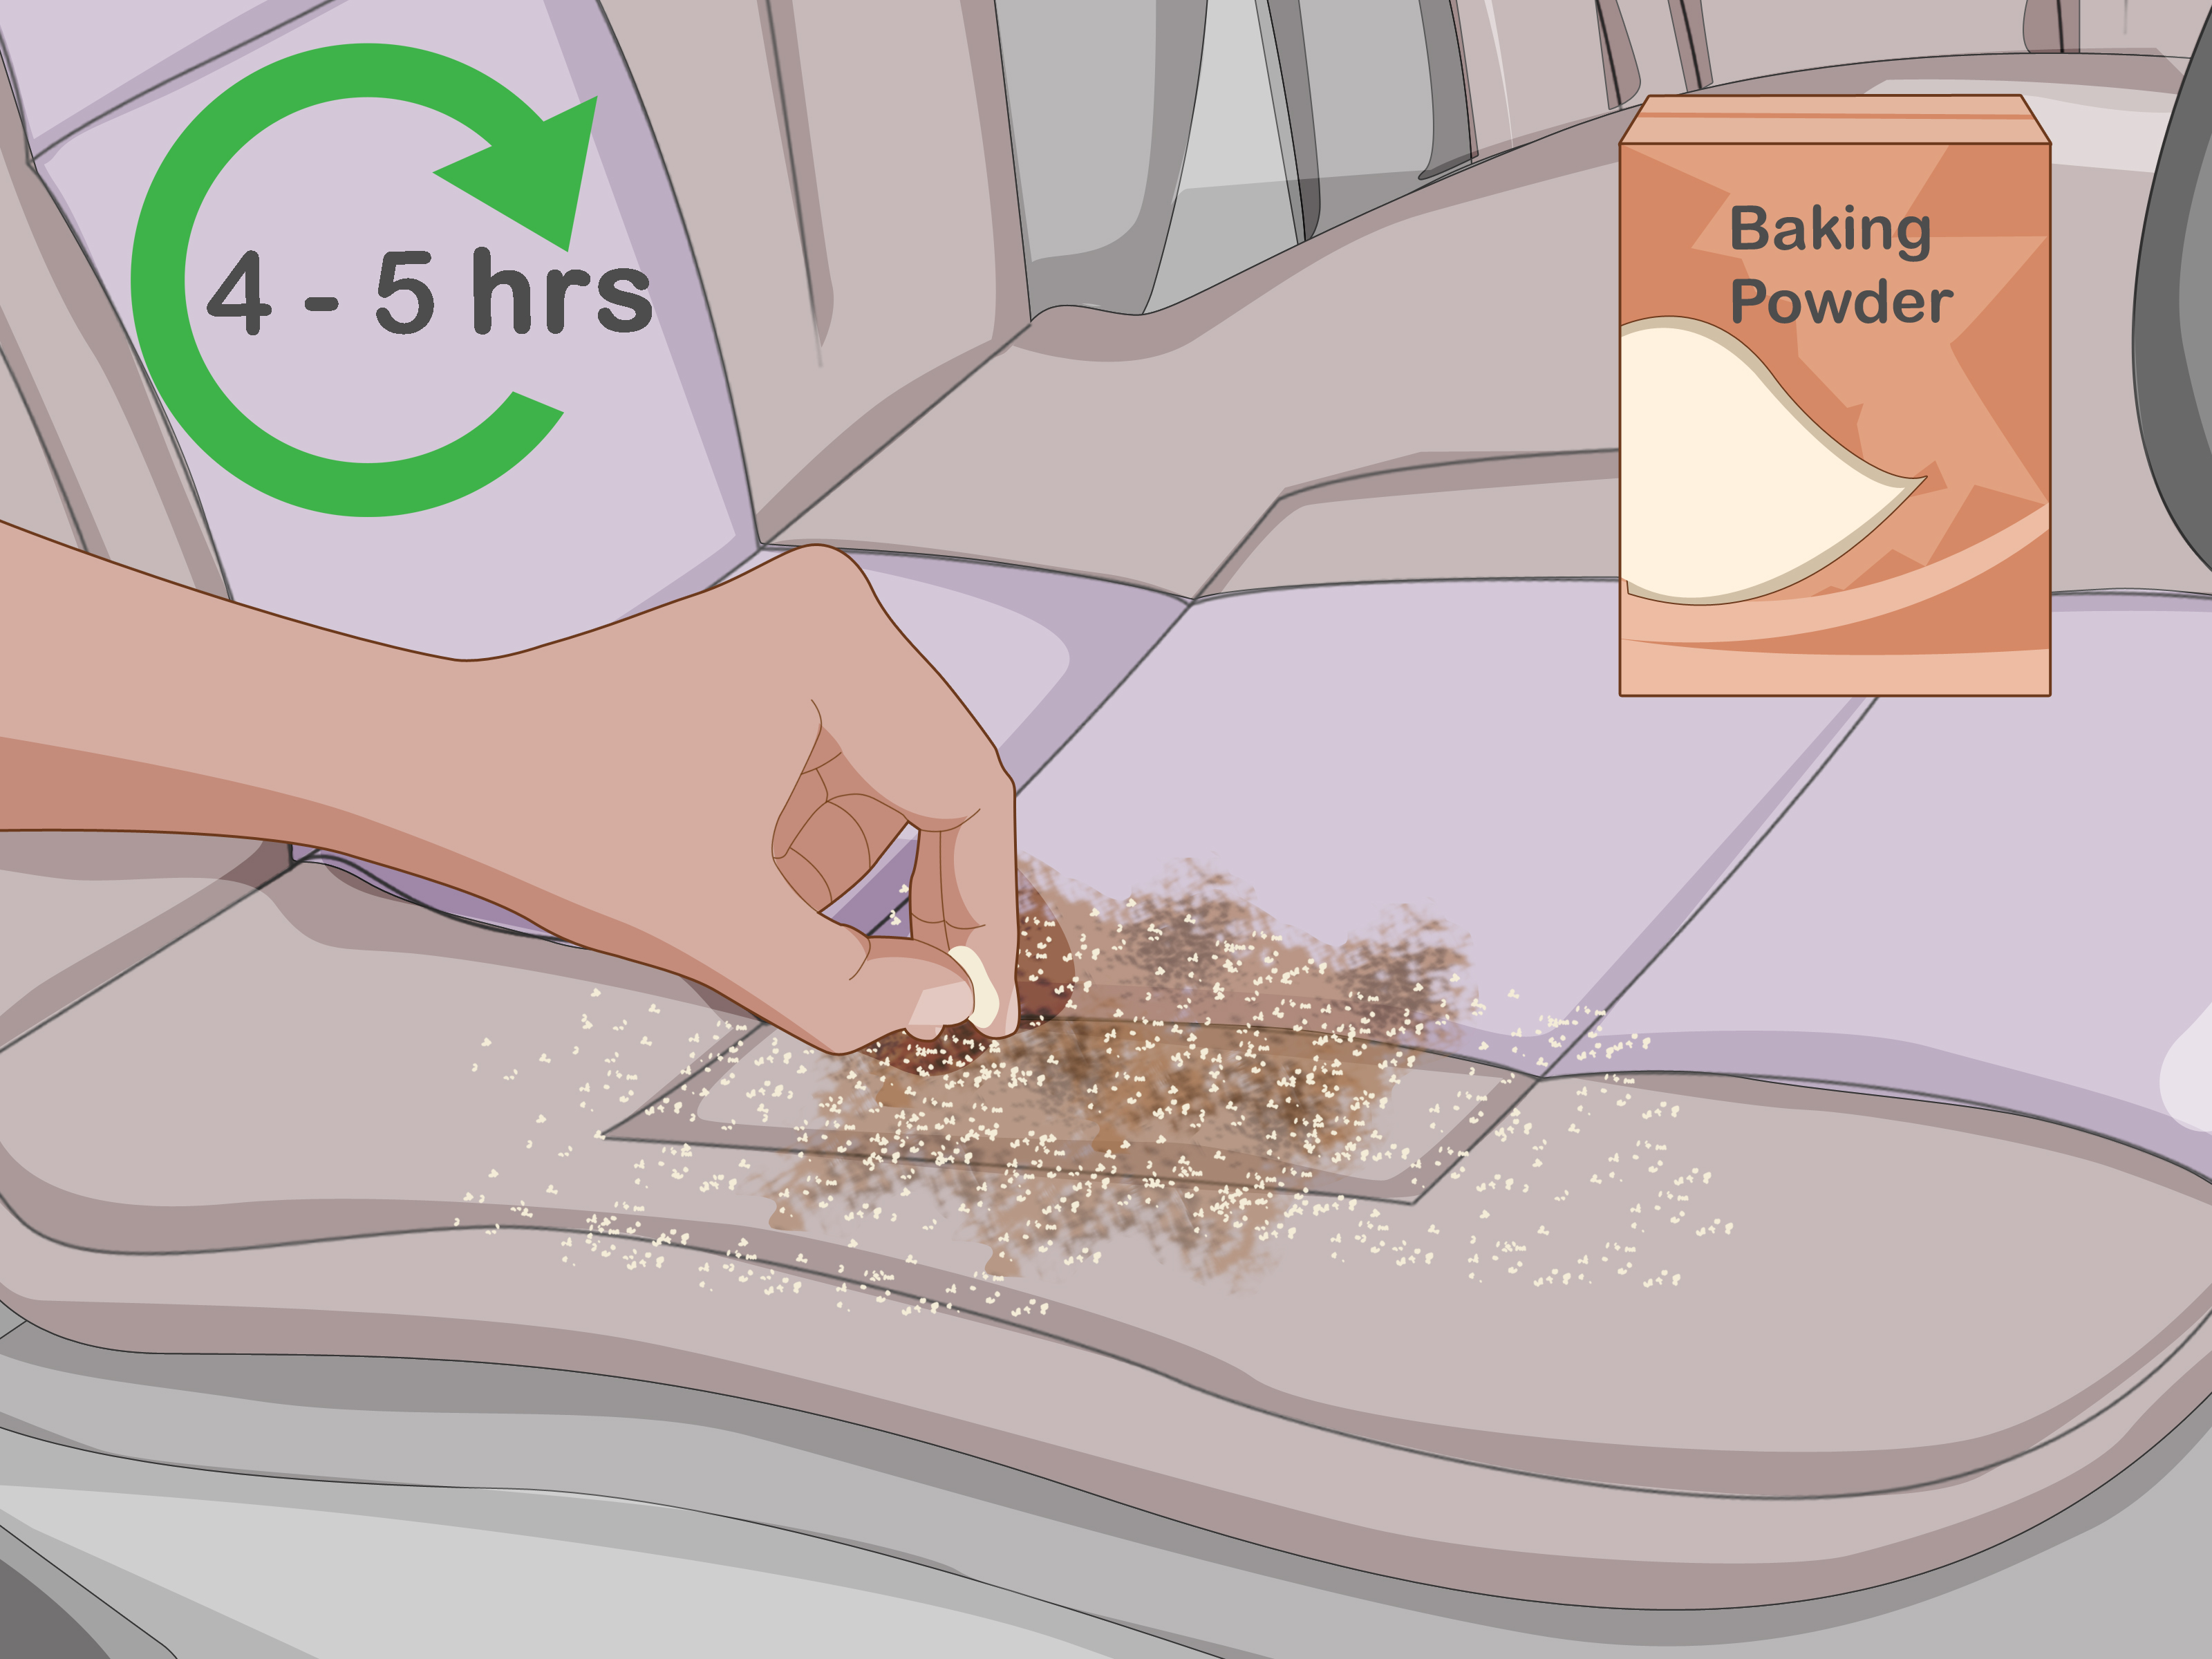
If the interior is dry, baking soda may be sprinkled lightly over fabric carpet or cloth upholstery before vacuuming. Let it sit for several hours, then remove it thoroughly. Avoid using baking soda on damp material because it may clump and become harder to extract.
Step 5: Clean Hard Interior Surfaces
Odor-causing residue does not live only in carpet. Smoke, cooking grease, body oils, beverage splashes, and pet drool can coat dashboards, door panels, steering wheels, consoles, plastic trim, and glass.
Wipe hard surfaces with a microfiber cloth and an automotive interior cleaner approved for the material. Apply the product to the cloth instead of spraying directly onto switches, screens, vents, or electronic controls. Use a soft detailing brush around buttons and textured plastic.
Test every cleaner in an inconspicuous spot. Avoid harsh solvents, undiluted household disinfectants, and heavily alkaline products unless the vehicle manufacturer specifically approves them. Touchscreens, piano-black trim, leather coatings, and soft-touch plastics are particularly easy to stain or dull.
Step 6: Treat Food, Drink, and Organic Stains
For spilled milk, coffee, juice, vomit, pet urine, and other organic messes, an enzyme-based automotive upholstery cleaner is often more useful than perfume. Enzymatic products are designed to break down odor-producing organic material rather than simply covering it.
How to spot-clean safely
- Blot fresh liquid with absorbent towels. Do not rub it farther into the fibers.
- Test the cleaner on a hidden section of fabric.
- Apply only enough product to reach the contaminated area.
- Allow the recommended dwell time shown on the label.
- Blot or extract the residue.
- Dry the area completely with doors open in a secure, ventilated location.
A wet-and-dry extractor can help remove contamination from carpeting, but avoid oversaturating the material. Excess water may soak the padding, damage wiring beneath the carpet, or create the next musty smell before you have finished defeating the first one.
Step 7: Shampoo Carpet, Mats, and Cloth Upholstery
When odor covers a large area, spot treatment may not be enough. Use a cleaner labeled for automotive carpet and upholstery. Work one manageable section at a time, agitate gently with a soft brush, and extract as much moisture as possible.
Wash rubber or all-weather mats outside the vehicle with mild soap and water, rinse them well, and let them dry completely. Fabric mats can be shampooed and extracted. Never reinstall damp mats, because trapping moisture between the mat and carpet is essentially sending mildew a formal invitation.
Be cautious with the headliner. Its fabric is usually attached with adhesive that can loosen when saturated or scrubbed aggressively. Use minimal moisture and gentle blotting. For valuable, delicate, or badly contaminated interiors, professional detailing is safer than turning the ceiling into a sagging hammock.
Step 8: Clean Leather Seats Correctly
Use a pH-balanced cleaner intended for automotive leather or the material specified in the owner’s manual. Some seats that look like leather are coated synthetic materials and require different care.
Apply cleaner to a microfiber cloth or soft brush, work gently, and wipe away the residue. After the surface dries, use an appropriate conditioner only if recommended for that upholstery. Do not soak perforated leather, because liquid can enter the foam and seat electronics below.
Skip vinegar, bleach, undiluted alcohol, and aggressive household degreasers on leather. A cleaner that successfully removes the odor along with the seat’s protective finish has technically completed only half the assignment.
Step 9: Neutralize Smoke Odors
Cigarette and cigar smoke are difficult because residue settles on nearly every interior surface. Clean the glass, dashboard, steering wheel, doors, console, carpet, upholstery, seat belts, visors, and headliner. Replace or clean removable ashtrays and check beneath seats for ash.
A diluted vinegar solution is sometimes used on compatible hard surfaces and washable fabrics, but it should always be spot-tested and should not be applied indiscriminately to leather, screens, electronics, or delicate finishes. Smoke removal usually requires repeated cleaning because sticky residue can remain after the first pass.
Activated-charcoal odor absorbers may help capture lingering airborne smells after the residue has been removed. They are supporting actors, not miracle workers. A charcoal pouch cannot clean tobacco film from a windshield any more than a scented candle can wash dishes.
Step 10: Replace the Cabin Air Filter
A dirty cabin air filter can hold dust, pollen, smoke particles, moisture, and unpleasant odors. Locate the replacement procedure in the owner’s manual; the filter is often behind the glove compartment, beneath the dashboard, or near the windshield cowl.
Replace it with the correct size and airflow orientation. Some vehicles support activated-carbon filters that provide additional odor control. Replacement intervals vary by vehicle and driving environment, so follow the manufacturer’s maintenance schedule rather than relying on a universal mileage rule.
If the old filter is damp, moldy, unusually dirty, or contaminated by rodents, inspect the surrounding housing and air intake. Simply inserting a fresh filter into a dirty compartment may produce a clean filter with a very short and disappointing career.
Step 11: Address Musty Air-Conditioning Odors
A sweaty-sock smell that appears when the fan or air conditioner starts often points to moisture and microbial growth around the evaporator, air intake, or HVAC housing. Begin by replacing the cabin filter and confirming that the air-conditioning condensate drain is not blocked.
Some vehicles can be treated through the exterior fresh-air intake with an automotive HVAC cleaner. Procedures vary, however, and spraying the wrong product into the wrong opening can damage sensors, stain the interior, or create irritating fumes. Follow the product instructions and vehicle manual exactly, keep the windows open, and never mix cleaning chemicals.
If the odor remains, have the evaporator, drain tube, blower housing, and intake system inspected. Persistent moisture or visible mold inside an HVAC system is a good reason to involve a trained technician.
Step 12: Dry, Ventilate, and Recheck the Car
After cleaning, remove as much moisture as possible. Park in a safe, dry area, open the doors or windows, and use fans to circulate air. Do not leave the vehicle unsecured or expose the interior to rain, excessive dust, or direct heat that could damage materials.
Once the interior is fully dry, close the vehicle for several hours and perform another smell test. Run the fan using both fresh-air and recirculation modes. Check the trunk and floor again for dampness. If the smell returns, the source has probably not been completely removed.
Professional help is appropriate when odor comes from flooding, extensive mold, decomposing pests, persistent smoke contamination, inaccessible carpet padding, or the HVAC system. Mechanical smells involving fuel, exhaust, hot electrical components, oil, brakes, or coolant belong with a qualified repair techniciannot beneath a decorative pine tree hanging from the mirror.
Common Mistakes That Make Car Odors Worse
Masking the smell before cleaning
Fragrances can make diagnosis more difficult and may bother passengers who have asthma, migraines, or fragrance sensitivity. Neutralize the source first and add a mild scent only after the car is clean and dry.
Mixing cleaning products
Never combine bleach, ammonia, vinegar, disinfectants, or other chemicals unless a manufacturer explicitly instructs you to do so. Dangerous gases and irritating vapors can form even from familiar household products.
Using too much water
More liquid does not automatically mean more cleaning. Excess moisture can reach carpet padding, electrical connectors, seat sensors, and sound insulation. Controlled application and strong extraction produce better results.
Running an ozone generator as a casual DIY treatment
Ozone can irritate the eyes and respiratory system and may damage certain materials. It should not be used in an occupied vehicle or treated as a harmless air freshener. When severe odor remediation requires specialized equipment, use a trained professional who follows appropriate exposure, ventilation, and reentry procedures.
Practical Experience: What Usually Works in Real-World Odor Cleanup
Car odor removal is rarely solved by one dramatic product. The most reliable approach is a sequence: locate the source, remove solid contamination, clean the affected material, extract moisture, ventilate, and inspect again. Skipping one stage often explains why an odor returns a day later.
Experience 1: The forgotten grocery spill
A common scenario begins with a grocery bag tipping over in the trunk. The driver wipes the visible liquid and assumes the problem is finished. Several warm days later, the vehicle smells like a refrigerator that lost an argument with nature.
The lesson is to inspect beneath the trunk liner. Liquid can travel through seams and collect in the spare-tire well or soak into fiberboard and insulation. Cleaning only the visible carpet leaves the deeper source untouched. Removing the liner, washing compatible surfaces, treating the fabric, and drying every layer usually matters more than applying a stronger fragrance.
Experience 2: The pet accident that keeps returning
Pet urine may look like a small surface stain while spreading through cloth upholstery into foam. A general carpet shampoo can improve the appearance without breaking down the odor-producing material. On humid days, the smell returns because moisture reactivates residue below the surface.
An enzyme cleaner matched to the contaminant, adequate dwell time, careful extraction, and complete drying generally provide better results. In severe cases, the seat cover or carpet may need to be lifted so the foam or padding can be treated directly. Repeatedly soaking the top layer rarely reaches the right depth and can introduce additional moisture.
Experience 3: The mysterious odor that appears only with the fan
When a car smells fine while parked but becomes musty as soon as the blower starts, cleaning the seats is unlikely to help. This pattern directs attention toward the cabin air filter, evaporator area, condensate drain, and exterior air intake.
Replacing a dirty filter is a sensible first move, but the filter may be only part of the issue. Leaves and debris can collect near the intake, while retained moisture can support microbial growth around the evaporator housing. If the drain is blocked, treating the air with fragrance creates a temporary “flowers over gym socks” situation instead of a repair.
Experience 4: The used car with old smoke residue
Smoke odor frequently survives a quick dealership detail because the residue is distributed across the entire cabin. Cleaning only the carpet ignores the headliner, glass, seat belts, air vents, plastic trim, and hidden areas beneath the seats.
Successful smoke cleanup is usually repetitive. The first wipe may remove visible film, while a second pass lifts residue that becomes noticeable after drying. Replacing the cabin air filter and cleaning the HVAC intake are also important. Heavily contaminated vehicles may require professional extraction and specialized odor remediation, and even then, complete removal is not guaranteed if smoke has penetrated foam and insulation for years.
Experience 5: The smell that was actually a repair warning
One of the most important lessons is knowing when to stop detailing. A sweet smell accompanied by damp carpeting may indicate heater-core or coolant leakage. A gasoline odor may point to an EVAP or fuel-system problem. Burning oil, electrical insulation, brakes, or clutch material requires diagnosis rather than deodorizing.
When an odor changes with engine temperature, driving speed, braking, or HVAC operation, record those details for the technician. Mention where the smell is strongest and whether warning lights, smoke, fluid spots, headaches, dizziness, or nausea occur. A clean cabin is pleasant; a safe cabin is nonnegotiable.
How to Keep Your Car Smelling Fresh
- Remove food packaging and drink containers after every trip.
- Use sealed containers for groceries, pet supplies, and sports equipment.
- Blot spills immediately instead of waiting for them to dry.
- Vacuum beneath the seats and floor mats regularly.
- Dry wet umbrellas, towels, and floor mats outside the vehicle.
- Inspect door seals and carpeting after heavy rain.
- Replace the cabin air filter according to the owner’s manual.
- Avoid smoking inside the vehicle.
- Keep a small cleanup kit with microfiber towels and approved interior wipes.
Conclusion
Learning how to remove odors from your car is mostly about resisting the temptation to cover the smell and hoping for the best. Track down the source, clean each affected surface with a compatible product, treat organic stains appropriately, inspect hidden moisture, service the cabin filter, and allow the interior to dry completely.
Minor food, pet, and upholstery odors can often be handled at home. Persistent mildew, flooding, smoke contamination, HVAC growth, fuel fumes, exhaust, burning smells, and leaking fluids deserve professional attention. Your car should smell neutral and cleannot like vanilla air freshener negotiating with a wet dog.