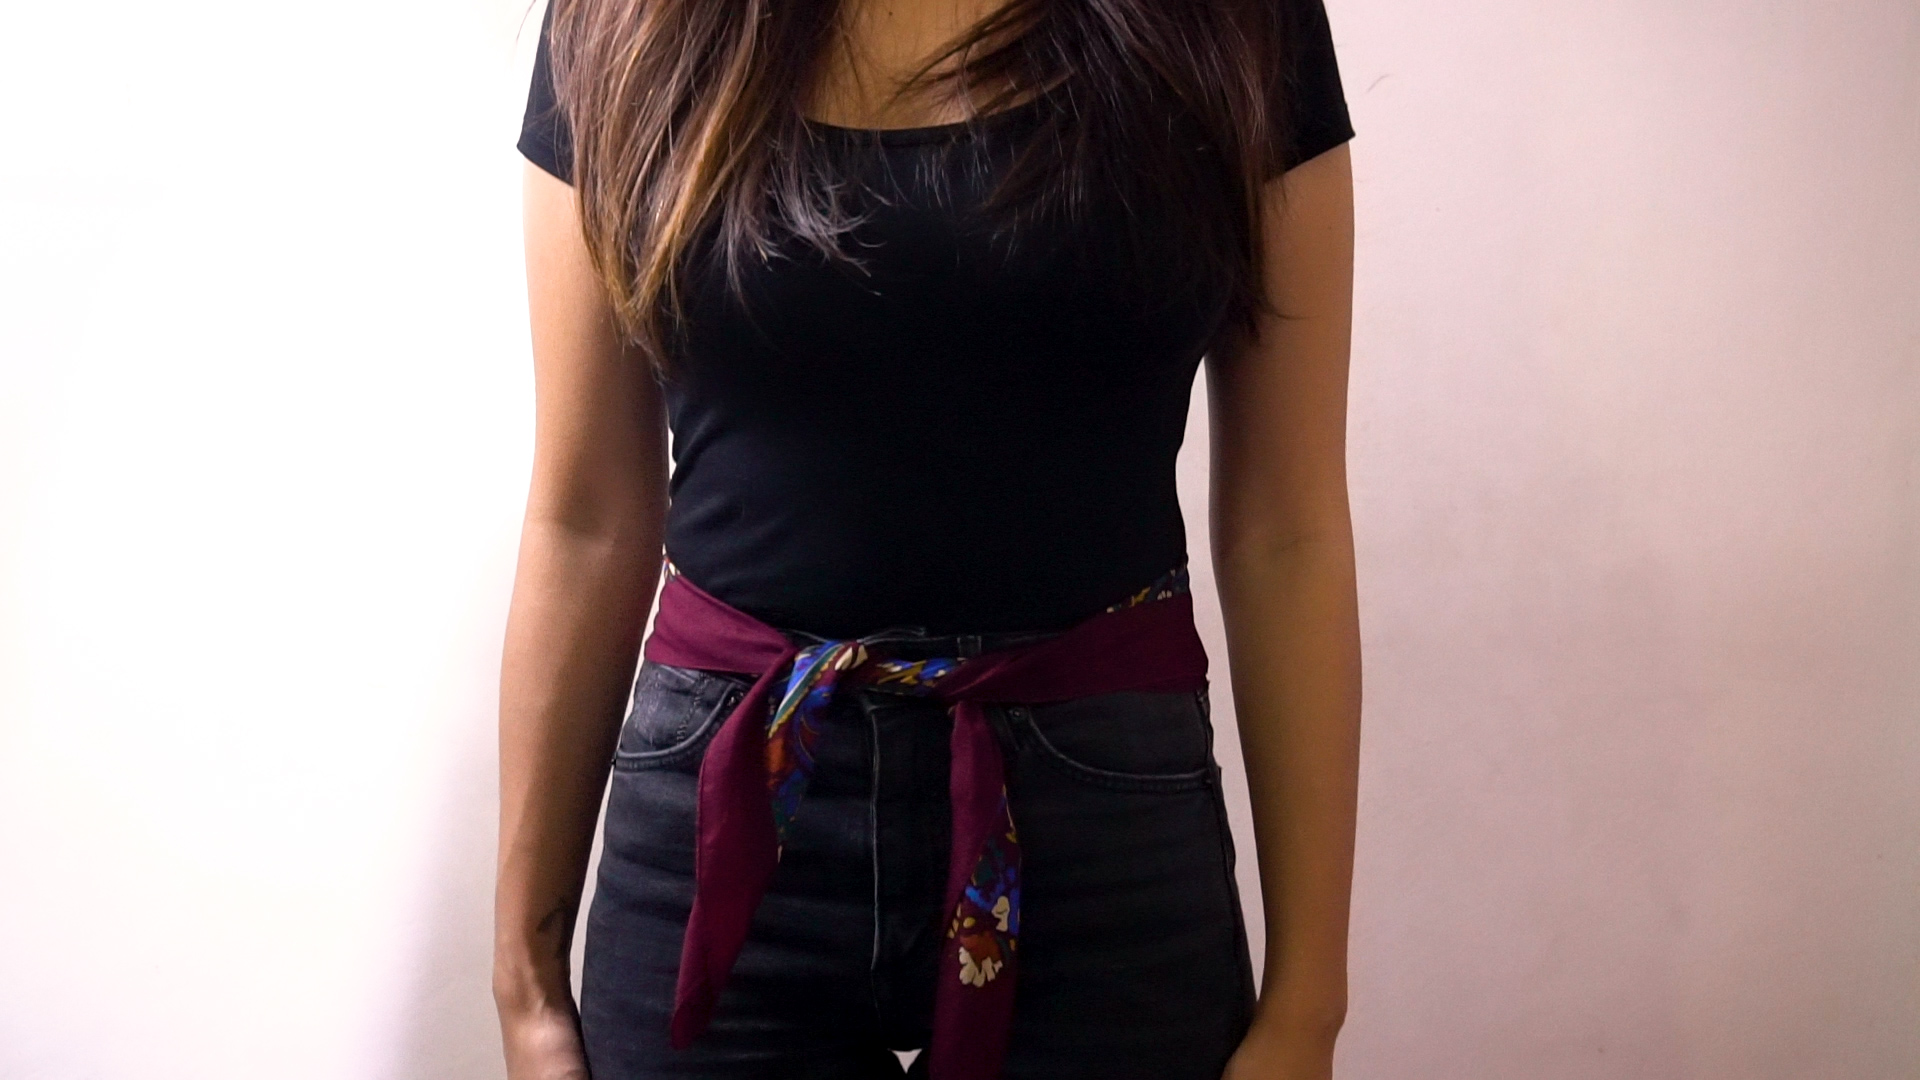
A scarf is essentially a rectangle of fabric with an unusually impressive résumé. It can warm your neck, rescue a plain outfit, hide a questionable hair day, decorate a handbag, replace a belt, and make an ordinary white T-shirt look as though you planned your wardrobe more than four minutes before leaving home.
Learning how to tie a scarf does not require advanced knot theory or the finger dexterity of a professional magician. Most styles begin with one of three moves: drape it, fold it into a triangle, or roll it into a narrow band. From there, a few loops, twists, and knots can create completely different looks.
The 19 scarf-tying methods below include classic neck wraps, cozy winter knots, silk-scarf styles, head coverings, hair accessories, and creative outfit accents. Each method also includes a short video tutorial cue that you can follow in front of a mirror or use as a filming outline.
Choose the Right Scarf Before You Start
The easiest scarf style depends on the shape, size, and fabric you are working with. A long rectangular scarf is best for loops, winter wraps, pretzel knots, and European-style knots. A medium square scarf works beautifully as a neckerchief, headband, hair tie, or handbag accent. An oversized square or blanket scarf can become a shawl, cape, hood, or belted layer.
Silk and satin scarves create polished folds but may slide, so secure them with a double knot when necessary. Cotton scarves are comfortable and generally easier for beginners to control. Wool and cashmere provide warmth, although bulky fabric performs better with loose knots than tiny decorative bows.
Three Basic Scarf Folds
The triangle fold: Bring two opposite corners of a square scarf together. This fold is useful for bandanas, shoulder wraps, headscarves, and triangle tops.
The narrow band: Fold a square scarf diagonally, then repeatedly fold the long edge toward the point until you have a strip. Use it for neckties, headbands, bracelets, and handbag handles.
The lengthwise fold: Fold a rectangular scarf in half along its length to reduce bulk while keeping the scarf long enough for loops and knots.
How to Tie a Scarf Around Your Neck
1. The Basic Drape
Place the center of a long scarf behind your neck and allow both ends to hang evenly in front. That is the entire technique. The basic drape works best when the scarf has an interesting pattern, fringe, or contrasting color that deserves to be seen rather than folded into fabric origami.
Video tutorial cue: Hold the scarf at its midpoint, position it behind the neck, lower both ends, and smooth the fabric over your coat or sweater.
2. The One-Shoulder Toss
Begin with the basic drape, then throw one end loosely over the opposite shoulder. Keep the front end slightly longer for a relaxed, asymmetrical appearance. This easy scarf style adds movement to a trench coat, blazer, or simple knit dress without creating a bulky knot near your face.
Video tutorial cue: Drape, check the lengths, toss one end backward, and loosen the fabric around the neck.
3. The Classic Once-Around
Drape the scarf so one end is longer. Wrap the long end once around your neck and bring it back to the front. Adjust the loop until it feels comfortable, leaving both ends loose. This is one of the most practical ways to tie a winter scarf because it balances warmth with an intentionally casual silhouette.
Video tutorial cue: Start uneven, circle the longer end around the neck once, release it in front, and fluff the center loop.
4. The European Loop
Fold a rectangular scarf in half so the ends meet. Place the folded scarf around your neck with the loop on one side and the loose ends on the other. Pull both ends through the loop and tighten gently. Also called the Parisian loop, this style is neat, warm, and nearly impossible to ruin.
Video tutorial cue: Fold, drape, open the loop, pull both ends through, and slide the knot upward.
5. The Pretzel Knot
Fold the scarf in half and drape it around your neck. Pull one loose end through the folded loop. Twist the loop to form a second opening, then pull the other end through that new opening. The interwoven shape covers more of the chest than a standard loop, making it especially useful on cold, windy days.
Video tutorial cue: Fold, insert one end, twist the loop, insert the second end, and spread the fabric across the chest.
6. The Figure-Eight Loop
Fold the scarf in half and place it around your neck. Pull both ends through the loop, but do not tighten. Twist the loop once into a figure eight, then pass the loose ends through the new opening. The finished knot looks complex even though your hands completed only one extra twist. Fashion loves efficient deception.
Video tutorial cue: Fold, pull through loosely, twist the opening, feed the ends through again, and adjust both layers.
7. The Simple Front Knot
Wrap a long scarf around your neck once, leaving the ends hanging in front. Tie the ends together with one relaxed overhand knot. Position it at the center or move it slightly to one side. This style works with medium-weight wool, cotton, linen, and soft synthetic scarves.
Video tutorial cue: Wrap once, cross the ends, pull one through, stop before tightening too firmly, and angle the knot.
8. The Double Front Knot
Follow the steps for a once-around wrap, then tie the ends twice. A double knot offers more security and produces a compact finish that stays in place while walking, commuting, or repeatedly removing your coat because every building apparently has its own private climate zone.
Video tutorial cue: Wrap, make the first knot, repeat the knot, and tuck or fan out the short ends.
9. The Necktie Knot
Drape a narrow scarf around your neck with one end longer. Cross the long end over the short end, bring it behind, and pass it across the front again. Lift the long end through the neck opening and slide it down through the front loop. Keep the finished knot loose for a modern, less corporate effect.
Video tutorial cue: Cross, circle behind, cross the front, lift through the neck loop, and pull down through the knot.
10. The French Neckerchief
Fold a small square scarf into a narrow band. Wrap it once around your neck and tie a small double knot at the front or slightly off-center. Pair it with an open button-down, crew-neck T-shirt, denim jacket, or blazer. The result feels polished without suggesting you spent the morning consulting a stylist.
Video tutorial cue: Fold into a band, center it, cross behind the neck, bring both ends forward, and tie twice.
11. The Soft Bow
Fold a lightweight square scarf into a band and wrap it around your neck. Tie the ends as you would tie shoelaces, creating two soft loops. Adjust the bow so it rests at the side rather than directly beneath the chin. Silk, satin, and fine cotton produce the cleanest shape.
Video tutorial cue: Make one basic knot, form the first loop, wrap the other end around it, pull through, and loosen the bow.
12. The Hidden-Knot Infinity Style
Tie the ends of a long scarf together with a secure double knot, creating one large circle. Place it around your neck, twist the circle into a figure eight, and pull the second loop over your head. Rotate the knotted section toward the back and hide it under the folds.
Video tutorial cue: Join the ends, place the circle over the head, twist, loop again, and conceal the knot.
Ways to Wear a Scarf Beyond the Classic Neck Knot
13. The Belted Drape
Drape a long scarf evenly around your neck and let both panels fall down the front of your outfit. Fasten a belt over the scarf at your natural waist. This technique adds color and vertical lines while giving a dress, coat, or oversized sweater more structure. Use a relatively flat scarf to avoid bunching beneath the belt.
Video tutorial cue: Drape evenly, smooth both sides, place the belt over the fabric, fasten, and pull the scarf slightly loose above the waist.
14. The Shoulder Shawl
Open a large square, rectangular, or blanket scarf to its full width. Place it across your shoulders and allow the ends to fall in front. Leave it open, tie the corners loosely, or toss one corner over the opposite shoulder. This style can substitute for a light jacket during cool dinners, flights, or over-air-conditioned meetings.
Video tutorial cue: Open the scarf, center it across the back, lower it over both shoulders, and secure or toss one end.
15. The Blanket-Scarf Cape
Fold an oversized square scarf into a triangle. Place the long folded edge across your shoulders with the point hanging down your back. Bring the two ends forward and leave them loose, cross them, or secure them with a belt. Keep the rest of the outfit streamlined so the scarf looks dramatic rather than duvet-adjacent.
Video tutorial cue: Fold diagonally, position the triangle behind you, bring the ends forward, spread the shoulders, and add an optional belt.
16. The Classic Headscarf
Fold a square scarf into a triangle. Place the long edge along your hairline with the point toward the back of your head. Bring the side corners behind your head and tie them over or beneath the triangle point. Adjust the front edge and use bobby pins if the fabric feels slippery.
Video tutorial cue: Fold, align with the hairline, pull the ends backward, knot at the nape, and smooth the crown.
17. The Scarf Headband
Fold a small or medium square scarf into a narrow band. Position the middle at the nape of your neck and bring the ends upward. Tie them at the crown for a playful retro look or knot them beneath your hair for a cleaner finish. This scarf style works with loose hair, braids, ponytails, and buns.
Video tutorial cue: Fold into a strip, place under the hair, bring the ends up, knot once or twice, and tuck the tips.
18. The Ponytail Wrap
Secure your ponytail with a regular elastic first; the scarf should decorate the hairstyle rather than perform all the structural engineering. Fold the scarf into a narrow strip, wrap it around the elastic, and tie a knot or bow. Leave the ends long for movement or wrap them several times for a compact finish.
Video tutorial cue: Make the ponytail, fold the scarf, center it beneath the elastic, cross above, and finish with a bow.
19. The Handbag Handle Wrap
Fold a small silk scarf into a narrow band. Tie one end at the base of a handbag handle, wrap the fabric diagonally around the handle, and knot the remaining end at the opposite side. You can also tie a simple bow at one attachment point. It is an easy way to introduce pattern without wearing it near your face.
Video tutorial cue: Anchor one end, spiral the scarf around the handle, smooth each wrap, and knot the opposite end securely.
How to Make Every Scarf Knot Look Better
Begin loosely and tighten gradually. Pulling a knot tight at the beginning makes it harder to balance the ends or reshape the folds. Once the structure is correct, adjust the tension and gently spread the visible fabric.
Match the scale of the knot to the fabric. Fine silk can support small bows and compact neckerchief knots. Thick wool looks better in large loops, drapes, and pretzel knots. Trying to tie bulky yarn into a tiny bow usually creates something resembling a decorative dinner roll.
Consider the neckline of your clothing. Short neck scarves stand out against crew necks, open collars, and simple sweaters. Long drapes complement coats and blazers. Large shawls are easiest to balance with narrow pants, fitted dresses, or other pieces that do not add competing volume.
For slippery scarves, use a double knot, hidden bobby pin, scarf ring, or small brooch. Avoid pins that can permanently damage delicate silk. Before washing a silk scarf, check its care label and test for colorfastness. When hand-washing is permitted, use cool water and a gentle detergent, and never wring the scarf aggressively.
Common Scarf-Tying Mistakes
Ignoring proportion: A small scarf cannot create a full winter wrap, while an enormous blanket scarf may overwhelm a delicate blouse. Choose a size that suits the intended knot.
Making every section symmetrical: Perfectly matching ends can look formal. Slight asymmetry often gives a scarf a more natural, modern appearance.
Overtightening the neck: A scarf should feel secure, not like it is conducting a surprise medical examination. Leave enough space to move and breathe comfortably.
Combining too many focal points: A bold printed scarf already attracts attention. Let it lead by keeping other large patterns or dramatic accessories under control.
Skipping the final adjustment: After tying the scarf, turn your head, lift your arms, and look at the style from the side. A knot that appears perfect from the front may be quietly staging a rebellion in the back.
My Experience Learning 19 Ways to Tie a Scarf
My first serious attempt at learning how to tie a scarf began with unreasonable confidence. I placed a long scarf around my neck, watched several seconds of a tutorial, and assumed the remaining steps had been absorbed through some fashionable form of telepathy. They had not. One end disappeared inside the knot, the other reached my knee, and the finished arrangement looked less like Parisian street style and more like I had lost an argument with a curtain.
The biggest improvement came when I stopped trying to memorize complete knots. Instead, I practiced the basic actions separately: finding the scarf’s midpoint, creating even folds, controlling the length of each end, and keeping loops loose until the final adjustment. Once those movements became familiar, complicated styles such as the pretzel knot and figure-eight loop stopped feeling complicated. They were simply familiar movements performed in a slightly different order.
I also learned that the same technique behaves very differently depending on the fabric. My crisp cotton scarf held a neckerchief knot obediently all day. A glossy satin scarf untied itself before I had crossed the room, apparently determined to pursue an independent career. A small double knot solved the problem without changing the look. Meanwhile, a thick wool scarf refused to form a neat bow but created an excellent once-around wrap. The lesson was clear: work with the material rather than demanding that every scarf complete the same assignment.
Practicing in front of a mirror helped, but recording short videos was even more useful. Watching the playback revealed that I often twisted the scarf unnecessarily or blocked the important step with my hands. Slowing down each motion made the tutorial clearer and improved the knot itself. A good demonstration should show the starting shape, the direction of every wrap, and the final adjustment. Skipping the starting fold is like beginning a cooking video after the cake has entered the oven.
The styles I expected to use most were not always the ones that became favorites. I assumed the elaborate knots would transform my wardrobe, yet the basic drape and one-shoulder toss proved surprisingly effective. They added color without crowding the neckline and took approximately three seconds. The French neckerchief became my favorite warm-weather option because it worked with plain T-shirts, denim jackets, and button-down shirts. The pretzel knot earned its place on windy days because it covered the upper chest better than a loose loop.
Using scarves away from the neck made them even more practical. A ponytail wrap improved a rushed hairstyle, while a scarf tied around a handbag handle refreshed a bag I had carried for years. The belted drape looked best when I kept the scarf flat and chose a narrow belt. My first attempt involved too much fabric beneath a wide belt and produced the unmistakable silhouette of someone smuggling a throw pillow.
After practicing all 19 methods, the most important lesson was not how to create a perfect knot. It was how to adjust one. Scarves rarely fall into place immediately. The stylish finish comes from loosening the neck, spreading a triangle, shortening one end, hiding a knot, or rotating a bow slightly to the side. Those final five seconds make the result look intentional.
I now keep one lightweight square scarf and one long rectangular scarf near the front of my closet. Between them, I can create nearly every style in this guide. Learning how to tie a scarf did not require buying an entirely new accessory collection. It simply made the scarves I already owned feel new again, which is considerably cheaper than reorganizing my wardrobe every time the weather or my mood changes.
Conclusion
A scarf may be one of the simplest accessories in a closet, but it offers an extraordinary number of styling possibilities. Start with the basic drape, once-around wrap, or European loop, then experiment with bows, pretzel knots, headbands, shawls, belts, and handbag accents. Choose a method that matches the scarf’s size and fabric, keep the initial folds loose, and spend a few seconds adjusting the final shape.
You do not need to master all 19 scarf styles at once. Practice two or three that suit your everyday wardrobe, then add another whenever your outfits begin feeling predictable. With a little folding and considerably less drama than your first attempt may suggest, one scarf can become a neck warmer, statement accessory, hair decoration, shoulder layer, belt, and bag embellishment.