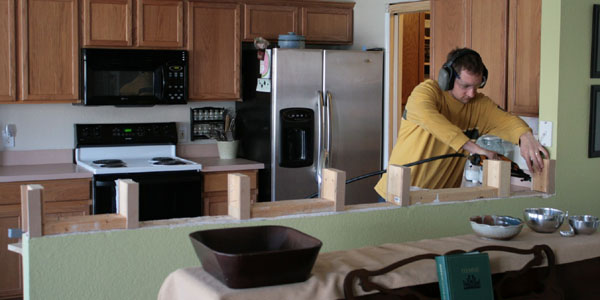
Some home projects begin with architectural drawings, a detailed budget, and an organized schedule. Our living room makeover began with a suspiciously casual sentence: “What if we just changed a few things?”
Those six words opened the door to paint samples, furniture measurements, lighting debates, delayed deliveries, and a collection of tools that now appears to be reproducing in the garage. What started as a simple living room refresh gradually became a full-scale home improvement project.
Still, there may finally be an end in sightor “site,” as the title says, because the room has occupied enough time and floor space to qualify as a construction site. This is Part 1 of our living room renovation story: what we planned, what changed, what went wrong, and how the room slowly began to feel like home.
Why Our Living Room Became the Never-Ending Project
The living room is one of the hardest-working spaces in a house. It may serve as a television room, reading area, conversation space, children’s play zone, pet lounge, occasional office, and emergency laundry-folding headquartersall before lunch.
That makes a living room makeover more complicated than simply selecting a sofa and hanging a picture above it. The room must support real routines while also looking reasonably intentional when visitors arrive.
Our original space was usable, but it did not feel finished. The furniture hugged the walls as though it had been told not to make eye contact. The lighting consisted mainly of one overhead fixture with two settings: interrogation room and mysterious cave. The paint was technically neutral, although “landlord oatmeal” might be a more accurate description.
Nothing was dramatically broken. That was part of the problem. When a room is merely inconvenient rather than disastrous, every improvement can be postponed. We kept adding small tasks to the list until the list became the project.
Starting With Function Instead of Shopping
Our first useful decision was to stop browsing furniture and define what the room actually needed to do. Successful living room planning begins with an honest assessment of the existing space, including its architecture, natural light, traffic patterns, furnishings, and daily use. Design experts also commonly recommend prioritizing large decisions before buying decorative accessories.
Our Living Room Priority List
We wanted comfortable seating for everyday use, a clear view of the television, enough open floor space to move through the room, better evening lighting, practical storage, and a layout that encouraged conversation.
We also wanted the space to feel warm without becoming visually crowded. That meant resisting the urge to fill every corner. Empty space is not automatically wasted space; it can improve circulation, give important furniture room to breathe, and make a living room feel calmer.
Measuring Before Making Expensive Mistakes
Before purchasing anything, we measured the room, windows, doorways, fireplace, electrical outlets, and major walkways. We then marked proposed furniture dimensions on the floor with painter’s tape.
This exercise was not glamorous, but it prevented us from ordering a sectional large enough to establish its own ZIP code. A sofa can look perfectly reasonable in a vast showroom and then arrive at home with the physical presence of a parked school bus.
We also photographed the room from every angle. Pictures made awkward areas easier to identify because they removed the familiarity that had allowed us to ignore them for years.
Creating a Realistic Living Room Renovation Plan
The phrase “living room renovation” can describe anything from moving a lamp to removing a wall. Our project landed somewhere in the middle. We were not changing the room’s footprint, but we were addressing the walls, trim, lighting, furniture layout, storage, textiles, and décor.
Phase One: Repair and Preparation
Before choosing the exciting pieces, we dealt with the boring ones: filling nail holes, repairing small cracks, cleaning baseboards, checking outlets, removing unused hardware, and fixing sections of trim.
Preparation is where optimistic schedules go to receive a reality check. Painting one wall sounds easy until that wall contains dents, anchors, uneven caulk, and a mysterious patch apparently applied with a serving spoon.
Phase Two: Paint, Lighting, and Permanent Features
Next came the changes that would be difficult or annoying to complete after the furniture returned. We planned to paint the walls and trim, update the main light fixture, adjust curtain hardware, and resolve the media area.
Completing messy overhead and wall work first reduced the chance of dripping paint onto new upholstery or showering a freshly styled room with drywall dust.
Phase Three: Furniture and Textiles
Only after the room’s shell was settled did we finalize the sofa position, chairs, rug, curtains, coffee table, side tables, and storage pieces.
Phase Four: Art and Accessories
Artwork, plants, pillows, books, and smaller objects would come last. Accessories are much easier to choose once the room’s scale, palette, and furniture arrangement are established.
Choosing Living Room Paint Without Losing Our Minds
Paint seemed like the simplest decision. We wanted a warm, relaxed neutral. Then we discovered that “warm neutral” includes approximately nine million colors, all of which look identical on a small paper chip and completely different on a wall.
Natural light changes throughout the day, and artificial light can alter how undertones appear at night. Paint manufacturers therefore recommend testing samples in the actual room and viewing them under different lighting conditions before committing.
Testing Large Paint Samples
Instead of painting tiny squares directly beside one another, we applied larger samples to movable boards. This allowed us to compare each color near the windows, behind the sofa, beside the trim, and in the darkest corner.
One promising beige turned strangely pink after sunset. A soft gray became blue whenever the television was on. A creamy white looked beautiful in the morning and resembled old mayonnaise by dinner.
The winner was not the color we initially expected. It had enough warmth to soften the room without fighting the wood tones, rug, or adjoining spaces.
Using One Cohesive Color Palette
We built the living room color scheme around a restrained combination of warm neutral walls, natural wood, muted green, soft black, and aged metal. Limiting the main palette made it easier to mix old and new furnishings without making the room feel like a furniture store clearance aisle.
The goal was coordination rather than perfect matching. A collected room generally feels more personal when pieces relate through color, shape, finish, or texture without belonging to an identical set.
Fixing the Furniture Layout
Our previous furniture arrangement followed a common formula: place every large item against a wall and leave a confusing empty area in the middle. It provided plenty of floor space, but nobody could comfortably talk without raising their voice as though addressing a town meeting.
Furniture layouts work better when they support traffic flow and bring seating close enough for comfortable conversation. In larger or elongated rooms, separate zones can help prevent the space from feeling like a hallway with a sofa in it.
Finding the Focal Point
Our room had two competing focal points: the fireplace and the television. Rather than pretending the television did not exist, we planned around both.
The sofa faced the media wall, while two movable chairs angled toward the sofa and fireplace. The arrangement allowed television viewing without turning the entire room into a shrine to electronics.
Protecting the Main Walkway
We preserved an obvious path from the entry to the adjoining room. No one should need to perform a sideways shuffle around a coffee table just to reach the kitchen.
We also left enough clearance for cabinet doors, side-table drawers, and the reclined position of a favorite chair. Furniture is not truly functional when opening one piece requires moving three others.
Choosing Flexible Pieces
Lightweight chairs, nesting tables, and a movable ottoman gave us more flexibility than a room full of massive furniture. The room can now shift between quiet evenings, family gatherings, and extra seating for guests without requiring professional movers.
The Area Rug Problem
Few decorating purchases create as much confusion as an area rug. Too small, and it floats beneath the coffee table like a decorative postage stamp. Too large, and it appears to be attempting a hostile takeover of the floor.
Common living room rug guidance suggests connecting the seating pieces visually, often by placing at least the front legs of the sofa and chairs on the rug. The correct solution depends on room dimensions and furniture placement, but the rug should make the seating area feel unified rather than fragmented.
We measured the entire seating group rather than choosing a rug according to the coffee table alone. We also considered durability, cleaning, pets, and how the rug’s pattern would interact with the upholstery.
Our final choice was larger and quieter than our first instinct. It created a clear zone while allowing the furniture and artwork to carry more visual interest.
Layering the Living Room Lighting
Replacing the overhead fixture helped, but one fixture could not solve every lighting need. A comfortable living room generally benefits from multiple light sources positioned at different heights, including ambient, task, and accent lighting.
Ambient Lighting
The ceiling fixture provides broad illumination for cleaning, entertaining, and locating the remote after it disappears into the sofa.
Task Lighting
A floor lamp beside the reading chair and a table lamp near the sofa provide focused light without flooding the entire room.
Accent Lighting
A small picture light and a low lamp on the console create warmth after dark. These lower sources make the room feel more relaxed than relying exclusively on bright overhead lighting.
Using Efficient Bulbs
We selected energy-efficient LED bulbs with compatible color temperatures so one side of the room would not appear golden while the other looked like a hospital hallway. Modern LEDs offer strong efficiency, long life, versatility, and increasingly good color quality.
Keeping the Living Room Makeover on Budget
A project can become “never-ending” because of time, but it can also become endless because every decision introduces another purchase. New curtains suggest new rods. New rods expose damaged trim. Fresh paint makes the old switch plates look yellow. Suddenly, the humble living room refresh has developed a supporting cast.
We Divided Spending Into Three Categories
Keep: Items that were comfortable, useful, well made, or personally meaningful.
Improve: Pieces that could be painted, repaired, reupholstered, reframed, or relocated.
Replace: Items that were damaged, incorrectly scaled, uncomfortable, or no longer useful.
This approach kept us from replacing everything merely because the room was changing. Some of the most successful additions were objects we already owned but had never placed thoughtfully.
We Budgeted for Unexciting Supplies
Drop cloths, brushes, rollers, caulk, wall filler, screws, anchors, extension cords, delivery fees, and disposal costs are not glamorous, but they are part of the project. Ignoring them does not make them free; it simply makes the final total more surprising.
We Allowed the Room to Develop Slowly
Not every empty wall required immediate decoration. Not every table needed three objects and a stack of books nobody intended to read. Leaving some decisions unresolved reduced impulse purchases and gave us time to find pieces we genuinely liked.
What Is Finished in Part 1?
At this stage, the walls and trim are repaired and painted. The main furniture arrangement is established. The area rug is in place, the lighting is layered, and the primary storage problems are under control.
The room already feels more comfortable because its biggest problems were functional rather than decorative. Better circulation, useful lighting, correctly scaled furniture, and a cohesive palette made a greater difference than any single statement object.
Part 2 will address the media wall, window treatments, artwork, smaller styling decisions, and the collection of cords that continues to resist civilized society.
Conclusion: Is the End Finally in Sight?
Our living room project is not completely finished, but it has crossed the important line between “room containing furniture” and “space where we actually want to spend time.”
The biggest lesson has been that a successful living room makeover does not require completing every task at once. It requires making decisions in the right order: understand the room, measure carefully, establish the layout, complete messy work, add the major furnishings, and decorate only after the foundation makes sense.
A home should be allowed to evolve. The goal is not to create a frozen showroom where nobody may put down a coffee cup. The goal is a welcoming, practical room that reflects the people living in iteven when one of those people keeps leaving a tape measure on the mantel.
Our Living Room Experience: The 500-Word Reality Check
Looking back, the most difficult part of this living room renovation was not painting, moving furniture, or assembling anything. It was making decisions while continuing to live in the middle of the project.
For several weeks, the sofa migrated around the room like a confused animal. One evening it faced the fireplace. The next morning it faced the television. At one point it sat diagonally because we had convinced ourselves that angles were sophisticated. They were not. The arrangement looked as though the sofa had attempted to leave and become stuck.
Paint selection created another period of unnecessary drama. We started with three samples, added four more, and eventually had a wall resembling a neutral-colored patchwork quilt. Every visitor was asked to vote. This produced no useful consensus. One person loved the warmest beige, another preferred the coolest gray, and someone suggested blue despite blue never being part of the plan.
Eventually, we stopped asking what looked best in isolation and started asking which color worked with the floor, furniture, daylight, trim, and adjoining hallway. That simple change made the decision much easier.
The lighting upgrade delivered the fastest emotional improvement. Before the makeover, evenings in the room felt flat and slightly gloomy. Adding lamps at different heights changed the atmosphere immediately. We could read in one chair, watch television without glare, or create softer light for conversation.
We also learned that storage should be planned around behavior rather than fantasy. We had imagined perfectly styled shelves with carefully arranged books and pottery. Real life required hidden storage for charging cables, game controllers, pet toys, blankets, instruction manuals, and several remotes that may or may not control anything currently in the house.
A closed cabinet proved more valuable than another decorative shelf. It may not earn applause on social media, but neither does a visible nest of electrical cords.
The budget changed several times. We saved money by keeping existing chairs, refinishing a side table, and reusing frames. We spent more than expected on the rug because the smaller, less expensive option made the entire room feel disconnected. That purchase hurt briefly, but buying the wrong size twice would have hurt more.
There were also days when nothing appeared to happen. We waited for deliveries, reconsidered measurements, and lived with empty corners. Those pauses initially felt like failure. In reality, they prevented rushed choices.
The room now contains a mixture of old pieces, new purchases, repaired furniture, practical storage, and objects collected over time. It does not look like a catalog, which is probably why it finally feels like ours.
Is the project completely over? Of course not. We still need artwork, improved cable management, final curtain adjustments, and one side table that does not wobble when someone breathes near it. But the major decisions are complete, and the remaining work feels manageable.
For the first time, the end truly seems to be in sight. We are choosing to enjoy that feeling before Part 2 inevitably begins.