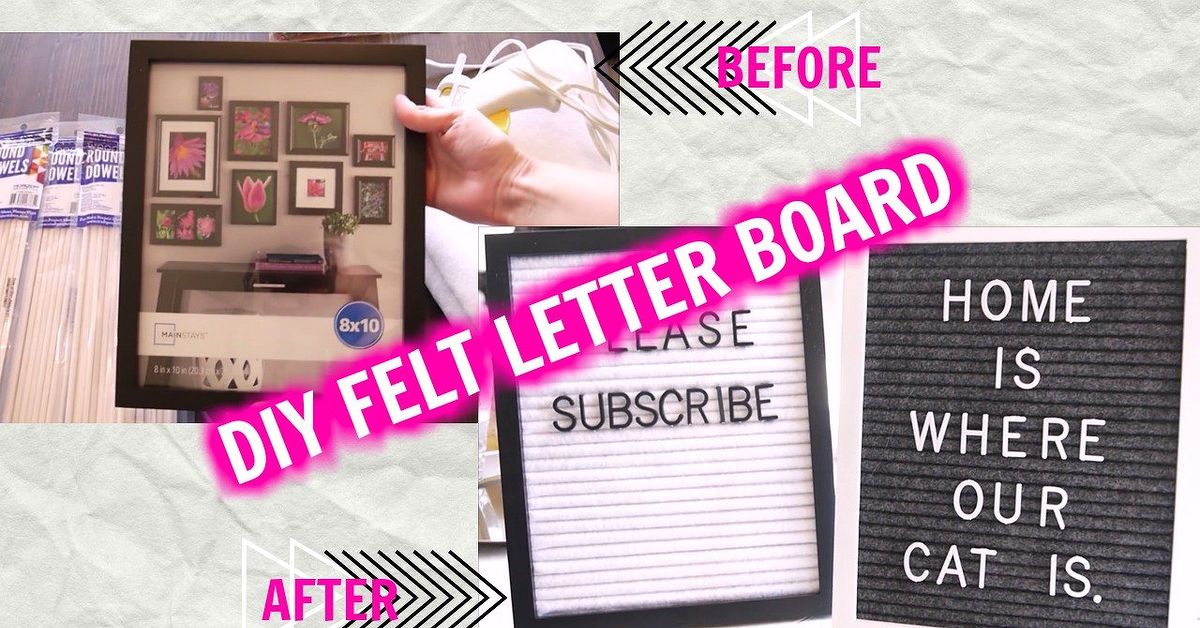
A felt letter board is the rare home décor project that manages to be nostalgic, practical, cute, and slightly bossy all at once. It can remind your family that dinner is tacos, announce a birthday, display a quote that makes you look suspiciously wise, or simply say “coffee first” because some truths belong on the wall.
The best part? You do not need to spend a small fortune on a store-bought board. With felt, a frame, a few wooden dowels, glue, and a little patience, you can make a custom DIY felt letter board that fits your home, your color palette, and your sense of humor. Want classic black felt with white letters? Easy. Want blush pink, forest green, rainbow stripes, or a moody charcoal board that looks like it belongs in a boutique coffee shop? Also easy. Well, mostly easy. There may be glue strings. There are always glue strings.
This guide walks you through how to make a felt letter board from scratch, including materials, sizing tips, step-by-step instructions, design ideas, troubleshooting, and real-life lessons learned from making one. Whether you are creating a message board for your kitchen, office, classroom, nursery, wedding table, or entryway, this project is beginner-friendly and customizable.
What Is a Felt Letter Board?
A felt letter board is a framed message board made with rows of soft felt grooves. Plastic letters, numbers, and symbols slide between those grooves, allowing you to change the message whenever you like. It is basically a reusable sign with better manners than a sticky note and more personality than a dry-erase board.
Traditional letter boards often use black, gray, or navy felt with white plastic letters. Modern DIY versions can be made in almost any color and size. Some use wooden dowels wrapped in felt. Others use foam strips, folded felt, or square dowels placed tightly together inside a frame. The goal is always the same: create narrow channels that hold letter tabs securely.
Why Make a DIY Felt Letter Board Instead of Buying One?
Store-bought felt letter boards are convenient, but DIY gives you three big advantages: size, color, and cost control. If you have ever searched for a large letter board, you already know the price can jump faster than a cat hearing a vacuum cleaner. A handmade version lets you use an old picture frame, thrifted frame, canvas frame, or scrap wood to create something custom for much less.
A DIY felt letter board is also better for matching your décor. You can choose soft beige felt for a minimalist room, emerald green for a dramatic office, warm rust for fall décor, or pastel colors for a nursery. You can even create an ombré effect by changing felt shades from top to bottom.
Materials You Need
Before you start, gather all supplies. This project is much smoother when you are not wandering around the house holding half-glued felt and asking, “Where did I put the scissors?”
Basic Supply List
- A picture frame, shadow box frame, or canvas frame
- Felt by the yard or felt sheets
- Quarter-inch wooden dowels or square wooden dowels
- Hot glue gun and glue sticks
- Fabric scissors or a rotary cutter
- Cutting mat, if using a rotary cutter
- Ruler or measuring tape
- Letter board letters with tabs
- Frame backing, foam board, or thin plywood backing
- Lint roller for cleanup
Optional Supplies
- Spray paint for the frame
- Wood stain for a natural frame finish
- Fabric glue for a slower-drying but flexible hold
- Small saw or miter box for cutting dowels
- Sandpaper for smoothing rough wood edges
- Command strips, sawtooth hanger, or easel stand for display
Best Frame Size for a DIY Felt Letter Board
An 8-by-10-inch frame is great for a desk, shelf, or small kitchen counter. An 11-by-14-inch board gives you more room for quotes and announcements. A 16-by-20-inch board makes a bold statement and works well for classrooms, events, entryways, or family command centers.
If this is your first letter board DIY project, an 11-by-14-inch frame is the sweet spot. It is large enough to be useful but not so large that you will spend your entire afternoon wrapping dowels while questioning your life choices.
Choosing the Right Felt
Felt is the star of this project, so choose it carefully. Craft felt sheets are inexpensive and easy to find, but felt by the yard often looks smoother and gives a cleaner finish on larger boards. Wool-blend felt usually has a richer texture, while acrylic felt is budget-friendly and widely available.
For best results, avoid felt that is too thin or floppy. Thin felt can wrinkle, stretch unevenly, or fail to grip the letters. Medium-weight felt gives the board structure and helps the plastic letter tabs stay in place. If you want a luxurious look, velvet-style fabric can work, but it may fray more than felt and can be fussier to cut.
How to Make a DIY Felt Letter Board
There are several ways to make a felt message board, but the dowel method is one of the most reliable. The dowels create the ridges, the felt creates the soft grooves, and the frame keeps everything tidy.
Step 1: Remove the Glass From the Frame
Start by opening your frame and removing the glass or plastic insert. You will not need it for the finished project. Keep the backing because it can help support the board. If your frame has a deep lip or shadow box style, even better. That extra depth makes room for the felt-covered dowels.
Wipe the frame clean before you begin. If you plan to paint or stain the frame, do that now and let it dry completely. A black frame gives a classic café-board look, natural wood feels warm and modern, and gold adds a little “I definitely have my life together” energy.
Step 2: Measure the Inside Opening
Measure the width and height of the inside frame opening. The dowels should fit snugly across the width. If your frame opening is 11 inches wide, cut the dowels slightly shorter so they fit inside without bending the frame.
Write your measurements down. Do not trust your memory here. Crafting confidence is wonderful, but numbers have a way of evaporating the second you pick up a glue gun.
Step 3: Cut the Dowels
Cut your wooden dowels to match the inside width of the frame. A small hand saw, miter box, or craft saw works well. If you are younger or not comfortable using cutting tools, ask an adult for help with this step. Sand any rough ends so they do not snag the felt.
The number of dowels you need depends on the height of your frame and the thickness of the dowels. For a 16-by-20-inch board, you may need several dozen dowels. For a smaller board, you will need fewer. Lay them inside the frame before gluing to check spacing.
Step 4: Cut Felt Strips
Cut felt strips long enough to wrap around each dowel. A strip about one inch wide is usually a good starting point for quarter-inch dowels. You want enough felt to cover the dowel completely without creating bulky overlap.
Use fabric scissors for a simple approach or a rotary cutter and ruler for cleaner, more even strips. Straight strips make the final board look polished. Wavy strips can still work, but they may give your board a charmingly “handmade after coffee number three” appearance.
Step 5: Wrap Each Dowel With Felt
Place a felt strip face down on your work surface. Run a thin line of hot glue down the center, then press the dowel onto the glue. Add another small line of glue along one side of the felt and roll it around the dowel. Repeat with the other side until the wood is covered.
Use enough glue to hold the felt securely, but avoid giant blobs. Too much glue creates lumps, and lumps make it harder for the letters to sit neatly in the grooves. Hot glue dries fast, so work in small sections and protect your fingers. Hot glue has no respect for optimism.
Step 6: Arrange the Felt-Covered Dowels
Once your dowels are wrapped, place them inside the frame. Push them close together, but not so tight that the letter tabs cannot slide between rows. After placing a few dowels, test the spacing with one of your plastic letters. The tabs should fit snugly without forcing.
This test is important. If the rows are too loose, letters may fall out. If they are too tight, you will need to wrestle each letter into place, which is not the peaceful crafting moment anyone ordered.
Step 7: Glue the Rows Into the Frame
When the spacing looks right, begin gluing the dowels into the frame. Add hot glue to the back or sides where the dowels touch the frame or backing. Press each row firmly and hold it for a few seconds. Continue until the entire opening is filled.
Keep checking alignment as you go. Rows that drift out of place can make your board look uneven. A ruler or straight edge can help keep everything level. However, do not panic over tiny imperfections. Once letters are added, small variations usually disappear.
Step 8: Trim and Tuck the Edges
After all the dowels are secured, inspect the sides of the board. Trim any extra felt and tuck loose edges behind the frame lip. A small putty knife, craft stick, or the dull side of a butter knife can help push fabric into place.
Use a lint roller to remove fuzz, thread bits, and the legendary hot-glue spiderwebs that appear during every craft project. This cleanup step makes the board look finished instead of “fresh from a battle with craft supplies.”
Step 9: Add the Backing
If your frame backing still fits, place it back into the frame. If the felt-covered dowels made the board too thick, replace the original backing with thin foam board or plywood. The backing helps stabilize the rows and keeps the board from flexing.
For a wall-mounted board, attach a sawtooth hanger or use strong picture-hanging strips rated for the board’s weight. For a shelf or desk, lean it against the wall or attach a small easel stand.
Step 10: Add Your Message
Now for the fun part: adding letters. Start with a short quote, menu, reminder, or seasonal phrase. Centering your message is easier if you count the characters in each line and start near the middle. You can also lay the letters out on a table before placing them on the board.
Try messages like “Home Sweet Chaos,” “Taco Tuesday,” “Today Is a Good Day,” “Laundry: The Sequel,” or “Welcome-ish.” The beauty of a changeable felt letter board is that you can be inspirational one day and mildly sarcastic the next.
Alternative DIY Felt Letter Board Methods
The Accordion Fold Method
Instead of wrapping each dowel separately, you can glue felt in accordion-style folds across a backing board. Dowels or foam strips sit inside each fold to create ridges. This method can be faster, but it requires careful tension. Pull the felt too loosely and the letters sag. Pull it too tightly and the grooves flatten.
The Foam Core Method
For an oversized letter board, foam core strips can replace wooden dowels. Cut foam core into even strips, cover or layer them with felt, and fit them into a deep frame. This method is lightweight and budget-friendly, especially for large wall displays.
The Loose Felt Strip Method
Some DIY boards use tightly packed felt strips held in place by the frame rather than individually glued rows. This allows you to rearrange colors for holidays or events. It is flexible and fun, though less permanent than the glued dowel method.
Design Ideas for Your Felt Letter Board
A classic black felt board with white letters is timeless, but DIY lets you go far beyond the basics. Try navy felt with gold letters for a sophisticated office. Use cream felt and black letters for modern farmhouse style. Choose blush pink for a nursery or craft room. Create a rainbow board for a classroom, playroom, birthday party, or any space that could use a cheerful personality boost.
For an ombré letter board, cut felt in several shades of the same color and transition from dark to light as you move down the frame. This works beautifully with blues, greens, pinks, and warm sunset tones. Keep the letters simple so the background remains the star.
Where to Use a Felt Letter Board
Kitchen
Use your board for weekly menus, grocery reminders, family jokes, or dinner announcements. “Soup Night” somehow feels more official when spelled out in plastic letters.
Home Office
Add a motivational quote, deadline reminder, or personal motto. Keep it short and punchy. Your board should encourage productivity, not become a second inbox.
Classroom
Teachers can use felt letter boards for daily greetings, vocabulary words, birthdays, classroom rules, or reading prompts. A handmade board can also be color-coordinated with classroom themes.
Parties and Events
Felt letter boards are perfect for baby showers, weddings, graduation parties, birthdays, holiday displays, and dessert tables. Use them for welcome messages, menus, hashtags, or table labels.
Nursery or Kids’ Room
Display a child’s name, milestone message, favorite quote, or funny phrase. Choose soft felt colors and a secure display location away from very young children, especially because small plastic letters can be choking hazards.
Common Mistakes and How to Avoid Them
Using Felt That Is Too Thin
Thin felt may not hold the letters well. Choose medium-weight felt or layer it if necessary.
Spacing Rows Too Far Apart
If the gaps are too wide, letters can tilt or fall. Test with actual letter tabs before gluing the entire board.
Using Too Much Glue
Large glue blobs create bumps. Use thin lines of glue and press firmly.
Skipping the Test Fit
Always test the dowels inside the frame before final gluing. Frames are not always perfectly square, especially thrifted ones.
Buying Too Few Letters
Most letter sets include plenty of consonants but may run short on vowels, especially if you like long quotes. Buying an extra letter set is usually worth it.
Care and Maintenance Tips
Keep your felt letter board looking fresh by using a lint roller regularly. Felt attracts dust, pet hair, and mysterious fuzz from unknown dimensions. Store extra letters in a small box, divided container, or zipper pouch so you are not hunting for the letter “E” every time inspiration strikes.
When changing messages, remove letters gently. Pulling too hard can stretch the grooves or loosen the felt. If a row comes loose, reattach it with a small amount of hot glue or fabric glue.
Budget Breakdown
The final cost depends on your frame size and supplies already on hand. A thrifted frame may cost only a few dollars, while a new shadow box frame will cost more. Felt is usually affordable, especially if bought by the yard. Wooden dowels, glue sticks, and letter sets make up the rest of the budget.
For a small board, you may spend around $15 to $30. For a larger, more polished board, expect around $35 to $60. That is still often less than many oversized store-bought felt letter boards, and yours will be custom-made.
DIY Felt Letter Board Experience: What I Learned the Fun Way
Making a DIY felt letter board sounds simple, and technically it is. But like many craft projects, the little details decide whether the final result looks boutique-worthy or like it barely survived a craft-room tornado. The biggest lesson is this: measuring matters. I know, it is not glamorous. Nobody gets excited about a ruler. But even spacing makes the board look clean, and clean rows make the letters sit properly.
The second lesson is to buy more glue sticks than you think you need. Hot glue disappears quickly when you are wrapping dowel after dowel. There is a special kind of sadness that happens when the glue gun is hot, the felt is cut, the momentum is perfect, and the last glue stick has vanished. Stock up before starting.
Another experience-based tip is to test the letters often. Do not wait until the board is finished to discover the grooves are too tight. After gluing every five or six rows, slide in a letter. If it fits easily but securely, keep going. If it feels like forcing a suitcase into an overhead bin, adjust your spacing immediately.
Color choice also matters more than expected. Black felt looks classic and makes white letters pop, but it shows lint. Light felt looks soft and modern, but dark letters are a must for readability. Bright colors are cheerful, but they can compete with long messages. If the board will be used for everyday reminders, neutral felt is usually easiest to read. If it is mainly decorative, go wild. A rainbow board has never apologized for being joyful.
One surprisingly helpful trick is to organize your letters before you start using the board. The first time you open a big bag of plastic letters, it feels like alphabet confetti. Sorting them into a craft box by letter saves time later. It also prevents the classic letter board problem: having a great quote ready but being unable to find a second “O.”
Finally, the best felt letter boards are not perfect. A tiny uneven row or slightly tucked corner is part of the handmade charm. Once the board is hanging on the wall with a funny quote or sweet message, nobody will inspect it with a magnifying glass. They will notice the personality. They will notice the color. They will probably ask where you bought it, which is your moment to casually say, “Oh, I made it,” and then try not to look too proud. You may fail at that last part. That is acceptable.
Final Thoughts
A DIY felt letter board is one of those projects that rewards patience without demanding expert skills. You can make it with simple supplies, customize it to match your home, and update the message as often as your mood changes. Use it for quotes, menus, reminders, holiday décor, party signs, classroom messages, or tiny household announcements with dramatic importance.
The key to success is choosing sturdy felt, spacing the rows carefully, testing your letters as you go, and cleaning up the edges for a polished finish. Once complete, your felt letter board becomes more than a craft project. It becomes a rotating billboard for your home’s personality. And if that personality occasionally says “More Snacks, Less Stress,” well, that is just good design.
Note: This article is written as an original, web-ready DIY guide based on commonly used felt letter board crafting methods, practical home décor techniques, and real maker experience. No source links are included in the article body for cleaner publishing.