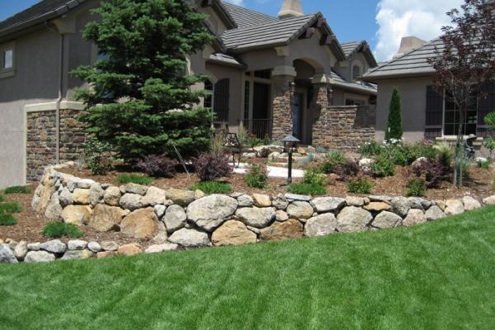
Note: Retaining wall repair is not just about making a wall look tidy again. The real goal is to stop the force that damaged it in the first placeusually water, soil pressure, a weak base, or a combination of all three. When in doubt, especially with tall walls, walls near a house, or walls holding back a driveway, bring in a qualified contractor or structural engineer before gravity gets creative.
Why Retaining Walls Fail in the First Place
A retaining wall has one very serious job: hold back soil that would rather slide, slump, swell, or roll downhill like it has somewhere urgent to be. When the wall starts leaning, cracking, bowing, or shedding blocks, it is usually not being dramatic. It is telling you something important.
The most common cause of retaining wall damage is poor drainage. Soil behind the wall absorbs water after rain, irrigation, snowmelt, or runoff from downspouts. Wet soil becomes heavier, and trapped water creates hydrostatic pressure behind the wall. That pressure pushes outward until the wall shifts, cracks, tilts, or fails. In other words, water is the sneaky villain wearing a mud costume.
Other causes include a shallow footing, poor compaction, missing gravel backfill, clogged weep holes, tree roots, frost heave, impact damage, weak mortar, rotting timber, and walls that were simply built too tall without reinforcement. Before repairing anything, diagnose the cause. Otherwise, the repair becomes a very expensive Band-Aid on a very determined hill.
Signs Your Retaining Wall Needs Repair
Some retaining wall problems are cosmetic. Others are structural warnings. Knowing the difference helps you decide whether this is a weekend project or a “call someone with insurance and a laser level” situation.
Minor Warning Signs
- Loose capstones or blocks
- Small mortar cracks
- Minor erosion at the base
- Clogged weep holes
- Surface staining or efflorescence
- Small gaps between blocks
Serious Warning Signs
- The wall is leaning outward
- A section is bulging or bowing
- Large stair-step cracks are visible
- Soil is washing out from behind or beneath the wall
- The base course has shifted
- Water pools behind the wall after rain
- The wall is over 3 or 4 feet tall and moving
- The wall supports a driveway, patio, structure, or steep slope
If a wall is actively moving, heavily bowed, or holding back a major load, do not try to “push it back” with a truck, jack, rope, wishful thinking, or your strongest cousin. Retaining walls fail because of forces you cannot safely muscle into submission. A badly displaced wall usually needs partial or full rebuilding.
Tools and Materials You May Need
The exact repair materials depend on whether the wall is made of concrete blocks, stone, brick, timber, poured concrete, or segmental retaining wall units. Still, most small retaining wall repairs require a similar collection of gear.
- Work gloves and safety glasses
- Shovel, trenching shovel, and hand trowel
- Level and mason’s line
- Rubber mallet
- Cold chisel and masonry hammer
- Stiff brush or wire brush
- Ready-mix mortar or masonry repair compound
- Landscape adhesive for cap blocks
- Crushed stone or angular gravel
- Perforated drainpipe
- Nonwoven landscape fabric or drainage fabric
- Tamper or plate compactor for larger repairs
- Replacement blocks, stones, bricks, or timbers
For bigger repairs, you may need a masonry saw, mini excavator, drainage fittings, geogrid reinforcement, or professional engineering help. That may sound like overkill, but so is rebuilding the same wall twice because the first repair ignored water. Retaining walls are big fans of consequences.
Step 1: Inspect the Wall and Identify the Real Problem
Start with a slow walk along the wall. Look at the front, top, base, and the ground behind it. Use a level to check whether the wall is leaning. Take photos and measure cracks or movement so you can compare changes after the next heavy rain.
Check where water goes during a storm. Are downspouts dumping water behind the wall? Does the yard slope toward it? Is mulch piled against the back? Are sprinklers soaking the retained soil every morning like the wall asked for a spa day? Surface water management is often the cheapest repair with the biggest payoff.
Also look for signs of poor drainage. Weep holes should not be packed with mud. Gravel backfill should allow water to move freely. If water stains, damp patches, mineral deposits, or muddy seepage appear on the wall face, there may be trapped water behind it.
Step 2: Fix Drainage Before Repairing the Face
Drainage is the heart of retaining wall repair. If you replace blocks or patch cracks without relieving water pressure, the same damage can return. The wall may even fail faster because the repair hides warning signs while the pressure keeps building behind the scenes.
Clean Existing Weep Holes
For masonry or concrete retaining walls with weep holes, clear them with a screwdriver, wire, stiff brush, or compressed air. Do not seal weep holes just because water comes out. That water is supposed to escape. Plugging weep holes is like telling a pressure cooker to keep its feelings inside.
Redirect Surface Runoff
Extend downspouts so they discharge away from the wall. Regrade soil so water flows away from the retained area when possible. Avoid creating a planting bed that traps water directly behind the wall. If the top of the wall collects runoff, add swales, drains, or surface grading to move water safely to another area.
Add Gravel Backfill and Drainpipe When Needed
If the wall lacks proper drainage, excavation may be necessary. For many block walls, a good drainage repair includes digging behind the wall, installing nonwoven drainage fabric, adding a column of angular gravel or crushed stone, and placing a perforated drainpipe near the base. The pipe should slope to daylight or another approved discharge point. The fabric helps keep fine soil from clogging the gravel and pipe.
For tall walls, engineered walls, or walls with heavy loads above them, drainage work should be designed or reviewed by a professional. A drainpipe installed with no outlet, poor slope, or clogged fabric is not drainage. It is just buried disappointment.
Step 3: Repair Loose Blocks, Bricks, or Stones
If the wall is stable and only a few blocks, bricks, or stones are loose, you can often repair the damaged area without rebuilding the whole wall.
For Mortared Brick or Stone Walls
- Remove the loose brick or stone carefully.
- Chip away old mortar from the opening and the removed piece.
- Brush away dust and debris.
- Dampen the masonry slightly so it does not pull moisture too quickly from the new mortar.
- Apply fresh mortar to the sides and bottom of the opening.
- Reset the brick or stone and press it into position.
- Tool the joints neatly and remove excess mortar.
- Allow the repair to cure according to the mortar manufacturer’s instructions.
For Segmental Block Walls
Segmental retaining wall blocks are often dry-stacked, meaning they rely on weight, setback, interlock, base preparation, and drainage rather than mortar. If individual blocks are loose but the wall is not leaning, remove the affected blocks, clean off soil and debris, and reset them level. Replace cracked units. Use landscape adhesive only where appropriate, typically for cap blocks, not to glue the entire wall into a rigid slab.
Step 4: Repair Cracks the Right Way
Small cracks in a retaining wall can sometimes be repaired, but the crack is not the problem; it is the symptom. Before patching, ask why the crack appeared. Is the wall settling? Is water trapped behind it? Is a tree root pushing against it? Is the base washing out?
Hairline cracks in concrete or mortar may be filled with masonry crack filler or hydraulic cement, depending on the material and moisture conditions. Wider cracks may need to be cleaned, widened slightly with a chisel, and packed with a suitable repair mortar. Always follow the product instructions for surface preparation, temperature, curing time, and moisture exposure.
Do not use ordinary caulk as a structural fix for a retaining wall. Caulk has its place, but holding back soil is not its dream career. If cracks are growing, stair-stepping through masonry, or paired with bulging or leaning, call a professional.
Step 5: Rebuild Leaning or Bowed Sections
Once a retaining wall leans outward or bows significantly, patching the face will not solve the problem. The displaced section usually needs to be dismantled and rebuilt with a better base, proper setback, drainage, and possibly reinforcement.
Basic Rebuild Process for a Small Block Wall
- Remove soil pressure carefully from behind the damaged section.
- Take down the unstable blocks and stack reusable units nearby.
- Excavate to a firm base and remove soft or organic soil.
- Install a compacted crushed stone base or leveling pad.
- Set the first course level, straight, and partially below grade.
- Place perforated drainpipe behind the base course if needed.
- Backfill behind the wall with angular gravel as you rebuild each course.
- Install geogrid reinforcement if required by wall height, soil, slope, or manufacturer instructions.
- Compact backfill in thin lifts, taking care not to push the wall outward.
- Reset cap blocks with landscape adhesive.
- Grade the surface to direct runoff away from the wall.
The first course is the most important course. If it is uneven, too shallow, or sitting on soft soil, every course above it inherits the problem. Think of it as the wall’s shoes. If the shoes are crooked, the whole outfit suffers.
Step 6: Address Erosion at the Base
Soil washing away from the base of a retaining wall can weaken support and allow the wall to settle or rotate. First, determine where the water is coming from. Common culprits include roof runoff, hillside flow, irrigation overspray, poorly placed drains, and bare soil that erodes during storms.
Repair minor erosion by adding compacted crushed stone at the base, restoring soil grade, and using mulch, groundcovers, or erosion-control fabric where appropriate. For more serious washouts, install a proper drainage solution before replacing soil. If the base has settled or the first course has moved, the wall section may need to be rebuilt from the foundation upward.
Step 7: Repair or Replace Timber Retaining Walls
Timber retaining walls can look warm and rustic, but wood does not last forever, especially when it spends its life pressed against damp soil. Rot, insect damage, loose spikes, failing deadmen, and bulging sections are common problems.
If only one timber is damaged and the wall is low and stable, you may be able to replace that timber. Remove soil from behind the area, take out the damaged piece, and install a pressure-treated replacement rated for ground contact. Use appropriate galvanized or corrosion-resistant fasteners.
If multiple timbers are rotten, the wall is leaning, or the anchors have failed, replacement is usually smarter than patching. A rebuilt wall may use new timbers, concrete block, natural stone, or another material better suited to the site. Whatever you choose, drainage still matters. Wood may rot, concrete may crack, and stone may shift, but water is the common denominator in many failures.
When to Call a Professional
DIY retaining wall repair can make sense for low garden walls, loose caps, clogged weep holes, minor mortar repairs, and small block resets. However, some walls are structural systems, not decorative weekend puzzles.
Call a professional if the wall is taller than about 3 or 4 feet, supports a driveway or building, sits near a property line, shows major movement, has repeated drainage problems, or is affected by steep slopes or poor soil. Many local building departments have rules for wall height, permits, drainage discharge, guardrails, and engineering. Check local requirements before rebuilding.
Professional repair may include excavation, soil stabilization, geogrid reinforcement, tiebacks, helical anchors, improved drainage, partial rebuilding, or complete replacement. It costs more than a bag of mortar, yes. But it also costs less than a collapsed wall, damaged patio, angry neighbor, and a weekend that turns into a courtroom vocabulary lesson.
How to Prevent Future Retaining Wall Damage
After repairing the wall, keep it healthy with simple maintenance. Inspect it after heavy rain. Clear weep holes. Keep drain outlets open. Watch for new cracks, leaning, settlement, or soil erosion. Avoid planting large trees too close to the wall, and do not add heavy loads above the retained area without professional advice.
Make sure irrigation does not oversaturate soil behind the wall. Keep mulch and soil from blocking drainage paths. If you add a patio, shed, fence, hot tub, driveway, or raised bed above the wall, remember that extra weight changes the forces on the wall. Retaining walls may look calm, but they are doing math all day.
Common Retaining Wall Repair Mistakes
Sealing Weep Holes
Weep holes are there to release water. Sealing them traps pressure behind the wall and can accelerate damage.
Using Soil Instead of Gravel Behind the Wall
Backfilling directly with heavy clay or poorly draining soil can increase pressure. A drainage zone of crushed stone or angular gravel helps water move away.
Ignoring the Base
A wall built on soft, uneven, or poorly compacted soil will keep shifting no matter how attractive the top course looks.
Patching a Moving Wall
Mortar, adhesive, and crack filler cannot stop structural movement. If the wall is still moving, fix the cause first.
Forgetting About Surface Water
Even a well-built wall can struggle if downspouts, slopes, or sprinklers constantly send water behind it.
Experience Notes: What Real Retaining Wall Repairs Teach You
One of the biggest lessons from real retaining wall repair is that the visible damage is rarely the whole story. A homeowner may point to one loose block and say, “Can I just glue that back?” Sometimes the answer is yes. More often, the loose block is the polite little messenger sent by a much bigger problem hiding behind the wall.
For example, a short garden wall may look fine for years and then suddenly begin leaning after a wet season. The blocks did not wake up one morning and decide to abandon professionalism. The soil behind them likely became saturated, heavier, and more aggressive. When the wall lacks gravel backfill or drainpipe, water has nowhere to go except sideways into the wall. Once you excavate behind the damaged section, the evidence is usually obvious: soggy clay, clogged fabric, blocked weep holes, or a drainpipe that ends in the dirt like a road to nowhere.
Another common field lesson is that the first course determines the future. Many small retaining walls fail because the base course was placed on loose soil, a thin sprinkle of sand, or an uneven trench. The wall may look good on day one, especially after the cap blocks go on and the mulch is fluffed. But over time, freeze-thaw cycles, rain, and soil movement expose the shortcut. A compacted crushed stone base is not glamorous, but it is the part of the wall doing the quiet heavy lifting.
Experience also teaches that drainage repairs can feel excessive until they work. Digging behind a wall to add gravel and perforated pipe is not anyone’s idea of a spa weekend. It is muddy, awkward, and oddly good at making shovels feel heavier every hour. But after the next storm, the difference can be dramatic. Water that once pushed against the wall now exits through a pipe or weep hole. Soil stays more stable. The wall stops acting nervous. The repair becomes invisible, which is exactly what good drainage is supposed to be.
Another practical observation: not every wall is worth saving. If a timber wall is rotting throughout, if a block wall is severely bowed, or if a concrete wall has major structural cracks, rebuilding may be safer and more economical than endless patching. Homeowners sometimes resist this because “repair” sounds cheaper than “replacement.” But repairing the wrong wall can be like putting new tires on a car with no engine. Technically, you improved something. Practically, you still have a problem.
The smartest retaining wall repair starts with patience. Watch where water flows. Check the base. Look for movement. Fix drainage first. Rebuild only what needs rebuilding, but rebuild it correctly. A retaining wall does not need fancy tricks; it needs a stable base, proper drainage, suitable materials, and respect for gravity. Gravity, unlike your neighbor’s advice, is undefeated.
Conclusion
Repairing a retaining wall starts with understanding why it failed. Loose stones, cracked mortar, leaning blocks, and erosion are symptoms. The deeper causes are usually water pressure, weak footing, poor backfill, soil movement, or missing reinforcement. For small, stable walls, DIY repairs like cleaning weep holes, resetting blocks, repointing mortar, improving grading, and adding drainage can extend the wall’s life. For tall, leaning, load-bearing, or badly damaged walls, professional help is the safer choice.
The golden rule is simple: do not just repair the wall face; repair the conditions behind it. Give water a place to go, give the wall a firm base, and give gravity fewer opportunities to embarrass your landscaping.