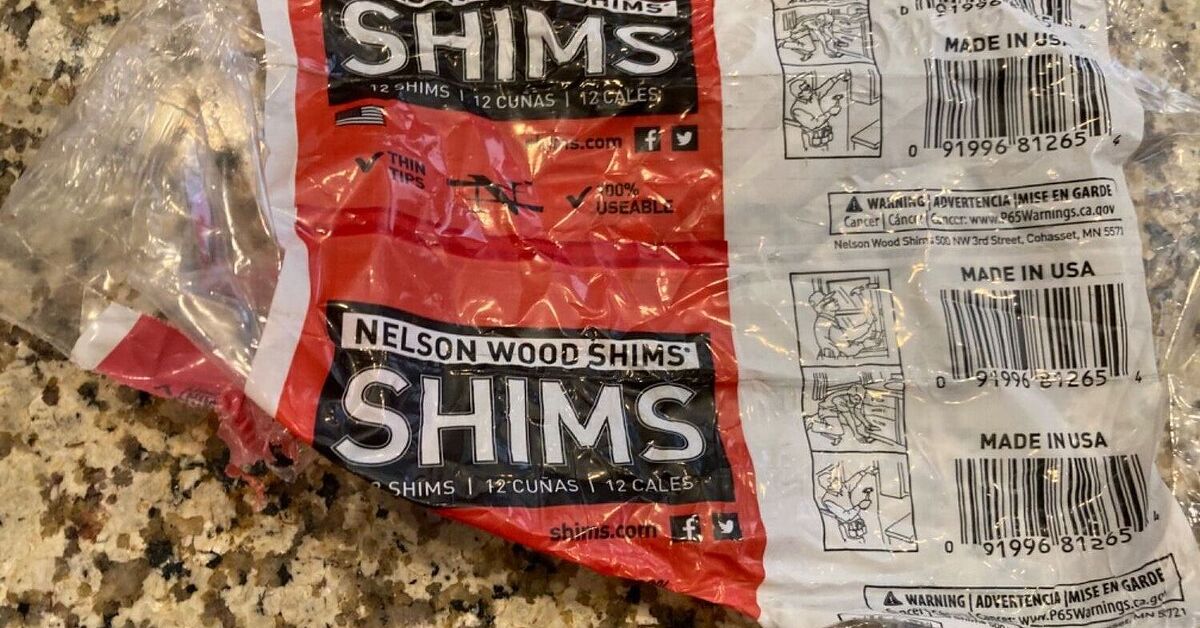
If your holiday decorating budget is feeling a little more “candy cane crumbs” than “winter wonderland,” allow me to introduce one of the cutest low-cost Christmas crafts around: the wood shim tree. Yes, wood shims. Those humble little tapered pieces of wood usually found hanging around doors, windows, and home improvement aisles like they own the place. Turns out they also make excellent holiday decor. Who knew?
A DIY Christmas tree out of wood shims is charming, affordable, beginner-friendly, and wonderfully customizable. You can paint it farmhouse white, stain it for a rustic look, add scrapbook paper for a whimsical finish, or pile on buttons, glitter, ribbon, tiny ornaments, and enough faux snow to make your mantel look like it filed for custody of December.
Best of all, this project is flexible. You do not need a workshop, a table saw, or the confidence of a person who casually says things like, “I just built a pergola over the weekend.” If you can line up wood pieces, glue them together, and resist touching wet paint for five minutes, you are fully qualified.
In this guide, you will learn exactly how to make a cute DIY Christmas tree out of wood shims, what supplies work best, how to finish it so it looks polished instead of accidental, and how to decorate it so your guests think you are either extremely crafty or suspiciously good at pretending to be.
Why Wood Shims Make Such a Great Christmas Craft
Before we jump into the steps, let’s give wood shims the tiny standing ovation they deserve. A wood shim is already tapered, which means it naturally helps create that classic Christmas tree silhouette. Put several together with the narrow ends pointing upward and the wider ends toward the bottom, and suddenly you have a tabletop tree without wrestling an entire lumber board into submission.
They are also lightweight, inexpensive, and easy to cut or sand by hand. That matters because not every DIY project should require the emotional recovery period of assembling flat-pack furniture. Wood shims also accept paint and stain beautifully, and they work well with embellishments like paper, ribbon, bells, beads, and miniature stars.
Another reason this project is such a favorite among holiday crafters is that it can lean in almost any design direction. Want a rustic Christmas tree? Go with stain, twine, and a burlap bow. Prefer something sweeter and more playful? Use pastel paint, polka-dot paper, and tiny pom-poms. Want a neutral tree for a modern mantel? White paint, clean lines, and a subtle gold star will do the trick.
Supplies You Will Need
One of the joys of this wood shim Christmas tree project is that the materials list does not look like a bank statement in disguise. Here is a practical starter list:
Basic supplies
- 10 to 12 wood shims for one tree, depending on your size and layout
- Wood glue or a strong craft adhesive
- Fine or medium-fine sandpaper
- Scissors or a craft knife for paper and embellishments
- A ruler or tape measure
- Clamps, painter’s tape, or clothespins to hold pieces while drying
Optional finishing supplies
- Acrylic paint, chalk-style paint, or wood stain
- Paintbrush or foam brush
- Scrapbook paper, book pages, or sheet music
- Mod Podge or decoupage medium
- Mini buttons, faux snowflakes, ribbon, twine, glitter, or tiny ornaments
- A wood bead or star topper
- Clear sealer for extra durability
If you are making several trees, buy extra shims. Not every piece will be identical, and a few backups will save you from giving one wonky shim the side-eye for ten straight minutes.
Step 1: Plan the Shape of Your DIY Christmas Tree
The easiest version of this project uses two angled sides made from shims, plus a small trunk and base. Lay your shims on a flat surface first without glue. This dry fit is important. It helps you see the final tree shape before you commit to anything sticky and irreversible.
Arrange the shims so the narrow ends point toward the top. Use four or five on each side to create the triangular outline of the tree. You can place the shims edge to edge for a cleaner, fuller look or leave tiny gaps if you want a more rustic, handmade vibe. Either works. Christmas is very accepting that way.
Once the sides look balanced, set aside one or two smaller pieces for the trunk and cut two short pieces for a base if you want the tree to stand on its own. If you plan to lean it against a wall or tuck it into a shelf display, the base can be simpler.
Take a quick photo of your dry layout before moving anything. Future you will appreciate the evidence when a piece slides away and suddenly the tree looks like modern art.
Step 2: Glue the Tree Sides Together
Start by gluing each side of the tree separately. Apply a thin line of wood glue where the shim edges meet, then press them together carefully. Do not use half the bottle like you are frosting a cinnamon roll. Too much glue creates squeeze-out, mess, and extra cleanup.
If your shims are rough or slightly warped, use painter’s tape, small clamps, or clothespins to keep them aligned while the glue sets. Let each side dry enough to hold its shape before moving on. Patience here is not glamorous, but it is the reason your tree ends up adorable instead of chaotic.
Once both sides are dry, glue them together at the top to form the tree shape. If there is a small gap where the top meets, do not panic. A tiny leftover sliver of shim can cover it neatly, and a star topper can hide almost anything except poor holiday manners.
Step 3: Add the Trunk and Base
Now it is time to give your tree a trunk and a little structure. Glue two short shim pieces together for the trunk if you want a thicker look. Attach that to the bottom center of your tree shape and let it dry. For a freestanding version, use a couple of small cut shim pieces as stabilizing feet or a flat base piece underneath.
This is the stage where measuring matters a bit more. You want the tree to stand fairly straight rather than leaning dramatically like it has had one too many holiday punch refills. Check the balance before the glue fully cures.
If you are making a set, vary the heights slightly. A trio of wood shim Christmas trees in different sizes looks far more intentional and styled than three identical little soldiers lined up on a shelf.
Step 4: Sand for a Smoother Finish
Once the glue is dry, give the tree a light sanding. This helps remove splinters, soften rough edges, and prepare the surface for paint or stain. Hand sanding is usually enough for a small, detailed craft like this. Focus especially on the edges, the top point, and any glue spots that dried where they were not invited.
Wipe away the dust with a dry cloth or slightly damp rag. Skipping this step is how you end up painting over sawdust and calling the texture “intentional.” Let’s not do that.
Step 5: Choose Your Finish
This is where your wood shim Christmas tree starts showing its personality.
Option 1: Paint it
Paint is the easiest way to make your tree look cheerful and polished. Green is classic, white is farmhouse-friendly, and soft blush, sage, navy, or metallic gold can look surprisingly chic. Apply thin coats and let each one dry before adding another. If you want a distressed finish, sand lightly after the paint dries so a bit of the wood peeks through.
Option 2: Stain it
Staining gives the tree a warmer, more natural look. If you like rustic Christmas decor, this is the move. Sand first so the stain absorbs more evenly, then brush or wipe it on with the grain. Wipe off any extra stain and let the wood dry completely before decorating.
Option 3: Decoupage it
If “cute” is the keyword, decoupage deserves serious attention. Scrapbook paper, sheet music, old book pages, wrapping paper, or festive napkins can transform a basic tree into something special. Brush a layer of decoupage medium onto the wood, place your paper, smooth it carefully, and add another light coat on top once it is set. Use wax paper or a clean sheet on top when smoothing so your decorative paper does not wrinkle or tear under pressure.
How to Make Your Wood Shim Tree Extra Cute
The structure matters, but the details are where the magic lives. Here are a few ideas that can take your DIY Christmas tree from “nice little craft” to “why do I suddenly need six of these?”
Buttons and beads
Glue on small buttons as ornaments. Mix sizes for a playful look. Tiny wood beads also work beautifully for a Scandinavian-style tree.
Ribbon garland
Wrap narrow ribbon, rickrack, or twine loosely around the tree like garland. This works especially well on painted trees.
Mini star topper
A small wooden star, metal ornament, or glitter foam star instantly finishes the top. It is amazing how one tiny topper can make the whole thing look complete.
Snowy accents
Dry-brush white paint on the edges or dab on a little faux snow for that frosted, wintry look. Go lightly unless you want your tree to look like it got caught in a powdered sugar incident.
Layered paper backgrounds
If your tree design has open space or a shadow-box feel, backing it with scrapbook paper can add color and depth without requiring complicated techniques.
Where to Display Your DIY Wood Shim Christmas Tree
One of the best things about this craft is that it works almost anywhere. Set one on a mantel, bookshelf, console table, coffee bar, kitchen counter, entryway table, or holiday centerpiece. Make a few in different sizes and group them together with candles, pinecones, and fairy lights for a mini forest effect.
They also make lovely handmade gifts. Tie a ribbon around the trunk, attach a gift tag, and suddenly you look like the thoughtful person who definitely planned ahead instead of panic-crafting two nights before the party.
Common Mistakes to Avoid
Even easy Christmas crafts can wander off course. Here are the most common issues and how to avoid them:
- Skipping the dry fit: Always lay out your shims before gluing. It saves time and frustration.
- Using too much glue: A thin bead is enough. Extra glue just creates cleanup and uneven edges.
- Not sanding: A quick sanding makes paint, stain, and handling much better.
- Decorating too soon: Let glue and paint dry properly or your embellishments may slide around like they are auditioning for chaos.
- Overloading the front: A few thoughtful decorations usually look cuter than attaching every festive object within reach.
Final Thoughts
If you are looking for a Christmas craft that is inexpensive, charming, easy to customize, and actually fun to make, a cute DIY Christmas tree out of wood shims is a winner. It has that sweet spot every great holiday project needs: simple enough for beginners, stylish enough for adults, and flexible enough to match almost any decor style.
You can keep it rustic, make it colorful, add a vintage paper finish, or create an entire forest of tiny trees in one afternoon. However you style it, the result feels handmade in the best possible way. Not messy. Not overcomplicated. Just festive, creative, and delightfully clever.
So the next time you pass a bundle of wood shims, do not just think “door project.” Think “adorable tabletop Christmas tree that looks far more expensive than it is.” That, my friend, is holiday crafting at its finest.
My Experience Making Wood Shim Christmas Trees
One of the most surprising things about making a wood shim Christmas tree is how quickly the project stops feeling like “just a craft” and starts feeling like a holiday ritual. The first time you make one, you are mostly focused on the mechanics. Are the sides even? Is the glue drying? Why does one shim suddenly look more dramatic than the others? But after the basic shape comes together, the whole project becomes much more relaxed and enjoyable.
That is the real charm of this kind of Christmas decor. It does not ask for perfection. In fact, tiny imperfections often make the finished tree more lovable. A slightly uneven edge can look rustic. A brushstroke left visible in the paint can make it feel handmade in a warm, intentional way. Even mismatched buttons or scraps of paper can add character. It is one of those rare DIY projects where “not factory perfect” is actually part of the appeal.
Another thing people tend to notice after making a few of these trees is how easy they are to personalize for different spaces. A whitewashed version with twine and a wood bead star can feel calm and minimal on a bookshelf. A green-painted one with tiny red buttons can look cheerful and traditional on a mantel. A neutral stained tree with old book pages or music paper can lean vintage and cozy. You can make one style for your own home and a completely different style as a gift without changing the basic construction at all.
There is also something very satisfying about using simple materials in a creative way. Wood shims are not glamorous. No one has ever gasped dramatically in a hardware aisle and whispered, “Behold, the romance of shims.” But when those plain, tapered pieces turn into a festive Christmas tree, the project feels a little magical. It is a reminder that good holiday decor does not have to be expensive or complicated. Sometimes it is just about seeing ordinary materials differently.
If you are crafting with family or friends, this project works especially well because everyone can make the same shape but end up with a completely different result. One person can go rustic, another can go sparkly, another can cover theirs in tiny ornaments like the tree is competing for attention at a very festive talent show. It is easy enough for a casual crafting night, but the finished trees still look polished enough to display all season.
What stands out most, though, is how these little trees create atmosphere. A single wood shim tree tucked into a corner adds a handmade touch. Three or five arranged together create a cozy holiday scene. Add pinecones, warm lights, or a small garland, and suddenly the display feels thoughtful and complete. It is the kind of decor that quietly makes a room feel more cheerful without screaming for attention.
That is probably why so many people end up making more than one. The first tree teaches you the process. The second lets you play. By the third, you are fully convinced you need a whole tiny forest. And honestly? You probably do.