There are two kinds of seasonal decorators: the people who own seventeen bins labeled “Fall, But Make It Cozy,” and the people who suddenly remember October exists three days before guests arrive. Luckily, festive paper pumpkin light accents are perfect for both groups. They look charming, cost very little, and bring that warm autumn glow without requiring you to carve a real pumpkin, wrestle with pumpkin guts, or explain why there are seeds stuck to the dog.
This simple paper pumpkin craft blends the cheerful shape of a pumpkin with the soft sparkle of battery-operated lights. The result is a lightweight, customizable accent that works for Halloween parties, Thanksgiving tables, fall mantels, classroom displays, entryway décor, or cozy weekend crafting. Even better, you can make several in different sizes and colors to create a glowing pumpkin patch indoors.
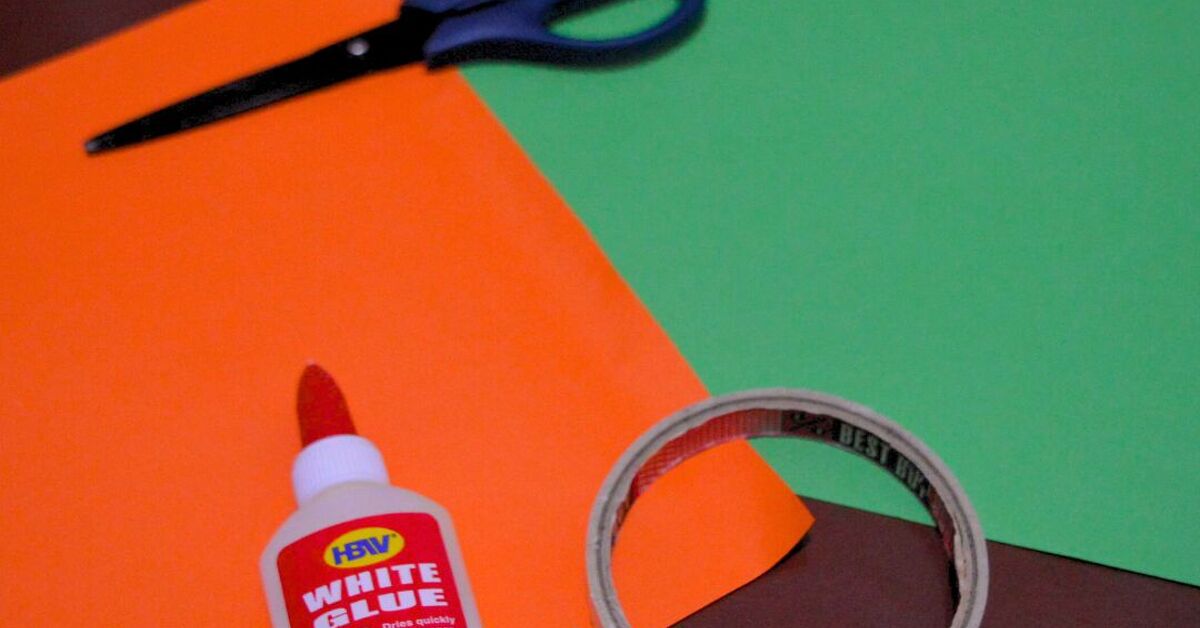
The best part? This project uses basic supplies: cardstock, scissors, glue, and LED tea lights or mini fairy lights. No advanced crafting degree required. If you can cut paper strips and keep your glue stick from mysteriously disappearing, you are fully qualified.
Why Paper Pumpkin Light Accents Are Perfect for Seasonal Décor
Paper pumpkins have become popular because they offer the look of fall décor without the mess, weight, or short shelf life of real pumpkins. Real pumpkins are wonderful, of course, but they eventually become less “harvest centerpiece” and more “science experiment by the front door.” Paper pumpkins, on the other hand, can be folded flat, stored, and reused if handled carefully.
Adding lights makes them feel more special. A simple pumpkin shape becomes a glowing accent for a shelf, side table, buffet, windowsill, or covered porch display. The light shines through small cutouts, vellum panels, or the spaces between paper strips, creating a soft lantern effect. For safety, this project should use battery-operated LED lights only, not real candles. Paper and open flames are not friends; they are a tiny drama waiting to happen.
Materials You’ll Need
Before you start, gather your supplies so the crafting session feels relaxed instead of turning into a scavenger hunt. You can make one medium pumpkin or prepare enough supplies for a whole glowing patch.
- Orange cardstock, scrapbook paper, or heavyweight construction paper
- Green cardstock or felt for leaves
- Brown cardstock, kraft paper, or a small paper tube for the stem
- Battery-operated LED tea light or short battery fairy light strand
- Scissors or a craft knife with adult supervision
- Ruler
- Pencil
- Hole punch, optional
- Glue dots, tacky glue, double-sided tape, or hot glue
- Twine, ribbon, raffia, or floral wire for decoration
- Small piece of vellum or tissue paper, optional, for a softer glow
Choosing the Right Paper
Cardstock is the easiest choice because it holds its shape well. Scrapbook paper adds pattern and personality, especially if you want plaid pumpkins, vintage florals, polka dots, or a modern neutral palette. Construction paper works for kids’ crafts, but it may bend more easily. If you want a pumpkin that lasts through the season, choose paper that feels sturdy but still bends without cracking.
Choosing the Right Light
Use LED tea lights for a classic flickering glow. Choose fairy lights if you want the pumpkin to sparkle through several openings. Warm white lights create a cozy harvest look, while orange lights feel more Halloween-ready. Avoid plug-in lights inside small paper crafts unless the product is clearly intended for that use and can remain cool. Battery lights are easier, safer, and less bossy about outlet placement.
7-Step Craft: How to Make Festive Paper Pumpkin Light Accents
This version uses curved paper strips to form a rounded pumpkin. It is simple enough for beginners but polished enough to use as real seasonal décor. Once you learn the basic technique, you can customize the size, color, face, cutouts, and lighting style.
Step 1: Cut the Paper Strips
Start by cutting orange cardstock into strips. For one medium pumpkin, cut 10 to 14 strips measuring about 1 inch wide and 8 to 10 inches long. Longer strips create a taller, rounder pumpkin. Shorter strips create a squat, cute pumpkin that looks like it belongs in a fall children’s book.
Try to keep the strips even, but do not panic if they are not perfect. Pumpkins in nature are lumpy little characters, so a handmade pumpkin with slight variations looks charming rather than flawed. That is the official crafter’s excuse, and we are using it proudly.
Step 2: Punch or Mark the Ends
Stack the paper strips together and punch a small hole near both ends of each strip. If you do not have a hole punch, mark the center of each end with a pencil and use a paper fastener, needle, or small craft brad to guide your assembly. The holes help the strips fan out evenly.
You can also skip holes and glue the strips directly at the top and bottom, but holes make the shape easier to control. If kids are helping, pre-punching the strips makes the project smoother and reduces the chance of someone declaring war on the hole punch.
Step 3: Form the Pumpkin Base
Line up one end of all the strips and secure them with a small brad, glue dot, or strong tape. Then bend the opposite ends upward and secure them together to create a curved oval shape. The strips should bow outward, forming the pumpkin body.
Once the top and bottom are connected, gently spread the strips around the center like the ribs of a pumpkin. Adjust the spacing until the shape looks full. If one strip sticks out like it has big dreams of becoming a handle, simply tuck it back into place.
Step 4: Add the LED Light
Place a battery-operated LED tea light inside the pumpkin before closing the final opening completely. If you are using fairy lights, coil the strand loosely and place the battery pack behind or under the pumpkin where it is easy to reach. Do not bury the switch under layers of glue unless you enjoy future frustration as a hobby.
For a softer lantern effect, place a small piece of vellum or orange tissue paper inside the pumpkin. This helps diffuse the light and makes the glow feel warmer. Make sure the material does not press tightly against the bulb area, even with LEDs, and always check that your lights stay cool during use.
Step 5: Create the Stem
Roll a small rectangle of brown cardstock into a tube and glue it closed. You can also use a piece of kraft paper, a short section from a paper straw, or a small twisted paper bag strip. Attach the stem to the top of the pumpkin with tacky glue or hot glue.
For a rustic look, wrap the stem with twine or raffia. For a whimsical look, curl a thin strip of green paper around a pencil to create a vine. A tiny detail like this makes the pumpkin feel finished rather than “I made this during a commercial break.”
Step 6: Add Leaves, Faces, or Cutout Details
Cut leaves from green cardstock, felt, or patterned paper and glue them near the stem. If you want Halloween paper pumpkin lights, add a jack-o’-lantern face using black cardstock triangles and a toothy grin. For fall décor that lasts through Thanksgiving, skip the face and use elegant leaves, vines, gold accents, or plaid paper.
You can also cut small stars, moons, dots, or leaf shapes into the paper strips before assembly. These openings allow more light to shine through. Keep cutouts simple and leave enough paper around each shape so the strips remain strong.
Step 7: Style and Display Your Paper Pumpkin Light Accents
Turn on the LED light and place your pumpkin where it can glow safely. A mantel, bookshelf, dining table, entry console, windowsill, or party dessert table are all excellent spots. Group several pumpkins together in different heights for a fuller seasonal display.
For a harvest centerpiece, set the pumpkins on a wooden tray with faux leaves, pinecones, mini gourds, and a strip of burlap. For Halloween, pair them with paper bats, black candlesticks with flameless candles, and a few not-too-serious ghosts. For Thanksgiving, use cream, copper, rust, and sage green papers to create a softer autumn palette.
Design Variations to Try
Classic Orange Pumpkin Lanterns
The traditional orange pumpkin is cheerful, bright, and instantly recognizable. Use solid orange cardstock and a warm LED tea light for the most familiar look. This style works beautifully for kids’ craft tables, classroom décor, and family-friendly Halloween displays.
Neutral Farmhouse Pumpkins
If your home leans cozy farmhouse, try ivory, kraft, tan, or muted pumpkin spice paper. Add jute twine, dried leaves, and wooden beads. The glow will feel softer and more grown-up, like your pumpkin drinks chai and owns linen napkins.
Glam Metallic Paper Pumpkins
Gold, copper, bronze, and pearl cardstock turn this humble craft into party-worthy décor. Metallic paper reflects LED light beautifully, especially in dim rooms. Use these pumpkins for fall dinner parties, Halloween cocktail tables, or Thanksgiving buffets.
Patterned Scrapbook Paper Pumpkins
Scrapbook paper gives every pumpkin a different personality. Plaid feels classic, gingham feels sweet, florals feel vintage, and black-and-white patterns feel modern. Just make sure the paper is sturdy enough to hold its rounded shape.
Safety Tips for Paper Pumpkin Light Décor
Because this craft uses paper, safety matters. Always use battery-operated LED lights, never real candles. Keep paper pumpkins away from fireplaces, stovetops, heaters, hot bulbs, and any other heat source. If you display them near curtains, table runners, dried leaves, or other decorations, leave enough space so nothing gets crowded around the light source.
Check LED lights before placing them inside the pumpkin. They should stay cool to the touch. Turn lights off when leaving the room for a long period, going to bed, or packing the décor away. If children are making these pumpkins, supervise cutting tools, hot glue, batteries, and small decorative pieces.
Where to Use Festive Paper Pumpkin Light Accents
These pumpkins are flexible because they are lightweight and easy to customize. You can use them almost anywhere indoors. Place a row along a mantel for a glowing fall garland effect. Add one to each place setting for a handmade dinner party favor. Cluster them on a coffee table with books and faux leaves. Tuck a few into a Halloween party snack station so the chips and cupcakes get the dramatic lighting they deserve.
They also work well for classrooms, offices, dorm rooms, and small apartments because they do not require carving tools, messy cleanup, or much storage space. If you are decorating a rental, paper pumpkins are a friendly option because they do not damage walls or surfaces when displayed properly.
How to Make the Craft Look More Expensive
The secret to making paper crafts look polished is consistency. Choose a color palette before you start. Three colors are usually enough: one main pumpkin color, one accent color, and one neutral. For example, try burnt orange, cream, and gold; or black, copper, and ivory; or sage, rust, and kraft brown.
Use clean cuts, hide glue marks, and repeat a few materials across the display. If every pumpkin has the same twine stem or matching leaf shape, the group looks intentional. Add height by placing some pumpkins on cake stands, stacked books, or wooden risers. A little elevation can turn a basic craft into a styled seasonal vignette.
Common Mistakes and Easy Fixes
The Pumpkin Looks Flat
Add more strips or use slightly shorter strips for a rounder shape. Spread the strips evenly around the center and gently bend them outward with your fingers.
The Paper Buckles
The paper may be too thin or the strips may be too long. Try cardstock instead of construction paper, or reduce the strip length by an inch.
The Light Is Too Bright
Add a small vellum insert or use a warm white LED instead of a bright white one. Soft light usually looks more seasonal and less like your pumpkin is about to give a presentation.
The Pumpkin Keeps Rolling
Flatten the bottom slightly or glue the pumpkin to a small cardstock circle. You can also place it in a shallow tray with leaves or moss to keep it steady.
Extra Experience: What Making Paper Pumpkin Light Accents Teaches You
After making a few festive paper pumpkin light accents, you start to notice something funny: the first pumpkin is the “learning pumpkin,” the second one is the “okay, now I understand” pumpkin, and the third one is when you begin acting like you run a boutique fall décor studio out of your kitchen. This is the natural life cycle of seasonal crafting.
One of the most useful lessons from this project is that simple materials can create a surprisingly strong visual impact. A few strips of cardstock do not look impressive on the table. They look like homework with ambition. But once they are curved, layered, and lit from within, they suddenly become charming seasonal accents. That transformation is what makes paper crafting so satisfying. You see progress quickly, and the finished piece feels personal.
This craft also teaches the value of planning before gluing. Choosing the paper color, light style, and display location ahead of time helps the final pumpkin fit your home. A pumpkin made from neon orange paper with a silly jack-o’-lantern face is perfect for a kids’ Halloween party. The same shape made from ivory cardstock with gold leaves can sit comfortably on a Thanksgiving table. The technique stays the same, but the mood changes completely.
Another experience worth mentioning is how forgiving the project is. Unlike sewing, woodworking, or complicated floral arranging, paper pumpkins allow plenty of small mistakes. If a strip bends oddly, you can replace it. If a leaf looks too big, trim it. If the face looks unintentionally chaotic, congratulations, you have created a Halloween pumpkin with personality. Handmade décor should not look machine-perfect. A little irregularity gives it warmth.
For families, this project becomes more than decoration. Kids can choose paper colors, punch holes, glue leaves, and decide whether the pumpkin should be spooky, cute, fancy, or “a pumpkin who has seen things.” Adults can handle cutting, hot glue, and light placement. The result is a craft that encourages creativity without turning the house into a glitter emergency. Although, if glitter enters the room, it will remain in your life until approximately 2047.
If you are making these for a party, the experience is even better when you create a small assembly station. Pre-cut the strips, set out leaves and stems, and let guests build their own glowing pumpkins. It becomes an activity and a take-home favor in one. For classrooms or community events, the same idea works beautifully with safe scissors, glue sticks, and pre-approved LED tea lights.
The display process is part of the fun, too. Paper pumpkin lights look best in groups. One pumpkin is cute, but three or five create rhythm and fullness. Mix sizes for a more natural look. Place taller pumpkins in the back, smaller ones in front, and scatter leaves around the base. When the room lights dim, the little glowing shapes feel festive without being overwhelming.
Finally, this craft reminds us that seasonal decorating does not have to be expensive or complicated. You do not need a cart full of new decorations every year. A thoughtful handmade accent can refresh a room just as well as store-bought décor. It adds story, texture, and that small proud feeling of saying, “I made that,” while pretending it only took ten minutes.
Conclusion
Festive paper pumpkin light accents are a delightful way to bring warmth, creativity, and seasonal charm into your home. They are affordable, beginner-friendly, and easy to adapt for Halloween, Thanksgiving, fall parties, classrooms, or cozy everyday décor. With cardstock, a safe LED light, and a little imagination, you can create glowing pumpkins that feel handmade in the best possible way.
Whether you choose classic orange, rustic neutrals, metallic glam, or playful patterned paper, this 7-step craft gives you a flexible foundation for beautiful seasonal decorating. Make one for a small shelf, a dozen for a party table, or a whole glowing patch for your mantel. Just remember the golden rule: paper pumpkins love LED lights, not real flames. Keep it safe, keep it cozy, and let your autumn décor glow.