Note: This article is written for beginners and DIY leathercrafters who want a clean, durable snap closure without turning a perfectly good leather project into a tiny battlefield.
Adding a snap to leather sounds simple: make a hole, place the hardware, give it a confident tap, and enjoy your new closure. In real life, the first attempt can feel more like negotiating with a stubborn metal mushroom. The cap tilts, the post bends, the snap refuses to snap, and suddenly your handmade wallet is judging you from the workbench.
The good news? Learning how to add a snap to leather is not difficult once you understand the parts, the tools, and the small details that make the difference between “professional leathercraft” and “why is this button sideways?” Whether you are making a leather wallet, bracelet, bag flap, key holder, journal cover, belt loop, pouch, or repair project, snap fasteners are among the most useful closures in leatherwork.
This guide breaks the process into nine beginner-friendly steps, explains how to choose the right snap size, and shares practical experience from real leathercraft habits: testing on scrap, matching post length to leather thickness, setting on a solid surface, and avoiding the classic mistake of smashing the snap like you are ringing a carnival bell.
What Is a Leather Snap?
A leather snap is a small mechanical fastener that creates a press-and-release closure. Most common leather snaps are made from four parts: a cap, a socket, a stud, and a post or eyelet. The cap and socket form one side of the snap, while the stud and post form the other side. When pressed together, the socket grips the stud and creates that satisfying little “click” leatherworkers secretly live for.
Common snap sizes include Line 20 and Line 24. Line 20 snaps are often used for lighter leather projects such as wallets, bracelets, notebook covers, small pouches, and decorative closures. Line 24 snaps are larger and stronger, making them a better fit for thicker leather, bags, belts, straps, and outdoor-style gear. The best snap is not always the biggest one. It is the one that matches the thickness, purpose, and style of your leather project.
Tools and Materials You Need
Before you start, gather the right tools. Leather is forgiving in some ways, but hardware holes are not exactly famous for their “undo” button.
Basic supplies
- Leather project or leather scrap for practice
- Snap fastener set with cap, socket, stud, and post
- Snap setter that matches your snap size
- Concave anvil or snap-setting base
- Hole punch, rotary punch, drive punch, or awl
- Rawhide, nylon, poly, or rubber mallet
- Cutting mat or poundo board
- Ruler or measuring tape
- Scratch awl, silver pen, or pencil for marking
- Scrap leather for testing
A dedicated hand press can make snap installation more consistent, especially if you plan to set many snaps. However, a basic setter, anvil, and mallet are enough for many beginner leather projects. The key is control, not brute force.
How to Add a Snap to Leather: 9 Steps
Step 1: Choose the Right Snap for Your Leather
Start by matching the snap to your leather thickness and project type. A lightweight bracelet does not need a heavy Line 24 snap, and a thick bag strap may laugh quietly at a tiny lightweight snap. For many small leather goods, Line 20 snaps work well. For heavier straps, flaps, and rugged closures, Line 24 snaps are often the better choice.
Pay close attention to the post length. The post must pass through the leather and still have enough height to roll over securely when set. If the post is too short, the snap will not lock properly. If it is too long, it may bend, collapse, distort the cap, or create a loose closure. As a practical rule, the post should rise slightly above the leather before setting, but not tower over it like a tiny metal skyscraper.
Step 2: Decide Where the Snap Should Go
Place your leather pieces together exactly as they will sit when the snap is closed. This is especially important for wallets, straps, purse flaps, and folded leather pieces. If the top and bottom snap positions do not align, the closure may pull crooked or refuse to close neatly.
Use a ruler to center the snap and keep it balanced. On a flap, position the snap far enough from the edge so the leather will not tear under pressure. A snap placed too close to the edge may look fine at first, but after repeated opening and closing, the leather can stretch, weaken, or crack around the hole.
For a professional look, mark the center point lightly with a scratch awl or leather-safe marking pen. Avoid using a dark pen on light leather unless you enjoy permanent reminders of your measuring adventure.
Step 3: Mark Both Sides of the Closure
Once the first mark is placed, mark the matching point on the second piece of leather. You can do this by folding the project into its finished position and pressing lightly where the snap should meet. Another option is to install the first side, add a tiny dab of chalk or removable marker to the snap, close the flap, and let it transfer the mark.
The goal is simple: the cap-and-socket side should meet the stud-and-post side directly. Even a small offset can make the closure feel awkward. On soft leather, misalignment can also create wrinkles around the snap because the leather is being pulled sideways every time it closes.
Step 4: Punch a Clean Hole
Place the leather on a cutting mat, poundo board, or scrap surface. Use a hole punch that matches the snap post. The hole should be just large enough for the post to pass through without forcing it. If the hole is too small, the post may bend during setting. If the hole is too large, the snap may wobble or pull through over time.
A rotary punch is convenient for thin to medium leather. A drive punch and mallet often make cleaner holes in thicker vegetable-tanned leather. Keep the punch vertical and strike firmly. A clean round hole gives the snap a better seat and creates a neater finished look.
Do not cut an oversized hole with scissors unless you have no other option. Leather snaps need support around the post. A ragged hole can weaken the area and make the hardware look sloppy. The snap should be snug, not strangled and not swimming.
Step 5: Install the Cap and Socket Side
The cap is the visible decorative top of the snap. Push the cap post through the hole from the finished side of the leather. Then place the socket over the post on the back side. Make sure the socket faces the correct direction so it can receive the stud later.
Set the cap into the concave side of the anvil. The concave shape supports the curved cap and helps prevent flattening or scratching. Place the setter into the socket and hold it straight up and down. If the setter leans, the post may roll unevenly, and your snap may end up looking like it had a rough Monday.
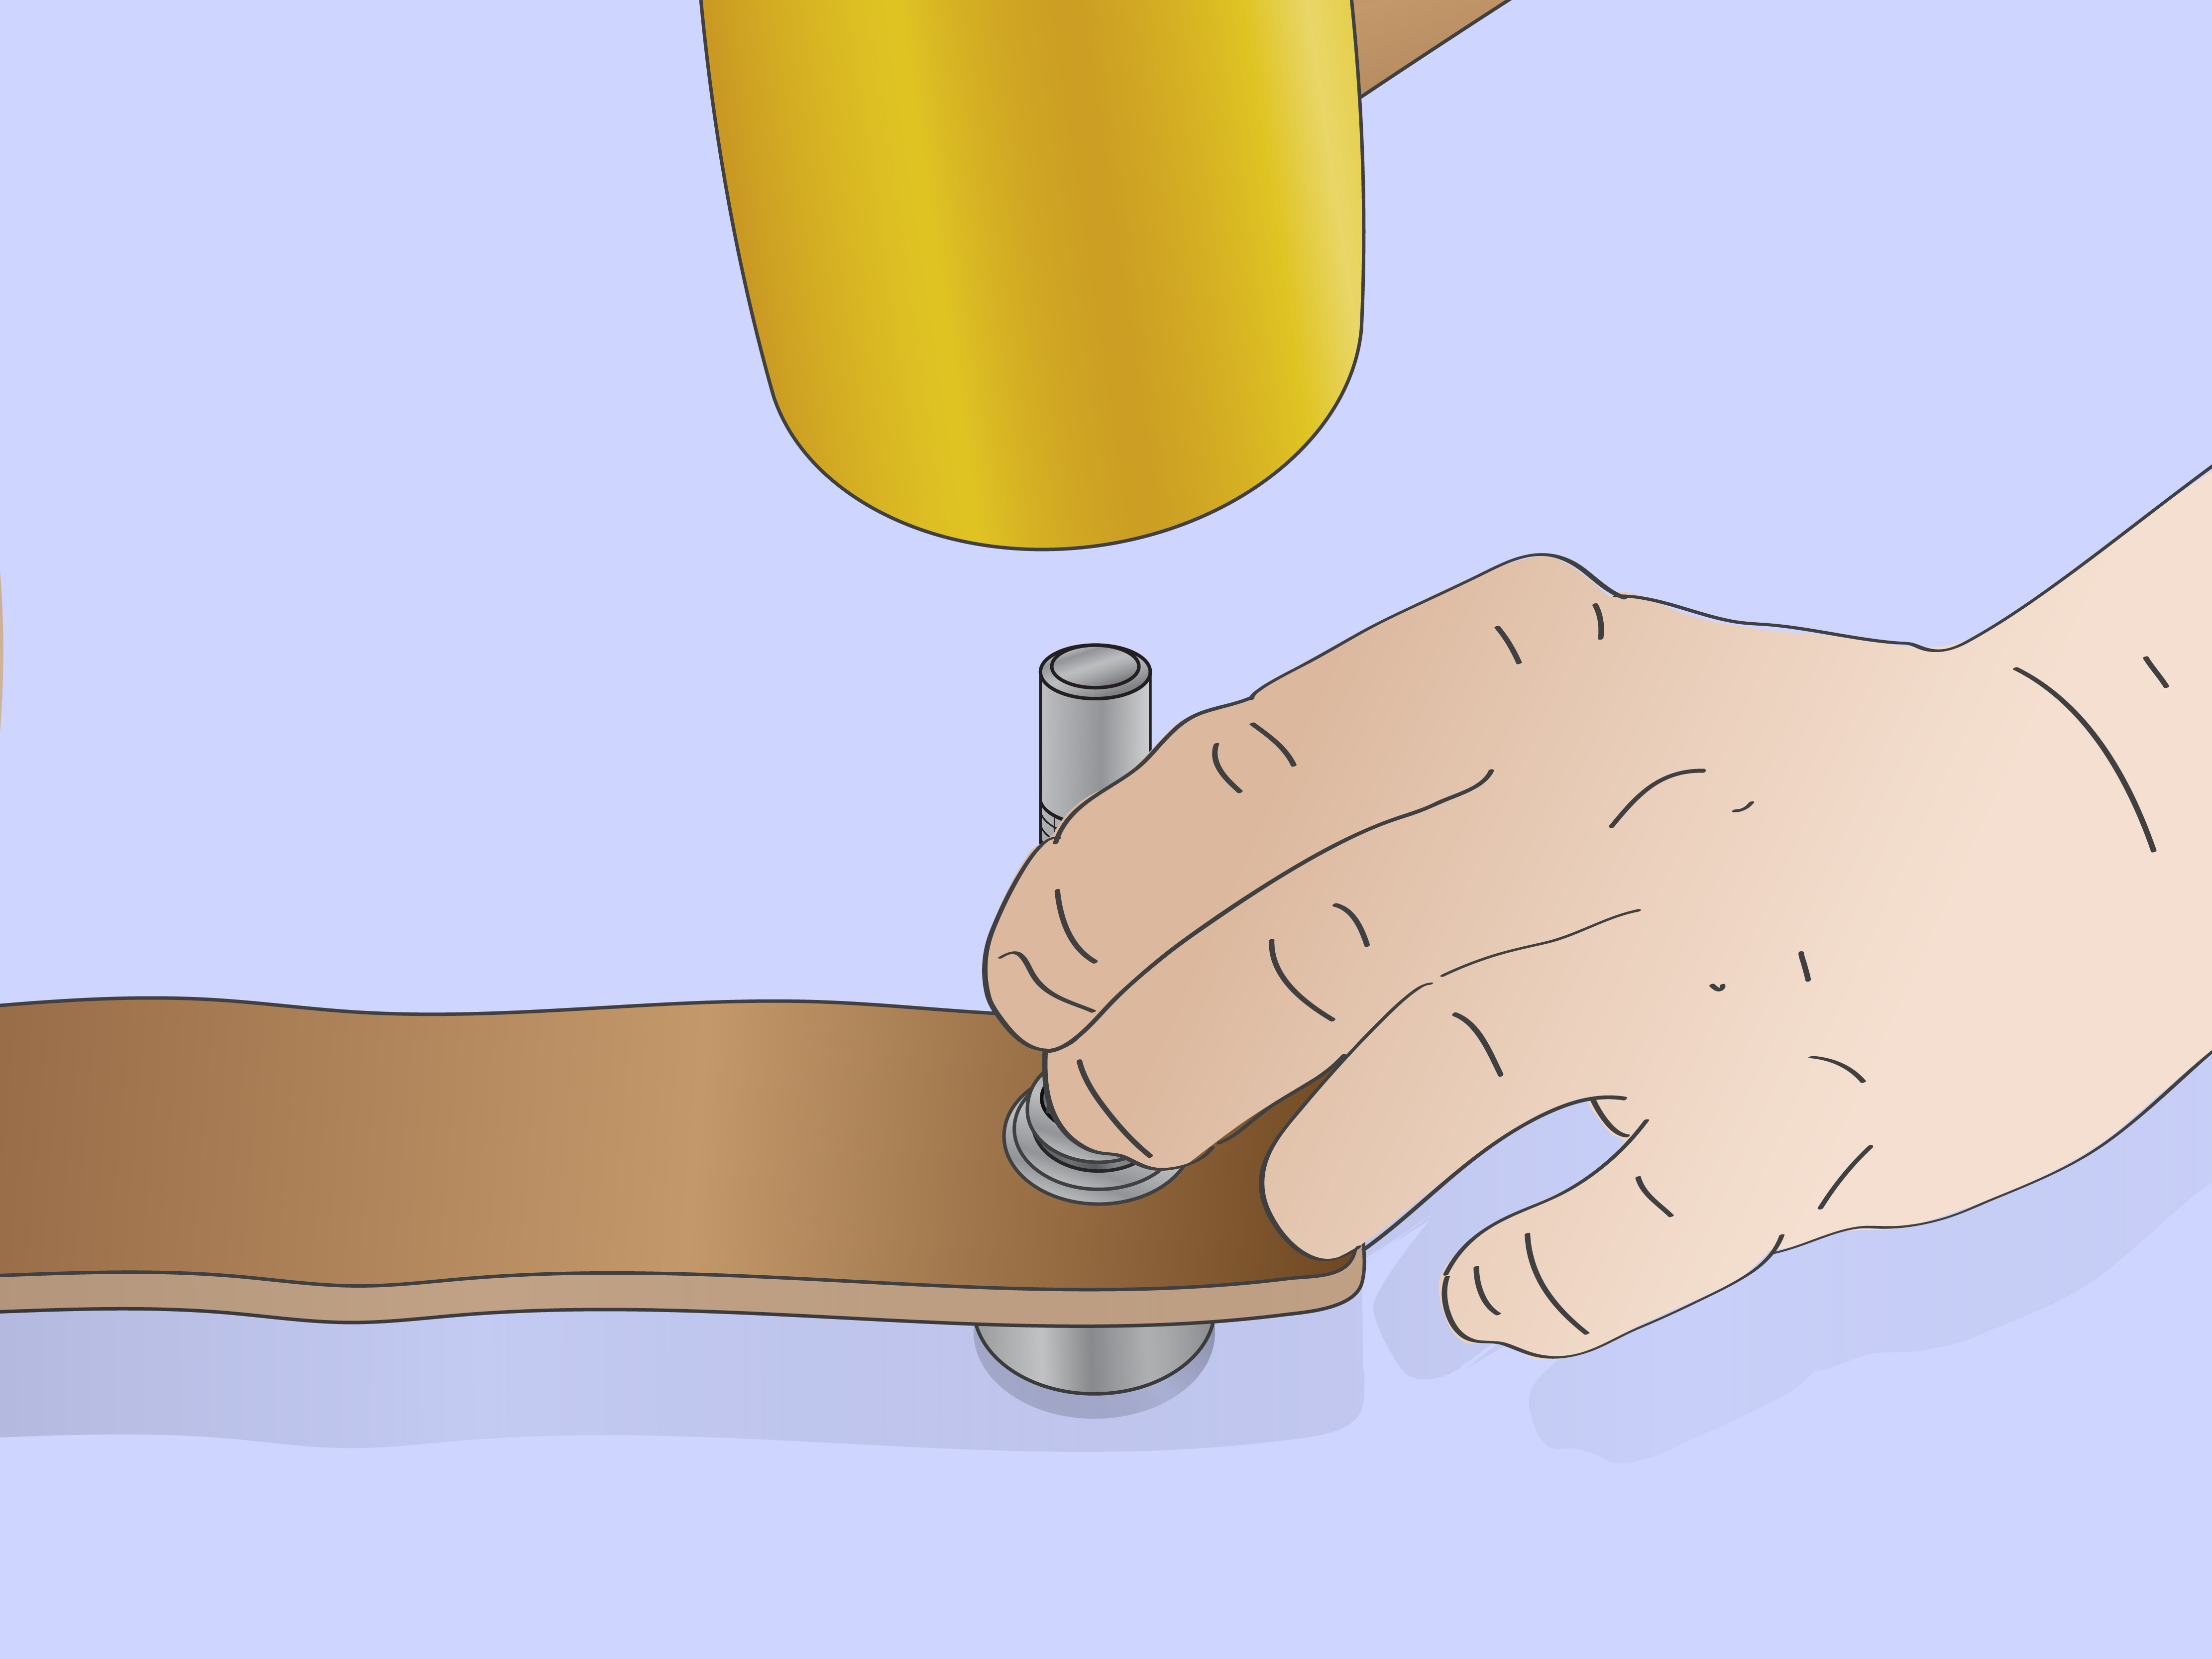
Tap the setter with a mallet using controlled strikes. You are not trying to demolish the snap. You are rolling or flaring the post so it grips the socket firmly. Check the hardware after a few taps. It should be tight, centered, and smooth.
Step 6: Install the Stud and Post Side
Now move to the second piece of leather. Insert the post or eyelet through the hole from the back side, depending on your snap design. Place the stud on top. The raised part of the stud should face outward so it can click into the socket.
Position the hardware on the anvil according to your setter’s instructions. Again, keep the setter vertical and use controlled taps. The goal is a firm set without crushing the stud. Once installed, the stud should not spin loosely, tilt, or pull away from the leather.
If you are working with soft leather, consider adding a small reinforcement patch behind the snap area. This helps distribute pressure and prevents the snap from stretching the leather over time.
Step 7: Test the Snap Closure
Press the two sides together. A properly installed snap should close with a crisp click and open with firm but reasonable pressure. If it closes too loosely, the parts may be mismatched, weak, or poorly set. If it takes superhero-level effort to open, the snap may be too heavy for the project or installed too tightly.
Open and close the snap several times. Watch the leather around the hardware. It should not twist, wrinkle badly, or pull out of shape. If the leather strains, the snap position may be off, or the snap may be too strong for that leather thickness.
Step 8: Fix Small Problems Before They Become Big Ones
If the snap is crooked but still functional, you may decide to leave it on a practice piece. On a finished project, however, a crooked snap can cause uneven wear. If the snap is loose, tilted, crushed, or will not close, it is usually better to remove it and install a new one.
To remove a bad snap, carefully lift or cut the rolled post from the back side using small pliers, end nippers, or a careful drilling method. Work slowly so you do not tear the leather. Once the old hardware is removed, inspect the hole. If it is stretched or damaged, you may need a slightly larger snap, a reinforcement patch, or a new location.
Common problems include bent posts, flattened caps, loose sockets, and snaps that pop open too easily. Most of these issues come from one of three causes: wrong post length, misaligned tools, or too much force.
Step 9: Finish and Condition the Leather
After the snap is installed and tested, clean up the leather surface. Brush away dust from punching, smooth any compressed fibers, and check that no sharp metal edges remain. If the project needs finishing, apply leather conditioner, edge finish, wax, or protective treatment according to the leather type.
Do not soak the snap area with conditioner. A light application is usually enough. Too much oil or conditioner can soften some leathers and reduce the support around the snap. The hardware should feel secure, the closure should sit flat, and the final result should look intentional rather than accidental.
Choosing Between Line 20 and Line 24 Snaps
Line 20 snaps are commonly used for small to medium leather goods. They are less bulky and often look more balanced on thin leather. They are a good choice for leather bracelets, minimalist wallets, small pouches, coin purses, notebook covers, and light bag pockets.
Line 24 snaps are larger and stronger. They work well on thicker leather and projects that need a more secure closure, such as bag flaps, belt loops, tool pouches, outdoor gear, and heavier straps. However, a Line 24 snap on thin leather can feel oversized and may require more force than the project can comfortably handle.
When in doubt, test both sizes on scrap pieces that match the same leather thickness and layers as your project. The test piece will tell you more than a product description ever could. Leather has a way of being honest, sometimes brutally.
Common Mistakes to Avoid
Using the wrong hole size
A hole that is too large weakens the snap area. A hole that is too small can bend the post. Punch a clean, snug hole that allows the post to pass through without forcing it.
Hammering too hard
Heavy blows can flatten the cap, bend the post, or crush the snap mechanism. Use several controlled taps instead of one dramatic strike. This is leathercraft, not a strength test at the county fair.
Setting on a weak surface
A wobbly table absorbs impact and causes uneven setting. Work on a solid bench, granite slab, anvil block, or sturdy surface that gives the setter proper support.
Forgetting to test on scrap
Always test the snap on scrap leather first, especially if you are using new hardware, a new setter, or a new leather thickness. A test snap costs pennies. A ruined finished project costs patience, dignity, and possibly snacks.
Mixing incompatible snap parts
Not all snap parts from different brands or sizes work well together. Mixing caps, sockets, studs, and posts can lead to loose closures or snaps that refuse to lock. Keep snap sets together whenever possible.
Best Leather Projects for Snap Fasteners
Snaps are useful because they combine convenience, strength, and style. They are easier to open than buckles and more durable than many adhesives or hook-and-loop closures. They also add a clean hardware detail that can make a handmade project look more finished.
Great projects for leather snaps include:
- Leather wallets with snap closures
- Coin pouches and small cases
- Bracelets and cuffs
- Messenger bag flaps
- Leather journal covers
- Key holders and cable organizers
- Tool rolls and utility pouches
- Card holders with fold-over flaps
- Decorative straps and tabs
For projects that will be opened often, choose high-quality hardware. Cheap snaps may work for decorative use, but frequent pulling can expose weak springs, thin plating, or poorly formed posts. Quality hardware is one of those tiny details that quietly upgrades the whole project.
Safety Tips for Setting Snaps in Leather
Leather tools are simple, but they deserve respect. Keep fingers away from the punch and setter. Use a stable work surface. Wear eye protection if you are striking metal tools, especially when removing old snaps or using a drive punch. Keep your non-striking hand clear of the mallet path because thumbs are useful and surprisingly bad at being anvils.
If you are younger or new to tools, ask an experienced adult to help with punching and striking. The process is not complicated, but clean hardware installation depends on steady hands, safe tool placement, and a little patience.
Extra Experience: What I Learned from Adding Snaps to Leather Projects
The first big lesson about adding snaps to leather is that the snap does not care how excited you are. It only cares about alignment, thickness, and pressure. Many beginners rush because the snap seems like the final tiny step after cutting, stitching, dyeing, and burnishing. But that tiny step sits right on the front of the project where everyone can see it. A crooked snap has excellent confidence. It will stand there proudly forever.
One of the best habits is to create a “hardware sandwich” test before touching the real project. Use the same leather, the same number of layers, and the same snap. If your bag flap uses two layers of 4-ounce leather, do not test on one thin scrap and assume the result will match. Leather thickness changes everything. The post length that works on one layer may be too short for two layers or too long for thin chrome-tanned leather.
Another experience-based tip is to mark snap locations after the project is folded or assembled, not only when the pieces are flat. Leather bends, shifts, and gains thickness when folded. A mark that looks perfectly centered on a flat pattern may land slightly off when the flap curves over a pocket. For wallets and pouches, close the project naturally, then mark the receiving side. This helps the snap close without twisting the leather.
Soft leather needs extra attention. Chrome-tanned leather, garment leather, and soft upholstery leather may stretch when a snap is pulled open. On these projects, a small reinforcement patch behind the snap can make a huge difference. The patch does not need to be bulky. Even a small circle or square of thin leather can give the snap more support and prevent the hole from widening over time.
With vegetable-tanned leather, the main challenge is usually thickness and firmness. A good clean hole is essential. If the punch is dull, the leather may compress instead of cutting cleanly. That creates a rough hole that grips the post unevenly. Sharpen or replace punches when they start making fuzzy holes. Your snaps will set better, and your workbench will hear fewer dramatic sighs.
Tool angle matters more than force. A snap setter that leans even slightly can roll the post to one side. Once the post starts bending sideways, extra hammering usually makes it worse. Hold the setter straight, use controlled taps, and check progress early. If the snap is almost set, one or two light finishing taps may be enough.
A hand press is worth considering if you install snaps often. It gives more control and repeatability than a mallet, especially for batches of bracelets, keychains, or bags. Still, a press is not magic. The dies must match the snap, the leather thickness still matters, and too much pressure can still distort hardware. Think of a press as a good assistant, not a wizard.
Finish choice also affects the final look. Nickel snaps can look clean and classic. Antique brass works beautifully with brown vegetable-tanned leather. Matte black snaps give a modern look, especially on black or dark brown leather. Brass and stainless options can be useful for durability, but they may require compatible setting tools and more care during installation.
Finally, never judge your leathercraft skills by one bad snap. Everyone who sets snaps eventually ruins a few. The trick is to ruin them on scrap first. Once you develop the feel for the right tap, the right post length, and the right hole size, adding snaps becomes one of the most satisfying parts of leatherwork. That clean click at the end feels like the project saying, “Yes, we are officially finished.”
Conclusion
Learning how to add a snap to leather is a practical skill that instantly improves your leather projects. The process is simple, but the details matter: choose the correct snap size, match the post length to the leather thickness, punch a clean hole, support the cap with an anvil, hold the setter straight, and use controlled force. Most snap problems come from rushing, guessing, or hitting too hard.
With a little practice on scrap leather, you can install snaps that look clean, close securely, and last through daily use. Whether you are making a wallet, bracelet, pouch, bag, or repair project, a well-set snap adds both function and polish. In leathercraft, small hardware details often make the biggest difference.