A well-organized kitchen should help you cook dinner, not force you to playyou do not need custom cabinetry, a professional organizer, or a collection of matching containers expensive enough to require their own insurance policy.
The most effective inexpensive kitchen organization ideas usually involve three simple moves: remove what you no longer use, give similar items a designated home, and turn overlooked spaces into practical storage. Cabinet doors, empty walls, drawer corners, and the narrow area beside the refrigerator can all work harder with a few affordable DIY upgrades.
The nine projects below are designed for real kitchens, including small apartments, rental homes, busy family kitchens, and spaces where the “pantry” is one crowded cabinet above the microwave. Most can be completed with dollar-store supplies, repurposed household materials, basic hardware, or leftover wood from another project.
Why Budget Kitchen Organization Works
Kitchen clutter is rarely caused by a complete lack of space. More often, the available space is divided poorly, filled with duplicate tools, or used for items that belong somewhere else. A deep cabinet may technically hold plenty, but it is not especially helpful when three forgotten cans of beans are hiding behind a slow cooker.
Before buying organizers, observe how you actually use the room. Everyday plates should be easy to reach. Coffee supplies should live near the coffee maker. Baking ingredients belong together instead of being scattered among five shelves like contestants in a scavenger hunt. An organizing system becomes sustainable when it follows your habits rather than fighting them.
1. Declutter First and Create Practical Kitchen Zones
Estimated cost: $0
Remove Before You Rearrange
The cheapest organizing tool is an empty cardboard box labeled “Donate.” Take everything out of one cabinet or drawer at a time. Remove broken utensils, lidless containers, duplicate gadgets, expired food, and specialty tools you have not used since enthusiasm briefly convinced you to become a professional avocado slicer.
Do not empty the entire kitchen at once unless you enjoy stepping over mixing bowls for six hours. Work in small sections so the project remains manageable.
Group Items by Activity
Once you know what is staying, create zones based on common kitchen tasks:
- A coffee zone with mugs, filters, beans, and sweeteners
- A baking zone with flour, sugar, measuring tools, and extracts
- A lunch-packing zone with containers, wraps, and snack bags
- A cooking zone with oils, frequently used spices, and utensils
- A cleaning zone with dish soap, towels, brushes, and trash bags
Store frequently used items between waist and eye level. Reserve high shelves and awkward corners for seasonal platters, extra serving pieces, and appliances used occasionally.
2. Make DIY Drawer Dividers from Affordable Materials
Estimated cost: $0 to $15 per drawer
A wide kitchen drawer without dividers quickly becomes a retirement community for random chopsticks, rubber bands, takeout menus, batteries, and one mysterious key nobody is brave enough to discard.
Use Cardboard for a No-Cost Version
Measure the drawer’s width, depth, and height. Cut strips from sturdy shipping boxes, cereal boxes layered together, or leftover foam board. Cover the pieces with washable shelf liner or decorative contact paper, then interlock them using small slots cut halfway through each strip.
This method works well for lightweight utensils, tea packets, measuring spoons, and small food-storage accessories. Because the dividers are custom-sized, you avoid wasting space around a standard organizer that almostbut not quitefits.
Build a More Durable Wood Version
For heavier tools, use thin poplar boards or leftover plywood. Sand the edges, cut the pieces to size, and secure them with wood glue. Removable dividers are usually better than permanent ones because kitchen needs change over time.
Before building compartments, arrange the drawer’s contents on a table. Create sections around the items you actually own rather than copying a perfectly styled drawer designed for someone with seventeen matching wooden spoons.
3. Install Tension Rods for Flexible Cabinet Storage
Estimated cost: $5 to $20
Small tension rods are among the most versatile inexpensive kitchen organizers. They install without drilling, making them especially useful for renters or anyone who considers power tools emotionally complicated.
Create a Hanging Station Under the Sink
Place a tension rod horizontally near the top of the under-sink cabinet. Hang spray bottles by their trigger handles so the cabinet floor remains available for bins, sponges, dishwasher tablets, and cleaning cloths.
Do not overload the rod, and position it where it will not interfere with plumbing. Keep household chemicals away from children and pets, preferably in a secured cabinet.
Divide Cutting Boards and Baking Sheets
Install several short tension rods vertically inside a lower cabinet. Space them a few inches apart to create upright compartments for cutting boards, muffin pans, cooling racks, and baking sheets.
Vertical storage allows you to pull out one item without lifting an entire stack. It also reduces the familiar metallic avalanche caused by placing one cookie sheet under seven pans and a pizza stone.
4. Turn an Empty Wall into a Pegboard Organizer
Estimated cost: $20 to $50
When cabinets are full, look upward. A pegboard converts unused wall space into customizable storage while keeping frequently used tools within reach.
Choose the Right Location
Install the pegboard near a prep area, but not so close to the stove that utensils collect grease. Use spacers or furring strips behind the board so hooks can fit through the holes. Anchor it securely according to the wall type and the expected weight.
Arrange Tools by Frequency
Hang lightweight pans, measuring cups, strainers, whisks, oven mitts, and large utensils. Outline frequently used objects with removable paint or arrange them by category so everyone knows where each item belongs.
A narrower alternative is a metal rail fitted with S-hooks. It can hold mugs, utensils, small baskets, or lightweight cookware. Check the rail’s weight rating and avoid hanging sharp tools where children can reach them.
5. Repurpose Jars, Cans, and Boxes as Kitchen Organizers
Estimated cost: $0 to $10
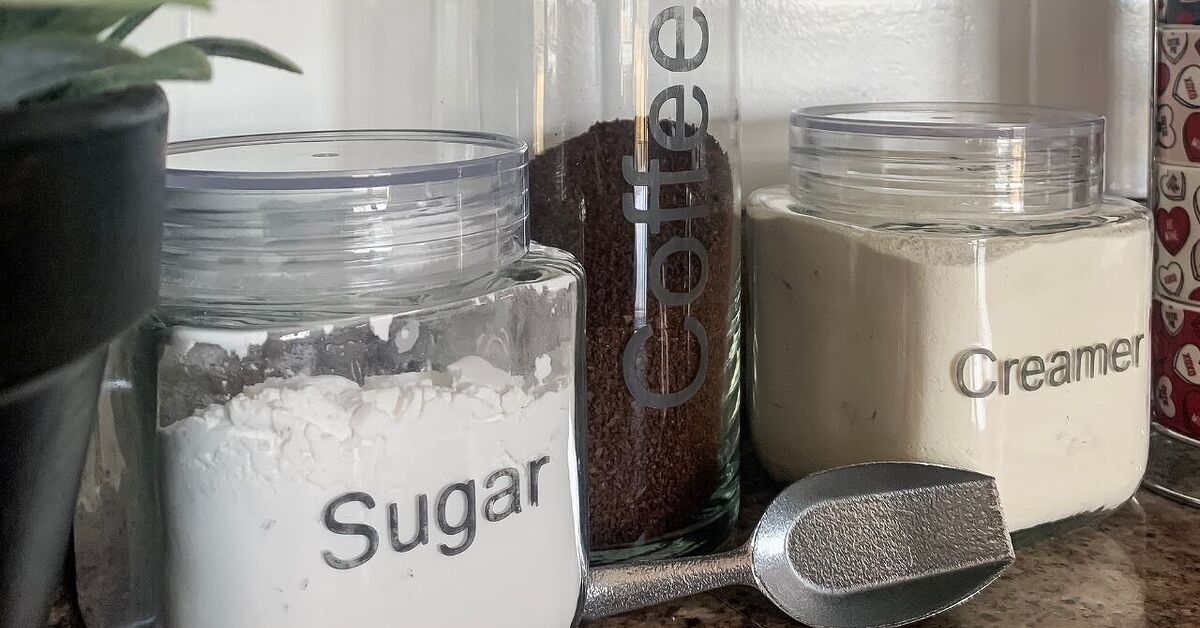
Before purchasing a matching container set, inspect your recycling bin. Glass pasta-sauce jars, coffee canisters, sturdy shoeboxes, tissue boxes, and food tins can become useful organizers after they are thoroughly cleaned and dried.
Use Jars for Dry Goods and Small Supplies
Repurposed glass jars work well for rice, lentils, nuts, tea bags, cupcake liners, reusable straws, or small packets. Label each jar with the contents and, when appropriate, the expiration or purchase date.
Only use food-safe containers for edible ingredients. Avoid reusing containers that previously held chemicals or materials with strong odors.
Turn Boxes into Pantry Bins
Cut the top from a cereal box at an angle to create a magazine-style holder for wraps, foil, parchment paper, or reusable food-storage bags. Cover it with adhesive paper for a cleaner appearance.
Shallow cardboard boxes can group snack packages, baking decorations, instant oatmeal, or spice refills. Label the front so family members can find what they need without conducting an archaeological dig through the pantry.
6. Use the Backs of Cabinet Doors
Estimated cost: $5 to $25
The inside of a cabinet door is valuable storage territory that is often ignored. Adhesive hooks, slim racks, and homemade holders can add space without changing the kitchen’s footprint.
Hang Measuring Tools and Small Accessories
Attach removable hooks for measuring spoons, oven mitts, bottle brushes, or lightweight strainers. Before installation, close the cabinet while holding the item in place to confirm it will not strike a shelf.
Add a DIY Wrap Holder
Mount a narrow magazine file or lightweight basket inside a door to hold plastic wrap, foil, parchment paper, and food-storage bags. Use short screws only when you know the door’s thickness. Renters can choose strong removable adhesive strips rated for the organizer’s total weight.
Cabinet-door storage also works for pot lids, but use a secure rack rather than improvised hooks. A glass lid falling from shoulder height is an unnecessarily dramatic way to begin making soup.
7. Build Simple Shelf Risers to Double Vertical Space
Estimated cost: $10 to $30
Many cabinets have tall gaps above short stacks of plates, mugs, or canned goods. Shelf risers divide that empty vertical space into usable levels.
Make a Basic Wood Riser
Cut one board for the top and two shorter pieces for the legs. Sand all edges and attach the legs using wood glue and small screws. Paint or seal the riser with a finish suitable for indoor cabinetry.
Use the lower level for dinner plates and the top for bowls, or place shorter pantry items underneath and taller containers above. Build the riser to fit your cabinet instead of accepting the dimensions of a store-bought product.
Try a No-Build Alternative
A sturdy wire cooling rack supported by matching mugs or small blocks can function as a temporary riser. Make sure the structure is stable and reserve it for lightweight items.
Do not stack shelves so tightly that removing an item becomes difficult. Organization should reduce effort, not create a tiny obstacle course for your coffee cup.
8. Store Pans, Lids, and Cutting Boards Vertically
Estimated cost: $5 to $25
Flat kitchen items are easier to access when stored like files rather than pancakes. Vertical storage works especially well for baking sheets, cutting boards, skillet lids, serving trays, and cooling racks.
Repurpose Office Organizers
Place a sturdy metal file sorter or magazine holder inside a cabinet. Assign one slot to each category. Heavier pans should go in stronger organizers placed on lower shelves.
Dollar-store napkin holders can separate food-storage lids by size. Keep the containers nested nearby and discard pieces without a matching partner. A container without a lid is not storage; it is an oddly shaped bowl with career uncertainty.
Create Categories That Make Sense
Arrange baking sheets together, cutting boards together, and pot lids together. Store the items closest to where they are used. Cutting boards belong near the prep area, while baking sheets are most convenient near the oven.
9. Create a Rolling Kitchen Station
Estimated cost: $20 to $75
A small rolling cart can serve as a movable pantry, coffee bar, baking station, produce rack, or appliance garage. Secondhand carts, utility carts, and refinished bar carts can provide useful storage for far less than permanent cabinetry.
Give the Cart One Clear Purpose
A cart becomes cluttered when it tries to store everything. Choose one activity and organize around it. For a coffee station, include the coffee maker, mugs, beans, filters, and sweeteners. For a baking station, store mixing bowls, measuring tools, liners, and commonly used ingredients.
Make It Safe and Easy to Move
Place heavy items on the bottom shelf to lower the center of gravity. Use baskets or bins to prevent objects from sliding. Locking casters are helpful when the cart is used as a work surface.
When additional floor space is needed, roll the cart beside a wall, into a pantry, or under an overhanging counter. This flexibility is particularly valuable in apartments and narrow galley kitchens.
How to Keep Your DIY Kitchen Organization System Working
Use the One-Minute Reset
At the end of the day, return stray tools, clear the main prep surface, and place dishes near the sink or dishwasher. A one-minute reset prevents small messes from recruiting friends overnight.
Label Only When Labels Add Value
Labels are helpful for similar pantry ingredients, shared family zones, and containers that are not transparent. You probably do not need a label that says “forks” on a drawer containing unmistakable forks.
Review the System After Two Weeks
Notice which areas remain tidy and which ones immediately become cluttered again. Repeated disorder usually means the designated location is inconvenient, too small, or too far from where the items are used. Adjust the system instead of blaming the people using the kitchen.
Avoid Buying Organizers Too Early
Measure shelves and drawers after decluttering. Record the width, depth, and height, including hinges, pipes, and door frames. Purchasing containers first often creates a new category of clutter: organizers waiting to be organized.
Experience-Based Case Study: Organizing a Small Kitchen for Under $50
The following composite case study reflects common experiences reported in small-kitchen organization projects.
Consider a compact rental kitchen with four upper cabinets, three lower cabinets, two drawers, and almost no pantry space. The counters are occupied by a toaster, coffee maker, blender, utensil crock, knife block, fruit bowl, paper towels, and several items that apparently pay rent by the square inch.
The first lesson from this type of project is that moving clutter is not the same as organizing it. An early attempt might involve buying several attractive baskets and placing everything inside them. The kitchen looks better for approximately three days. Then someone needs a measuring cup, empties two baskets, and leaves their contents on the counter. The baskets were not a system; they were decorative hiding places.
A better approach begins with observation. The coffee maker is used every morning, but the filters are stored across the room. Baking supplies occupy three cabinets even though baking happens only once or twice a month. Six travel mugs compete for space even though only two are regularly used. Once these patterns become visible, the solution becomes much simpler.
The first afternoon is devoted to decluttering. Duplicate utensils and unused mugs go into a donation box. Expired pantry items are discarded. Food-storage containers are matched with their lids, and the unmatched pieces are removed. This step costs nothing and creates more room than any purchased organizer.
Next, the kitchen is divided into zones. The cabinet above the coffee maker becomes the beverage zone. The coffee, filters, mugs, and tea are stored together. Baking ingredients move to one upper shelf because they do not need prime real estate. Daily dishes occupy the easiest-to-reach cabinet.
About $12 is spent on two tension rods. One is installed under the sink for spray bottles. The other helps divide baking sheets and cutting boards in a lower cabinet. A $6 metal file organizer holds pot lids. Small cardboard boxes become pantry bins for snacks, pasta, and baking packets. Printed labels are unnecessary; masking tape and a marker work perfectly well.
The largest improvement comes from clearing the counters. The rarely used blender moves to a lower cabinet. Cooking utensils go into a divided drawer. Paper towels are mounted beneath a cabinet using an inexpensive holder. The fruit bowl remains because it encourages the household to eat the fruit before it achieves a new and exciting form of consciousness.
Finally, a secondhand rolling cart purchased for about $20 becomes a coffee and breakfast station. The coffee maker sits on top, mugs occupy the middle shelf, and cereal containers fit below. Because the cart has one specific purpose, it remains orderly.
The finished kitchen is not magazine-perfect. The containers do not match, the labels are handwritten, and one cabinet still contains an optimistic collection of reusable shopping bags. However, meal preparation becomes faster, counters stay clearer, and everyone can find common items without asking for directions.
The main experience-based lesson is that successful kitchen organization depends less on appearance than on convenience. When an item’s home is obvious, nearby, and easy to access, people are more likely to put it back. The best system is not the prettiest one on social media. It is the one that still works on a busy Tuesday night when dinner is late and nobody is feeling particularly organized.
Conclusion
These nine inexpensive ideas to organize kitchen DIYs prove that better storage does not require a major renovation. Start by removing unnecessary items and grouping what remains into practical zones. Then improve your existing space with drawer dividers, tension rods, pegboards, repurposed containers, cabinet-door storage, shelf risers, vertical dividers, and a focused rolling cart.
Complete one small project at a time and test it during your normal routine. A homemade organizer that saves five minutes every day is more valuable than an expensive system that looks impressive but is difficult to maintain. Your kitchen does not need to resemble a showroom. It simply needs to help you cook, clean, and locate the can opener before dinner becomes an emergency.