Easter crafting has one wonderfully forgiving rule: if the finished project includes pastel colors, floppy ears, tiny chicks, or an unreasonable number of pom-poms, it probably looks festive. Better yet, many easy Easter crafts can be made with paper, cardboard, jars, fabric scraps, and other supplies already hiding in your home.
This collection includes Easter crafts for kids, polished projects for adults, and plenty of family-friendly ideas everyone can make together. Popular seasonal craft collections consistently feature decorated eggs, paper wreaths, handmade baskets, recycled cardboard animals, floral displays, garlands, and personalized table decorations.
You do not need a professional craft room or the patience of a kindergarten teacher on glitter day. Choose a project, cover the table, gather your helpers, and accept that at least one googly eye will disappear forever.
Before You Start Your Easter Crafting Session
Keep a basic collection of construction paper, cardstock, washable paint, paintbrushes, markers, child-safe scissors, white glue, ribbon, yarn, felt, paper plates, cardboard tubes, and plastic craft eggs nearby. Adults can add a low-temperature glue gun, craft knife, floral wire, wood blanks, acrylic paint, and decoupage medium for more detailed projects.
Match each activity to the crafter’s age. Preschoolers do best with stamping, sticking, fingerprint painting, and large paper pieces. Older children can measure, weave, fold, and paint details. Adults should handle sharp tools, floral wire, ovens, and hot glue. The U.S. Consumer Product Safety Commission’s art-safety guidance recommends age-appropriate materials and cautions against high-temperature glue guns around children.
When decorating real eggs, separate display eggs from eggs intended for eating. Keep hard-cooked eggs refrigerated, avoid non-food-safe paints on edible eggs, and consider plastic or wooden eggs for decorations that will sit out. USDA guidance specifically recommends plastic eggs for hunts and careful handling of hard-cooked or hollowed eggshells.
Easy Easter Egg Decorating Ideas
1–9: Colorful Eggs Without Complicated Techniques
- Watercolor-Wash Eggs: Brush diluted washable paint across wooden or plastic eggs. Let the colors overlap for a dreamy finish that looks artistic even when a toddler is holding the brush backward.
- Rubber-Band Striped Eggs: Wrap rubber bands around eggs before dyeing or painting them. Remove the bands after drying to reveal crisp stripes and geometric patterns.
- Washi Tape Eggs: Cover plastic eggs with narrow strips of patterned washi tape. This mess-free project is ideal when you want creativity without repainting the kitchen table.
- Botanical Napkin Eggs: Separate the printed layer of a floral paper napkin, cut out small motifs, and attach them to wooden eggs with decoupage medium.
- Paint-Pen Doodle Eggs: Use oil-based paint pens on wooden or ceramic eggs to draw flowers, dots, zigzags, names, or tiny bunny faces.
- Naturally Dyed Eggs: Experiment with red cabbage, onion skins, turmeric, beets, or coffee to create earthy colors. Pantry-based dye methods are widely used for softer, naturally varied results.
- Twine-Wrapped Eggs: Apply tacky glue to a foam or papier-mâché egg, then coil colorful baker’s twine around it from bottom to top.
- Confetti-Dipped Eggs: Brush glue over the lower half of a wooden egg and roll it in paper confetti. The result looks party-ready with almost no artistic skill required.
- Easter Animal Eggs: Add cardstock ears, felt wings, paper beaks, and drawn faces to transform craft eggs into rabbits, chicks, sheep, and spring birds.
Adorable Easter Bunny Crafts
10–18: Floppy Ears, Fluffy Tails, and Maximum Cuteness
- Paper Plate Bunny Mask: Cut eyeholes in a paper plate, then add cardstock ears, cotton-ball cheeks, whiskers, and a craft-stick handle.
- Cardboard Tube Bunnies: Paint empty paper tubes, glue on tall paper ears, and finish each rabbit with a pom-pom tail and marker-drawn face.
- Pom-Pom Bunny Garland: Make yarn pom-poms in several sizes, add felt ears, and string the bunnies together for a soft mantel decoration.
- No-Sew Sock Bunny: Fill a clean sock with dry rice, tie sections for the head and body, and cut the empty top into two ears.
- Clothespin Rabbits: Paint wooden clothespins white or pastel, add tiny faces, and clip them onto baskets, napkins, gift tags, or place cards.
- Bunny Ear Headbands: Attach felt or cardstock ears to plain headbands. Let each child decorate a pair with fabric scraps, markers, or paper flowers.
- Wooden Spoon Bunnies: Paint wooden spoons, add felt ears and ribbon bows, and arrange the finished rabbits in a jar like a peculiar but charming bouquet.
- Bunny Silhouette Canvas: Paint a simple rabbit silhouette onto a small canvas and glue on a fluffy yarn or pom-pom tail.
- Bunny Flowerpot: Paint a terra-cotta pot white, add a rabbit face and paper ears, then fill it with flowers, candy, or seed packets.
Chick and Lamb Easter Crafts
19–27: Farmyard Friends for Little Makers
- Paper Plate Chick: Paint a plate yellow and add orange paper feet, a folded beak, feathers, and large googly eyes.
- Handprint Lamb: Trace a child’s hand on black paper, turn the fingers into legs, and cover the body with cotton balls.
- Paper Tube Spring Chicken: Paint a cardboard tube yellow and attach cardboard wings, a beak, a comb, and a tail. Recycled-tube animals are a common spring project because the basic shape is easy for children to handle.
- Pom-Pom Chicks: Glue two yellow pom-poms together, then add tiny felt beaks, feet, wings, and black bead eyes.
- Egg Carton Chicks: Cut individual cups from a cardboard egg carton, paint them yellow, and decorate them as miniature hatchlings.
- Fingerprint Chick Cards: Press yellow-painted fingertips onto folded cardstock, let the prints dry, and add legs, beaks, and surprised expressions.
- Feathered Chick Eggs: Paint wooden eggs yellow and attach soft craft feathers. Add a tiny triangular beak to complete each bird.
- Lamb Treat Cup: Cover a paper cup with cotton balls, add a black cardstock face, and fill the cup with wrapped candy.
- Chick-Painted Rocks: Paint smooth stones yellow, add simple faces and wings, and use them as decorations, garden markers, or basket fillers.
Paper and Recycled Easter Crafts
28–36: Budget-Friendly Projects Made From Everyday Materials
- Potato-Stamped Egg Cards: Cut a potato in half, carve simple lines into the surface, dip it in washable paint, and stamp egg shapes onto cardstock.
- Paper Plate Egg Wreath: Remove the center of a paper plate and cover the remaining ring with colorful paper eggs and a ribbon bow.
- Accordion Spring Flowers: Fold paper strips into accordion springs and attach colorful blossoms to the tops for a bouncy tabletop garden.
- Coffee Filter Butterflies: Color coffee filters with washable markers, mist them lightly, let them dry, and pinch the centers with clothespins.
- Cereal Box Easter Basket: Cut and fold thin cardboard into a basket shape, then cover it with wrapping paper, paint, or fabric scraps.
- Paper Bag Bunny Puppet: Turn a lunch bag into a rabbit with paper ears, teeth, paws, and a face drawn across the folded flap.
- Tissue Paper Suncatcher: Sandwich pastel tissue squares between sheets of clear contact paper and trim the finished panel into an egg shape.
- Cardboard Carrot Banner: Cut triangles from shipping boxes, paint them orange, attach green paper tops, and string them along twine.
- Pop-Up Easter Card: Fold and cut cardstock so an egg, chick, flower, or rabbit springs forward when the recipient opens the card.
DIY Easter Baskets and Treat Holders
37–45: Handmade Containers for Candy and Small Gifts
- Woven Paper Basket: Cut strips of sturdy paper and weave them over and under one another. Add a stapled or glued handle after shaping the base.
- Bunny Ear Treat Bag: Cut two ears into the top of a paper bag, draw a rabbit face, fill the bag, and tie it closed below the ears.
- Mason Jar Bunny: Paint a clean jar, add a face and felt ears, and fill it with wrapped sweets, crayons, or small craft supplies.
- Tin Can Easter Basket: Cover a smooth-edged can with paper or fabric, attach a ribbon handle, and embellish it with flowers or pom-poms.
- Mini Wood Crate Basket: Paint a small unfinished crate and stencil a name on the side for a sturdy basket that can be reused each year.
- Milk Carton Basket: Wash and dry an empty carton, cut it into a handled basket shape, and cover it with colored paper.
- Felt Carrot Pouch: Fold orange felt into a cone, glue or sew the sides, and finish the opening with green felt leaves.
- Cupcake Liner Treat Cup: Decorate paper cups with flattened cupcake liners, paper flowers, or bunny faces for quick party favors.
- Flowerpot Candy Holder: Paint a miniature terra-cotta pot in spring colors and fill it with wrapped candy or a small seed-starting kit.
Easter Wreaths, Garlands, and Door Decorations
46–54: Cheerful DIY Easter Decorations
- Plastic Egg Wreath: Attach lightweight plastic eggs to a wreath form, filling the gaps with moss, ribbon, or artificial greenery.
- Floral Bunny Wreath: Arrange two grapevine wreaths as a rabbit’s head and body, then add wire ears, spring flowers, and a bow.
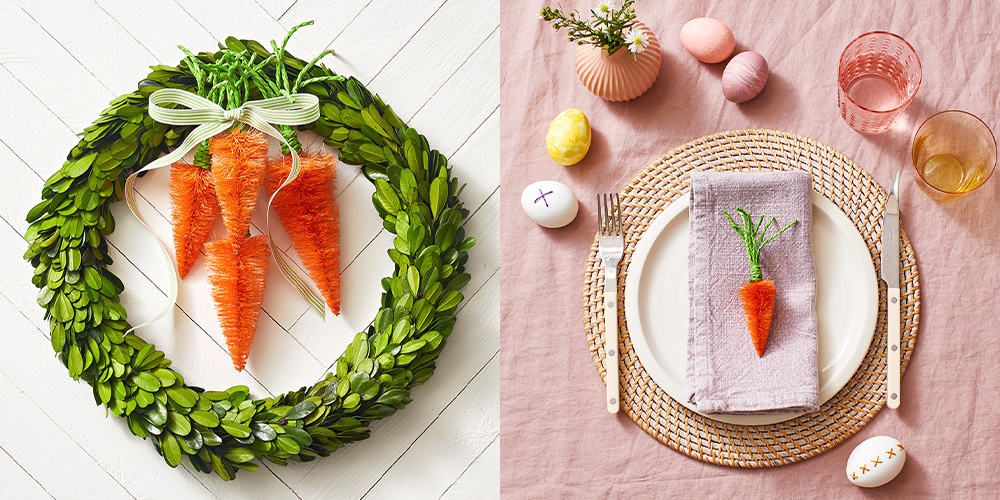
- Paper Carrot Garland: Fold orange cardstock into carrot shapes, add fringed green tops, and hang the carrots from baker’s twine.
- Salt Dough Egg Garland: Cut egg shapes from salt dough, poke hanging holes before baking, and paint the cooled ornaments.
- Easter Egg String Lights: Carefully fit plastic eggs over LED string lights and embellish them with ribbon, faux flowers, or stickers.
- Ribbon Scrap Garland: Knot short strips of pastel ribbon around a cord until the garland looks full, soft, and deliberately extravagant.
- Spring Embroidery-Hoop Wreath: Attach greenery and flowers to one side of a wooden hoop, leaving open space for a modern appearance.
- Moss-Covered Monogram: Cover a cardboard or wooden initial with preserved craft moss and finish it with a gingham ribbon.
- Umbrella Bouquet Door Display: Fill a closed decorative umbrella with artificial tulips and greenery, secure the middle with ribbon, and hang it carefully.
Easter Table Decorations and Handmade Gifts
55–63: Crafts Adults Will Be Happy to Display
- Bunny Place Cards: Cut rabbit silhouettes from cardstock or thin wood, write each guest’s name on one, and support it with a clothespin.
- Fabric Egg Coasters: Decoupage lightweight fabric onto egg-shaped glass or wood blanks for practical Easter table accents.
- Rope-Wrapped Vase: Coil rope around a plain container, securing it as you work, then fill the finished vase with tulips or daffodils.
- Decorated Easter Tree: Arrange bare branches in a weighted vase and hang paper, felt, wooden, or salt-dough eggs from the twigs.
- Mini Nest Napkin Rings: Twist covered floral wire or grapevine into small nests and add a painted wooden bead or miniature egg.
- Painted Wood Serving Tray: Tape off geometric sections on an unfinished tray, paint them in coordinated spring colors, and attach handles.
- Egg-Shaped Candle Holders: Place battery-operated tea lights inside decorative egg cups or painted holders. Skip open flames around paper, moss, and plastic decorations.
- Wooden Bead Bunny Centerpiece: Stack painted wooden beads on wire or dowels, add felt ears, and arrange several rabbits on a tray with greenery.
- Watercolor Cloth Napkins: Dampen plain cotton napkins and brush on diluted fabric paint for a soft ombré effect that suits Easter brunch.
Outdoor, Educational, and Playful Easter Projects
64–72: Crafts That Become Activities
- Eggshell Seed Starters: Place clean shell halves in an egg carton, add potting mix and seeds, and keep them away from food-preparation surfaces.
- Egg Carton Seed Garden: Fill cardboard egg cups with soil and quick-growing seeds. Children can label each section with miniature paper carrots.
- Spring Bee Hotel: Pack a weather-protected wooden container with hollow, untreated plant stems to create an educational garden project for older children and adults.
- Bunny Windsock: Decorate a paper cup as a rabbit, attach ribbon streamers underneath, and hang it outside where the ears can enjoy the breeze.
- Nature Scavenger Basket: Decorate a small basket, then use it to collect fallen petals, twigs, feathers, and other permitted spring discoveries.
- Watercolor Salt Painting: Draw an egg or bunny with glue, sprinkle salt over the lines, and touch the salt with liquid watercolor.
- Easter Egg Punch Board: Cover small prizes in the openings of a cardboard board using tissue paper, then let players punch through one section at a time.
- Handmade Egg Hunt Clues: Decorate paper clues with stamps and drawings, then create an indoor or outdoor trail leading to hidden eggs.
- Painted Garden Stones: Turn rocks into chicks, carrots, flowers, ladybugs, or patterned eggs and place them along a walkway or garden border.
How to Choose the Right Easter Craft
Start with the amount of time, supervision, and cleanup you can realistically manage. A potato-stamping project can entertain several young children without requiring precise instructions. A decoupage egg or floral wreath is better for adults who want an attractive decoration they can store and reuse.
For mixed-age groups, establish one shared theme and provide different ways to complete it. Preschoolers might decorate paper eggs with stickers, older children can paint wooden eggs, and adults can make botanical decoupage versions. Everyone participates without forcing a five-year-old to master floral wire or asking an adult to spend an hour gluing cotton balls to a plate.
It also helps to decide what should happen to the craft afterward. Some projects are keepsakes, some are decorations, and others are simply enjoyable activities. When every creation is treated like a future museum exhibit, storage becomes the final boss of Easter.
Realistic Experiences From a Family Easter Crafting Day
Preparation Matters More Than Artistic Talent
The smoothest Easter craft sessions usually begin before anyone opens the paint. Precutting complicated shapes, covering the table, portioning glue into small containers, and placing supplies on trays can prevent most avoidable chaos. Children are far more interested in creating than waiting while an adult searches three drawers for the only working pair of scissors.
A useful approach is to set up one “clean” station and one “messy” station. Paper folding, stickers, and markers belong at the clean table. Paint, dye, glue, and glitter stay at the messy table. This arrangement gives cautious children somewhere comfortable to work and keeps enthusiastic painters from decorating someone else’s sleeves.
Finished examples can help, but they should be treated as inspiration rather than rules. A child who turns a bunny into a six-legged purple creature has not failed the assignment. That child has simply discovered a species the rest of us were not imaginative enough to anticipate.
Simple Crafts Often Create the Best Memories
Complicated projects may look impressive in photographs, but simple activities tend to work better for families. Paper plate masks invite pretend play after the glue dries. Painted rocks can become characters in an outdoor story. Handmade baskets can be carried during an egg hunt. Crafts that lead into another activity usually hold children’s attention longer than decorations they are immediately told not to touch.
Personalized projects also become meaningful keepsakes. A handprint lamb records a child’s size. A fingerprint card captures a particular stage of drawing and handwriting. A wooden basket painted with a name can return year after year. These creations do not need perfect lines or coordinated colors; their value comes from the person who made them.
Adults benefit from choosing at least one project for themselves. While children stamp paper eggs, grown-ups might paint a serving tray, assemble a spring wreath, or decorate cloth napkins. Family crafting is more enjoyable when adults are participating instead of spending the entire afternoon acting as unpaid glue technicians.
Imperfections Make Homemade Easter Decor Better
Real crafting rarely produces a matching set. One egg will be elegant, another will have too much glue, and a third will somehow acquire eyebrows. Displaying them together is part of the charm. Handmade Easter decorations feel warmer than mass-produced pieces precisely because they reveal different hands, choices, and levels of patience.
It is wise to keep the schedule flexible. Younger children may finish in ten minutes and immediately request snacks. Older kids may spend an hour perfecting one painted egg. Adults may become unexpectedly competitive about wreath symmetry. Plan several optional activities rather than insisting that everyone complete all 72 projects before dinner.
Finally, take a photograph of the crafting process, not just the finished display. The paint-covered fingers, concentrated expressions, piles of paper ears, and slightly crooked rabbits often tell a better story than the polished centerpiece. Supplies can be packed away and decorations eventually come down, but the experience of making something together is what gives homemade Easter crafts lasting value.
Conclusion
These 72 easy Easter crafts offer something for every age, skill level, budget, and tolerance for glitter. Children can stamp cards, build cardboard animals, and paint rocks, while adults can create wreaths, decoupage eggs, table decorations, and reusable baskets. Families can also work side by side on garlands, seed starters, place cards, and handmade egg-hunt accessories.
The best project is not necessarily the fanciest one. It is the craft that fits your available time, uses materials you can safely manage, and gives everyone room to make it their own. Gather a few basic supplies, choose two or three ideas, and let the creative process unfold. Your Easter bunny may end up with uneven ears, but personality has never required perfect symmetry.
Note: Adult supervision is recommended whenever children use scissors, hot glue, small decorations, floral wire, ovens, or real eggs. The year in the title reflects the original editorial theme, but these Easter craft ideas are evergreen and can be reused or adapted for future spring celebrations.