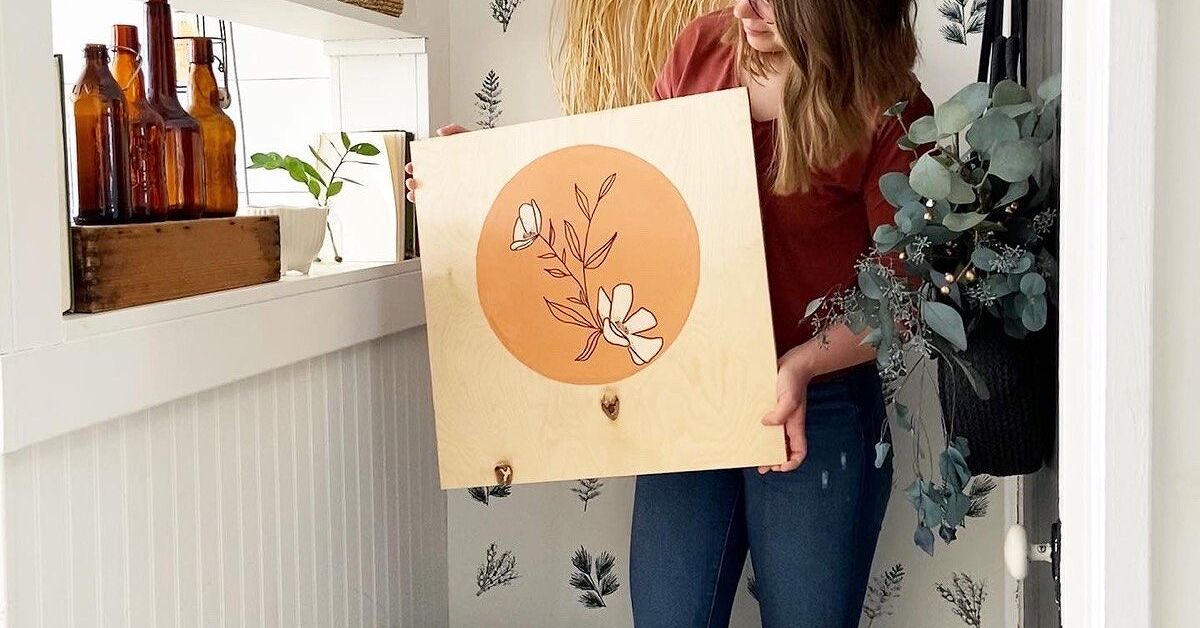
Scrap wood is the confetti of the DIY world: it shows up everywhere, gets stuck in corners, and somehow makes everything feel more festive when used correctly. Whether you have leftover 1x4s from a shelving project, pallet boards from a delivery, tiny plywood offcuts, or that mysterious piece of lumber you have moved from garage to garage like a family heirloom, you can turn it into home decor that looks intentionalnot like “I found this behind the shed and panicked.”
The beauty of scrap wood home decor is that it combines three things most homeowners love: saving money, reducing waste, and creating something nobody else has. You do not need a professional workshop, a truck full of tools, or a woodworking apron with your name embroidered on it. Most of the ideas below can be completed with basic supplies: sandpaper, wood glue, screws or brad nails, paint or stain, a measuring tape, and a little patience. If your patience is currently on backorder, coffee helps.
Before starting, choose clean, dry wood that is not rotten, oily, moldy, or chemically treated. If you use pallet wood, look for safe markings such as heat-treated wood and avoid unknown industrial pallets. Always sand rough edges, wear eye protection, and use a dust mask or respirator when cutting or sanding. Wood dust is not “rustic glitter.” It is still dust, and your lungs have not asked to become a craft drawer.
Why Scrap Wood Is Perfect for Cheap DIY Home Decor
Scrap wood works because imperfections are part of the charm. A nicked board can become a farmhouse sign. A short block can become a candle holder. A few thin strips can turn into wall art. The goal is not to make every board look factory-perfect; the goal is to create decor with warmth, texture, and personality.
Scrap wood also fits almost every design style. Sand it smooth and paint it matte black for modern decor. Whitewash it for coastal style. Stain it walnut for a classic look. Leave nail holes and weathered grain visible for rustic farmhouse decor. Add brass hooks, leather straps, ceramic knobs, or simple black hardware, and suddenly your leftover lumber looks like it came from a boutique where everything costs $87 and smells faintly like eucalyptus.
Essential Tools and Supplies for Scrap Wood Projects
You can start small. For most beginner-friendly scrap wood decor ideas, you may need a hand saw or miter saw, drill, screwdriver, clamps, measuring tape, pencil, sandpaper, wood glue, screws, picture hangers, paintbrushes, stain, primer, and a clear protective finish. A brad nailer is convenient, but not required. If you can measure twice, cut once, and apologize to the board when you do the opposite, you are ready.
For finishing, test paint or stain on a small offcut first. Different woods absorb color differently, especially pine, oak, plywood, and pallet wood. A stain that looks “warm honey” on the can may look “haunted orange” on your actual board. Testing saves the project, your mood, and possibly your relationship with the paint aisle.
10 Easy and Cheap DIY Home Decor Ideas from Scrap Wood
1. Rustic Floating Ledge Shelf
A floating ledge shelf is one of the easiest ways to turn scrap wood into useful home decor. Use a narrow board as the base, a thinner strip as the front lip, and another piece as the back support. Once assembled, the shelf can hold framed photos, small plants, candles, books, or seasonal decorations.
Estimated cost: $0 to $15, depending on screws, stain, and wall anchors.
How to make it: Cut one board for the shelf bottom and one narrow strip for the front rail. Sand all surfaces, attach the rail with glue and nails or screws, then stain or paint. Mount it into wall studs when possible, or use anchors rated for the weight. For a polished look, make two or three matching ledges and stagger them on the wall.
Style tip: Use leftover flooring planks or thin hardwood scraps for a cleaner finish. For farmhouse style, lightly sand the edges after painting so the wood peeks through.
2. Scrap Wood Picture Frame
Picture frames are perfect for small offcuts because they do not require long boards. You can make a simple square or rectangular frame using mitered corners, butt joints, or even deliberately uneven reclaimed pieces for a casual handmade look.
Estimated cost: $3 to $12 for glass, clips, backing, or hanging hardware.
How to make it: Measure your photo or print, cut four pieces to fit, sand them smooth, then glue and clamp the corners. Add a backing board from thin plywood or cardboard. If you do not want to deal with glass, frame a canvas print, pressed flowers, fabric scraps, or a printable quote.
Style tip: Mix stains on each side of the frame for a patchwork effect. This works beautifully with wood scraps from different projects because the mismatched tones look intentional.
3. Wooden Key Holder for the Entryway
A DIY key holder is small, cheap, and extremely usefulespecially if your keys enjoy hiding in jacket pockets, laundry baskets, and alternate dimensions. A single scrap board can become an entryway command center with hooks for keys, a small ledge for sunglasses, and a clip for mail.
Estimated cost: $5 to $20 for hooks and hardware.
How to make it: Sand a board about 12 to 18 inches long. Stain or paint it, then attach small hooks evenly across the front. Add a sawtooth hanger or keyhole brackets on the back. For more function, attach a tiny shelf strip on top for wallets or decor.
Style tip: Use black hooks for modern farmhouse style, brass hooks for vintage charm, or colorful knobs for a playful family entryway.
4. Mini Wood Planter Box
A small scrap wood planter box can dress up a windowsill, dining table, coffee table, porch, or office shelf. It is also forgiving because plants already do most of the decorating. You simply provide the cute container and pretend you have a full botanical strategy.
Estimated cost: $0 to $18, depending on liner, potting supplies, and finish.
How to make it: Build a simple rectangular box from thin scrap boards. Use wood glue and brad nails or screws. Sand the edges, stain or paint the outside, and line the interior with plastic if you plan to place real plants inside. Better yet, keep plants in nursery pots and set them inside the box so water does not sit directly on the wood.
Style tip: Add small feet made from wood cubes, beads, or short dowel pieces. It gives the planter a finished, store-bought look.
5. DIY Scrap Wood Wall Art
Scrap wood wall art is where the oddest leftover pieces finally get their moment. Thin strips, triangles, squares, and uneven boards can become geometric art, mountain silhouettes, chevron patterns, abstract mosaics, or simple color-blocked panels.
Estimated cost: $0 to $25 for backing board, glue, paint, and hanging hardware.
How to make it: Start with a plywood backing panel. Arrange wood scraps into a pattern before gluing anything down. Once the layout looks balanced, attach the pieces with wood glue and clamp or weigh them down while drying. Paint sections in neutral tones or stain each piece differently for depth.
Style tip: Leave tiny gaps between pieces for a shadow-line effect. This makes simple scraps look more architectural and less like a cutting-board accident.
6. Wooden Candle Holders
Small blocks of scrap wood can become charming candle holders for mantels, dinner tables, shelves, or holiday displays. This project is ideal for leftover 2×4 pieces, chunky pallet blocks, or hardwood scraps.
Estimated cost: $2 to $15 for candles, drill bit, finish, or felt pads.
How to make it: Cut blocks to different heights, sand thoroughly, and drill shallow holes sized for tea lights or taper candle cups. Do not place open flames directly against unfinished wood. Use metal or glass candle inserts, or choose battery-operated candles for the safest option.
Style tip: Group three candle holders of different heights. Odd-numbered arrangements often look more natural and designer-friendly.
7. Scrap Wood Serving Tray
A wooden tray is practical decor at its finest. It can corral coffee table clutter, serve breakfast in bed, hold bar accessories, or make a candle-and-vase arrangement look organized instead of “items gathered during a cleaning sprint.”
Estimated cost: $10 to $30 for handles, screws, stain, and clear finish.
How to make it: Join several boards side by side using wood glue and support strips underneath. Add two short end pieces or raised sides. Sand until smooth, stain or paint, and seal with a clear protective finish. Attach handles to both ends for easy carrying.
Style tip: Use contrasting stains to create stripes or a simple geometric pattern. If the tray will hold drinks, apply a durable topcoat and wipe spills quickly.
8. Farmhouse Wood Sign
A farmhouse-style wood sign is a classic scrap wood project because it requires very little material. You can make a kitchen sign, laundry room sign, family name plaque, seasonal quote, or simple label for a pantry or mudroom.
Estimated cost: $0 to $20 for paint, stencil, transfer paper, or hanging hardware.
How to make it: Sand the board, paint or stain the background, then add lettering with a stencil, vinyl decal, paint pen, or printed transfer method. Distress the edges lightly with sandpaper. Seal with a clear coat if the sign will be handled often or used outdoors under cover.
Style tip: Keep the wording short. “Pantry” looks classy. “Live, Laugh, Locate the Extra Pasta” may be emotionally accurate, but visually crowded.
9. Small Bathroom Shelf or Towel Rack
Bathrooms always need more storage, and scrap wood can help without requiring a full renovation. A narrow shelf with hooks can hold hand towels, small jars, toiletries, or a tiny plant that bravely accepts humidity as a lifestyle.
Estimated cost: $8 to $25 for hooks, anchors, and finish.
How to make it: Use a board long enough for your wall space. Add a narrow shelf on top and hooks underneath. Sand well, paint or seal the wood to resist moisture, and mount securely. In bathrooms, a protective finish is especially important because steam and splashes can damage raw wood over time.
Style tip: Pair a warm stained shelf with white walls and black hooks for a modern spa-meets-farmhouse look.
10. Scrap Wood Bookends
Bookends are excellent beginner projects because they are small, useful, and nearly impossible to overcomplicate unless you decide to carve a replica of Mount Rushmore. Simple L-shaped bookends can be made from two pieces of scrap wood each.
Estimated cost: $0 to $15 for glue, screws, felt pads, or decorative details.
How to make it: Cut two rectangles per bookend: one vertical back and one horizontal base. Join them with wood glue and screws from the bottom. Sand and finish. Add felt pads underneath to protect shelves. For extra weight, use thicker wood or attach a small metal bracket inside the corner.
Style tip: Paint them the same color as your shelf for a minimalist look, or add a bold accent color to make them pop.
Budget-Friendly Design Tips for Scrap Wood Decor
Scrap wood decor looks best when it has a plan. Even if the wood is free, your finished project should match the room. Choose one finish family before you begin: warm rustic stain, clean white paint, natural Scandinavian wood, moody black, soft sage green, or coastal whitewash. This keeps your DIY home decor from looking like a lumberyard sample board had a family reunion.
Pay attention to scale. A tiny sign can disappear on a large wall, while a chunky shelf may overwhelm a narrow hallway. Before drilling holes, use painter’s tape to outline the project size on the wall. Step back and look at it from across the room. This five-minute test can save you from creating a shelf that looks like it was installed by a very confident raccoon.
Use repetition to make DIY decor feel intentional. Make two matching shelves, three candle holders, or a set of four frames. Repeated shapes and finishes create rhythm, which is the fancy design word for “it looks like you meant to do that.”
Safety and Prep Tips Before You Cut, Sand, or Stain
Scrap wood may be cheap, but safety is not the place to economize. Inspect every piece for nails, screws, staples, cracks, mold, or chemical stains. Remove hardware before cutting. If the board smells strange, has oil marks, or came from an unknown industrial setting, skip it. Free wood is not free if it brings mystery chemicals into your living room.
When sanding, wear eye protection and a dust mask or respirator. Work outdoors or in a well-ventilated area when possible. Vacuum dust rather than blowing it around. If you are staining or painting, read product directions, allow proper drying time, and avoid rushing the finish. Most DIY disasters happen when someone says, “It’s probably dry enough.” Those words have ruined many tabletops.
For wall-mounted projects, use the correct anchors or attach directly into studs. Decor becomes less charming when it falls off the wall at 2 a.m. and makes everyone think the house is haunted.
How to Make Scrap Wood Projects Look Expensive
The difference between “homemade” and “handcrafted” often comes down to finishing. Sand edges until they feel smooth to the touch. Fill obvious gaps if your style is clean and modern. Use primer before painting raw or uneven wood. Apply thin coats instead of one gloopy coat that records every brushstroke like a crime scene.
Hardware also matters. A $6 pair of handles can make a tray look boutique-ready. Attractive hooks can elevate a key holder. Felt pads on the bottom of bookends or trays make the project feel thoughtful. Small details tell people, “Yes, I made this,” not “Yes, I fought this board and barely survived.”
Finally, style the finished piece with restraint. A shelf does not need seventeen objects. A tray does not need a candle, three books, a vase, a bowl, a sculpture, and your emotional baggage. Let the wood breathe. Negative space is free, and in decorating, free is a beautiful word.
Real-Life Experience: What Scrap Wood DIY Teaches You
The first thing you learn from scrap wood projects is that no board is as straight as it claims to be. You pick up a piece that looks innocent, bring it to the workbench, and suddenly it has more twists than a mystery novel. This is why simple projects are the best starting point. A rustic tray, small shelf, or key holder can tolerate slight imperfections. In fact, small flaws often make scrap wood decor feel warmer and more authentic.
Another lesson is that sanding changes everything. A rough board may look useless at first, but after ten minutes with 120-grit and then 220-grit sandpaper, the grain starts to show, the corners soften, and the project begins to feel like something you would actually allow inside the house. Sanding is not glamorous. Nobody has ever said, “Come over and admire my sanding technique.” But it is the quiet step that makes a DIY project look finished.
Finishing is where personality appears. Paint can make mismatched scraps feel unified, while stain celebrates the differences between boards. If you are nervous, start with a neutral finish: natural wood, walnut, white, black, or soft gray. These colors work with most home decor styles and are easier to blend into existing rooms. Once you gain confidence, experiment with bolder colors on small projects like bookends, frames, or wall art.
Scrap wood also teaches practical problem-solving. Maybe one board is too short, so you create a patchwork pattern. Maybe a cut is slightly uneven, so you distress the edges and call it rustic. Maybe the stain goes darker than expected, so you turn the piece into moody modern decor instead of cheerful farmhouse. DIY is full of tiny pivots. The trick is to treat mistakes as design negotiations, not failures.
One of the most satisfying parts is using something that would otherwise be thrown away. A leftover board from a closet project becomes a bathroom shelf. A pallet slat becomes a picture frame. A 2×4 offcut becomes a candle holder. These projects make your home feel layered because every piece has a story. Store-bought decor can be beautiful, but it rarely lets you say, “I made that from the weird pile in the garage.” That sentence carries a special kind of pride.
The best advice from experience is to batch your projects. Sand several pieces at once. Stain multiple small items together. Keep a small box of hooks, screws, felt pads, and picture hangers so you do not have to pause every project for a hardware store trip. Also, label leftover stain colors on sample scraps. Future you will be very grateful, especially when trying to match a shelf you made six months ago during what can only be described as a “weekend of creative overconfidence.”
Most importantly, start with projects that solve real problems in your home. Need a place for keys? Make the key holder. Need more plant space? Build the planter or shelf. Need a gift? Make a tray or frame. Useful decor gets used, admired, and remembered. That is the magic of scrap wood: it turns leftovers into little improvements you see every day.
Conclusion
Scrap wood is more than leftover lumber. It is affordable material with personality, texture, and creative potential. With a few basic tools and a smart plan, you can create rustic floating shelves, picture frames, wall art, planters, trays, candle holders, signs, bookends, and storage pieces that make your home feel more personal. These easy and cheap DIY home decor ideas from scrap wood are beginner-friendly, budget-conscious, and flexible enough for almost any style.
The best project is the one you will actually use. Start small, sand well, test your finish, and choose hardware that makes the piece feel complete. Your scrap pile may not look inspiring today, but give it a little attention and it can become the most charming corner of your home. And if anyone asks where you bought your new decor, you get to smile and say, “I made it.” Try not to say it too smugly. Or do. You earned it.