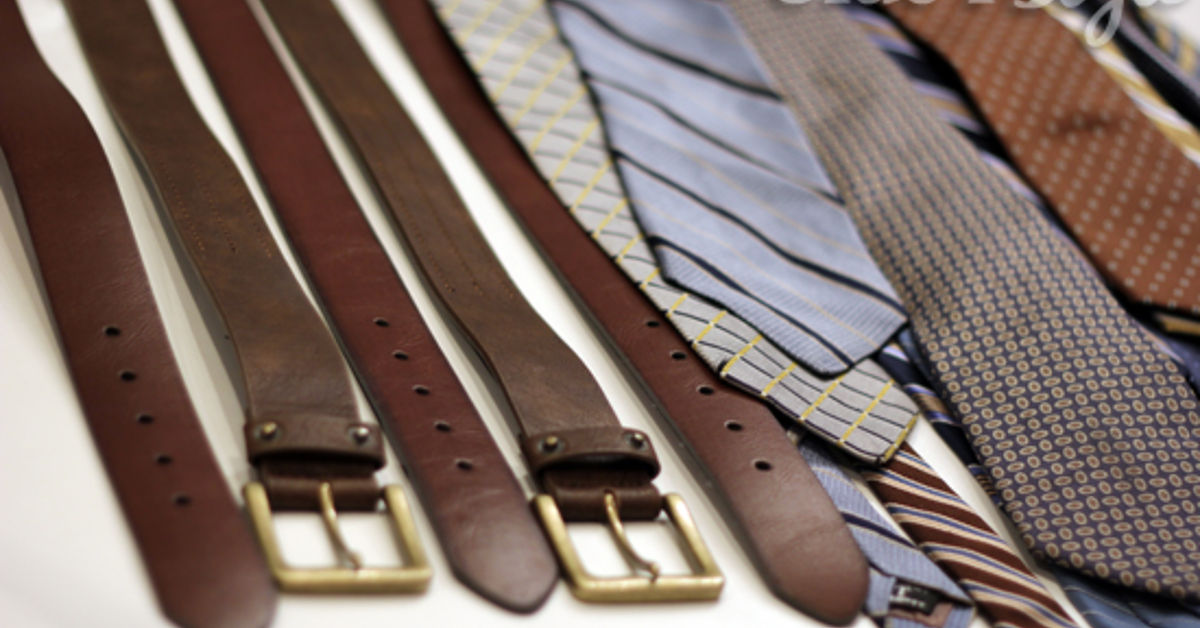
An old belt may be retired from holding up jeans, but t punch, and basic cabinet hardware, a forgotten men’s belt can become a set of handsome drawer pulls that look custom-made. The result is warm, tactile, affordable, and just unusual enough to make guests ask, “Where did you buy those?” You may then enjoy the deeply satisfying answer: “I made them from a belt that was headed for the donation pile.”
This beginner-friendly project works well on dressers, nightstands, desks, and small cabinets. Leather softens hard furniture lines and often looks better as it develops a natural patina.
Why Turn Men’s Belts Into Drawer Pulls?
Replacing ordinary hardware is one of the fastest ways to change the personality of furniture. A plain white dresser can feel modern with black leather loops, rustic with weathered brown straps, or playful with a mix of embossed and braided belts. Apartment Therapy has highlighted low-cost belt material used to create leather-style pulls, while HGTV has repeatedly featured old belts as useful decorative material for upcycled home projects. In other words, your closet has been quietly operating a hardware department. rdable, Personal, and Comfortable
A thrift-store belt can supply several pulls for less than one premium leather handle. Existing stitching, stamped patterns, worn edges, and color variations give mass-produced furniture a custom look. Flexible straps are also comfortable to grip and have no sharp corners, although thin or stretchy fashion belts are less reliable than sturdy leather or reinforced faux leather.
Choose the Right Belt for DIY Drawer Pulls
The best belt is strong, reasonably thick, and free from deep cracks. Full-grain or top-grain leather is ideal, although reinforced synthetic material can work on lightly used furniture.
Inspect the Belt Before Cutting
- Bend it gently: Surface wrinkles are normal; splitting layers and crumbling edges are not.
- Pull lengthwise: Excessive stretch can produce saggy handles.
- Check thickness: Choose material substantial enough to hold its shape.
- Find clean sections: Avoid buckle holes, torn stitching, mildew, and sharply curved areas.
Clean dusty leather with a lightly damp cloth and let it dry fully. If the belt feels dry, apply a small amount of suitable leather conditioner and test it first on an inconspicuous area because conditioning products can darken some finishes. Leather specialists note that conditioning helps restore flexibility and reduce drying and cracking.
Tools and Materials You Will Need
- One or more men’s leather belts
- Sharp utility knife, heavy-duty scissors, or rotary cutter
- Cutting mat or scrap wood
- Ruler, combination square, and pencil
- Leather hole punch or appropriately sized drill bit
- Cabinet screws or machine screws that fit the drawer thickness
- Flat washers for the back of the drawer front
- Decorative finishing washers, Chicago screws, or screw caps for the front
- Drill and drill bits
- Masking tape
- Optional leather conditioner, edge paint, beeswax, or clear leather finish
A revolving leather punch makes clean, repeatable holes and offers better control than forcing an awl through thick material.
Plan the Size and Style Before You Cut
Cabinet pulls are commonly described by their center-to-center measurement, meaning the distance from the center of one mounting screw to the center of the other. A familiar 3-inch pull, for example, has mounting holes 3 inches apart even though the overall handle is longer. with a strap about 5 to 7 inches long and 3/4 to 1 1/4 inches wide. A 5-inch strip mounted through holes 3 inches apart creates a modest arch. Make one sample before cutting the entire belt.
Two Good Pull Shapes
Flat tab: Fold a short strip in half and secure both ends at one point. This creates a compact finger tab for small drawers and cabinet doors.
Arched handle: Secure one end at each mounting hole so the center bows outward. This is the most practical style for dresser drawers.
How to Make Men’s Belt Drawer Pulls Step by Step
1. Remove the Old Hardware
Remove the old hardware and measure its hole spacing. Reusing existing holes prevents unnecessary drilling and preserves the option to reinstall the original pulls.
2. Make a Paper or Scrap-Leather Prototype
Make a paper strip, mark the screw locations, and attach it temporarily. Open the drawer several times to confirm finger clearance and loop height. This quick test can prevent an entire belt from becoming stylish bookmarks.
3. Cut Equal Leather Strips
Use a square to mark perpendicular cut lines. Cut slowly with a sharp blade in several light passes, then use the first strip as the template for every remaining piece.
4. Mark and Punch the Holes
Measure from each end so the holes are symmetrical. Punch them only slightly larger than the screw shanks; oversized holes allow movement and increase wear.
5. Create a Drilling Template for the Furniture
If the drawers do not already have two correctly spaced holes, make a template from hardboard, cardboard, or scrap plywood. Mark the centerline of each drawer and use the same template repeatedly. Cabinet-installation guides consistently recommend jigs or templates because they improve alignment and repeatability across multiple doors and drawers. rill Carefully
Remove the drawer, support the back with scrap wood, and drill straight through. Confirm that no slide or brace sits behind the planned hole; perfect alignment is less impressive when the bit also finds metal.
7. Attach the Leather Pulls
Pass the screw through a decorative washer, the leather, and the drawer front. Add a flat washer and nut inside. The washer spreads pressure and helps prevent tearing. Tighten securely, but stop before the leather becomes a sad little pancake.
8. Test Every Drawer
Pull from the center and both sides. Check for twisting, loose screws, and adequate clearance before finishing the remaining drawers.
Design Ideas for Different Furniture Styles
Modern and Minimal
Use smooth black belts cut into identical narrow strips. Pair them with matte-black screws on white, pale oak, or charcoal-painted furniture. Keep the loops shallow and the spacing consistent.
Rustic or Farmhouse
Choose medium-brown leather with visible wear, stitching, or stamped details. Antique-brass finishing washers complement warm wood, milk paint, and distressed finishes. Slight variations in tone look natural in this style.
Midcentury-Inspired
Try cognac leather on walnut or teak-colored furniture. Use clean brass fasteners and avoid bulky loops. The combination of warm leather, simple geometry, and wood grain feels refined without becoming formal.
Common Mistakes and How to Avoid Them
Cutting all pieces before testing: Always complete one pull first. Furniture proportions can make a seemingly sensible measurement feel awkward.
Using brittle leather: Cracked leather may fail around the screw holes. Choose a healthier section or reinforce the back with a second strip.
Skipping washers: A small screw head concentrates force in one spot. Use washers or purpose-made leather hardware to distribute the load.
Mixing measurements: Mark a master template and label its top edge. Reversing it halfway through creates modern art, not aligned hardware.
Overtightening: Leather should be firmly clamped, not compressed until its surface buckles.
Ignoring drawer weight: Leather pulls are ideal for typical furniture drawers, but an overloaded file drawer or heavy workshop cabinet may require thicker straps, reinforced holes, and larger fasteners.
Care and Maintenance
Wipe the handles with a dry or barely damp cloth, avoid harsh cleaners, and condition real leather sparingly after a hidden-area test. Tighten loose fasteners promptly. Expect frequently used pulls to darken and soften as they develop patina.
Experiences From Making Mens’ Belts Turned Drawer Pulls
The first time I tried this project, I assumed the cutting would be the difficult part. It was not. The difficult part was accepting that a belt that looked perfectly straight while hanging in a closet had spent years curving around a human waist and had developed opinions about geometry. Once cut, several pieces curled slightly to one side. The lesson was simple: use the straight middle section, flatten it under books overnight, and make a sample before announcing victory.
My test piece went onto a small three-drawer nightstand. The original hardware consisted of tiny silver knobs that looked as though they had apologized for being installed. I used a worn brown leather belt, brass machine screws, and small finishing washers. The first loop was too long. It drooped against the drawer front and looked less like custom hardware and more like the furniture had grown a mustache. Trimming the strap by about three-quarters of an inch gave it a better arch and made the drawer easier to open.
Hole placement mattered more than expected. On the second pull, I measured from the cut ends rather than using the first piece as a template. One hole ended up slightly off, and the loop twisted. The difference was perhaps one-eighth of an inch, barely enough to notice on a ruler and absolutely enough to notice on a row of drawers. From then on, I stacked the strips, aligned their edges, and marked every hole from one master piece.
I also learned not to judge screw length while the drawer is still assembled. Drawer fronts vary, and some furniture has an applied decorative face over the drawer box. A screw that appears generous may become comically short once it must pass through leather, a washer, the front panel, and the box. Measure the total thickness with the drawer removed, then buy screws slightly longer than required. Keep extra washers nearby because hardware stores have a special talent for selling the exact screw you need in a package containing one fewer than the project requires.
Conditioning produced another useful surprise. The belt looked dry, so I applied conditioner before cutting. The color deepened from pale brown to warm cognac, which looked excellentbut it also revealed uneven absorption near old scratches. Since every strip was cut after conditioning, the variation remained consistent. Had I conditioned each finished pull separately, they might have ended up looking like unrelated cousins. Treating the whole usable belt section at once created a more unified finish.
After several months, the pulls softened but stayed secure. The most-used handle darkened first and developed the mellow sheen of a well-used wallet. Flat washers kept the screws stable, and the holes did not stretch.
The most satisfying part was how dramatically the hardware changed inexpensive furniture. The nightstand did not become an heirloom, but it stopped looking anonymous. The leather added warmth, the brass introduced a small highlight, and the repetition of three matching loops made the piece feel intentional. Visitors noticed the pulls before they noticed the fresh paint.
The project rewards patience more than specialized skill. Measure twice, prototype once, and resist cutting every strap during the opening burst of enthusiasm. With sturdy leather, clean holes, washers, and a repeatable template, an old belt can retire from fashion and earn a promotion in furniture.
Conclusion
Turning men’s belts into drawer pulls reuses durable material while giving ordinary furniture a distinctive finish. Select sound leather, test one sample, cut matching strips, punch accurate holes, and use washers with properly sized fasteners. A simple template keeps the installation straight, while leather color and metal finish can suit modern, rustic, farmhouse, or midcentury rooms.
Your old belt may no longer fit your waist, but with a drill and a little confidence, it can fit your dresser beautifully.
Note: Test all leather cleaners, conditioners, dyes, and finishes on a hidden area before treating the full belt, and use hardware sized for the actual thickness and weight of your drawer.