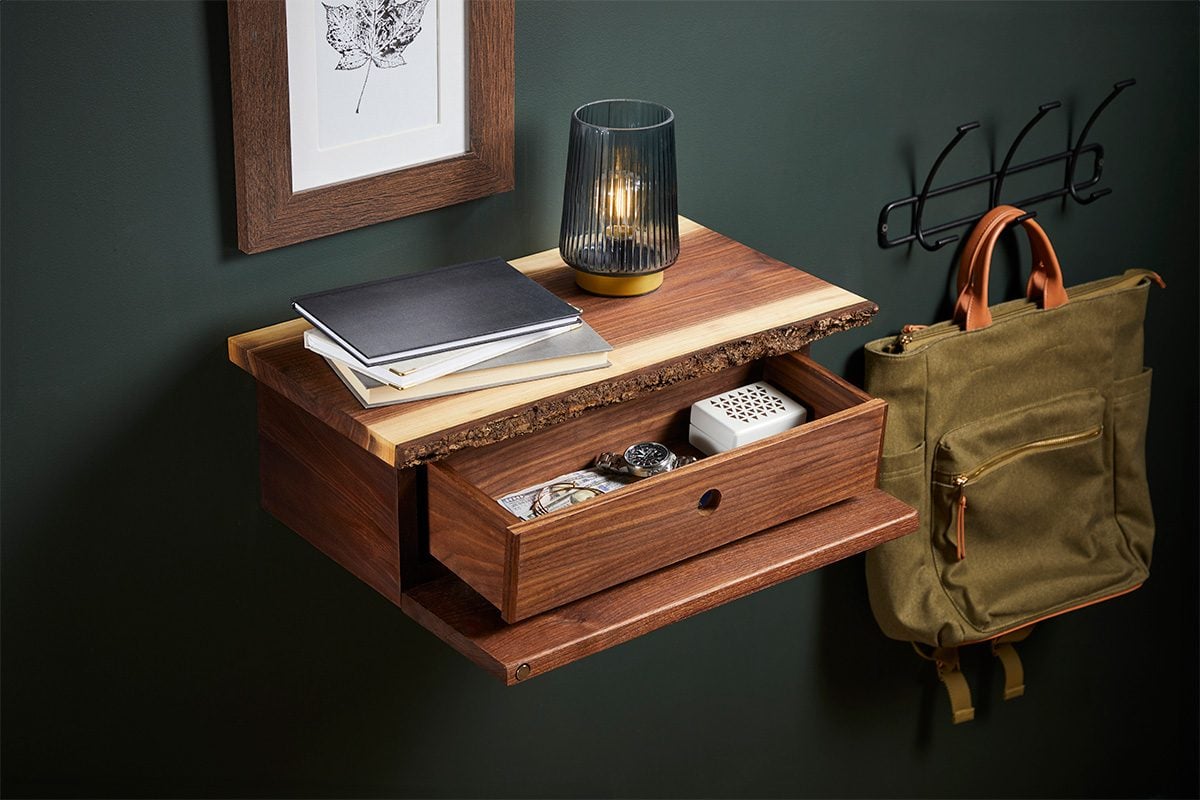
A wall shelf is already a hardworking little hero. It holds books, plants, framed photos, tiny candles you bought because they smelled like “cozy rain,” and possibly one mug full of pens that have not worked since 2019. But a wall shelf with a secret hidden storage box? Now we are talking about furniture with a plot twist.
This project combines the clean look of a floating wall shelf with a concealed compartment tucked inside the shelf body. From the outside, it looks like a simple decorative shelf. Inside, it can hide spare keys, small keepsakes, documents, emergency cash, jewelry, USB drives, or anything else you would rather keep out of plain sight. It is not a bank vault, and it should not be treated like one, but it is a clever DIY storage solution for everyday privacy and organization.
In this guide, you will learn how to build a wall shelf with secret hidden storage box using common woodworking tools, affordable lumber, smart mounting methods, and a little patience. The finished design is practical, attractive, and sneaky in the best possible way.
What Is a Secret Hidden Storage Wall Shelf?
A secret hidden storage wall shelf is a shelf that looks normal from the outside but contains a concealed compartment inside or behind it. Some versions use a lift-up top. Others use a pull-out drawer, magnetic latch, false bottom, sliding panel, or hinged face. For this beginner-friendly project, we will focus on a floating shelf with a lift-up lid and hidden box compartment.
The basic idea is simple: build a shallow wooden box, add a shelf top that opens, mount the box securely to the wall, and disguise the access point so it blends with the shelf design. When closed, the shelf looks like a chunky floating shelf. When opened, it reveals a small storage space. It is like your wall learned a magic trick.
Best Uses for a Wall Shelf with Hidden Storage
Before grabbing the saw, decide what you want the secret box to hold. This helps determine the shelf size, depth, mounting method, and hardware.
Good items to store
A hidden shelf compartment is ideal for small, lightweight items such as spare keys, passports, letters, small notebooks, memory cards, jewelry boxes, cash envelopes, sentimental keepsakes, remote controls, or charging cables.
Items to avoid
Do not use this kind of shelf to store heavy valuables, hazardous materials, medication that children might access, or anything that requires fireproof or waterproof protection. A DIY hidden shelf is clever storage, not a certified safe. It is best for convenience and discretion, not high-security protection.
Tools and Materials You Will Need
This DIY hidden storage shelf can be made with basic woodworking tools. A table saw is helpful, but you can use a circular saw with a guide if you measure carefully.
Materials
- 1×4 or 1×6 board for the shelf box frame
- 1/2-inch or 3/4-inch plywood for the shelf top and bottom
- 1/4-inch plywood or hardboard for a lightweight compartment bottom
- Wood glue
- 1 1/4-inch pocket-hole screws or wood screws
- Brad nails or finishing nails
- Small concealed hinges or piano hinge
- Magnetic catch, touch latch, or small rare-earth magnets
- Wall cleat, French cleat, or heavy-duty floating shelf brackets
- Stud screws or structural wood screws
- Drywall anchors only when appropriate for light-duty support
- Wood filler
- Sandpaper in 120-grit and 220-grit
- Paint, stain, polyurethane, or wood finish
Tools
- Tape measure
- Pencil
- Stud finder
- Level
- Drill and driver bits
- Miter saw, circular saw, or table saw
- Clamps
- Pocket-hole jig, optional but useful
- Brad nailer or hammer
- Sanding block or orbital sander
- Safety glasses and hearing protection
Planning the Shelf Size
A good beginner size is about 24 inches wide, 6 inches deep, and 4 inches tall. This gives enough space for a useful hidden compartment while keeping the shelf compact and easier to mount.
For a larger shelf, such as 36 or 48 inches wide, use stronger mounting hardware and anchor into at least two wall studs whenever possible. A long shelf with hidden storage has more leverage on the wall, especially if someone places books or heavy decor on top. The shelf may look relaxed, but gravity has a full-time job and never takes a vacation.
Recommended dimensions for beginners
- Width: 24 inches
- Depth: 6 inches
- Height: 4 inches
- Hidden compartment depth: about 4 1/2 to 5 inches
- Hidden compartment height: about 2 1/2 to 3 inches
Step 1: Locate the Wall Studs
Before building, choose the wall where the shelf will hang. Use a stud finder to locate studs and mark their centers with painter’s tape or pencil. Most residential wall studs are spaced 16 inches apart, though some may be 24 inches apart. Do not assume. Walls enjoy keeping secrets too.
For the strongest installation, mount the shelf into wall studs. Drywall anchors can work for light decorative shelves, but a hidden storage shelf is basically a small wall cabinet. It needs secure support. If the shelf will hold anything heavier than a few lightweight items, studs or an approved mounting system are strongly recommended.
Step 2: Cut the Shelf Box Pieces
Cut the front, back, and side pieces from a 1×4 or 1×6 board. For a 24-inch shelf, cut the front and back pieces to 24 inches. Cut the side pieces to match the shelf depth, usually around 5 to 6 inches depending on the board and design.
Then cut the bottom panel from 1/4-inch plywood or hardboard. Cut the lid from 1/2-inch or 3/4-inch plywood. The lid should sit flush with the top edges of the box so the shelf looks like one clean piece when closed.
Example cut list for a 24-inch shelf
- Front board: 24 inches long
- Back board: 24 inches long
- Side boards: 5 1/2 inches long, two pieces
- Bottom panel: 22 1/2 inches by 5 1/2 inches, adjust to fit inside the frame
- Top lid: 24 inches by 6 inches
- Internal cleats: scrap strips or 1/4-inch square dowels
Always measure your actual lumber before cutting the panels. Store-bought boards can vary slightly, and plywood thickness is sometimes more “creative suggestion” than exact measurement.
Step 3: Assemble the Hidden Storage Box
Dry-fit the front, back, and side pieces first. Check that the corners are square. Apply wood glue to the joints, then fasten the box frame with pocket-hole screws, brad nails, or wood screws. Pocket holes are excellent because they create strong joints while keeping screw heads hidden inside the box.
After the frame is assembled, add the bottom panel. Apply a thin bead of wood glue along the lower inside edges, place the bottom panel, and secure it with brad nails or small screws. Clamp the assembly while the glue dries.
At this stage, you should have a shallow open-top box. Congratulations: you have built the secret compartment. Try not to immediately hide snacks in it. Actually, go ahead. Testing is important.
Step 4: Add Internal Cleats for the Lid
The lid needs support so it sits flush with the top of the shelf. Install narrow internal cleats along the inside walls of the box. These can be thin wood strips, square dowels, or leftover plywood strips.
Place the cleats slightly below the top edge of the box. The exact setback should match the lid thickness. For example, if your lid is 1/2 inch thick, install the cleats 1/2 inch below the top edge. This allows the lid to rest level with the surrounding frame.
Use glue and brad nails to secure the cleats. Check the lid fit before the glue dries. The lid should open easily but not rattle like a haunted drawer.
Step 5: Create the Secret Opening Mechanism
There are several ways to access the hidden compartment. For a simple and reliable design, use a hinged top with a magnetic catch.
Option 1: Hinged lid
Attach two small concealed hinges or a narrow piano hinge along the back edge of the lid. This lets the top swing upward. Add a small magnetic catch near the front inside edge to keep it closed. This option is easy to build and dependable.
Option 2: Lift-off lid with magnets
Skip the hinges and use rare-earth magnets to hold the lid in place. Drill shallow recesses for the magnets, glue them into the lid and cleats, and make sure the polarity lines up. This creates a cleaner look, but the lid must fit precisely.
Option 3: Push-to-open touch latch
A touch latch lets the lid release with a gentle press. It feels fancy, like something from a spy movie, except your mission is mostly finding the good scissors.
For most DIYers, the hinged lid with magnetic catch offers the best balance of strength, simplicity, and stealth.
Step 6: Sand and Shape the Shelf
Sand the entire shelf with 120-grit sandpaper, then move to 220-grit for a smooth finish. Slightly round over the front edges by hand or with a router. Rounded edges make the shelf look more polished and help paint or stain wear better over time.
Fill nail holes, screw holes, and small gaps with wood filler. Let it dry, sand again, and wipe away dust with a tack cloth or slightly damp rag.
Step 7: Finish the Shelf
The finish depends on the style of your room. Paint creates a clean, modern look and hides mixed materials like pine and plywood. Stain highlights the wood grain and gives the shelf a warmer, handmade feel. For kitchens, bathrooms, or humid rooms, add a protective clear coat.
Popular finish ideas
- Matte black for a modern industrial look
- White paint for a clean farmhouse or minimalist style
- Walnut stain for a rich, classic appearance
- Natural clear coat for Scandinavian-style decor
- Color-matched paint so the shelf blends into the wall
Let the finish cure fully before mounting. Paint that feels dry may still be soft underneath, and soft paint loves collecting fingerprints like it is gathering evidence.
Step 8: Choose the Best Mounting Method
The mounting method is the difference between a shelf that quietly does its job and a shelf that makes a dramatic midnight exit from the wall.
French cleat
A French cleat uses two beveled strips that lock together. One strip attaches to the wall, and the other attaches to the shelf. It is strong, simple, and great for floating-style shelves. Use a 45-degree bevel and secure the wall cleat into studs.
Heavy-duty floating shelf brackets
Floating shelf brackets use metal rods or supports that slide into holes drilled in the shelf. They create a very clean floating appearance. Choose brackets rated for your shelf size and expected load.
Backplate or mounting rail
A backplate is a flat mounting board attached to studs. The shelf box then screws into the backplate from inside the hidden compartment. This is one of the easiest methods for a secret storage shelf because the screws can be hidden inside.
For this project, a backplate or French cleat is recommended. Both allow strong wall attachment while keeping the outside of the shelf clean.
Step 9: Mount the Shelf Securely
Hold the mounting cleat or backplate against the wall at the desired height. Use a level to make sure it is straight. Mark the screw holes over the studs, drill pilot holes, and fasten the cleat or backplate with strong screws.
If you cannot hit two studs, use a combination of one stud and properly rated toggle anchors, depending on the shelf load and wall type. For heavy shelves, do not rely on basic plastic anchors alone. When in doubt, reduce the shelf size, change the location, or use a professional-grade mounting method.
Once the wall hardware is installed, attach the shelf box. Check for level again. Open and close the hidden compartment to make sure the lid works smoothly and nothing rubs.
Step 10: Style the Shelf Without Giving Away the Secret
Now comes the fun part: making the shelf look normal. Add a small plant, a framed print, a candle, or a few books. Keep the decor lightweight and casual. If the shelf looks too empty, people may inspect it. If it looks too crowded, opening the secret lid becomes annoying.
Try placing decor toward the sides and leaving the lid’s opening path clear. If you use a hinged top, avoid heavy items directly on the lid unless you enjoy removing six objects every time you need your spare keys.
Safety Tips for Building and Installing Hidden Wall Storage
Any wall-mounted project should be built with safety in mind. Wear eye protection while cutting, drilling, and sanding. Clamp boards before cutting. Keep fingers away from saw blades. Read the instructions for your hinges, latches, anchors, and brackets.
Also consider where the shelf will be installed. Avoid drilling into areas where plumbing or electrical wiring may be present. Be extra cautious near bathrooms, kitchens, outlets, switches, and walls shared with utility spaces.
Finally, do not overload the shelf. Hidden storage makes the shelf more useful, but it does not cancel physics. Keep heavier items close to the wall, use studs whenever possible, and follow hardware weight ratings.
Common Mistakes to Avoid
Building the shelf too deep
A deep shelf creates more leverage on the wall. For most rooms, 5 to 8 inches deep is practical. Anything deeper needs stronger support.
Skipping the dry fit
Test every part before gluing. A hidden lid needs smooth movement and accurate spacing. Glue is wonderful, but it is not famous for giving second chances.
Using weak hinges
Small craft hinges may look cute, but they can loosen quickly. Choose sturdy hinges that match the lid weight and opening style.
Ignoring wall structure
The shelf is only as strong as the wall connection. Use studs, heavy-duty brackets, or appropriate anchors for the wall type.
Making the secret too obvious
Large gaps, visible hinges, or a lid that sits higher than the shelf frame can reveal the compartment. Sand carefully, align the lid, and use paint or stain to blend the pieces together.
Design Variations to Try
Once you understand the basic build, you can customize the shelf for different rooms and styles.
Entryway key shelf
Add small hooks underneath for keys, dog leashes, or hats. Store backup keys and small essentials in the hidden compartment.
Bedside floating shelf
Mount the shelf next to the bed as a compact nightstand. Hide charging cables, reading glasses, or a small notebook inside.
Bathroom storage shelf
Use moisture-resistant finish and store small toiletries, extra razors, or personal items. Avoid placing it where it will be splashed regularly.
Office secret shelf
Use it above a desk for USB drives, memory cards, stamps, or important notes. Add a cable notch if you want to hide charging cords.
Estimated Cost and Time
The cost depends on wood species, hardware, and finish. A basic painted pine and plywood shelf may cost around $30 to $60 if you already own the tools. A hardwood version with premium concealed hardware may cost $75 to $150 or more.
Most DIYers can finish the build in one weekend. Cutting and assembly may take a few hours. Sanding, finishing, drying, and mounting add more time. The most important rule is simple: do not rush the finish or the installation. A beautiful shelf that falls off the wall is not a design feature.
Extra Experience: Lessons Learned from Building a Hidden Storage Shelf
The first thing you learn when building a wall shelf with a secret hidden storage box is that “simple” projects are often simple only after you finish them. On paper, it is a box with a lid. In real life, it is a box with a lid that must sit straight, open smoothly, mount securely, look attractive, and not announce to every guest, “Hello, I am obviously hiding something.” That is where the real craft begins.
One helpful experience is to build the hidden compartment slightly larger than you think you need, but not so large that the shelf becomes bulky. Small items have a funny way of multiplying. You may start by hiding one spare key and an envelope, then suddenly the compartment contains a flashlight, old birthday card, thumb drive, foreign coins, and a mystery screw you are afraid to throw away. A little extra space is useful, but too much depth makes the shelf harder to support.
Another lesson is that lid alignment matters more than expected. If the top lid sits even slightly proud of the shelf frame, it catches the eye. If it sits too low, it looks like a mistake. The easiest fix is to install the internal cleats carefully and test the lid several times before fastening anything permanently. Use playing cards, thin cardboard, or painter’s tape as temporary spacers while adjusting the fit. This tiny step can save a lot of sanding, muttering, and dramatic staring into the middle distance.
Magnets are also worth testing before final assembly. Rare-earth magnets are strong, but they need to be placed correctly. If the magnet polarity is wrong, the lid will repel instead of close, which is hilarious for about four seconds and annoying forever after. Mark the magnet faces with a pencil before gluing them in place. Use epoxy or strong adhesive, and drill shallow recesses so the magnets sit flush.
When mounting the shelf, the best experience-based advice is to choose function over fantasy. The shelf may look better centered over a sofa, but if that location misses every stud, you need a better plan. Move the shelf slightly, use a longer mounting cleat, or choose stronger hardware. Wall studs are not glamorous, but they are the quiet heroes of home improvement. Respect them.
Finishing the shelf is another area where patience pays off. Paint or stain before installing the final hardware when possible. It is much easier to finish flat pieces on a workbench than to paint around tiny hinges after assembly. For a painted shelf, primer helps hide grain and gives the final coat a smoother look. For stained wood, test the stain on scrap first. Pine can absorb stain unevenly, so a pre-stain conditioner may help create a cleaner finish.
Finally, style the shelf naturally. A secret shelf works best when it does not look too special. Place a small plant, a picture frame, or two light books on top. Avoid overly symmetrical styling that makes the shelf look staged for inspection. The goal is quiet usefulness. The best hidden storage is not dramatic; it simply blends into the room and does its job without asking for applause.
Conclusion
Building a wall shelf with a secret hidden storage box is a satisfying DIY project because it combines woodworking, storage, design, and a little mystery. With basic materials, careful measuring, strong mounting, and the right opening mechanism, you can create a shelf that looks stylish while hiding small essentials in plain sight.
The key is balance. Make the shelf strong enough for everyday use, simple enough to build accurately, and subtle enough that the hidden compartment stays hidden. Whether you install it in an entryway, bedroom, office, or living room, this project adds both personality and practicality to your wall. And let’s be honest: every home deserves at least one piece of furniture with a secret.
SEO Tags
Note: This article is written for general DIY education. Always follow tool safety instructions, check your wall structure before drilling, and use mounting hardware rated for your shelf size and expected load.