A washing machine spends its life cleaning muddy jeans, sweaty gym clothes, pet blankets, bath towels, and the occasional tissue that somehow explodes into a thousand fluffy pieces. Naturally, we assume all that soap and water keeps the appliance clean too.
Unfortunately, a washer does not wash itself simply because it washes your socks. Detergent residue, fabric softener, lint, body oils, minerals, and moisture can gradually collect inside the tub, dispensers, agitator, filters, and hidden crevices. Eventually, the machine may develop a musty odor, leave flakes on clothing, or make freshly washed laundry smell suspiciously less than fresh.
The good news is that learning how to clean a top loader washing machine is straightforward. Most of the work involves wiping removable parts, running an empty cleaning cycle, and changing a few laundry habits so the grime does not immediately return.
Why Does a Top-Loading Washer Get Dirty?
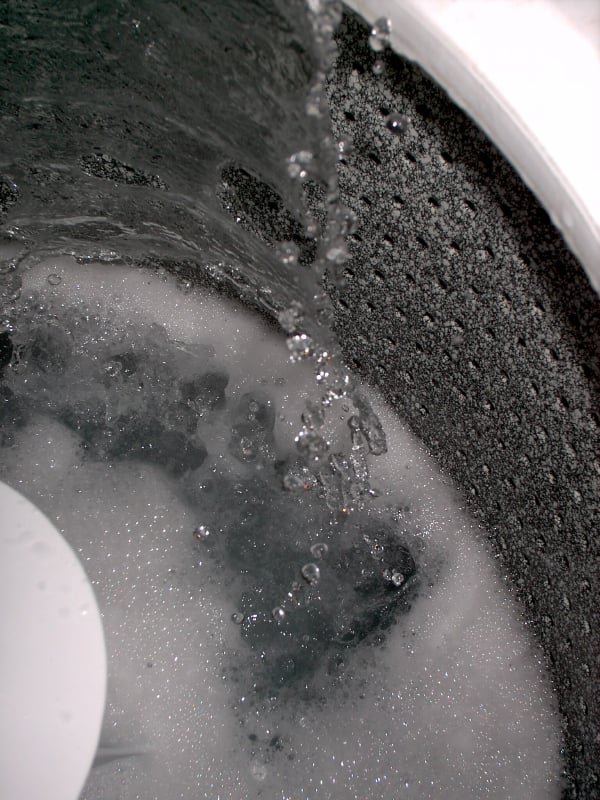
A top loader may look spotless from above while hiding a miniature swamp below the waterline. Modern detergents suspend dirt and oils so they can be rinsed away, but not every particle leaves the machine. Small amounts can settle on the outer tub, under the agitator, around the wash plate, or inside a dispenser.
Using too much detergent makes the problem worse. Extra soap does not automatically produce cleaner clothes. It can create excess suds and leave a sticky film that traps lint, oils, and odor-causing residue. High-efficiency top loaders are especially sensitive because they use less water and require low-sudsing HE detergent.
Liquid fabric softener can also accumulate because it is designed to coat fibers. Unfortunately, it may coat dispenser cups and washer components just as enthusiastically. Add warm moisture, a closed lid, and damp laundry forgotten overnight, and the washer becomes an inviting place for unpleasant smells.
Signs Your Washer Needs Cleaning
Your top-loading washing machine is probably ready for attention when you notice one or more of the following:
- A sour, musty, or mildew-like odor inside the tub
- Freshly washed clothes that smell stale
- Brown, gray, or waxy flakes on laundry
- Visible detergent or softener residue in the dispensers
- A dirty ring around the upper tub or beneath the lid
- Lint, hair, or debris collecting around the agitator
- A washer-clean reminder appearing on the control panel
What You Need to Clean a Top Loader Washing Machine
Gather the supplies before starting so you do not have to wander through the house with one wet glove and a toothbrush covered in detergent slime.
- Two or three microfiber cloths
- A soft-bristled toothbrush or detailing brush
- A small bowl of warm water
- A few drops of mild dish soap
- A manufacturer-approved washing machine cleaner
- Rubber or nitrile cleaning gloves
- Paper towels for loose residue
- Your washer’s owner manual
A commercial washer-cleaning tablet or powder is the simplest option because it is made to dissolve detergent film and odor-producing buildup. Some manufacturers also permit liquid chlorine bleach in the clean-washer cycle. Use bleach only when your manual specifically allows it, and follow the stated amount and dispenser instructions.
Vinegar appears in many traditional cleaning recipes, but appliance manufacturers do not agree on its use. Some washer instructions permit a measured amount, while others warn that repeated exposure to acidic cleaners may affect seals, hoses, or components. Your model’s manual should settle the argument.
How to Clean a Top Loader Washing Machine Step by Step
1. Empty the Washer Completely
Remove clothing, stray socks, coins, hair clips, tissues, and anything else hiding in the tub. A cleaning cycle must be run with an empty washer unless the manufacturer says otherwise.
Check beneath the rim and around the agitator. Small objects can become trapped where they are difficult to see. If your model has a removable agitator, wash plate, lint filter, or softener cup, consult the manual before trying to take it apart. Do not use force; plastic clips have a remarkable ability to break on weekends when replacement parts are difficult to find.
2. Clean the Detergent, Bleach, and Fabric Softener Dispensers
Remove any dispenser cups or trays designed to come out. Rinse them under warm running water and apply a small amount of mild dish soap. Scrub corners, siphon openings, and narrow channels with a soft toothbrush.
For fixed dispensers, dip a cloth or toothbrush in warm, lightly soapy water and wipe away residue. Avoid flooding the control panel or pouring water into electrical openings. Finish with a clean damp cloth, then dry the area.
If the dispenser contains a thick waxy coating, repeated gentle cleaning is safer than attacking it with a screwdriver or abrasive pad. Sharp tools can scratch the plastic and create new hiding places for residue.
3. Wipe the Lid, Rim, and Upper Tub
Raise the lid and examine its underside, hinges, glass, and surrounding frame. These areas collect detergent splashes, dust, and lint but receive little cleaning action during a regular cycle.
Wipe them with a microfiber cloth dampened with mild soapy water. Use a toothbrush around hinges and along the tub rim. Follow with a cloth dampened only with clean water, and then dry the surfaces.
Pay close attention to the ring above the normal waterline. It often develops a dark film because wash water splashes there without fully rinsing it.
4. Clean the Agitator or Wash Plate
Traditional top loaders have a tall center agitator, while newer machines may use a low-profile impeller or wash plate. In most cases, the main tub-cleaning cycle also cleans these components.
If you see grime on the agitator, wipe it with a damp cloth and mild soap. Remove and wash the fabric softener cup if the manufacturer designed it to come off. Use a long, soft brush to reach narrow areas, but do not dismantle the agitator unless the manual provides instructions.
For a removable agitator, follow the manufacturer’s exact removal procedure. Lift it carefully, clean underneath, and reinstall it securely before operating the washer.
5. Add One Approved Cleaning Product
Choose one of the following methods according to your owner manual:
- Washer-cleaning tablet or powder: Place it in the empty basket or dispenser as directed by the product and appliance instructions.
- Liquid chlorine bleach: Add only the amount specified by the washer manufacturer, usually through the bleach dispenser rather than pouring it randomly into the tub.
- Another approved cleaner: Follow both the cleaner label and the washer manual.
Do not add laundry detergent to the cleaning cycle unless the manual specifically calls for it. Regular detergent can create more of the residue you are trying to remove.
Most importantly, do not combine products. A bleach cycle and a vinegar experiment should never become roommates.
6. Run the Clean Washer, Tub Clean, or Self-Clean Cycle
Select the dedicated maintenance cycle if your machine has one. Depending on the brand, it may be labeled Clean Washer, Basket Clean, Tub Clean, Self Clean, Pure Cycle, or something similar.
These cycles generally use a specific combination of water level, temperature, soaking, agitation, and rinsing to clean areas that a normal laundry cycle may not reach. Allow the program to finish without interruption.
If the washer does not have a cleaning cycle, the manual may instruct you to use the longest cycle, highest available water level, and hottest permitted water setting. Do not assume every machine should be filled manually or paused for an hour. Some electronic models automatically drain after being paused, while others lock the lid or use low-water cleaning procedures.
7. Inspect the Tub and Run an Extra Rinse if Needed
When the cleaning cycle ends, open the lid and look for loosened residue. Wipe visible flakes or film from the tub with a clean cloth or paper towel.
If you still smell cleaner or see debris, run an empty rinse-and-spin cycle. An extra rinse is particularly useful after a heavy buildup has been loosened or when the product instructions recommend it.
8. Check and Clean the Washer Filter
Not every top loader has a user-accessible filter. Depending on the design, the filter may be inside the agitator, under the upper rim, near the water pump, or completely inaccessible without service work.
Use the manual to locate it. If the filter is removable, unplug the washer first, place a towel nearby, and follow the manufacturer’s directions. Remove lint and debris, rinse the filter with warm water, gently scrub it, and reinstall it correctly.
Never open a pump housing or remove panels based solely on a generic online video. A procedure that works on one model may create a leak, electrical hazard, or very expensive puddle on another.
9. Clean the Exterior and Control Panel
Wipe the washer cabinet with a damp microfiber cloth and a small amount of mild soap. Clean knobs, buttons, and the area around the lid. Apply water to the cloth rather than spraying cleaner directly onto the control panel.
Dry the exterior to prevent streaks. While you are there, sweep or vacuum behind and beside the appliance if the area is safely accessible.
10. Let the Washer Air-Dry
Leave the lid and dispenser drawer open until the interior is dry. Air circulation helps moisture escape and makes the washer less welcoming to odor-causing buildup.
If children or pets can access the machine, follow the manufacturer’s safety recommendations rather than leaving the lid widely open and unattended.
How Often Should You Clean a Top-Loading Washer?
A monthly cleaning cycle is a useful general schedule for a frequently used washer. Some manufacturers recommend cleaning about every 30 or 40 loads, while smart washers may display a reminder based on the number of completed cycles.
You may need to clean more often when the washer handles heavily soiled work clothes, cloth diapers, pet bedding, oily kitchen linens, or several loads every day. Hard water, frequent cold-water washing, excess detergent, and heavy fabric-softener use can also speed up residue formation.
For a lightly used machine, follow the maintenance interval in the manual and clean it whenever you notice odor or visible buildup.
How to Keep a Top Loader Clean Between Deep Cleanings
Use the Correct Detergent
Use HE detergent in a high-efficiency top loader. Look for the HE symbol on the detergent package and measure according to the product label, load size, soil level, and water hardness.
Do not automatically fill the detergent cap. Many caps hold far more product than an average load requires. More soap can mean more residue, more rinsing difficulty, and less impressive laundry.
Remove Wet Laundry Promptly
Transfer clothes to the dryer or drying rack soon after the wash cycle ends. Damp fabric sitting in a closed tub can develop a musty smell and keep the washer humid.
Leave the Lid Open Between Loads
Allow the tub to dry when the washer is not in use. Leave removable dispenser drawers slightly open as well. Again, consider child and pet safety when deciding how far to open the lid.
Do Not Overload the Washer
Clothes need room to circulate. Packing the basket tightly can reduce cleaning and rinsing performance, strain the machine, and leave more soil behind. Arrange items loosely and evenly around the agitator or wash plate.
Limit Fabric Softener Buildup
Use only the recommended amount of liquid fabric softener and place it in the correct dispenser. Never pour concentrated softener directly onto clothing or randomly into the tub.
Wipe Spills Immediately
Clean detergent drips and softener splashes before they dry into colorful glue. A quick wipe takes seconds; removing a month-old crust requires archaeology.
How to Handle Common Top-Loader Cleaning Problems
The Washer Still Smells After Cleaning
Run another manufacturer-approved cleaning cycle, especially if the washer had a heavy buildup. Clean the dispensers, agitator cup, lid rim, and accessible filter again. Verify that the drain hose is installed correctly and that water is not remaining in the tub.
A persistent sewage-like odor may come from the household drain rather than the washer. If the smell remains after maintenance, contact a qualified appliance technician or plumber.
Brown or Black Flakes Appear in the Tub
Flakes are often loosened detergent, softener, mineral, or soil deposits. Wipe them out, run another empty cleaning cycle, and follow with a rinse. Severe buildup may require multiple cycles rather than one industrial-strength chemical cocktail.
The Washer Has Hard-Water Deposits
Use a washing machine cleaner labeled for mineral buildup if the appliance manufacturer permits it. Clean the dispensers regularly and adjust detergent use for your water conditions. A whole-home water softener is a larger investment but may help when mineral buildup affects several appliances and fixtures.
The Washer Does Not Drain Properly
Stop using the appliance if water remains in the tub, the pump makes unusual noises, or the washer displays a drain error. Check the manual for a user-cleanable filter and inspect the visible drain hose for kinks. Avoid removing panels or reaching into pump components while the washer is connected to power.
Practical Experiences and Lessons From Cleaning Top-Load Washers
Real-world washer cleaning rarely looks like a perfectly staged demonstration in which one tablet goes in and a sparkling appliance emerges 60 minutes later. The first cleaning often reveals how laundry habits have been affecting the machine for months or even years.
Experience 1: The “Clean” Laundry That Smelled Musty
A common situation begins with towels that smell acceptable when they leave the washer but turn sour as soon as they become damp again. The instinct is often to add more detergent, more scent booster, and more fabric softener. That approach can temporarily cover the odor while creating additional buildup.
The more effective response is to clean the washer, scrub the softener dispenser, reduce product amounts, and remove loads promptly. After an empty maintenance cycle, the first few rinses may release small gray flakes. This is unpleasant but useful: the cleaning process is removing residue that had been hiding inside the machine.
The lesson is that fragrance is not the same as cleanliness. When laundry requires an increasingly dramatic cloud of perfume to smell fresh, the washer and the laundry routine both deserve inspection.
Experience 2: The Agitator With a Secret Collection
Another familiar discovery occurs when the softener cup is removed from the top of an agitator. Beneath it may be a sticky combination of detergent, lint, hair, and softened mystery material. The visible tub can look perfectly clean while this small component produces much of the odor.
Warm water, mild dish soap, and a toothbrush usually work better than aggressive scraping. The dispenser may need several rinses, especially when old softener has thickened inside a narrow siphon channel. Once dry and reinstalled, it should be maintained with quick monthly rinses rather than waiting for another detergent stalactite to form.
The lesson is to clean the parts that handle laundry products, not just the stainless steel or porcelain basket that receives all the attention.
Experience 3: Too Much Detergent Was the Real Problem
In high-efficiency top loaders, owners are sometimes surprised by the small amount of visible water. They respond by adding extra detergent, assuming a stronger dose will compensate. Instead, the low-water system may have difficulty rinsing away the excess suds.
After a deep cleaning, reducing the detergent amount can make a noticeable difference. The tub stays fresher, dispensers remain cleaner, and clothing feels less stiff or coated. Measuring detergent is not exciting, but neither is cleaning blue slime from a dispenser with a cotton swab.
The lesson is to follow the detergent label and washer instructions rather than treating the cap as a mandatory serving size.
Experience 4: The Cleaning Cycle Was Not a One-Time Cure
A neglected washer may need two maintenance cycles. The first loosens buildup, and the second removes what remains. Between cycles, wiping the tub and cleaning the upper rim prevents loosened residue from simply settling somewhere else.
However, repeatedly adding stronger chemicals is not the answer. When an approved cleaner and a second rinse do not solve the problem, it is time to inspect the filter, drainage, and installation or arrange professional service.
The lesson is to be patient but not reckless. Controlled repetition is safer than improvising a chemistry experiment in the laundry room.
Experience 5: Small Habits Made the Biggest Difference
The most successful long-term routine is not complicated. Remove wet clothing promptly. Leave the lid open so the tub dries. Wipe detergent spills. Rinse the dispenser before buildup becomes visible. Run the machine’s maintenance cycle when the reminder appears.
These tasks take only a few minutes, yet they prevent the dramatic odors and heavy residue that make deep cleaning unpleasant. A top loader does not require constant polishing; it simply benefits from being allowed to drain, dry, and operate with the correct amount of laundry product.
The final lesson is reassuring: washer maintenance is less about heroic scrubbing and more about consistency. Treat the appliance to a monthly cleaning cycle and sensible daily habits, and it is far less likely to return your favor by making clean towels smell like a forgotten basement.
Conclusion
To clean a top loader washing machine properly, begin with the instructions for your exact model. Empty the basket, wash removable dispensers, wipe the lid and tub rim, clean the agitator or wash plate, and run the dedicated cleaning cycle with one approved cleaning product. Finish by removing loosened residue, checking any accessible filter, and allowing the machine to dry.
Regular maintenance is easier than rescuing a washer after years of buildup. Use the correct detergent, measure it carefully, transfer wet laundry promptly, and leave the lid open between loads when it is safe to do so. Most importantly, never mix cleaning chemicals. Your laundry room should smell freshnot like an emergency science demonstration.