If your pantry currently looks like a small grocery store had a dramatic breakup with a craft drawer, you are not alone. Bags of flour lean sadly against cereal boxes. Rice hides behind pasta. Chia seeds, sesame seeds, and “mystery beige powder” all pretend to be the same ingredient until dinner gets weird. The good news? You do not need a fancy label maker, expensive vinyl decals, or a degree in professional organizing to fix it.
You can make beautiful, clear pantry jar labels with something you probably already have in a drawer: clear packing tape. Yes, the same tape that seals boxes, traps loose glitter forever, and somehow always sticks to itself at the worst possible moment. With a printed label, a strip of tape, warm water, and a little rubbing, you can create transparent labels that look surprisingly polished on glass jars, spice containers, canisters, storage bins, and even repurposed sauce jars.
This guide walks you through how to make DIY clear labels from packing tape, how to design labels that actually look good, which printer works best, how to apply the labels without bubbles, and how to keep your pantry organized without turning it into a museum exhibit where nobody is allowed to touch the oats.
Why Make Clear Pantry Jar Labels With Packing Tape?
Clear labels have become a favorite in pantry organization because they look clean, modern, and easy to read. Unlike paper labels, they visually disappear onto glass, leaving only the text or design visible. That means your jars still look simple and uncluttered, but everyone in the house can finally tell the difference between powdered sugar and cornstarch without conducting a risky taste test.
The packing tape method is especially appealing because it is inexpensive, customizable, and beginner-friendly. You can choose your own fonts, label sizes, wording, and style. Want minimalist black text? Easy. Want tiny botanical illustrations next to “Rosemary” and “Thyme”? Also doable. Want a label that says “Emergency Chocolate Chips” because honesty matters? Absolutely.
The Benefits of DIY Packing Tape Labels
Making labels from packing tape is practical for several reasons. First, it costs very little compared with buying custom vinyl labels. Second, you can make only the labels you need instead of buying a pack that includes “quinoa,” “farro,” and “coconut flour” when your pantry is mostly pasta and snacks. Third, the labels work beautifully on smooth surfaces such as glass jars, plastic canisters, metal tins, and some ceramic containers.
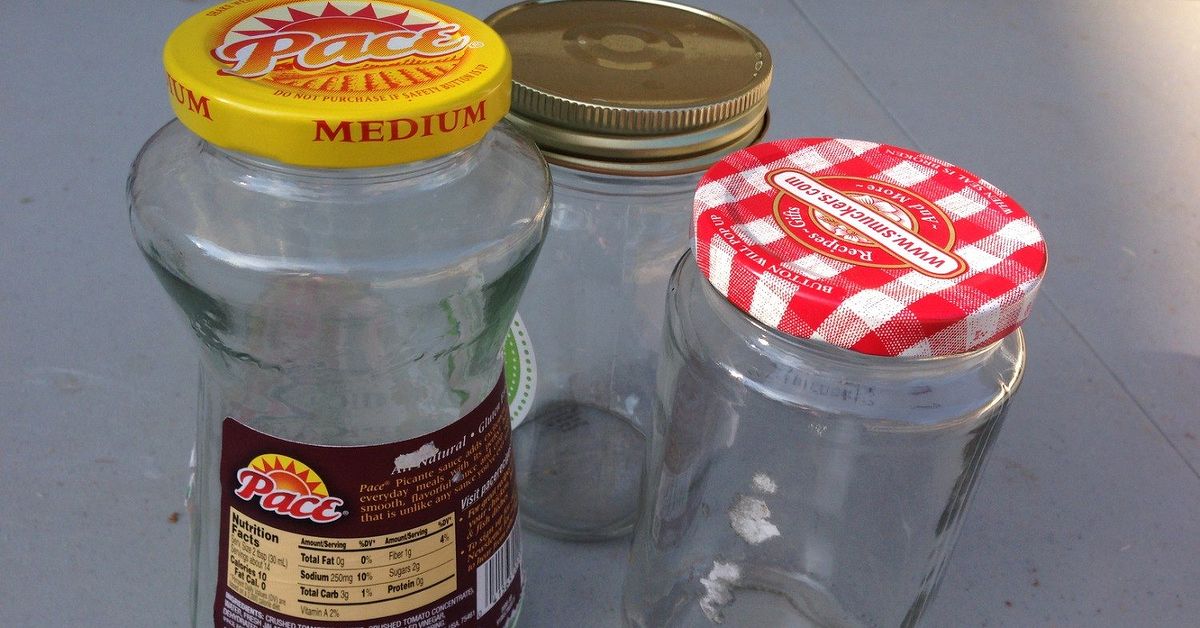
They are also a smart option for repurposing jars. Empty salsa jars, pasta sauce jars, jam jars, and pickle jars can become matching pantry storage with a little cleaning and a clear label. This gives your pantry a more uniform look while reducing waste. Your old marinara jar gets a second career as an elegant lentil container. Honestly, inspirational.
How the Packing Tape Transfer Method Works
The basic idea is simple. You print your label on ordinary paper, press clear packing tape over the printed design, burnish it so the ink or toner bonds to the adhesive, soak the paper in warm water, and gently rub the paper backing away. The printed words stay on the tape, creating a clear sticker-like label.
This technique works best with laser-printed labels or photocopies because toner sits on the surface of the paper and transfers more reliably to the tape adhesive. Some crafters have success with inkjet prints, but results can vary because inkjet ink may bleed, fade, or wash away during soaking. If you only have an inkjet printer, test one label before printing a whole pantry’s worth of tiny kitchen poetry.
Supplies You’ll Need
You do not need much for this project, which is part of its charm. The supply list is wonderfully short, unlike the instructions for assembling certain flat-pack furniture that shall remain nameless.
- Clear packing tape, preferably wide and heavy-duty
- Printed label designs on regular copy paper
- Laser printer or laser photocopy for best results
- Scissors or a craft knife
- A bowl of warm water
- A credit card, spoon, craft stick, or bone folder for smoothing
- Clean glass jars or pantry containers
- Rubbing alcohol or dish soap for cleaning the jar surface
- A towel for drying labels and containers
Wide packing tape gives you more room for larger labels. Standard tape is usually around two inches wide, so keep your label designs within that height unless you plan to overlap strips. For pantry jars, a label height between half an inch and one and a half inches is usually enough.
Step-by-Step: How to Make Clear Labels From Packing Tape
Step 1: Decide What You Want to Label
Before opening your design program, make a list of what actually lives in your pantry. This saves time and prevents the classic organizing mistake of creating labels for an imaginary lifestyle. You may dream of labeling “heirloom black lentils,” but if your real pantry contains elbow macaroni, all-purpose flour, instant coffee, and five kinds of chips, start there.
Common pantry jar labels include flour, sugar, brown sugar, powdered sugar, oats, rice, pasta, lentils, beans, coffee, tea, cocoa powder, baking soda, baking powder, breadcrumbs, cereal, granola, nuts, seeds, and spices. For baking ingredients, consider adding small secondary details, such as “all-purpose,” “bread flour,” or “self-rising,” so nobody accidentally bakes a cake with the wrong flour and then blames the oven.
Step 2: Design Your Labels
You can design labels in a basic word processor, Google Docs, Canva, Microsoft Word, or any simple design tool. Choose readable fonts with clean lines. Script fonts can look lovely, but make sure they are still readable at a small size. The pantry is not the place for a font so curly that “cumin” looks like “cannon.”
For a modern look, use a simple sans-serif font in black. For a farmhouse style, try a typewriter-inspired font or small uppercase lettering. For a softer handmade look, use a simple script font paired with plain block letters. Keep spacing generous, and avoid making letters too thin. Bolder text transfers more clearly than delicate hairline fonts.
Step 3: Print on Regular Paper
Print your labels on regular copy paper, not glossy photo paper. A laser printer usually gives the cleanest transfer. If you do not own one, you can send the file to a local print shop or office supply store and request a black-and-white laser print. This small step can make the difference between crisp labels and a blurry little tragedy.
Print a test sheet first. Cut out one label, place it against your jar, and check the size. The label should be large enough to read at a glance but not so large that it wraps awkwardly around the jar. For spice jars, smaller labels work best. For large flour or cereal canisters, bigger labels look balanced.
Step 4: Cover the Printed Label With Packing Tape
Lay the printed paper on a flat surface. Cut a piece of clear packing tape slightly larger than the label. Carefully place the tape over the printed side, sticky side down. Try to avoid wrinkles and bubbles. If the tape lands crooked, do not panic. This is a craft project, not a NASA docking procedure.
Once the tape is in place, press it firmly over the printed area. Use the edge of a credit card, spoon, craft stick, or bone folder to rub across the tape. This is called burnishing. The goal is to make strong contact between the printed letters and the tape adhesive. Rub in several directions, especially over the edges of each letter.
Step 5: Trim the Label
Cut around the taped label, leaving a small border of clear tape around the words. Rounded corners are a nice touch because they are less likely to peel later. If you want a clean rectangular look, use a ruler and craft knife. If you are more of a “good enough and still cute” person, scissors are fine.
Step 6: Soak the Label in Warm Water
Place the trimmed label in a bowl of warm water with the paper side facing down or fully submerged. Let it soak for a minute or two. The water softens the paper fibers so they can be rubbed away while the ink or toner remains attached to the tape.
Do not rush this step. If the paper resists, give it a little more time. For thicker paper, soaking may take longer. Warm water works well, but avoid boiling water. Boiling water is dramatic, and pantry labels do not need drama.
Step 7: Rub Away the Paper
Remove the label from the water and gently rub the paper backing with your fingers. The paper should roll away in soft bits, leaving the printed words on the clear tape. Work slowly and avoid scraping aggressively. If you rub too hard, you can remove parts of the design.
When most of the paper is gone, dip the label back into water and rub again. A faint cloudy layer may remain at first. Keep rubbing lightly until the label looks clear. Tiny bits of paper can hide around letters, so check the label against a darker surface to spot any leftovers.
Step 8: Let the Label Dry
Lay the label sticky side up or place it gently on a clean towel. As it dries, the adhesive usually becomes tacky again. This is the part that feels like kitchen witchcraft. One minute it is wet and not sticky; the next minute it is ready to cling to a jar like it has found its purpose in life.
Do not apply the label while it is dripping wet. Give it time to dry until the adhesive feels slightly sticky. If a label seems to have lost too much stickiness, it may still work on a clean glass surface, but it is better to test before committing.
Step 9: Clean the Jar Surface
Labels stick best to clean, dry, smooth surfaces. Wash jars with dish soap and dry them completely. If you are reusing jars, remove old paper labels and adhesive residue first. Rubbing alcohol can help remove leftover oils and sticky residue from glass. Wipe the area where the new label will go, then let it dry fully.
A clean surface matters because pantry jars often collect invisible kitchen film from hands, flour dust, cooking oils, and general countertop life. If the surface is greasy or damp, the label may peel.
Step 10: Apply the Label to the Jar
Hold the label by the edges and position it carefully on the jar. Start from one side and smooth across to the other side to push out air bubbles. Use your fingers or the edge of a card to press it down gently. If the jar is curved, apply slowly so the label does not wrinkle.
Once the label is in place, press over the entire surface for a few seconds. Pay special attention to the corners. Then step back and admire your work. You have just turned packing tape into a custom clear label, which is the kind of small domestic victory that deserves a snack.
Design Ideas for Pantry Jar Labels
Minimalist Black Text
The simplest option is often the most elegant. Use black uppercase or lowercase text in a clean font. This style works especially well on clear glass jars with white, beige, or neutral pantry staples such as flour, oats, rice, and sugar. It gives your pantry that calm, organized look usually seen in photos where nobody appears to own children, pets, or open bags of tortilla chips.
Vintage Apothecary Style
For a classic look, use serif fonts, thin borders, and small decorative lines. This style looks great on mason jars, swing-top jars, and recycled glass containers. Try labels like “Rolled Oats,” “Cocoa,” “Brown Rice,” and “Loose Leaf Tea.” Keep the design simple so the transfer remains crisp.
Handwritten-Style Labels
If you like a warm, casual kitchen, choose a neat handwritten-style font. This works well for family kitchens because it feels friendly rather than overly staged. Just be careful with very thin script fonts. Thick, smooth lettering transfers better and is easier to read.
Category Labels for Bins
Packing tape labels are not only for jars. Use them on clear bins or baskets to organize snacks, baking supplies, breakfast items, pasta, grains, teas, lunchbox supplies, and backstock. Category labels are especially helpful if multiple people use the pantry. A labeled snack bin reduces the chance of someone opening seven containers while looking for crackers.
What to Label Beyond the Ingredient Name
A pretty label is helpful, but a practical label is even better. For everyday dry goods, the ingredient name may be enough. For items with expiration dates, specialty flours, homemade mixes, or bulk foods, consider adding a small date label on the back or bottom of the jar. This keeps the front beautiful while preserving useful information.
For example, if you decant flour into a jar, you may want to keep the best-by date from the original package. You can write it on a small piece of painter’s tape on the bottom of the jar or keep a pantry inventory note. For homemade spice blends, label the date mixed. For home-canned goods, always label contents and date clearly so you know what to use first.
Common Mistakes and How to Avoid Them
Using the Wrong Printer
The most common problem is using a print that does not transfer well. Laser prints and photocopies usually perform best. Inkjet prints can work in some cases, but they may smear or fade when soaked. Always test first.
Not Burnishing Enough
If your letters wash away, the tape may not have been pressed firmly enough onto the print. Burnish the tape thoroughly before soaking. Rub over every part of the design with steady pressure.
Leaving Paper Fibers Behind
If the label looks cloudy, there may still be paper residue on the tape. Soak it again and rub gently. Cloudiness can also happen if the tape itself is not very clear, so choose glossy, transparent packing tape rather than cloudy or matte tape.
Applying Labels to Dirty Jars
Even a perfect label can peel off a greasy jar. Clean and dry the surface before applying. A quick wipe with rubbing alcohol helps remove oils from glass.
Expecting Dishwasher-Proof Results
Packing tape labels are water-resistant enough for normal pantry use, but they are not the same as commercial waterproof vinyl labels. Avoid soaking labeled jars or running them through the dishwasher. Hand wash carefully around the label when needed.
How to Remove or Replace Packing Tape Labels
One advantage of this method is that the labels are not permanent forever. If you decide your “Quinoa” jar is now a “Chocolate-Covered Almonds” jar because life improved, you can usually peel the tape away from glass. If residue remains, wash with warm soapy water and use rubbing alcohol or a small amount of cooking oil to loosen stickiness. Wash the jar again before adding a new label.
This flexibility makes packing tape labels great for changing pantry systems. You can update labels seasonally, rename bins, or fix a spelling mistake without feeling like you ruined an expensive custom sticker.
Best Containers for Clear Packing Tape Labels
Clear labels look best on smooth containers. Glass jars are the top choice because the tape blends into the surface and the contents show through. Mason jars, clamp jars, recycled jam jars, spice jars, and wide-mouth canisters all work well.
Plastic containers can work too, especially if the surface is smooth and glossy. However, textured plastic may prevent the label from sticking evenly. Metal tins can also look attractive with clear labels, especially for tea, coffee, or baking supplies. Avoid rough ceramic, unfinished wood, or heavily textured surfaces unless you test first.
Pantry Organization Tips to Go With Your New Labels
Group Similar Items Together
Labels are most helpful when they support a system. Group baking ingredients together, breakfast foods together, grains together, snacks together, and dinner staples together. This reduces visual clutter and makes grocery planning easier.
Use Clear Containers Strategically
You do not have to decant every single pantry item. Focus on foods that are messy, bulky, frequently used, or hard to store in their original packaging. Flour, sugar, oats, rice, pasta, cereal, nuts, and snacks are good candidates. Items you rarely use can stay in their original packaging, especially if the package contains important cooking instructions.
Keep Instructions When Needed
If you decant pancake mix, rice blends, specialty grains, or anything with specific directions, cut out the cooking instructions and tape them to the back of the jar or store them in a small pantry note file. A beautiful jar is less useful if nobody remembers the water-to-grain ratio.
Label Dates Quietly
For a clean look, put the main label on the front and the date on the bottom or back. This gives you the best of both worlds: a polished pantry and practical food rotation.
Budget-Friendly Pantry Labeling Ideas
This project is naturally inexpensive, but you can stretch it even further. Reuse jars from pasta sauce, pickles, olives, salsa, jam, and nut butter. Soak off old labels, clean the jars well, and match them by shape when possible. Even mismatched jars look more intentional when they share the same style of clear label.
You can also print a full sheet of labels at once to save paper. Leave enough space between each design for cutting. If you are making spice labels, print them in small rows and use narrow strips of tape. For large jars, use bigger text so the label is readable from a pantry shelf.
Creative Uses Beyond Pantry Jars
Once you learn the packing tape transfer method, it becomes dangerously tempting to label everything. You can use clear tape labels for bathroom jars, craft supplies, office containers, school supplies, gift tags, homemade candles, cleaning bottles, seed packets, storage bins, and holiday decorations.
They are also great for party favors and homemade gifts. A jar of cookie mix looks more charming with a custom clear label. A bottle of homemade vanilla extract suddenly looks boutique. A tin of tea becomes gift-worthy with a simple transparent label and a ribbon. This is how packing tape quietly becomes the hero of your craft drawer.
Troubleshooting: Why Didn’t My Label Work?
The Text Disappeared
The print may not have bonded to the tape, or the printer ink may not be compatible with the method. Try a laser print, burnish longer, and avoid rubbing the design too aggressively after soaking.
The Label Is Cloudy
Cloudiness usually means paper fibers remain on the adhesive. Soak again and gently rub until the backing is gone. Also check the tape quality. Some packing tapes are naturally less transparent.
The Label Won’t Stick
The adhesive may still be too wet, or the jar may not be clean. Let the label dry until tacky and wipe the jar with rubbing alcohol before applying.
The Label Has Bubbles
Bubbles happen when the label is applied too quickly. Start from one side and smooth slowly across the jar. For curved jars, use smaller labels because large labels wrinkle more easily on rounded surfaces.
My Real-Life Experience Making Packing Tape Pantry Labels
The first time I tried making clear labels from packing tape, I expected a cute little craft project. What I got was a tiny science experiment, a wet paper situation, and eventually a pantry jar that looked like it had been professionally labeled by someone with their life together. Was that person me? Temporarily, yes.
The biggest lesson I learned is that preparation matters. I started by printing labels for every dry good I could think of, including several items I did not own. This is how I ended up with a label for “millet” and no millet. A better approach is to open the pantry, write down what is actually there, and label those items first. Start with the hardworking basics: flour, sugar, oats, rice, pasta, coffee, cereal, beans, and snacks. You can always add more later when your pantry personality develops.
I also learned that font choice is not just an aesthetic decision. Thin, delicate fonts look beautiful on a computer screen, but they can become faint after soaking and rubbing. Bolder fonts transfer more clearly. My favorite labels used simple black text with enough thickness to survive the process. The script labels were pretty, but a few of them became slightly too whimsical. When “baking powder” looks like “barking thunder,” the pantry has gone too far.
Burnishing is another step worth taking seriously. The labels that turned out best were the ones I rubbed firmly before soaking. I used the edge of an old gift card and pressed across the tape several times. The labels I rushed were patchier. This is one of those crafts where thirty extra seconds can save you from reprinting the word “lentils” at midnight.
The soaking step was surprisingly satisfying. After a minute or two in warm water, the paper began to rub away in soft little rolls. At first, I worried I was destroying the label, but then the clear design appeared. It felt a bit magical, like revealing secret pantry treasure. The trick is to rub gently. If you attack the paper like you are scrubbing a casserole dish, you may remove part of the lettering.
Applying the labels taught me one more thing: clean jars are everything. I tried sticking one label onto a jar that looked clean but had a little invisible oil from handling. The corner lifted within an hour. After wiping the next jar with rubbing alcohol and letting it dry, the label stuck much better. Pantry organization may look glamorous online, but behind the scenes, it is mostly wiping things properly.
My favorite part of the finished project was not just how the jars looked. It was how much easier the pantry became to use. Clear labels helped everyone put ingredients back in the right place. The jars looked coordinated even though many were reused from grocery products. The whole pantry felt calmer, and I stopped buying duplicate bags of rice because I could actually see what I had.
Would I use packing tape labels for every container in the house? Probably not. For items that get washed often, commercial waterproof labels may be better. But for pantry jars, spice containers, and dry storage, this method is charming, affordable, and surprisingly effective. It gives you the custom look without the custom price tag. Plus, there is something deeply satisfying about turning basic packing tape into something pretty. It is the craft equivalent of wearing sweatpants that somehow look elegant.
If you are trying this for the first time, make three test labels before committing to a full pantry makeover. Test your printer, tape, font, and jar surface. Once you find the combination that works, print a full sheet and enjoy the process. Put on music, make a cup of coffee, and prepare to feel unusually proud of a container labeled “oats.” Honestly, there are worse ways to spend an afternoon.
Conclusion
Making your own clear labels for pantry jars from packing tape is one of those rare DIY projects that is cheap, useful, and genuinely good-looking. With clear packing tape, printed words, warm water, and a little patience, you can create custom labels that make your pantry easier to use and much prettier to look at.
The key is to use the right materials, keep your designs simple, burnish the tape well, clean your jars before applying, and remember that pantry labels should serve real life. A beautiful pantry is nice. A beautiful pantry where you can actually find the rice before dinner is even better.
Whether you are organizing baking supplies, upgrading spice jars, repurposing glass containers, or giving your shelves a budget-friendly refresh, packing tape labels are a clever solution. They prove that good organization does not have to be expensive. Sometimes it starts with a roll of tape, a bowl of water, and the brave decision to finally identify the mystery powder.
Note: This article is written as original web-publishing content based on real DIY labeling methods, pantry organization practices, and practical home storage experience.