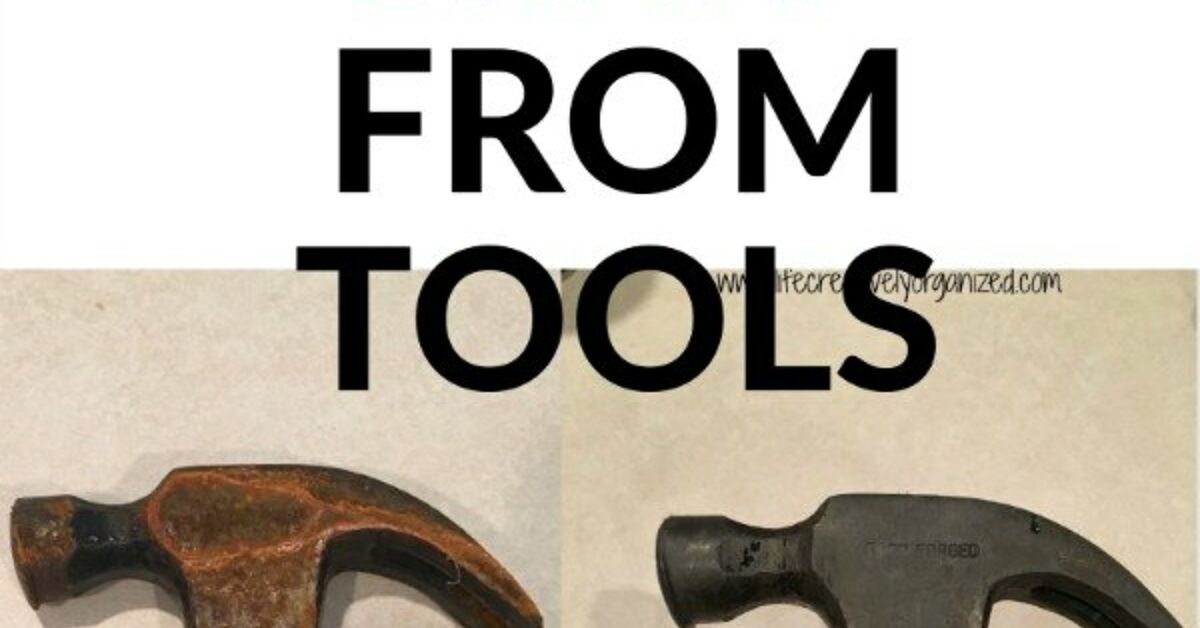
Rust has a special talent for appearing exactly where you do not want it: on the wrench you need right now, inside the hinge of your favorite pruning shears, or across a socket set that was supposedly “stored somewhere dry.” Fortunately, surface corrosion does not automatically mean a tool belongs in the trash.
Most rusty hand tools can be restored with common household supplies, a commercial rust remover, or controlled abrasion. The best method depends on the amount of rust, the tool’s material, and whether it has moving parts, plating, paint, wood, plastic, or electrical components. This guide explains how to remove rust from metal tools safely, restore their function, and prevent the orange menace from scheduling a return visit.
Why Metal Tools Rust
Rust forms when iron or steel reacts with oxygen and moisture. Humid garages, damp toolboxes, wet garden soil, fingerprints, road salt, and condensation can all encourage corrosion. A tool does not need to be sitting in a puddle, either. Persistent humidity is often enough to create a thin orange film.
Light surface rust is mostly cosmetic and usually easy to remove. Heavier corrosion may create pits, weaken cutting edges, freeze joints, or alter precision surfaces. Removing rust early saves time and helps preserve the tool before damage becomes structural.
Inspect the Tool Before Removing Rust
Do not drop every rusty object into a bucket of vinegar and hope for a workshop miracle. First, identify what you are dealing with.
Check the severity of the corrosion
- Light rust: A thin orange or brown film with smooth metal underneath.
- Moderate rust: Rough patches, stubborn discoloration, or partially seized joints.
- Heavy rust: Flaking scale, deep pits, missing metal, cracks, or severely weakened edges.
A heavily pitted wrench may still handle light work, but a corroded hammer head, pry bar, jack component, climbing tool, or other load-bearing item can become dangerous. Replace tools with cracks, thinning metal, loose heads, or serious structural damage.
Identify sensitive parts
Acidic soaking methods are generally intended for ordinary iron and carbon steel. They may discolor or damage chrome plating, black-oxide finishes, blued steel, paint, aluminum, brass, zinc coatings, wooden handles, rubber, or certain plastics. Test an inconspicuous area and consult the tool manufacturer when the finish matters.
Never soak an assembled power tool, battery, motor, switch, insulated handle, or electrical connector. For those items, treat only the affected exposed metal.
Tools and Supplies You May Need
- Safety glasses and chemical-resistant gloves
- Dish soap or a suitable degreaser
- Clean rags and an old toothbrush
- Wire brush, brass brush, abrasive pad, or steel wool
- Sandpaper in several grits
- White vinegar
- Baking soda
- Lemon juice and salt
- Commercial rust remover
- Plastic or glass soaking container
- Light machine oil, paste wax, or corrosion inhibitor
Work in a ventilated area. Follow product labels, protect nearby surfaces, and never combine rust removers with bleach, ammonia, drain cleaner, or unrelated chemicals. Chemistry experiments are more entertaining when they are intentional.
How to Remove Light Rust with Oil and an Abrasive
For a light film of rust, begin with the least aggressive method. This preserves markings, edges, plating, and the original shape of the tool.
- Wash away dirt and grease with dish soap and warm water.
- Dry the tool thoroughly.
- Apply a small amount of penetrating oil or light machine oil to the rusted surface.
- Scrub gently with fine steel wool, a fine abrasive pad, or a brass brush.
- Wipe away the loosened rust and inspect the surface.
- Repeat as needed, then apply a thin protective coating.
A brass brush is useful on details and threads because it is often gentler than a steel brush. On polished, plated, or decorative surfaces, start with a nylon brush or low-scratch pad and increase abrasiveness only when necessary.
How to Remove Rust from Tools with Vinegar
White vinegar contains acetic acid, which can loosen light to moderate rust and make it easier to scrub away. It is inexpensive and particularly convenient for solid-steel wrenches, sockets, pliers, fasteners, and removable tool heads.
Step-by-step vinegar method
- Clean grease and dirt from the tool so the vinegar can reach the rust.
- Place the metal portion in a plastic or glass container.
- Add enough white vinegar to cover the rusted areas.
- Check light rust after a few hours. Moderate corrosion may require an overnight soak.
- Remove the tool as soon as the rust has softened. Avoid leaving it forgotten for days because acid can eventually attack bare metal.
- Scrub the surface with a brush, abrasive pad, or fine steel wool.
- Rinse thoroughly with clean water.
- Optionally wipe the tool with water containing a small amount of baking soda to help neutralize residual acidity, then rinse again.
- Dry immediately and apply oil or another rust-preventive coating.
Do not immerse wooden handles or sensitive finishes. For a large tool, press a vinegar-soaked cloth against the rusted area and keep it damp, checking the metal frequently.
How to Remove Small Rust Spots with Baking Soda
Baking soda is helpful when rust is limited to a few small areas and a full acid soak would be excessive.
- Mix baking soda with just enough water to create a thick paste.
- Spread the paste over each rust spot.
- Let it remain on the surface for about one hour.
- Scrub with a toothbrush, abrasive pad, or fine steel wool.
- Rinse, dry, and inspect the tool.
- Repeat if necessary, then protect the exposed metal with oil or wax.
This method is mild, inexpensive, and easy to control. It is not the fastest choice for thick, flaky corrosion, but it works well when a screwdriver has three rusty freckles rather than a complete orange wardrobe.
How to Use Lemon Juice and Salt on Surface Rust
Lemon juice provides mild acidity, while salt adds scrubbing action. This method is best for small, accessible patches of light rust.
- Sprinkle a modest amount of salt over the affected area.
- Add enough lemon juice to wet the salt and create a loose paste.
- Let the mixture work for up to two hours while checking the surface periodically.
- Scrub gently with a pad or brush.
- Rinse extremely well to remove acidic juice and chloride-containing salt.
- Dry immediately and apply protection.
Because leftover salt can encourage future corrosion, thorough rinsing is essential. This is a spot-treatment method, not an invitation to marinate an entire toolbox.
Using a Commercial Rust Remover
A purpose-made rust remover is often the most practical solution for heavily rusted tools, intricate parts, threads, or recessed areas that are difficult to scrub. Products may use acids, chelating agents, or other chemical systems, so their instructions are not interchangeable.
General procedure
- Remove loose dirt, oil, and flaky rust.
- Read the product label and verify material compatibility.
- Wear the recommended gloves, eye protection, and other protective equipment.
- Soak, brush, or spray the product onto the tool as directed.
- Observe the exact contact time. Some products work in minutes; others require several hours.
- Rinse, wipe, or neutralize the surface according to the manufacturer’s directions.
- Dry the tool completely and apply a corrosion inhibitor.
Chelating rust removers are popular for detailed parts because they can remove iron oxide with little or no sanding. Acid-based formulas may work faster but can etch metal or damage finishes if misused. The label outranks internet folklore every time.
Mechanical Rust Removal for Heavy Corrosion
When rust is thick, flaky, or spread across a large surface, mechanical removal may be faster than soaking. Options include a hand wire brush, sanding block, drill-mounted abrasive wheel, nonwoven stripping disc, or bench-mounted wire wheel.
Safe mechanical removal process
- Secure the tool in a padded vise without crushing or distorting it.
- Put on safety glasses or a face shield, hearing protection, gloves appropriate for the task, and respiratory protection when dust exposure requires it.
- Remove loose scale with a hand brush before using a power tool.
- Begin with the least aggressive abrasive that will do the job.
- Keep the abrasive moving to avoid grooves, excess heat, and changes to the tool’s shape.
- Switch to finer sandpaper to blend scratches and smooth the finish.
- Remove dust, wipe the surface clean, and apply protection.
Be especially careful around cutting edges, measuring surfaces, threads, jaws, and precision-machined faces. Aggressive grinding can remove good metal, alter heat treatment, round an edge, or turn a carefully sized tool into a shiny but inaccurate paperweight.
Electrolysis for Valuable or Intricate Steel Tools
Electrolysis can remove rust from iron and steel with limited abrasion, making it useful for antique tools and complex shapes. However, the process requires a suitable power source, a nonconductive container, an electrolyte solution, and correct placement of a sacrificial steel anode.
This is an advanced method rather than a casual kitchen-counter project. Incorrect wiring can create electrical hazards, and inappropriate electrodes can generate dangerous contamination. Perform electrolysis outdoors or in excellent ventilation, keep flames and sparks away, never use stainless steel as the sacrificial anode, and follow a reputable technical procedure. Beginners will usually get safer, more predictable results from a commercial soaking product.
How to Treat Different Types of Tools
Pliers, cutters, and adjustable wrenches
Clean the exterior first, then work rust remover into the joint without soaking padded grips. After drying, add a drop of light machine oil to the pivot and move the handles repeatedly. Wipe away excess oil so the tool does not become a pocket-sized dust collector.
Pruning shears and garden tools
Remove soil and sap before addressing rust. Treat the steel surfaces, sharpen the cutting edge if necessary, and lubricate the pivot. Smooth dry wooden handles with fine sandpaper and condition them separately with an appropriate handle oil.
Chisels, plane irons, and cutting tools
Remove corrosion without rounding the cutting edge or flattening only part of the back. After rust removal, sharpen and hone the blade using the correct angle. Deep pitting near the edge may require significant regrinding or replacement.
Saws and toothed blades
Use gentle abrasion parallel to the blade rather than scrubbing aggressively across the teeth. Avoid changing tooth geometry or damaging hardened tips. Replace blades with severe corrosion, cracks, or missing teeth.
Power tools
Disconnect the cord or remove the battery. Do not pour water, vinegar, or rust remover into the housing. Treat exposed tables, chucks, and unpainted steel surfaces with a controlled application, then wipe them completely dry. Avoid lubricating surfaces where oil could affect a workpiece or create a slipping hazard.
Drying the Tool Is a Critical Step
Freshly cleaned steel can develop flash rust surprisingly quickly. After rinsing, dry the tool immediately with clean towels. Compressed air can help clear joints, holes, sockets, and threads, provided it is used safely. Gentle warmth from a hair dryer or a warm, dry location can remove hidden moisture.
Once the tool is completely dry, protect bare steel with a thin layer of light machine oil, paste wax, corrosion inhibitor, or another coating appropriate for its intended use. Lubricate pivots separately and wipe away excess product.
Common Rust-Removal Mistakes
- Soaking for too long: Acid can continue attacking clean metal after the rust is gone.
- Starting too aggressively: Coarse abrasives may erase markings, plating, or precision surfaces.
- Ignoring grease: Rust remover cannot work efficiently through a thick layer of oil and grime.
- Failing to rinse: Residual acid or salt can cause corrosion to return.
- Allowing slow air-drying: Water left on bare steel encourages flash rust.
- Skipping protection: Newly exposed metal needs oil, wax, paint, or another barrier.
- Saving unsafe tools: Cosmetic restoration cannot replace metal lost to deep structural corrosion.
How to Prevent Rust from Returning
Rust prevention is easier than rust removal and involves considerably less scrubbing.
- Remove dirt, sap, chemicals, and moisture after each use.
- Dry tools before placing them in drawers, bags, or cases.
- Apply a light protective film to bare carbon steel.
- Store tools indoors in a dry, ventilated location.
- Use silica-gel packets or another suitable moisture-control product in enclosed toolboxes.
- Repair chipped paint and damaged protective coatings promptly.
- Hang large garden tools instead of leaving them on damp concrete.
- Inspect rarely used tools several times a year.
Be cautious with the traditional bucket of oily sand sometimes suggested for garden tools. It can clean shovel and hoe surfaces, but plunging sharpened or pointed tools into a hidden container creates an injury risk. A visible brush, rag, and controlled oil application are safer choices for many households.
Practical Experience: Lessons Learned from Restoring Rusty Tools
The first lesson from real tool restoration is that patience usually removes more rust than brute force. It is tempting to attack an old wrench with the roughest wheel available, especially when the corrosion looks dramatic. That approach produces quick sparks and impressive noise, but it can also remove stamped size markings, round corners, and leave deep scratches. Beginning with degreasing, a soak, and a hand brush often produces a cleaner result with less damage.
A second lesson is to check soaking tools frequently. One neglected pair of pliers may need several hours in vinegar, while another tool with a thin surface film may clean up in less time. Leaving every item overnight simply because “overnight” sounds official can produce darkened or etched steel. The condition of the tool, concentration of the solution, and temperature of the workspace all affect the result.
Moving joints deserve special attention. Rust may disappear from the outside of pruning shears while remaining packed inside the pivot. After cleaning, drying, and lubricating the joint, work the handles through their complete range several times. Brown liquid or gritty residue may emerge. Wipe it away, add another small drop of oil, and repeat until movement is smooth and the discharged lubricant stays clean.
Tool geometry matters more than appearance. A chisel with a mirror-bright surface but a rounded bevel is less useful than a slightly stained chisel with a properly sharpened edge. The same principle applies to saw teeth, drill bits, plane irons, scissors, and pruning blades. Restore function first. Cosmetic polishing comes later, assuming it is necessary at all.
Drying is where many otherwise successful restorations fail. A tool may look perfect immediately after rinsing and show a faint orange haze an hour later. This flash rust develops because clean, unprotected steel is highly exposed. Toweling alone may not remove water trapped inside sockets, adjustment screws, or pivots. Compressed air, careful warming, and prompt application of a protective film make a noticeable difference.
Another practical discovery is that more oil is not always better. A heavy coating attracts sawdust, grit, and soil, creating an abrasive paste that works its way into joints. A thin, evenly wiped film is generally sufficient for storage. Garden tools exposed to soil may need more frequent treatment, while indoor measuring tools benefit from a very light, clean protectant.
Finally, restoration has limits. An antique wrench with shallow pits can remain a useful shop tool. A deeply corroded striking tool or load-bearing component may be unsafe regardless of how attractive it looks after polishing. Experienced restorers learn to separate sentimental value from working condition. Some tools should be cleaned for display, while others should be retired with dignity before they retire one of your fingers.
Conclusion
The most effective way to remove rust from metal tools is to match the treatment to the corrosion. Use oil and gentle abrasion for light rust, vinegar or baking soda for manageable household projects, a compatible commercial remover for complex or stubborn corrosion, and controlled mechanical methods for heavy scale.
Whatever method you choose, the final steps are the same: rinse when required, dry the tool completely, lubricate moving parts, and protect exposed steel. With sensible maintenance, an old tool can return to service instead of spending eternity at the bottom of a drawer looking like an archaeological discovery.
Research synthesized from guidance published by major U.S. home-improvement organizations, tool-restoration publications, manufacturers, and metalworking specialists.