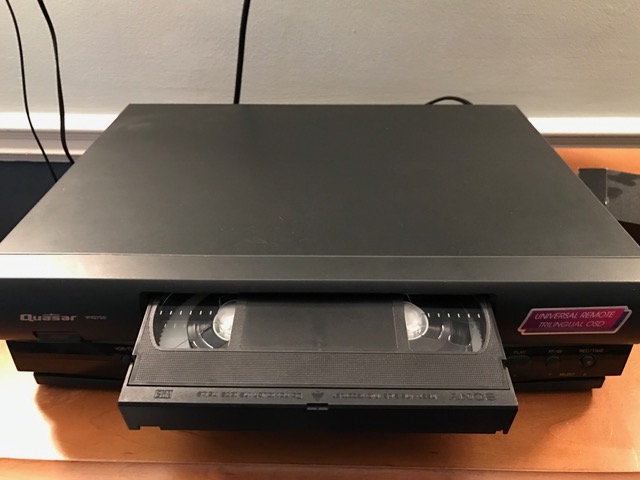
Somewhere in a closet, under a stack of old holiday decorations and one mysterious cable nobody remembers buying, your VCR is waiting for its comeback tour. Maybe you found a box of family VHS tapes. Maybe you want to watch an old movie exactly as the universe intended: with tracking lines, soft edges, and the occasional dramatic whirr. Whatever the reason, the good news is simple: you can connect a VCR to a Roku TV in most cases.
The slightly less glamorous news? Roku TVs are modern smart TVs, while VCRs belong to the noble analog era. That means the connection depends on the ports available on your specific TV model. Some Roku TVs include composite AV inputs for the classic yellow, red, and white cables. Others use a small AV adapter jack. Some newer models have no analog input at all, which means you will need an RCA-to-HDMI converter.
This guide explains how to connect a VCR to a Roku TV in five practical steps, including what cables you need, how to choose the correct input, how to fix “No Signal,” and how to get the best possible picture from a format that was never asked to look good on a 65-inch 4K screen. Let’s bring that tape deck back from retirement.
Before You Start: Know What Kind of Connection You Have
Before plugging anything in, look at the back or side of your Roku TV and the back of your VCR. You are looking for one of three connection setups:
1. Composite AV Ports
Composite AV ports are the classic three-color connections: yellow for video, red for right audio, and white for left audio. If both your VCR and Roku TV have these ports, you are in excellent shape. This is the easiest way to connect a VCR to a Roku TV.
2. A Single AV Adapter Jack
Some Roku TV models do not have three full-size RCA ports. Instead, they have one small port labeled “AV IN” that looks a bit like a headphone jack. This requires a compatible AV breakout adapter. The adapter turns that one small jack into the familiar yellow, red, and white connectors. Do not assume every adapter is universal; some TVs need a brand-specific or model-compatible adapter.
3. HDMI-Only Roku TV
If your Roku TV has only HDMI ports and no AV input, you will need an RCA-to-HDMI converter. This little box converts the VCR’s analog signal into a digital HDMI signal your Roku TV can display. Make sure you buy an RCA-to-HDMI converter, not an HDMI-to-RCA converter. Direction matters. Buying the wrong one is the cable-world equivalent of trying to enter through an exit door.
What You Need to Connect a VCR to a Roku TV
Gather your supplies before you start. This will save you from the classic home-theater crawl: kneeling behind the TV, holding a flashlight in your teeth, wondering why there are seventeen cables and none of them are the right one.
- A working VCR
- A VHS tape for testing
- A Roku TV
- Composite RCA cables: yellow, red, and white
- An AV breakout adapter, if your Roku TV uses a single AV input jack
- An RCA-to-HDMI converter, if your Roku TV does not have AV input
- An HDMI cable, if using a converter
- A power source for the converter, usually USB or a wall adapter
- Your Roku TV remote
Once you have the right gear, the process is straightforward. The key is matching output to input: VCR output goes to TV input, or VCR output goes to converter input, then converter output goes to TV HDMI input.
How to Connect a VCR to a Roku TV: 5 Steps
Step 1: Turn Off the Roku TV and VCR
Start by turning off both devices. This is not always strictly required, but it is a smart habit when connecting older electronics. VCRs are sturdy little machines, but they were not designed in the age of hot-swapping everything like USB drives.
Place the VCR near the TV, ideally on a stable shelf with enough space around it for ventilation. VCRs have moving parts, and they appreciate not being wedged into a cabinet like a lasagna in a packed freezer. Also, keep the VCR close enough that the cable can reach without stretching.
Step 2: Connect the VCR Using Composite AV Cables
Look at the back of your VCR. Most VCRs have RCA output jacks labeled “Video Out” and “Audio Out.” Plug the yellow cable into the yellow video output. Plug the red cable into the red audio output. Plug the white cable into the white audio output.
Now connect the other ends to your Roku TV’s AV input. Yellow goes to video, red goes to right audio, and white goes to left audio. The colors are your friends here. They are doing the organizing for you.
If your Roku TV has a single AV input jack, plug the AV breakout adapter into the TV first. Then connect the yellow, red, and white cables from the VCR to the matching connectors on the adapter. If the picture does not appear later, double-check that the adapter is compatible with your Roku TV model.
Step 3: Use an RCA-to-HDMI Converter If Needed
If your Roku TV does not have composite AV input, connect the VCR to an RCA-to-HDMI converter. Plug the yellow, red, and white cables into the converter’s RCA input side. Then connect an HDMI cable from the converter’s HDMI output to an HDMI port on your Roku TV.
Most converters also need power. Connect the converter’s USB power cable to a USB port on the TV or to a wall adapter. Without power, the converter will usually do absolutely nothing, which can make you question your life choices and the entire history of home entertainment.
Check the converter’s output setting if it has one. Many models let you switch between 720p and 1080p. Either setting can work, but 720p is often enough for VHS because VHS is a standard-definition format. Upscaling does not magically create detail that was never there; it just helps the signal fit a modern screen.
Step 4: Select the Correct Input on Your Roku TV
Turn on the Roku TV and the VCR. Insert a tape and press play. Then use your Roku TV remote to go to the Home screen. Look for the input tile that matches your connection.
If you connected directly with composite cables, choose the input labeled “AV,” “Composite,” “Video,” or something similar. If you used an RCA-to-HDMI converter, choose the HDMI input where you connected the converter, such as “HDMI 1,” “HDMI 2,” or “HDMI 3.”
Roku TVs usually let you rename inputs, which is useful if you do not want to remember that “HDMI 2” means “that ancient tape machine that contains Thanksgiving 1998.” Rename it “VCR,” “VHS Player,” or “Retro Movie Machine” if your household appreciates drama.
Step 5: Test the Picture and Adjust the Setup
Once the correct input is selected, your tape should appear on the screen. The image may look softer than modern video, especially on a large HD or 4K Roku TV. That is normal. VHS was built for old tube TVs, not today’s ultra-sharp panels that can reveal every speck of dust on an actor’s jacket.
If the picture appears in black and white, check that the yellow video cable is plugged into the correct video input. If there is picture but no sound, check the red and white audio cables. If there is sound but no picture, the yellow cable or converter input is usually the first suspect.
If you see “No Signal,” do not panic. Make sure the VCR is powered on, the tape is playing, the cables are firmly connected, and the Roku TV is set to the correct input. If using a converter, confirm that the converter has power and that the HDMI cable is connected to the correct HDMI port.
Alternative Method: Connecting Through the Coaxial Cable Port
Some VCRs also have a coaxial output, usually labeled “RF Out,” “TV Out,” or “Out to TV.” This connection uses a round screw-on coaxial cable, the same general style used for cable TV or antennas. If your Roku TV has an antenna or cable input, you may be able to connect the VCR this way.
To use this method, connect a coaxial cable from the VCR’s RF output to the Roku TV’s antenna/cable input. Set the VCR to channel 3 or 4, depending on the switch on the back of the VCR. Then run a channel scan on the Roku TV’s live TV or antenna input. Once the channel is found, play the tape.
This method can work, but composite AV usually gives a cleaner picture than coaxial. Coaxial is useful when your VCR does not have RCA outputs or when you are working with limited cable options. Think of it as the backup singer: dependable, but not always the star of the show.
Common Problems and Easy Fixes
No Signal on Roku TV
Make sure the VCR is turned on and playing a tape. A paused or stopped VCR may not send a strong visible signal. Confirm that you selected the correct Roku TV input. If using HDMI, try another HDMI port or cable. If using a converter, check the converter’s power light.
Black-and-White Picture
A black-and-white picture often means the video cable is in the wrong input, especially on TVs with shared component/composite inputs. The yellow cable must go to the composite video input. On some shared inputs, the green port may also serve as the composite video connection, but always follow your TV’s labels or manual.
No Sound
Check the red and white audio cables. If your VCR is mono, it may only have one audio output. In that case, plug it into the white audio input. You may hear sound from one speaker only unless you use a mono-to-stereo adapter.
Picture Looks Fuzzy
VHS is naturally soft compared with modern digital video. Still, you can improve results by cleaning the VCR heads, using a good-quality tape, avoiding loose cables, and turning off aggressive picture sharpening on the TV. Some Roku TVs have picture settings for each input, so adjust brightness, contrast, and sharpness while the tape is playing.
Tape Plays but Rolls or Flickers
Try using the VCR’s tracking control if it has one. Older tapes may have tracking issues, especially if they were recorded on a different machine decades ago. Rewinding and fast-forwarding the tape once can sometimes help smooth playback.
Best Settings for Watching VHS on a Roku TV
Modern TVs love sharpness, motion smoothing, and digital processing. VHS does not love these things back. To make tapes look better, try switching the picture mode to “Movie,” “Normal,” or “Standard.” Reduce sharpness if the image has harsh outlines. Turn off motion smoothing if the tape looks strange or artificial.
Also, do not expect widescreen perfection. Many VHS tapes are 4:3, meaning they were made for square-ish old TVs. Your Roku TV may show black bars on the sides. That is correct. Stretching the image to fill the screen can make everyone look like they have been flattened by a rolling pin.
Should You Use a Cheap Converter or a Better Upscaler?
A basic RCA-to-HDMI converter is fine for casual viewing. It gets the signal from the VCR to the Roku TV, and for many people, that is enough. However, very cheap converters can introduce lag, color issues, or extra fuzziness.
If you plan to watch a lot of tapes or digitize family videos, consider a higher-quality converter or a dedicated video capture device with time-base correction features. VHS signals can be unstable, and better equipment can help maintain a cleaner image. For one movie night, though, a simple converter usually does the job.
Can You Record Roku TV Content to a VCR?
In most cases, no. This guide is about playing a VCR on a Roku TV, not recording streaming shows to VHS. Roku TV apps and HDMI sources generally use digital copy protection, and modern streaming content is not designed to be recorded by a VCR. If your goal is nostalgia, play tapes. If your goal is recording Netflix to VHS, the technology gremlins will not be kind.
Safety Tips for Old VCRs and VHS Tapes
Before inserting a precious family tape, test the VCR with a tape you do not care about as much. Old VCRs can eat tapes if belts, rollers, or internal parts are worn. If the machine makes grinding noises, refuses to eject, or smells like hot dust and regret, stop using it until it can be checked or cleaned.
Store VHS tapes away from heat, humidity, and magnets. Keep them upright in their cases. If a tape has mold, do not put it in your VCR. Mold can spread inside the machine and damage other tapes. That is not nostalgia; that is a tiny horror movie.
My Practical Experience: What Actually Happens When You Connect a VCR to a Roku TV
Connecting a VCR to a Roku TV sounds simple until you are standing behind the television with three RCA plugs in your hand and no yellow port in sight. In real life, the most important step is not plugging in the cables. It is identifying the TV’s actual input options. Many Roku TVs look modern and minimal, which is lovely until you need to connect a device from the era when remote controls had the weight and confidence of a brick.
The easiest experience is with a Roku TV that has full composite inputs. You connect yellow to yellow, red to red, white to white, choose the AV input, and suddenly your VHS tape is alive again. This setup feels satisfyingly direct. There is no converter, no power cable, and no guessing whether a little box is doing its job. If your TV has this option, use it.
The second-most-common experience is discovering that the TV has an AV input, but it is a tiny jack. This is where people often get stuck. The TV may need a breakout adapter, and not every adapter uses the same internal wiring. Two adapters can look identical and behave completely differently. If the screen stays black even though everything seems connected, the adapter may be the problem. The best move is to check the Roku TV brand and model, then get the compatible AV adapter recommended for that model.
The HDMI-only route is also common. In that case, an RCA-to-HDMI converter is the hero of the story. The most frequent mistake is buying the wrong direction converter. You need RCA input and HDMI output. The VCR sends analog RCA out; the Roku TV receives HDMI in. Another common mistake is forgetting to power the converter. Many converters need USB power, and without it, the TV will show no signal no matter how beautifully you arranged the cables.
Picture expectations matter, too. VHS will not look like Blu-ray, and it definitely will not look like 4K streaming. On a big Roku TV, the image may look soft, grainy, or slightly unstable. That does not mean the connection is wrong. It means the TV is showing you exactly what is on the tape, including all the charming imperfections. Lowering sharpness and avoiding stretched screen modes can make the image more comfortable to watch.
Sound is usually easy, but mono VCRs can surprise people. If the VCR has only one audio output, connect it to the white input. If sound comes from one side only, that is normal for mono playback. A small adapter can duplicate mono audio into both left and right channels, but it is not required just to watch the tape.
The best habit is to test with an unimportant tape first. Old VCRs can be unpredictable, especially if they have been sitting unused for years. Let the machine rewind, fast-forward, play, and eject before trusting it with priceless family memories. Once everything works, label the input on your Roku TV as “VCR.” Future you will appreciate not having to remember whether the VCR lives on AV, HDMI 1, or the mysterious input named “Game Console” from three years ago.
In the end, connecting a VCR to a Roku TV is less about advanced technology and more about patience, cable matching, and realistic expectations. When the tape finally plays, the little bit of fuzz, the mechanical hum, and the old-school picture become part of the fun. It is not just watching a video. It is time travel with buttons.
Conclusion
Learning how to connect a VCR to a Roku TV is mostly about choosing the right connection path. If your Roku TV has composite AV inputs, use the yellow, red, and white RCA cables. If it has a small AV input jack, use a compatible breakout adapter. If it only has HDMI ports, use an RCA-to-HDMI converter and make sure the converter is powered.
Once connected, select the correct input on the Roku TV, play a test tape, and adjust picture settings for the best results. VHS will never look ultra-modern, but that is part of its charm. With the right setup, your Roku TV can become a surprisingly good screen for old tapes, family recordings, vintage movies, and whatever forgotten masterpiece has been hiding in that dusty cardboard box.