Note: This guide is for educational purposes and basic DIY auto maintenance. Always follow your vehicle owner’s manual, use equipment rated for your vehicle, and get professional help if you are unsure. A car is not a housecat; if it falls, it will not land gracefully.
Learning how to use jack stands correctly is one of the most important skills in home auto repair. Whether you are changing oil, rotating tires, checking brakes, replacing a splash shield, or simply trying to see where that mysterious driveway drip is coming from, jack stands are what keep a raised vehicle safely supported while you work.
Here is the golden rule: a jack lifts; jack stands support. A hydraulic floor jack, bottle jack, or scissor jack is not designed to be your only protection while you are under a vehicle. Jacks can leak, shift, roll, sink, tip, or fail. Jack stands, when selected and positioned properly, create a stable mechanical support system that can hold the vehicle while you complete the job.
This in-depth guide explains how to use jack stands in 13 clear steps, with practical safety tips, common beginner mistakes, and real-world experience from typical garage situations. The goal is simple: lift smart, support safely, finish the job, and still have all your favorite bones in their original arrangement.
Why Jack Stand Safety Matters
Vehicles are heavy. Even a compact sedan weighs thousands of pounds, and trucks or SUVs may weigh far more. When you raise part of that weight into the air, gravity immediately becomes the most motivated worker in the garage. Jack stands reduce the risk of a vehicle falling by providing fixed support points, but only when they are used on the right surface, at the right locations, and within their rated capacity.
The most dangerous mistake is crawling under a vehicle supported only by a jack. A jack is a lifting tool, not a long-term support tool. Another common mistake is placing jack stands under thin sheet metal, plastic panels, suspension parts that can move, rusty frame sections, or random “that looks strong enough” areas. Spoiler alert: guessing is not a safety system.
Before You Begin: Tools and Safety Gear
Before using jack stands, gather the right equipment. At minimum, you need a properly rated floor jack, a matching pair of jack stands, wheel chocks, your vehicle owner’s manual, work gloves, safety glasses, and a flashlight. A flat concrete surface is strongly recommended. If you are working in a garage, sweep away gravel, nuts, bolts, and debris that could make a jack stand sit unevenly.
Choose jack stands based on weight rating, height range, stability, and condition. For most cars, a quality 2-ton or 3-ton pair may be suitable, while heavier trucks and SUVs often require higher-rated stands. Always check your vehicle’s gross weight and the stand manufacturer’s instructions. Do not use cracked, bent, rusty, recalled, modified, or mystery-meat jack stands inherited from a garage sale in 1998.
How to Use Jack Stands: 13 Steps
Step 1: Park on a Flat, Solid Surface
Park the vehicle on level, hard ground before lifting. Concrete is best because it resists sinking and shifting. Avoid dirt, grass, gravel, steep driveways, asphalt softened by summer heat, or any surface where the jack or stands may tilt. If the ground is not stable, postpone the job or move the vehicle. The best repair is the one that does not begin with “I thought the slope was probably fine.”
Step 2: Put the Vehicle in Park or Gear
For an automatic transmission, shift into Park. For a manual transmission, shift into first gear or reverse. This helps prevent rolling. Turn off the engine and remove the key. If the vehicle has push-button start, keep the key fob away from the cabin so nobody accidentally wakes the electronics while you are underneath.
Step 3: Set the Parking Brake
Engage the parking brake before lifting, especially if you are raising the front of the vehicle. The parking brake usually acts on the rear wheels, so think about which wheels will stay on the ground. If you are lifting the rear wheels, wheel chocks become even more important because the parking brake may no longer help once the rear tires leave the floor.
Step 4: Chock the Wheels That Stay on the Ground
Place wheel chocks in front of and behind the tires that remain on the ground. If you are lifting the front, chock the rear wheels. If you are lifting the rear, chock the front wheels. Proper wheel chocks are better than bricks or random wood scraps because they are shaped to resist rolling. A vehicle can shift surprisingly easily when one end is lifted, so chocks are cheap insurance.
Step 5: Read the Owner’s Manual for Jacking Points
Your vehicle has specific jacking points and support points designed by the manufacturer. These may be pinch welds, reinforced frame areas, subframe points, axle tubes, or dedicated lift pads. The owner’s manual usually identifies safe lifting locations. Do not place a jack under the oil pan, transmission pan, exhaust, fuel tank, floorboard, rocker panel, or plastic trim. Those parts are not secretly structural; they are secretly expensive.
Step 6: Inspect the Jack and Jack Stands
Before lifting, inspect your floor jack and jack stands. Look for leaks, bent legs, cracked welds, damaged saddles, missing pins, worn pawls, rust, or unstable bases. If you use ratchet-style stands, confirm the locking pawl fully engages. If you use pin-style stands, verify the pin fits correctly and is not bent. Never modify a jack stand, drill extra holes, weld on accessories, or stack stands on blocks to gain height.
Step 7: Position the Floor Jack Correctly
Slide the floor jack under the proper jacking point. Center the jack saddle carefully so the lifting pad contacts the reinforced area. If your vehicle uses pinch welds, use the correct adapter or rubber pad when needed. Pump the jack slowly until the saddle touches the lift point, then pause and confirm alignment. A few seconds of checking here can save a lot of drama later.
Step 8: Lift the Vehicle Slowly
Raise the vehicle gradually. Watch the jack, the lift point, and the vehicle body as it rises. The jack should roll slightly as the lifting arm changes angle; this is normal on a smooth concrete floor. If the jack starts leaning, twisting, digging into the surface, or sliding off-center, stop immediately and lower the vehicle. Never rush the lift. This is not a pit crew competition unless your garage also has sponsors and fire suits.
Step 9: Place the Jack Stands Under Approved Support Points
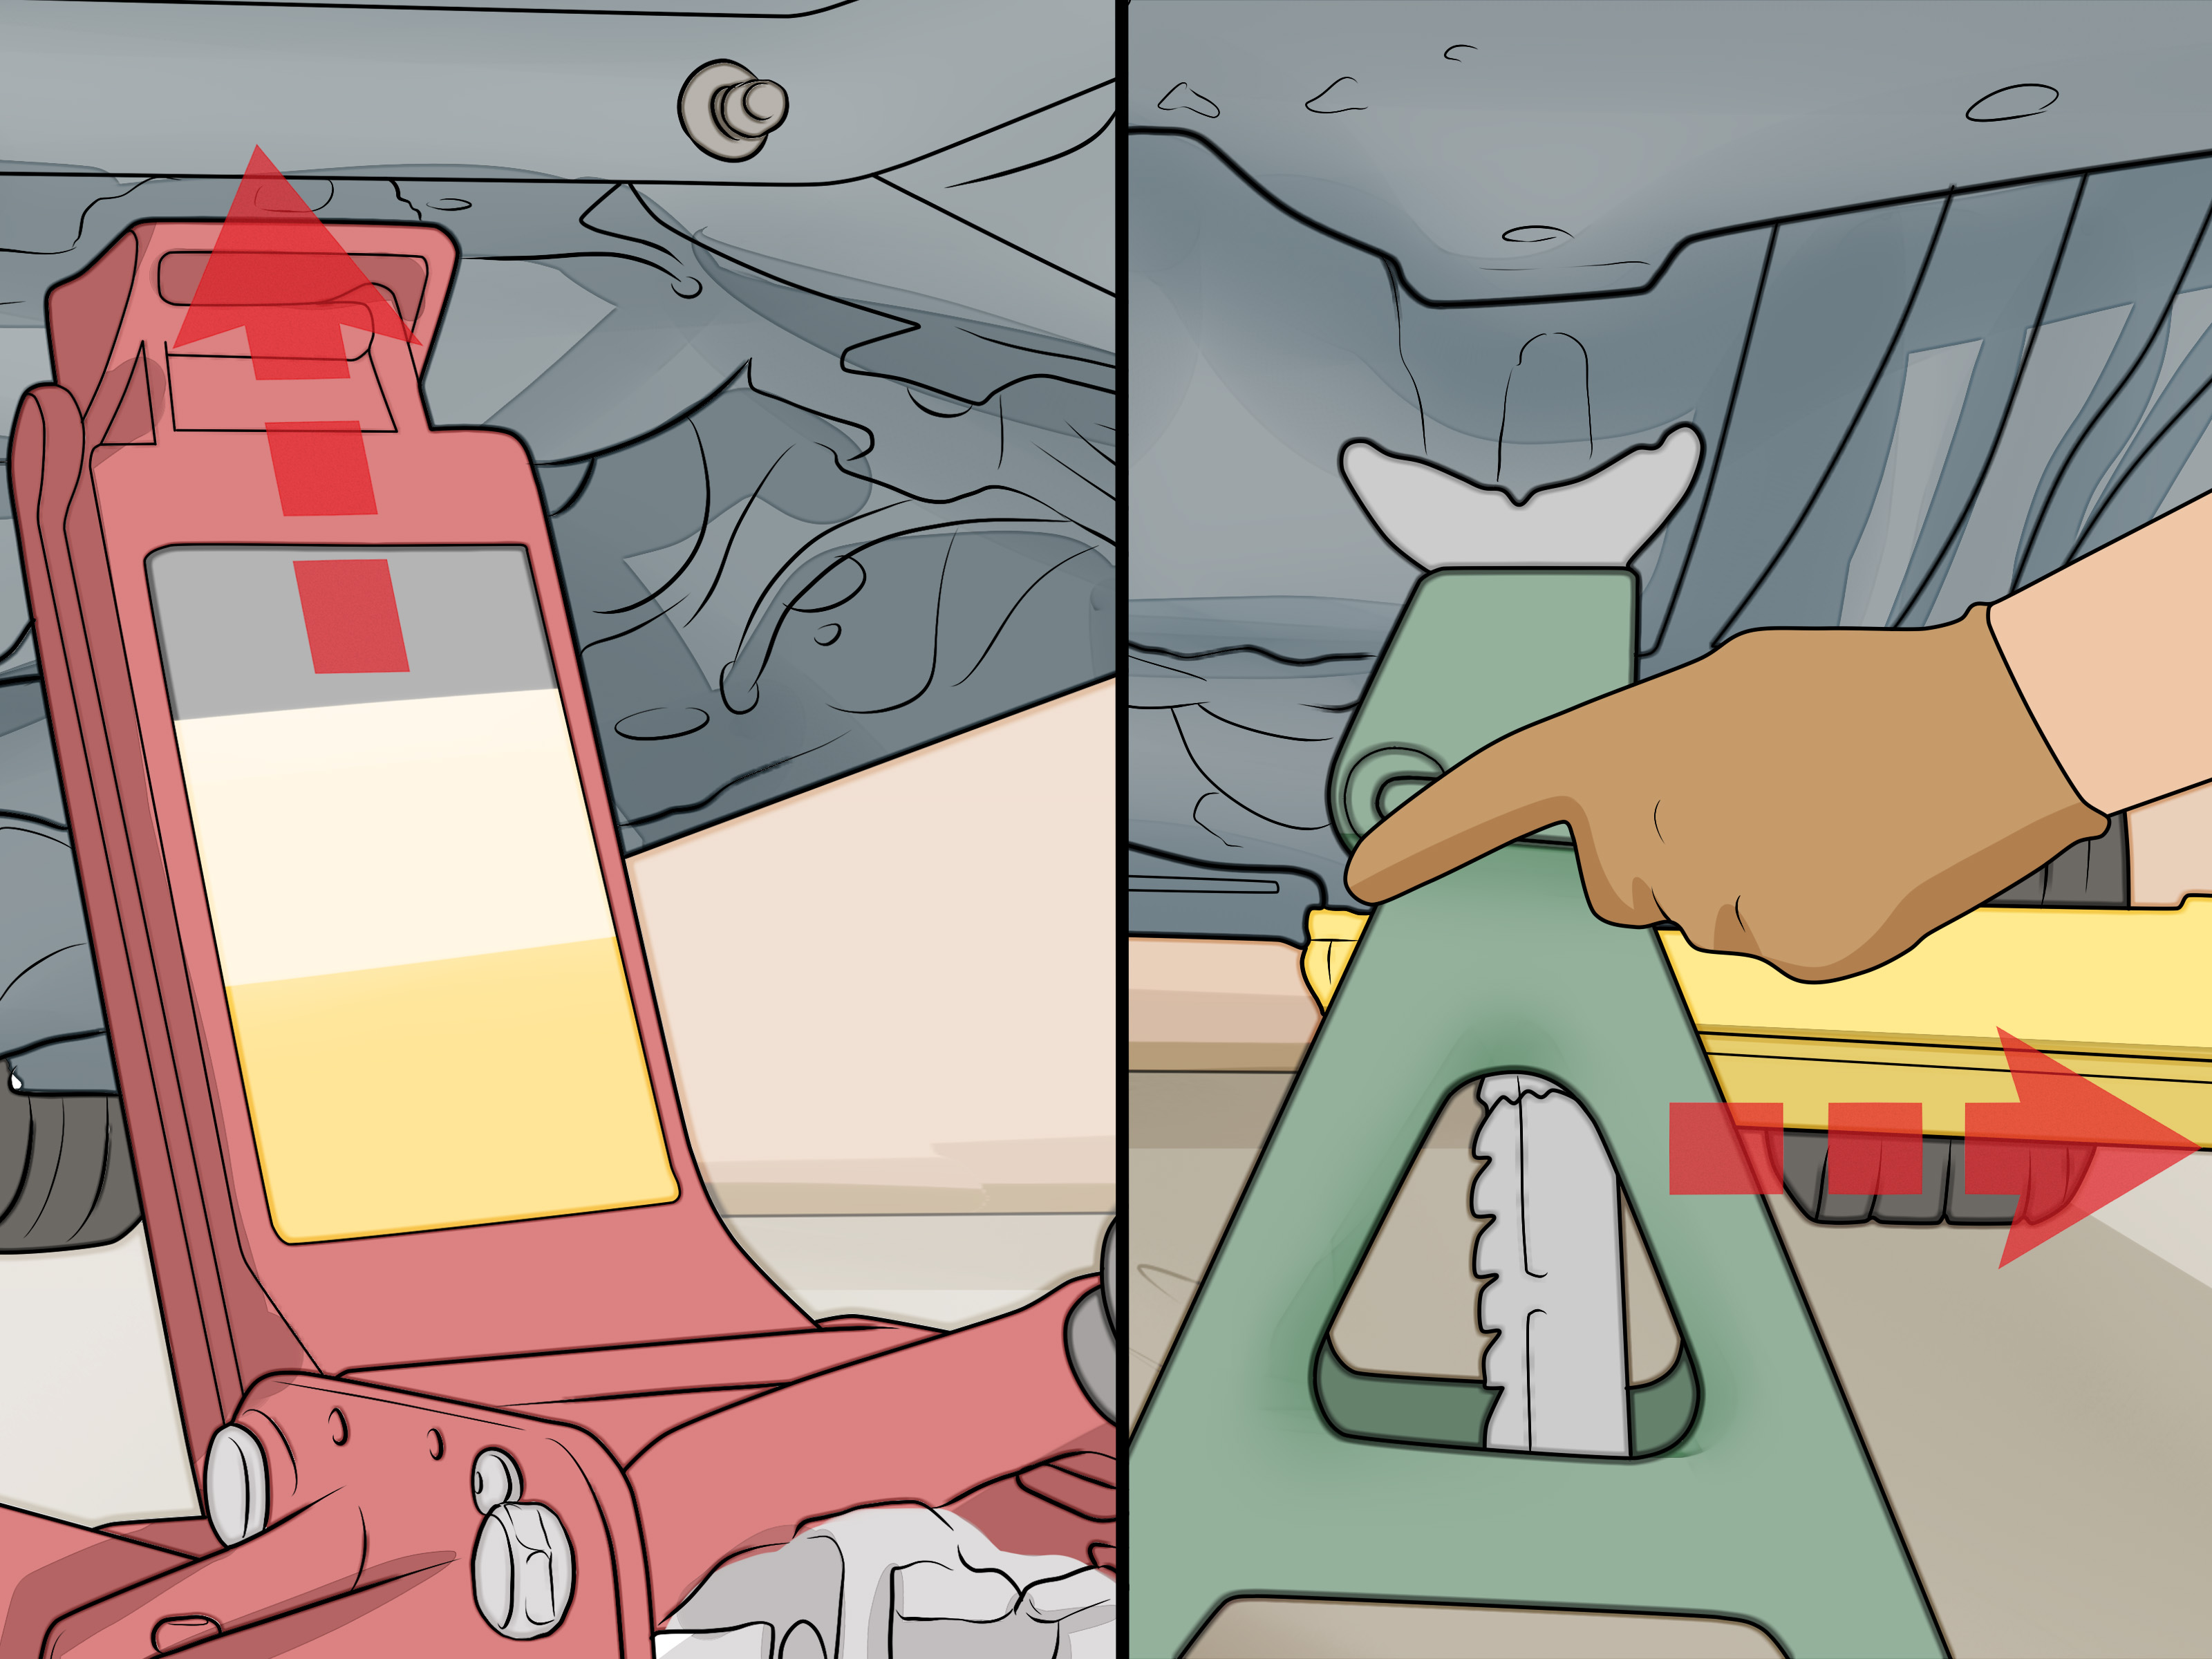
Once the vehicle is high enough, slide the jack stands under the manufacturer-approved support points. Use stands in pairs whenever you are supporting one end of the vehicle. Make sure both stands are set to the same height and that their bases sit flat on the floor. The saddle should contact a strong, reinforced area of the vehicle. Do not support the car on unstable suspension components unless the service manual specifically allows it.
Step 10: Lower the Vehicle Onto the Stands
Slowly open the jack release valve and lower the vehicle until its weight rests securely on the jack stands. Do not drop the car suddenly onto the stands. Keep the jack in position as a backup, but do not rely on it as the primary support. Once the vehicle settles, check that each stand is vertical, level, and firmly loaded. The stand saddle should not be balancing on an edge or corner.
Step 11: Perform a Stability Check
Before putting any part of your body under the vehicle, perform a careful stability test. Stand beside the vehicle and gently push it from a safe position. You are checking for wobble, rocking, sliding, or shifting. If anything moves in a way that makes your eyebrows rise, lift the vehicle again, reposition the stands, and retest. A small shake test is much better than discovering instability while your head is under the oil pan.
Step 12: Work Safely Under the Vehicle
Once the vehicle is stable, keep your workspace organized. Do not bump the stands with tools, creepers, wheels, or your shoulder. Avoid heavy pulling or pushing that could shift the vehicle, such as yanking on a stuck bolt without thinking about force direction. Keep children, pets, and curious neighbors away from the work area. If you remove wheels, many experienced DIYers slide them under the vehicle frame as an additional emergency buffer, but wheels are not a substitute for proper jack stands.
Step 13: Raise the Vehicle Slightly and Remove the Stands
When the work is finished, remove tools from underneath the vehicle. Use the floor jack to lift the vehicle just enough to take weight off the stands. Pull the stands out carefully, then lower the vehicle slowly to the ground. Remove wheel chocks only after the vehicle is fully down. Finally, torque any wheel lug nuts to specification if wheels were removed. Congratulations: you have successfully lowered the vehicle without turning your driveway into a physics demonstration.
Common Mistakes to Avoid
Using the Wrong Weight Rating
Never assume all jack stands are strong enough for every vehicle. A small set that worked for a compact car may not be suitable for a full-size truck. Check the rating on the stands and understand whether that rating applies to the pair or each individual stand. When in doubt, use higher-rated equipment from a reputable manufacturer.
Working on Soft or Uneven Ground
Soft ground can let a jack stand sink or tilt. Uneven ground can shift the load sideways. Both are dangerous. A flat concrete floor is the safest place for most DIY work. If you must work outside, be extra cautious and avoid lifting unless the surface is truly solid and level.
Placing Stands Under Weak Areas
Pinch welds, frames, axles, and subframes vary by vehicle. Some areas look strong but are not designed to support weight. Thin sheet metal can crush, plastic can crack, and rusty sections can fail. Always use the owner’s manual or service manual to identify correct support points.
Skipping the Shake Test
The shake test is simple, fast, and important. If the car feels unstable before you get underneath, you have a chance to fix the setup safely. Skipping this test is like not checking if a chair exists before sitting down, except the chair weighs two tons.
How to Choose the Best Jack Stands
Good jack stands should have a wide, stable base, clear weight markings, solid welds, a dependable locking mechanism, and enough height range for your vehicle. Ratchet-style stands are common and convenient, while pin-style stands are popular for heavier-duty applications because the locking pin provides a visible mechanical stop. Either style can be safe when well made, properly rated, and used correctly.
Look for stands that meet recognized safety standards and come from a trusted brand. Avoid stands with unclear labels, damaged packaging, suspiciously low prices, or no manufacturer information. Also check for product recalls, especially if you are using older stands that have been sitting in the garage for years. Jack stands are not decorative metal pyramids; they are life-safety equipment.
Jack Stands vs. Ramps: Which Should You Use?
Jack stands and ramps both lift a vehicle, but they are useful for different jobs. Ramps are convenient for oil changes and underbody inspections where the wheels can stay on. Jack stands are better when you need to remove wheels, inspect brakes, service suspension parts, or lift only one end of the vehicle. Ramps can be easier for beginners, but they require careful tire alignment and a flat surface. Jack stands require more setup, but they offer greater flexibility.
For many DIY garages, the best setup includes both ramps and jack stands. Use the right tool for the job, and never mix shortcuts with heavy vehicles. Shortcuts are great for keyboard commands, not for supporting a car.
Extra Safety Tips for Beginners
If this is your first time using jack stands, practice without crawling under the vehicle. Lift the car, place the stands, lower it, test stability, then raise it again and remove the stands. This dry run helps you understand how the vehicle moves and how the equipment feels. It also reduces stress when you do the real repair.
Keep a phone nearby, but not under the car where you cannot reach it. Tell someone you are working on the vehicle. Wear eye protection because rust, dust, and road grit enjoy falling directly into human eyeballs with Olympic-level accuracy. Use gloves, but avoid loose clothing that can catch on parts. Good lighting also matters; a headlamp can make underbody work much easier.
Real-World Experience: Lessons from Using Jack Stands in a Home Garage
The first thing most people learn about jack stands is that the setup takes longer than expected, especially when you are new. That is normal. In real garage work, the safest person is often the one who moves slowly, checks twice, and refuses to let impatience make decisions. A simple oil change may require only a few extra minutes to lift and support the car correctly, but those minutes are not wasted. They are the difference between a controlled workspace and a risky balancing act.
One practical lesson is that floor cleanliness matters more than beginners think. A tiny pebble under one leg of a jack stand can make the stand sit unevenly. A socket, washer, or chunk of dried mud can create a wobble. Before lifting, sweep the work area and look at the exact spots where the jack and stands will sit. This sounds boring until you watch a stand rock slightly because it is sitting on garage debris. Suddenly, sweeping becomes the most exciting safety habit in the world.
Another experience-based tip is to plan where the jack stands will go before the vehicle is in the air. Many beginners lift the car first, then realize the floor jack is occupying the same space where the stand needs to be. This creates awkward repositioning and unnecessary frustration. Before pumping the jack, identify the lift point and the support points. Think through the path: jack here, stand there, second stand there, lower slowly. A 30-second plan can prevent a 20-minute garage yoga session.
Lighting also changes everything. Under a vehicle, shadows hide jack points, leaks, cracks, and tool locations. A rechargeable work light or headlamp makes the job safer and less annoying. If you cannot clearly see where the stand saddle contacts the vehicle, do not lower the car yet. Visibility is not a luxury; it is part of the safety process.
Experience also teaches respect for rusty vehicles. On older cars, factory jack points may be weakened by corrosion. A pinch weld that looks acceptable from the side may crumble when loaded. If the vehicle has significant rust, inspect support areas carefully and consider having a professional lift it. Rust is basically metal’s way of saying, “I would rather not participate today.”
Finally, the best habit is to stay humble. Even experienced mechanics pause, recheck, and reset equipment when something feels wrong. If a stand is tilted, if the car shifts, if the surface seems questionable, or if your gut says “nope,” listen. Lower the vehicle and start again. Using jack stands safely is not about bravery. It is about patience, preparation, and refusing to trust gravity with your weekend plans.
Conclusion
Knowing how to use jack stands is a core DIY auto repair skill. The process is straightforward: park on a flat surface, secure the vehicle, chock the wheels, lift from approved jacking points, place rated jack stands under approved support points, lower slowly, test stability, and work carefully. The details matter because jack stands are not accessories; they are safety equipment.
When used correctly, jack stands make routine maintenance safer and more manageable. When used carelessly, they can turn a simple repair into a serious emergency. Respect the weight of the vehicle, respect the equipment, and respect your own limits. Your garage projects will go more smoothly, and your future self will thank you every time you slide out from under the car in one fully assembled piece.