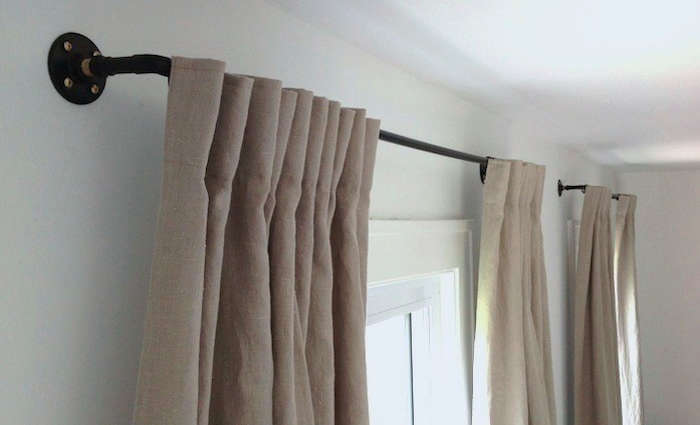
A curtain rod should not cost as much as a weekend getaway. Yet somehow, when you walk into the window-treatment aisle, a simple metal pole with two decorative knobs can suddenly feel like it belongs behind glass at a jewelry counter. That is exactly why a DIY copper pipe curtain rod is such a satisfying project: it looks custom, feels sturdy, and brings that warm, polished copper glow to your window without emptying your snack budget.
This guide shows you how to make a copper pipe curtain rod for about $35, depending on your local hardware prices, the size of your window, and whether you already own basic tools like a drill and pipe cutter. The method is beginner-friendly, apartment-friendly if your lease allows wall mounting, and stylish enough to make guests say, “Wait, you made that?” which is the official soundtrack of every successful DIY project.
Even better, copper works with more design styles than people expect. It can look modern, industrial, farmhouse, vintage, minimalist, or cozy depending on the curtains you choose. Pair it with white linen panels for an airy look, velvet curtains for drama, or simple cotton drapes for everyday charm. Copper is basically the golden retriever of hardware finishes: friendly, warm, and somehow welcome in every room.
Why Use Copper Pipe as a Curtain Rod?
Copper plumbing pipe is rigid, attractive, easy to cut, and available at most home improvement stores. Unlike some lightweight decorative rods, a copper pipe has a real structure to it. It does not feel flimsy, and it can support common curtain panels when installed properly with strong brackets or pipe hangers.
The biggest reason to use copper is the finish. Real copper has depth. It starts bright and shiny, then slowly develops a softer patina over time. If you love a freshly polished look, you can clean it occasionally. If you prefer a relaxed, lived-in finish, simply let it age naturally. Either way, your curtain rod will have more personality than a basic plastic or hollow metal rod.
Another advantage is customization. Store-bought rods usually come in fixed ranges, such as 36 to 72 inches or 72 to 144 inches. With copper pipe, you can cut the rod to the exact width you need. That means no awkward telescoping seam in the middle unless you intentionally build an adjustable version using two different pipe diameters.
Can You Really Make It for $35?
Yes, but with one important note: prices for copper pipe and hardware change often. The “$35” version works best for a single standard window when you choose a simple design, use Type M copper pipe, keep the span reasonable, and already have tools available. If you need a very long rod, heavy-duty brackets, multiple windows, or brand-new tools, the cost will increase.
For the most budget-friendly version, use one 1/2-inch or 3/4-inch copper pipe, two or three copper-compatible pipe straps or brackets, screws, wall anchors, and optional copper caps for the ends. If you want a chunkier designer look, choose 3/4-inch pipe. If you want the lowest cost and are hanging light curtains, 1/2-inch pipe can work nicely for smaller windows.
Materials You Will Need
Basic Supply List
- One copper pipe, usually 1/2-inch or 3/4-inch diameter
- Two copper tube caps or end caps for simple finials
- Two or three pipe straps, bell hangers, or curtain rod brackets
- Wall anchors rated for the weight of your rod and curtains
- Screws, preferably matching the bracket requirements
- Painter’s tape for marking placement
- Optional clear lacquer or wax to slow tarnishing
Tools You Will Need
- Measuring tape
- Pencil
- Level
- Pipe cutter or hacksaw
- Deburring tool or metal file
- Drill and drill bits
- Screwdriver
- Safety glasses
- Stud finder, recommended
A pipe cutter gives the cleanest cut and is easier to control than a hacksaw. If you use a hacksaw, clamp the pipe securely and take your time. Copper is not difficult to cut, but it does like to roll around like it has somewhere more important to be.
Step 1: Measure Your Window the Smart Way
Start by measuring the width of your window frame. Then add extra width on both sides so the curtains can open fully without blocking the glass. A good rule of thumb is to extend the rod 4 to 12 inches beyond the window frame on each side, depending on your wall space and curtain fullness.
For example, if your window is 48 inches wide, a finished rod around 60 to 68 inches wide will usually look more generous and allow the curtain panels to stack outside the window. This makes the window appear larger and lets in more daylight when the curtains are open.
Next, decide how high to mount the rod. Most rooms look better when the curtain rod is installed several inches above the window frame. Hanging curtains higher draws the eye upward and creates the illusion of taller ceilings. In a standard room, mounting the rod 4 to 6 inches above the trim is a safe starting point. For a more dramatic look, mount it closer to the ceiling, as long as your curtain length still works.
Step 2: Choose the Right Copper Pipe Size
The two most practical sizes for a DIY copper curtain rod are 1/2-inch and 3/4-inch copper pipe. The 1/2-inch pipe is slimmer, lighter, and often less expensive. It works well for small to medium windows, café curtains, sheers, and lightweight cotton panels.
The 3/4-inch pipe has a bolder profile and feels more like a traditional designer curtain rod. It is better for wider windows and medium-weight curtains. If your curtains are heavy blackout panels or lined drapes, choose sturdy supports, add a center bracket, and make sure your anchors or studs can handle the load.
Do not choose pipe size based only on looks. Consider the weight of the fabric, the rod span, and how often the curtains will be opened and closed. A decorative rod in a guest room has an easier life than a living-room rod that gets tugged twice a day by humans, pets, and possibly one determined toddler.
Step 3: Cut the Copper Pipe to Length
Mark your desired rod length with a pencil or painter’s tape. If you are using end caps, remember that they may add a small amount of length. Measure twice before cutting. This is not just a wise saying from experienced DIYers; it is also cheaper than buying a second pipe because the first one became “modern art.”
To use a pipe cutter, place it around the pipe at your mark, tighten it gently, and rotate it around the pipe. Tighten slightly every few rotations until the cut is complete. Do not crank down too hard at the start, or you may dent the pipe. Slow and steady gives you a cleaner edge.
After cutting, use a deburring tool or metal file to smooth the inside and outside edges. This step matters because sharp burrs can snag curtain fabric, scratch rings, or cut your fingers during installation. A smooth edge makes the project look and feel finished.
Step 4: Clean and Finish the Copper
New copper pipe often has printed markings, fingerprints, or dull spots from handling. You can clean it with a soft cloth and a gentle copper cleaner. For a simple approach, wipe it with a mild dish soap solution, dry it completely, and polish lightly with a microfiber cloth.
If you want the copper to age naturally, leave it unfinished. It will slowly darken and develop character. If you want to preserve the bright penny-like shine, apply a clear lacquer made for metal or use a protective wax. Follow the product directions carefully and let the finish cure before hanging curtains.
Some DIYers prefer an aged copper look from day one. You can speed up patina with specialty patina products, but for a curtain rod, natural aging is usually the simplest and safest option. Copper already has main-character energy. It does not need a chemistry experiment to be interesting.
Step 5: Plan the Bracket Placement
For a narrow window, two brackets may be enough. For a wider span, add a center bracket to prevent sagging. As a general guide, use a center support when the rod is longer than about 60 inches or when the curtain fabric is heavy. The bracket style can change the overall look of the project.
Pipe straps are inexpensive and minimal. Bell hangers give a more industrial plumbing-inspired look. Standard curtain brackets can also work if the cradle size fits your copper pipe. If the bracket color does not match, you can spray-paint the hardware with a copper-tone metal paint for a more unified finish.
Before drilling, use painter’s tape to mark the planned bracket locations. Step back and look at the marks from across the room. Check that the rod will be centered, level, and wide enough for the curtain panels. This is the moment to adjust. Once holes are drilled, the wall becomes a very honest witness.
Step 6: Install Anchors or Drill Into Studs
If your bracket locations line up with wall studs, that is ideal. Drill pilot holes and attach the brackets directly into the studs with appropriate screws. Stud mounting provides the strongest hold and is especially helpful for heavy curtains.
If your marks do not line up with studs, use drywall anchors rated for the combined weight of the rod and curtains. Do not rely on tiny plastic anchors for heavy drapes. For extra strength, choose toggle bolts or heavy-duty anchors. The package should list weight ratings, and it is smart to choose anchors with more capacity than you think you need.
Hold each bracket in place, mark the screw holes, drill pilot holes if required, insert the anchors, and screw the brackets firmly to the wall. Use a level before tightening everything completely. A crooked curtain rod is one of those things you will notice forever, usually while brushing your teeth or trying to relax.
Step 7: Add the Curtains and End Caps
Slide your curtains or curtain rings onto the copper pipe before attaching both end caps. If you are using grommet panels, make sure the grommets move smoothly over the pipe. If you are using clip rings, choose rings large enough to glide without scraping.
Add the end caps. Some caps fit snugly by pressure alone, while others may need a tiny amount of removable adhesive. Avoid permanent glue unless you are completely sure you will never need to remove the curtain panels. Future you may want to wash the curtains, swap styles, or move the rod to another room.
Set the rod into the brackets and test the movement of the curtains. Open and close them gently. Watch for bracket wobble, fabric snagging, or rod sag. If anything feels loose, fix it now rather than waiting for gravity to file a complaint.
Design Ideas for a Copper Pipe Curtain Rod
Modern Minimalist
Use 3/4-inch copper pipe with simple white or oatmeal linen curtains. Keep the brackets minimal and mount the rod high and wide. This style works beautifully in bedrooms, living rooms, and home offices where you want warmth without clutter.
Industrial Chic
Pair copper pipe with exposed pipe hangers, matte black screws, and heavier canvas or charcoal curtains. The mix of copper and black creates a handsome contrast. It is a great choice for lofts, studios, and rooms with brick, concrete, or dark wood.
Soft Vintage
Let the copper patina naturally and use floral, lace, or gauzy curtains. The aged finish gives the rod a collected-over-time look. Add antique brass accents nearby, such as a lamp or picture frame, to make the copper feel intentional.
Common Mistakes to Avoid
The first mistake is cutting the pipe too short. A rod that barely extends beyond the window makes curtains look cramped and blocks light when open. Always add width beyond the frame.
The second mistake is skipping the center support on a wide span. Copper is strong, but every material has limits. If the rod is long or the curtains are heavy, a center bracket keeps everything straight and secure.
The third mistake is using weak anchors. Curtains get pulled, shifted, opened, closed, washed, rehung, and occasionally attacked by pets with dramatic opinions. Strong anchors are not optional; they are the quiet heroes of the project.
The fourth mistake is ignoring curtain length. A beautiful copper rod cannot rescue curtains that hover awkwardly above the floor like they are afraid of commitment. Measure from the installed rod to the floor before choosing panels. For most rooms, curtains should just kiss the floor or hover slightly above it.
Estimated Budget Breakdown
Here is a sample budget for one standard window. Your total may vary, but this gives you a realistic planning point:
- Copper pipe: $15 to $27
- Two copper end caps: $3 to $8
- Pipe straps or brackets: $4 to $10
- Screws and wall anchors: $3 to $8
- Optional finish or polish: $0 to $10
If you already have screws, anchors, polish, or brackets in your toolbox, staying near $35 is easier. If you buy premium hardware or choose a longer pipe, expect the final cost to rise. Still, compared with many custom-look curtain rods, copper pipe remains a strong value.
Maintenance Tips
Dust the rod regularly with a soft cloth. If you like bright copper, polish it occasionally with a copper-safe cleaner. If you prefer patina, leave it alone and let time do the decorating. Avoid harsh abrasive pads because they can scratch the surface.
Check the brackets every few months, especially if the curtains are used daily. Tighten screws if needed. If you notice the rod bending, add a center bracket or switch to a thicker pipe. Good DIY is not just about making something look great on day one; it is about making something that still works after real life has had a few rounds with it.
Experience Notes: What This DIY Project Teaches You
Making a copper pipe curtain rod is one of those projects that feels small at first, then quietly changes how you see your home. Before doing it, a curtain rod seems like a basic purchase. You measure the window, go to the store, grab whatever rod looks acceptable, and hope it does not bend, clash, or cost more than dinner. But once you build one yourself, you realize the rod is not just hardware. It is a line across the room, a design detail, and a surprisingly powerful finishing touch.
The first lesson is that measuring matters more than muscle. This is not a difficult project, but it rewards patience. The difference between a rod that looks custom and a rod that looks “good enough from far away” often comes down to a half inch. Measuring the window, adding side clearance, checking curtain length, and marking bracket height all shape the final result. The pipe cutting is easy compared with deciding exactly where the rod should live.
The second lesson is that inexpensive does not have to mean cheap-looking. Copper pipe is a humble plumbing material, but on the wall it looks intentional and stylish. That is the magic of DIY: context changes everything. A pipe in the plumbing aisle is just a pipe. A pipe above a linen curtain is suddenly a design choice. The same material, moved six feet up a wall, gets promoted.
The third lesson is to respect the wall. Many beginner DIYers worry about cutting the pipe, but the real long-term success comes from secure installation. If the brackets are weak, the prettiest rod in the world becomes a future repair job. Finding studs, using proper anchors, drilling clean pilot holes, and leveling carefully are what make the rod feel professional. The wall is doing the heavy lifting, so treat it like part of the project, not an afterthought.
The fourth lesson is that copper develops character. At first, you may want it to stay bright and shiny forever. Then, after a few weeks or months, the finish softens. Fingerprints fade into patina. The color becomes warmer and less perfect. For many homes, that aging process is part of the appeal. It makes the rod feel less like something ordered from a catalog and more like something that belongs in the room.
The fifth lesson is that small upgrades can change your confidence. After making one curtain rod, you may start looking at other basic home items differently. Could a towel bar be made from copper pipe? Could open shelving use pipe brackets? Could a boring closet become a tiny boutique with the right rod and hangers? This is how DIY begins: one simple project, one successful afternoon, and suddenly every aisle at the hardware store looks like a possibility.
Most importantly, this project proves that good design does not always require a big budget. It requires observation, care, and a willingness to try. For around $35, a copper pipe curtain rod can make a plain window feel finished, personal, and a little more grown-up. And every time someone compliments it, you get to enjoy the best sentence in home improvement: “Thanks, I made it.”
Conclusion
A DIY copper pipe curtain rod is affordable, attractive, and practical. It gives you a custom look without custom pricing, and it can be built with basic tools and a short supply list. The key is to measure carefully, choose the right pipe size, cut cleanly, use strong brackets, and mount everything securely.
Whether your style is modern, industrial, vintage, or somewhere between “Pinterest board” and “I found this chair on the curb,” copper has a way of making a room feel warmer and more finished. For about $35, this project offers a lot of visual impact for very little fuss. Not bad for a piece of plumbing pipe living its best decorative life.