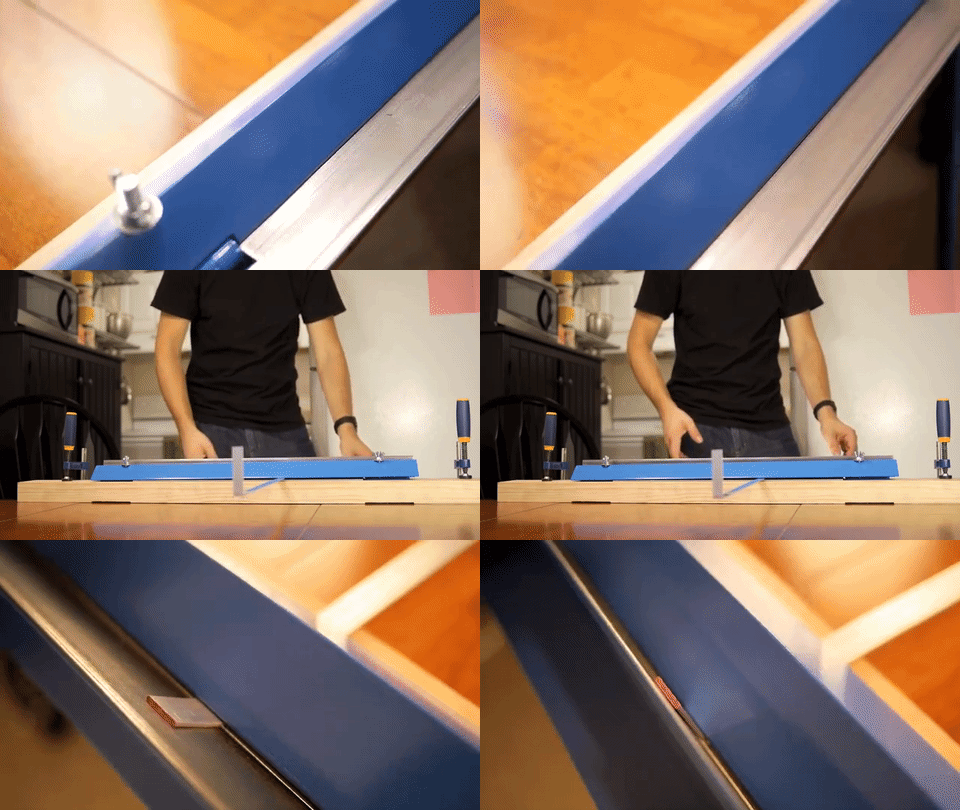
A home-made metal brake is one of those workshop projects that sounds suspiciously like a dare, but is actually a practical way to make cleaner bends in sheet metal without buying a commercial brake the size of a compact refrigerator. For hobbyists, restorers, makers, farm-shop tinkerers, HVAC experimenters, and anyone who has ever tried to bend aluminum over the edge of a workbench while whispering “please be straight,” a DIY sheet metal brake can be a genuine upgrade.
At its simplest, a metal brake is a bending tool. It holds a sheet of metal securely, then uses a hinged bending leaf or clamping beam to fold that sheet along a straight line. The result can be a crisp flange, a tray edge, a bracket, a patch panel, a flashing detail, a small enclosure, or the kind of neatly folded part that makes people assume you own more expensive tools than you actually do.
This guide explores what a home-made metal brake is, why people build one, what design choices matter, how to think about materials and accuracy, and what real-world lessons separate a useful shop tool from a dramatic chunk of steel that mostly collects dust.
What Is a Home-Made Metal Brake?
A home-made metal brake is a shop-built version of a sheet metal bending brake. Commercial brakes are available in many forms, including hand brakes, box and pan brakes, finger brakes, magnetic brakes, and hydraulic press brakes. A DIY version is usually simpler. Most home-built models use steel angle, flat bar, hinges, clamps, a sturdy base, and a long handle to bend thin sheet metal by hand.
The goal is not to compete with a professional press brake. That would be like challenging a freight train to a shoving match. The goal is to create a dependable tool for light-to-medium sheet metal work, especially when the job requires straight, repeatable bends but not industrial production speed.
Common Uses for a DIY Sheet Metal Brake
A well-made home-made metal brake can help with many small fabrication jobs. Common projects include aluminum trim, garage storage brackets, drip edges, small trays, electrical box covers, automotive patch pieces, computer case panels, model-making parts, and workshop organizers. Some makers use them for thin stainless, copper, brass, or mild steel, although each material behaves differently.
Aluminum is generally friendlier for beginners because it bends with less force than steel, but it can crack if the bend radius is too tight for the alloy and temper. Mild steel is tougher and more forgiving in some ways, but it requires a stronger brake. Stainless steel is the stubborn relative at the family reunion: impressive, shiny, and not interested in cooperating unless the tool is built for it.
Why Build a Metal Brake Instead of Buying One?
The most obvious reason is cost. A small commercial bending brake can be affordable, but larger, heavier, or more precise models quickly become expensive. Building your own allows you to match the tool to your actual projects rather than paying for capacity you may never need.
Another reason is customization. A home shop may only need a 24-inch brake for thin aluminum, while a garage fabricator may want a wider 36-inch brake for patch panels. Someone building small boxes may care about removable fingers, while another person bending simple flanges may prefer maximum stiffness and simplicity.
There is also the satisfaction factor. A home-made metal brake is a tool that makes more parts. That means it joins the elite club of workshop objects that can reproduce value. It is not just a tool; it is a metal-bending employee that does not ask for lunch breaks.
How a Metal Brake Works
A basic bending brake has three working parts: the bed, the clamp, and the bending leaf. The sheet metal rests on the bed. A clamping bar holds it in place. The bending leaf pivots upward, forcing the exposed portion of the sheet to bend around the clamping edge.
The quality of the bend depends on alignment, stiffness, clamping force, hinge placement, and the shape of the bending edge. If the clamp flexes, the bend may be soft in the middle. If the hinge line is poorly positioned, the bend radius and angle may wander. If the bed is not straight, the tool may produce bends that look like they were measured by a raccoon with a ruler.
The Importance of Stiffness
Stiffness is the secret ingredient. Many first-time builders focus on the hinge, but the real villain is flex. When bending sheet metal, force concentrates along the bend line. If the clamping bar bows upward, the metal slips or forms an uneven bend. If the bending leaf twists, one side reaches 90 degrees while the other side is still politely thinking about it.
This is why many successful DIY brakes use heavy steel angle, rectangular tubing, thick flat bar, or reinforced beams. The wider the brake and the thicker the metal being bent, the more stiffness matters. A 12-inch brake for thin aluminum can be simple. A 48-inch brake for steel needs a much more serious frame.
Choosing the Right Design
There is no single perfect home-made metal brake design. The best version depends on your projects, available tools, budget, and skill level. However, most DIY brakes fall into a few general categories.
Simple Angle-Iron Brake
This is the classic garage-built brake. It often uses two or three lengths of steel angle, a hinge, bolts, and clamps. It is affordable, understandable, and useful for light sheet metal. The downside is that accuracy and capacity depend heavily on how straight and rigid the parts are.
Bench-Mounted Brake
A bench-mounted brake attaches to a heavy workbench or welded stand. This improves stability and makes bending safer and more repeatable. A flimsy bench can ruin the experience. The brake should not lift, slide, or wobble while bending. If the whole bench moves, the tool is not bending metal; it is rearranging furniture.
Box and Pan Style Brake
A box and pan brake uses removable fingers on the clamping beam. These allow the user to bend up sides on trays, boxes, and enclosures without the previously bent sides crashing into a solid clamping bar. This design is more versatile but harder to build accurately.
Press Brake Attachment
Some makers build a small press brake attachment for a hydraulic shop press. This setup uses a punch and die rather than a hinged leaf. It can create strong bends in shorter pieces, but it requires careful alignment and serious respect for stored force. For most casual users, a hinged hand brake is easier to control for long, thin panels.
Materials a Home-Made Metal Brake Can Bend
Material capacity depends on brake width, frame strength, clamp stiffness, handle leverage, and the metal itself. Thin aluminum flashing may bend easily on a light brake. Mild steel of the same thickness demands more force. Stainless steel usually requires even more effort and a stronger tool.
Gauge numbers can be confusing because a higher gauge means thinner material. For example, 22-gauge sheet is thinner than 16-gauge sheet. Many home-built brakes are most comfortable with thin sheet metal, such as aluminum, galvanized sheet, copper, and light mild steel. Trying to bend material beyond the tool’s capacity can damage the brake, distort the bend, or create a safety hazard.
A smart builder designs for the work they actually plan to do. If your projects are small brackets and thin covers, build a compact brake. If your dreams involve wide steel panels, build much heavier or consider buying a commercial brake. Ambition is wonderful, but steel does not care about optimism.
Bend Quality: What Makes a Clean Bend?
A clean bend is straight, consistent, and predictable. It has a reasonable inside radius, minimal surface damage, and the final angle matches the intended angle. Several factors affect the result.
Clamping Pressure
The sheet must be held firmly along the bend line. If it slips, the flange dimension changes and the bend may curve. Good clamping is especially important for narrow flanges.
Bend Radius
A sharp bend may look crisp, but too tight a radius can crack certain metals. Aluminum alloys and harder tempers are especially sensitive. A slightly larger radius often creates a stronger, cleaner part.
Springback
Springback is the metal’s habit of bending, then relaxing slightly after pressure is removed. It is not being rude; it is physics. Steel, stainless steel, and some aluminum alloys may need to be bent slightly past the target angle so they settle back into the desired position.
Consistent Layout
Accurate marking matters. A metal brake can only bend where the sheet is positioned. Use clear layout lines, reliable measuring tools, and test pieces. A test bend is cheaper than ruining the final part, especially when the final part was cut from the “good sheet” you were saving.
Safety Considerations for DIY Metal Brakes
A home-made metal brake may be manually operated, but it still deserves respect. Sheet metal edges can be razor sharp. Bending leaves can pinch fingers. Long handles can swing with surprising force. Heavy parts can shift, drop, or trap hands.
Basic safety habits include wearing eye protection, using cut-resistant gloves when handling sheet metal, deburring sharp edges, securing the brake to a stable bench or stand, keeping fingers away from the clamping and bending line, and never forcing a bend that clearly exceeds the tool’s capacity. For younger users, adult supervision is essential. For everyone else, common sense is cheaper than stitches.
If welding, grinding, drilling, or cutting metal is part of the build process, follow proper shop safety practices, use suitable protective equipment, and work in a safe, ventilated area. A metal brake should make your projects better, not turn your garage into an emergency-room prequel.
Design Details That Matter More Than They Look
Hinge Alignment
The hinge line must be straight and parallel to the clamping edge. Poor hinge alignment causes uneven bends and binding. Heavy-duty hinges or a continuous piano-style hinge can work for light brakes, but larger brakes may need stronger hinge solutions.
Clamping Bar Shape
The clamping edge should be straight and durable. Some builders bevel the clamping bar to provide bend clearance. Others use angle iron with a crisp edge. Whatever the design, the clamp should not deform under pressure.
Handle Length
A longer handle provides more leverage, but it also increases stress on the tool. The handle should be strong, comfortable, and positioned so the user can bend smoothly without awkward body mechanics.
Adjustability
Different sheet thicknesses may need slightly different clamping gaps. Adjustable bolts, slots, or shims can improve performance. However, too much adjustability can make the tool fussy. The best design is adjustable enough to be useful but not so complicated that every bend feels like tuning a piano.
Home-Made Metal Brake vs. Commercial Brake
A commercial brake usually wins on precision, durability, capacity, and convenience. It may include counterweights, angle stops, removable fingers, hardened bending surfaces, and engineered frames. A home-made metal brake wins on cost, customization, repairability, and pride.
For occasional shop projects, a DIY brake can be excellent. For production work, tight tolerances, thick material, or repeated professional use, a commercial machine is usually the better investment. The honest question is not “Which is best?” but “Which is best for the work?” A homemade tool that perfectly serves your projects is a success. A homemade tool that tries to do everything may become a very heavy lesson.
Practical Project Examples
Garage Shelf Label Holders
Thin aluminum strips can be bent into small label holders for bins and shelves. This is a friendly first project because the material is easy to bend and mistakes are inexpensive.
Drip Edge for a Shed Door
A simple strip of galvanized sheet can be bent into a protective drip edge. The key is making a long, straight bend so water sheds cleanly away from the door.
Small Electronics Enclosure
A home-made brake can bend aluminum into a U-shaped case or simple cover. For full boxes, a finger brake design is more helpful, but even a straight brake can produce useful panels.
Automotive Patch Flanges
Restoration work often requires small flanges and patch pieces. A compact brake can help create cleaner edges than pliers or hammer-forming alone.
Common Mistakes When Building a Home-Made Metal Brake
The first mistake is building too light. A brake that flexes will disappoint you immediately. The second mistake is building too wide for the available materials. A short, stiff brake is usually more useful than a long, flimsy one. The third mistake is ignoring clamping. Without firm clamping, accuracy disappears.
Another common mistake is expecting perfect bends immediately. Every brake has a personality. Some need slight overbending. Some prefer certain materials. Some produce better results when the workpiece is positioned in a particular way. Test strips are your friends. They are tiny metal tutors.
Maintenance and Care
A home-made metal brake does not need luxury treatment, but it does need basic care. Keep the bending surfaces clean. Remove metal chips that can dent soft aluminum. Check bolts and clamps for looseness. Lubricate hinges when needed. Store the tool where it will not rust heavily or become buried under mysterious garage objects from 2009.
If the brake begins producing uneven bends, inspect for frame movement, loose fasteners, hinge wear, or a bent clamping bar. A small alignment problem can create a big bend problem.
Real-World Experience: Lessons From Using a Home-Made Metal Brake
The first thing many people learn after building a home-made metal brake is that the tool reveals every shortcut. If the hinge is slightly crooked, the bend announces it. If the clamp is weak, the sheet slides. If the frame is too light, the center of the bend looks relaxed while the ends look sharp. Metal is not dramatic, but it is very honest.
One practical experience is that test bends are not optional. They are the price of admission. Before bending the final part, cut a narrow strip from the same material and bend it first. This shows how much springback to expect, whether the bend radius is acceptable, and whether the flange dimension needs adjustment. A two-minute test can save a full sheet from becoming modern art.
Another lesson is that layout lines should be treated like serious business. Pencil marks may disappear on oily metal, and thick marker lines can introduce small errors. A scribed line, fine marker, or carefully applied tape edge can improve repeatability. When making multiple parts, a stop block or simple gauge is incredibly helpful. It turns “measure every time” into “set once and repeat,” which is how sanity survives batch work.
Clamping technique also matters. Tighten the clamp evenly from side to side. If one side is clamped hard and the other is barely held, the sheet may creep during the bend. On wider pieces, adding clamping points near the center can reduce bowing. The goal is to make the metal feel trapped, but not mangled.
Users also discover that not all metals bend the same way. Thin aluminum feels almost friendly. Galvanized sheet can be springy. Mild steel demands more effort. Stainless steel can make a homemade brake feel underbuilt very quickly. The best approach is to start with easier materials and work upward only after understanding the tool’s limits.
Surface protection is another useful trick. If the finished part will be visible, protect the metal from scratches with masking tape, thin cardboard, or clean contact surfaces. A brake with dirty jaws can emboss little shop fossils into soft aluminum. Those marks may not matter on a hidden bracket, but they matter on trim.
Perhaps the biggest experience-based lesson is to build for repeatability, not just strength. A massive brake that bends once is impressive. A moderately sized brake that bends accurately again and again is more useful. Angle marks, adjustable stops, a solid mounting surface, and a comfortable handle all make the tool easier to use.
Finally, a home-made metal brake changes how you think about sheet metal. Flat scraps become brackets. Offcuts become covers. That annoying gap under a door becomes a custom flashing project. The tool encourages experimentation because it lowers the cost of trying. And yes, it may also cause you to save too many metal scraps “for later,” but that is a recognized workshop condition and probably incurable.
Conclusion
A home-made metal brake is a practical, satisfying, and surprisingly versatile addition to a home workshop. It will not replace an industrial press brake, and it should not be pushed beyond its safe limits, but for light fabrication, small repairs, custom brackets, trim pieces, and creative metal projects, it can be a genuine problem-solver.
The best DIY sheet metal brake is strong, straight, safely mounted, and designed around realistic materials. Build it too flimsy and it will flex. Build it thoughtfully and it will reward you with cleaner bends, better parts, and the quiet joy of using a tool you made yourself. That is the real charm of a home-made metal brake: it bends metal, but it also bends the workshop in your favor.
Note: This article is for educational and editorial use. Metalworking involves sharp edges, pinch points, heavy parts, and tool hazards, so readers should use proper safety equipment, stable workholding, and qualified adult supervision where appropriate.