Learning how to post while trotting on a horse is one of those riding milestones that looks suspiciously easy from the arena rail and suddenly feels like a full-body pop quiz once you are in the saddle. One moment your instructor says, “Up, down, up, down,” and the next moment your legs, seat, hands, and horse all seem to have joined different musical bands. Good news: posting the trot is not magic. It is rhythm, balance, timing, and a little patience with your own bouncing human anatomy.
Posting, also called rising trot, means lifting your seat lightly out of the saddle and returning softly in time with the horse’s trot. The trot is a two-beat diagonal gait, meaning the horse moves opposite front and hind legs together. Posting helps the rider stay more comfortable, keeps the horse’s back from receiving every ounce of beginner bounce, and builds the coordination needed for stronger riding in English, Western schooling, dressage basics, jumping, trail riding, and general horsemanship.
This guide breaks down how to post the trot in 10 clear steps, with practical examples, common mistakes, and rider-tested fixes. Think of it as your friendly arena-side coach, minus the dust, hay in the socks, and pony who believes cones are personally offensive.
What Does It Mean to Post the Trot?
To post while trotting, the rider rises slightly from the saddle on one beat of the trot and sits softly on the next beat. The motion is not a dramatic stand-up-sit-down exercise. It is more like letting the horse’s movement lift your hips forward and up, then allowing yourself to return gently. A good posting trot looks quiet, smooth, and easy because the rider is working with the horse’s natural motion instead of fighting it.
The main keyword here is how to post while trotting on a horse, but the related skills matter just as much: posting trot, rising trot, correct diagonal, trot rhythm, rider balance, lower leg stability, and soft hands. Once these pieces click together, posting becomes less “human popcorn” and more “polite dance partner.”
Before You Begin: Safety and Setup
Posting the trot should be practiced in a safe riding area with a qualified instructor, especially if you are new to horseback riding. Wear a properly fitted riding helmet, boots with a heel, and comfortable pants that allow movement. Your horse should be suitable for beginner trot work: calm, responsive, and not the equine version of a caffeinated squirrel.
Check that the saddle fits the horse, the girth is secure, and your stirrup length allows your leg to hang naturally with a slight bend in the knee. If your stirrups are too long, you may struggle to rise. If they are too short, you may feel perched and unstable. Your goal is a balanced position with your ear, shoulder, hip, and heel roughly aligned.
How to Post While Trotting on a Horse: 10 Steps
1. Understand the Trot Rhythm
Before trying to post, understand what you are matching. The trot has a clear two-beat rhythm: one-two, one-two. In posting, your body follows that rhythm as “rise-sit, rise-sit.” Many instructors use the chant “up, down, up, down” because it trains your timing without making you overthink every hoofbeat.
At first, listen and feel more than you look. The horse’s movement will gently push you upward during the trot. Instead of forcing yourself out of the saddle, allow that upward motion to help you. Posting is not a squat workout, even though your thighs may file a complaint after the first lesson.
2. Start With a Balanced Riding Position
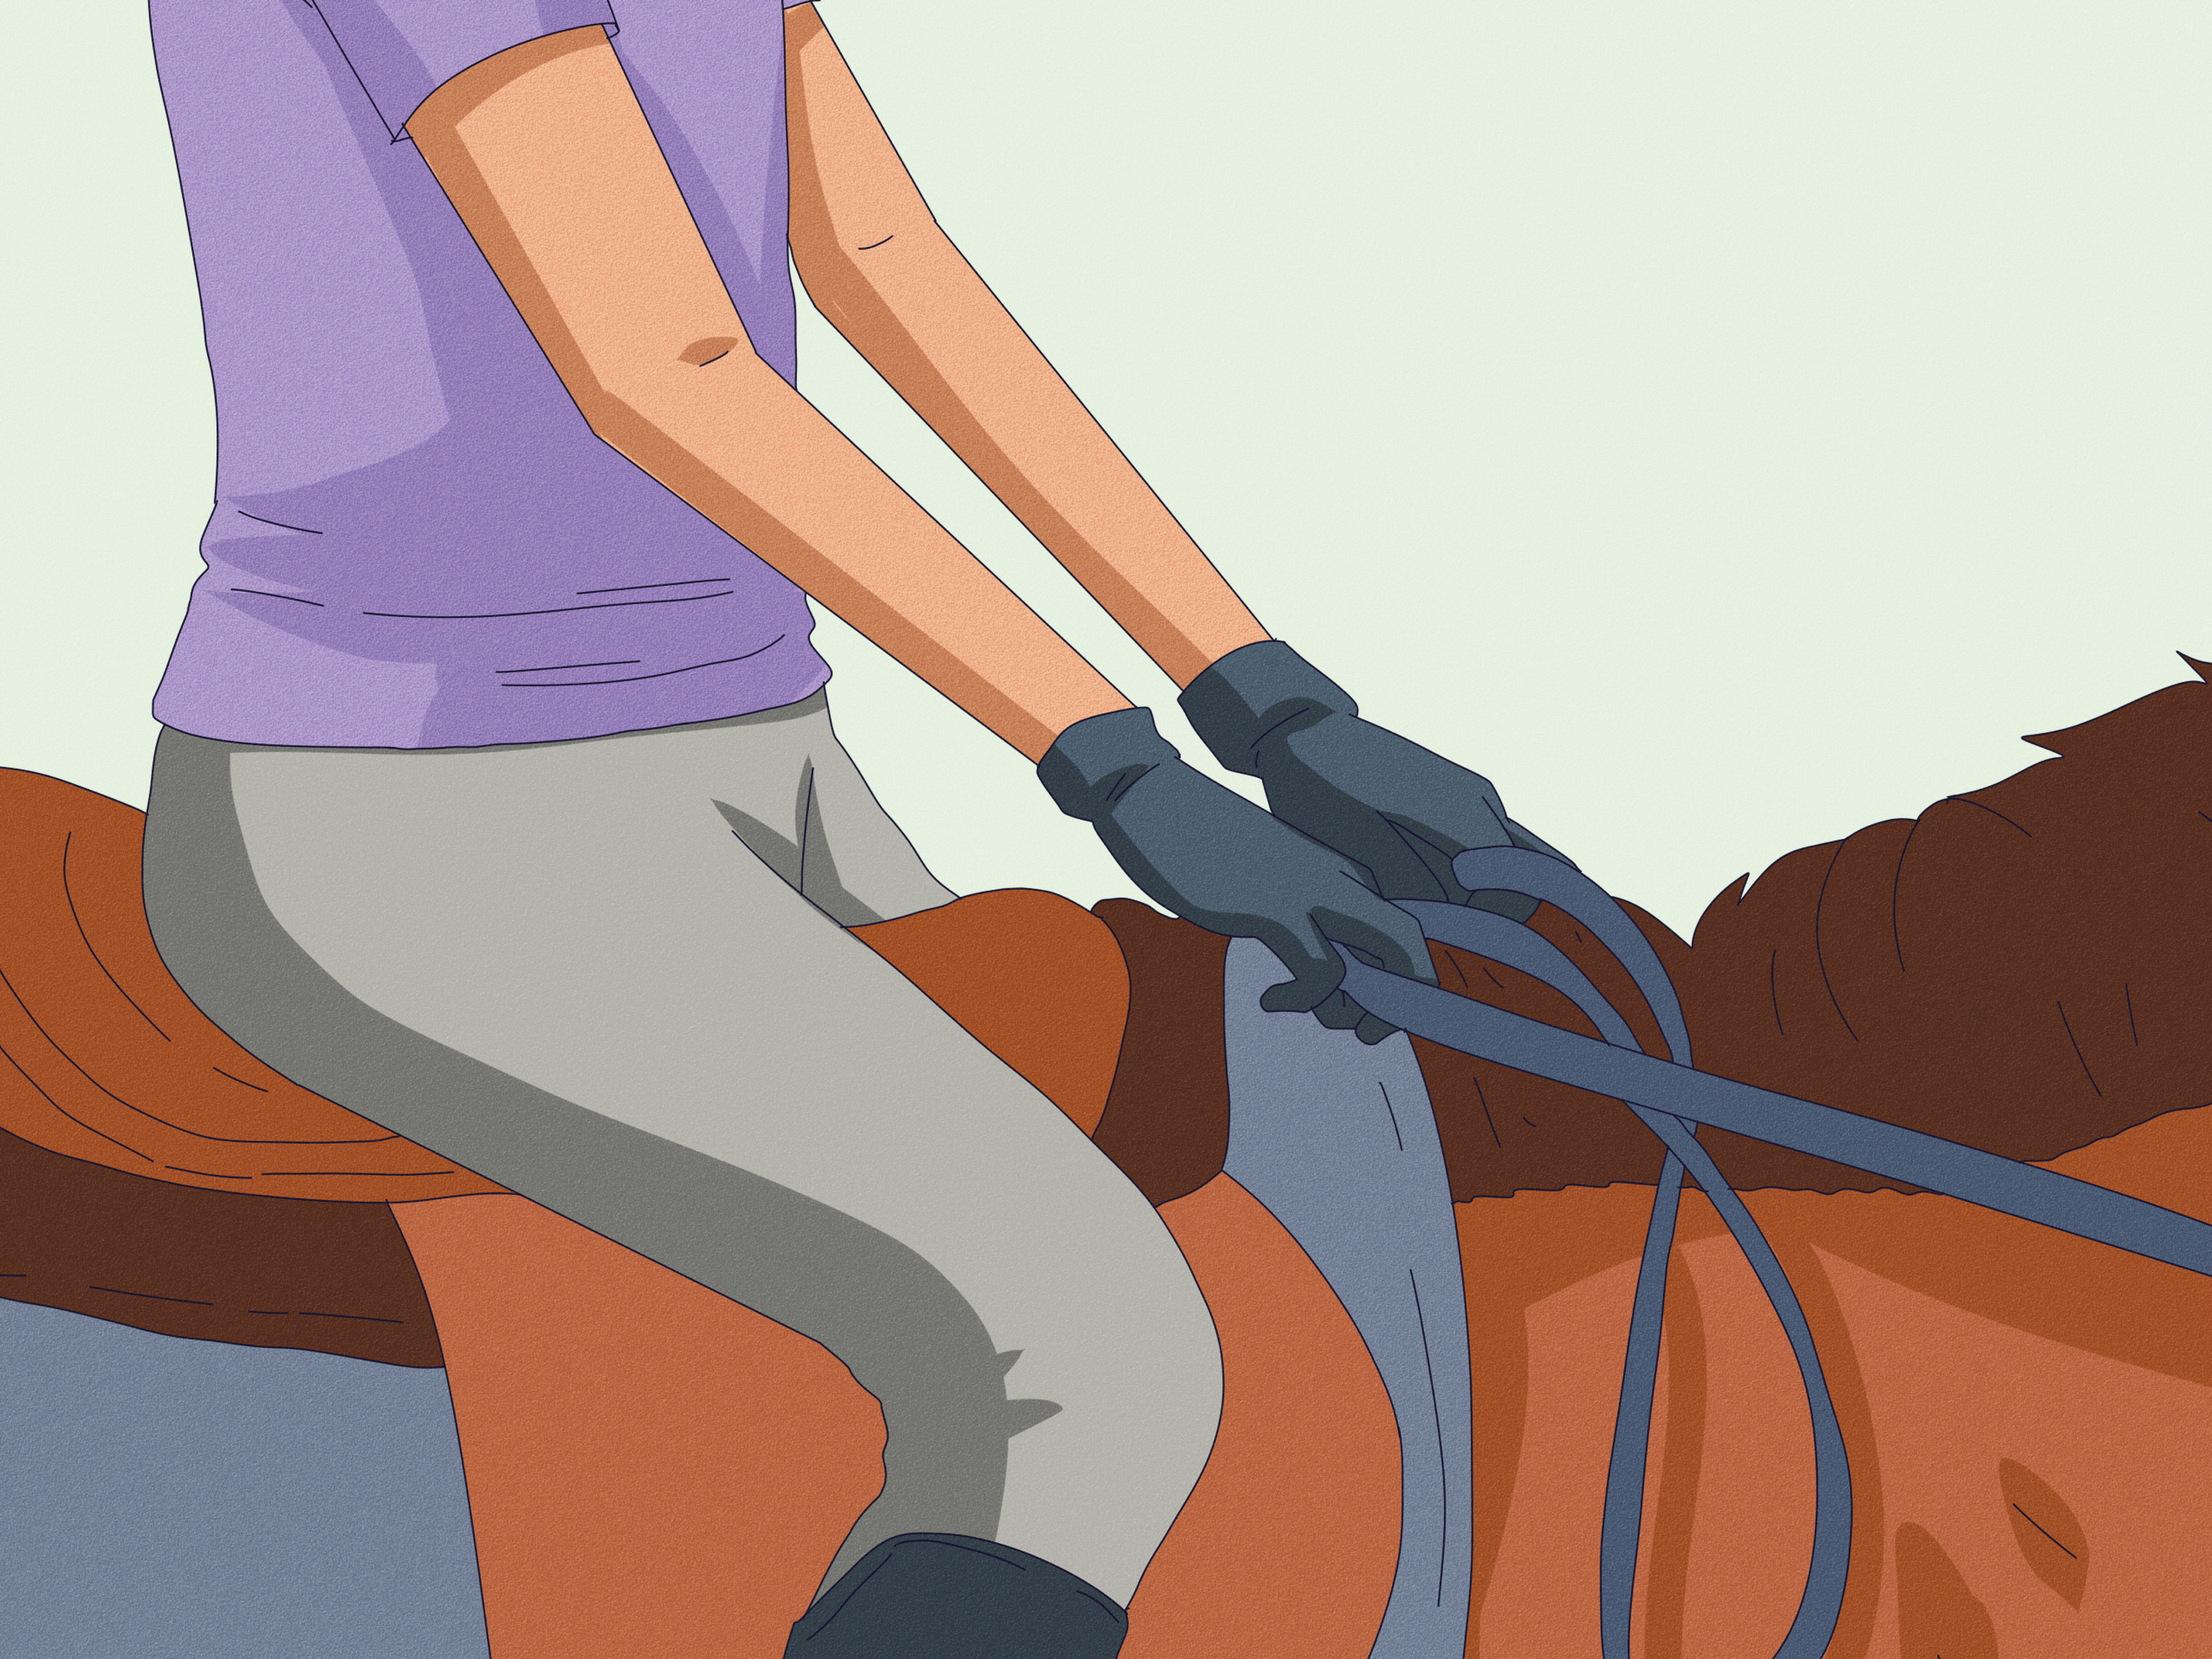
A good posting trot begins before the horse trots. Sit tall in the saddle with your shoulders relaxed, chest open, and eyes looking ahead. Keep your hands quiet and carried above the withers. Your elbows should be soft, not locked like you are bracing for turbulence.
Let your legs hang long around the horse. Your heels should sink down naturally, but do not shove them down so hard that your toes point at the horse’s ears. Keep gentle contact with your calves. Avoid gripping with your knees because that often pushes your lower leg backward and tips your upper body forward.
3. Practice at the Walk First
Before trotting, practice the idea of rising and sitting while your horse walks. This will not feel exactly like posting the trot, but it helps you learn how to move without pulling on the reins or throwing your upper body around.
At the walk, stand slightly in your stirrups, then sit softly. Notice where your weight goes. Ideally, your weight stays down through your legs and heels, while your hands remain independent. If standing makes your hands yank backward, grab a neck strap or a bit of mane for stability instead of balancing on the horse’s mouth.
4. Ask for the Trot Calmly
When you are ready, ask your horse to trot using both legs evenly, following your instructor’s guidance. Keep your body tall and relaxed. Many riders tense up right before the transition, which tells the horse, “Something weird is coming,” and tells your seat, “Prepare to bounce dramatically.”
As the horse moves into trot, do not panic-post immediately. Feel the rhythm for a stride or two. Some riders begin by sitting the first few beats, then allowing the horse’s motion to lift them into posting. The transition should feel organized, not like you were launched from a saddle-shaped trampoline.
5. Let the Horse Lift You
The biggest secret of the posting trot is that you do less than you think. Beginners often try to stand straight up, which makes the motion too big and tiring. Instead, let the horse’s trot lift your hips slightly forward and upward. Your pelvis moves on a small diagonal arc, not a vertical elevator shaft.
Imagine your belt buckle moving gently toward the horse’s ears as you rise. Then return to the saddle softly. Do not plop. A heavy sit can make the horse hollow the back, rush, or become uncomfortable. Think “touch the saddle” rather than “drop into the saddle.” Your horse will appreciate the difference, even if he does not write you a thank-you card.
6. Keep Your Lower Leg Stable
Your lower leg is the anchor of the posting trot. If your leg swings forward and backward, your upper body will wobble and your hands will start doing interpretive dance. Keep your calf softly against the horse’s side and your heel underneath your hip.
A helpful image is to imagine your lower leg as a tree trunk and your upper body as a flexible branch. The branch can move with the breeze, but the trunk stays rooted. If you lose your stirrups often, you may be gripping with your knee or pinching upward. Relax your thigh, stretch down through your heel, and let your weight flow into the stirrup without jamming your foot forward.
7. Avoid Pulling on the Reins
Posting should not depend on the reins. Your hands need to stay steady while your hips rise and sit. This is easier said than done, especially when you first learn and your body is negotiating a peace treaty with gravity.
If your hands bounce, shorten the motion of your post and soften your elbows. Keep your thumbs on top and maintain a straight line from elbow to bit. When in doubt, use a neck strap, grab a small piece of mane, or ask your instructor for a lunge-line lesson so you can practice without steering. The horse’s mouth is not a handlebar, emergency brake, or emotional support rope.
8. Learn the Correct Diagonal
Once you can post in rhythm, learn the correct diagonal. In most arena work, riders post on the outside diagonal. A common phrase is “rise and fall with the leg on the wall,” meaning you rise as the horse’s outside front leg moves forward and sit as it comes back. Another formal way to say it: the correct diagonal is when the rider sits as the outside front foot and inside hind foot are on the ground.
To check your diagonal, glance down with your eyesnot your whole headat the horse’s outside shoulder. If the shoulder moves forward as you rise, you are on the correct diagonal. If it moves forward as you sit, you are on the opposite diagonal. Keep the glance quick. Staring down for too long can tip your body forward and invite your balance to leave the building.
9. Change Diagonals Smoothly
When you change direction, you usually need to change your posting diagonal. The simplest method is to sit for two beats instead of one, then resume posting. For example: rise, sit, sit, rise. That extra sit changes the rhythm so you begin rising with the other diagonal pair.
Practice changing diagonals on straight lines, across the arena, and before or after turns as your instructor recommends. The goal is to make the change quiet enough that your horse barely notices. If your diagonal change feels like a dramatic scene from an action movie, slow down, breathe, and make the movement smaller.
10. Practice Short, Quality Sessions
Posting trot improves with repetition, but tired riders develop messy habits. Practice in short sets: one lap posting, one lap walking, then repeat. Add circles, serpentines, transitions, and ground poles only when your basic rhythm is steady.
Quality matters more than speed. A few minutes of balanced posting is better than twenty minutes of bouncing, gripping, and silently bargaining with your quadriceps. Ask your instructor for feedback on your leg position, upper body, hands, and diagonal. The more often you correct small issues early, the faster posting becomes natural.
Common Posting Trot Mistakes and How to Fix Them
Mistake 1: Posting Too High
Rising too high wastes energy and makes it harder to stay with the horse. Fix it by thinking of your hips moving forward rather than upward. Your seat only needs to clear the saddle slightly.
Mistake 2: Sitting Too Hard
If you land heavily, your horse may tense or rush. Fix it by tightening your core gently, keeping your thighs relaxed, and returning to the saddle like you are setting down a glass of water you do not want to spill.
Mistake 3: Gripping With the Knees
Knee gripping blocks your hips and destabilizes your lower leg. Fix it by breathing, opening the knee angle, and allowing your weight to sink through your calf and heel.
Mistake 4: Looking Down Too Much
Checking diagonals is useful, but riding while staring at the horse’s shoulder is not. Fix it by glancing down briefly, then looking forward between the horse’s ears.
Mistake 5: Using the Reins for Balance
This is common but unfair to the horse. Fix it by practicing on a lunge line, holding a neck strap, strengthening your core, and focusing on independent hands.
Helpful Exercises for Better Posting
One excellent exercise is counting out loud: “one-two, one-two,” or “up-down, up-down.” Speaking forces you to breathe, and breathing prevents the classic beginner face known as “concentrating so hard I forgot oxygen exists.”
Another useful drill is posting without changing speed. Ask your horse to maintain the same trot while you make your rise smaller and quieter. If the horse speeds up when you post, you may be bumping with your seat or gripping with your leg. If the horse slows down, you may be landing too heavily or losing forward energy.
You can also practice two-point position at the walk and trot with an instructor. Two-point strengthens the lower leg and helps you feel balance over your feet. However, do not skip learning to sit softly; posting requires both rising and returning well.
How Posting Helps the Horse
Posting is not just for rider comfort. It can help reduce the jarring effect of sitting every trot stride, especially for beginner riders who are still developing a supple seat. A balanced posting trot allows the horse to move forward with more freedom through the back. This is one reason posting is often used during warm-ups, conditioning rides, lessons, and long stretches of trotting.
On circles and turns, using the correct diagonal can support the horse’s balance by coordinating the rider’s rise and sit with the horse’s diagonal pairs. While experienced riders may intentionally choose different diagonals for training purposes, beginners should first learn the standard outside diagonal because it builds awareness and consistency.
How Long Does It Take to Learn Posting Trot?
Some riders find the rhythm in one lesson. Others need several weeks before it feels smooth. Both are normal. Your progress depends on the horse, saddle fit, stirrup length, instruction, fitness, confidence, and how much your body enjoys new coordination challenges.
The moment posting “clicks” is usually not dramatic. You may simply realize you are no longer bouncing, your hands are quiet, and your instructor has stopped chanting like a metronome with boots. That is the magic moment. From there, you refine the skill: better diagonals, softer landings, steadier legs, and smoother transitions.
Experience Notes: What Posting the Trot Really Feels Like
The first time many riders try to post, they expect the movement to be mostly leg strength. In real riding, it feels more like timing. A rider who tries to muscle the post often gets tired quickly, rises too high, and loses balance. A rider who waits for the horse’s motion and follows it usually finds the rhythm faster. The horse is already creating the bounce; your job is to organize it, not launch yourself into low orbit.
One common beginner experience is the “double bounce.” This happens when you miss the rhythm and land at the wrong moment, causing a second little bounce before you rise again. It feels awkward, but it is also useful feedback. Instead of getting frustrated, slow your mind down. Count the trot. Let your hips follow. Make the rise smaller. Most riders fix the double bounce by relaxing rather than trying harder.
Another very real experience is learning that your eyes control more of your balance than you thought. When riders stare down at the horse’s shoulder to check the diagonal, their shoulders tip forward, their seat gets lighter in the wrong way, and their lower leg may slide back. A quick glance is enough. The better long-term goal is to feel the diagonal through your seat and hips. That takes practice, but it is a satisfying milestone.
Posting can also reveal whether you are truly balanced over your feet. If your stirrups keep slipping away, your leg may be too tense or too far forward. If your upper body tips ahead of the motion, you may be standing in the stirrups instead of allowing your hips to move forward. If your horse speeds up every time you post, your leg may be accidentally squeezing with each rise. Horses are honest teachers; sometimes brutally honest, but rarely boring.
During lessons, a helpful exercise is to post for ten strides, walk for ten strides, and repeat. This gives your muscles time to reset and your brain time to process. Another helpful practice is riding behind a steady school horse and matching its rhythm visually. Some riders learn best by hearing “up, down.” Others learn by feeling the saddle lift them. Others need to watch videos of the trot in slow motion. There is no shame in needing more than one learning style. Horses do not read instruction manuals either, and they seem to do fine.
On trail rides, posting becomes practical rather than decorative. A long trot down a safe, open path is much more comfortable when you can rise with the rhythm instead of sitting every stride. Posting can help you stay relaxed, conserve energy, and keep your horse moving freely. However, terrain matters. Sit deeper, slow down, or return to the walk when footing is uneven, slippery, rocky, or crowded.
Perhaps the most important experience is realizing that good posting is quiet. It does not look like a fitness class. It does not require dramatic height. It is a small, efficient, forward-and-back rhythm that blends with the horse. Once you feel that, posting the trot becomes one of the most enjoyable basics in riding: simple enough for beginners to learn, subtle enough for advanced riders to keep improving, and useful every time you ask a horse to trot.
Conclusion
Learning how to post while trotting on a horse is a foundational riding skill that improves comfort, balance, rhythm, and communication. Start with a safe setup, a steady horse, and a balanced position. Let the horse’s motion lift you, keep your lower leg stable, sit softly, and learn to recognize the correct diagonal. With patient practice, posting changes from a bouncy mystery into a smooth, natural movement.
Remember: every rider has had at least one lesson where posting felt impossible. Then, little by little, the rhythm appeared. Keep your sense of humor, protect your horse’s back, listen to your instructor, and give yourself permission to learn one trot stride at a time.
Note: This article is educational and should not replace hands-on instruction from a qualified riding coach. Always ride with proper safety equipment and choose a horse suitable for your experience level.