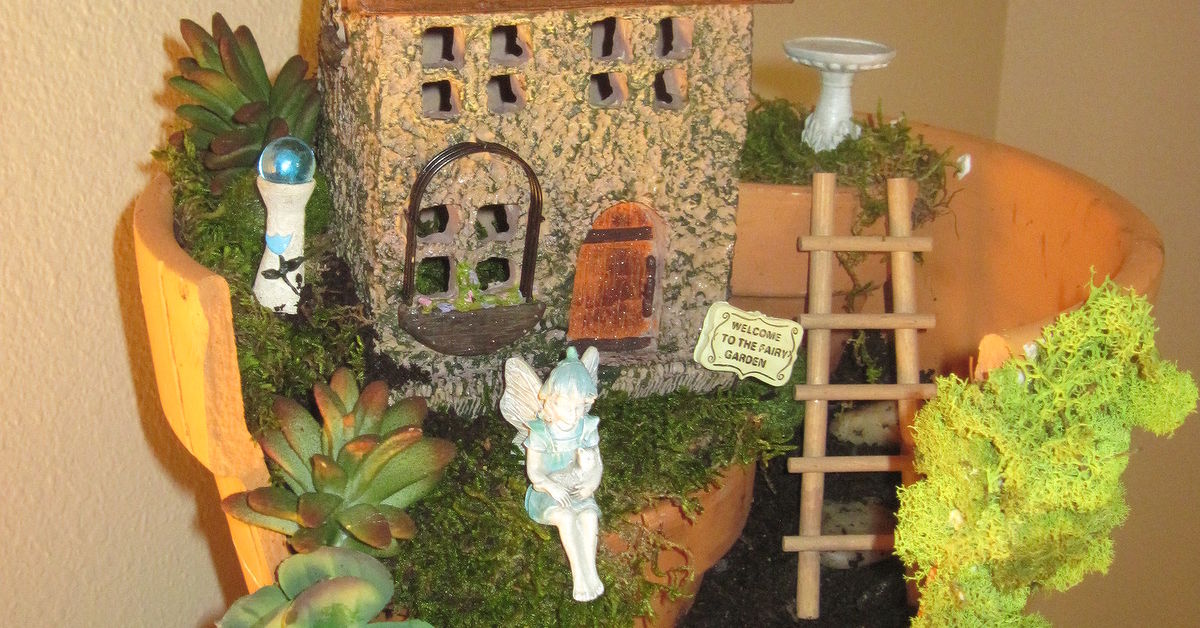
My first fairy garden began with a container, a handful of tiny plants, and the bold belief that a miniature bench could emotionally support an entire village of imaginary winged residents. That is the real charm of a fairy garden: it turns ordinary gardening into storytelling. A cracked flowerpot becomes a hillside cottage. Pebbles become a winding path. Moss becomes a lawn so soft you almost expect a fairy homeowner association to complain if someone parks a mushroom there.
For beginners, a fairy garden is one of the friendliest ways to start gardening because it does not require a big yard, expensive tools, or advanced plant knowledge. You can build one in a shallow dish, a terra-cotta pot, a wooden crate, a wheelbarrow, a birdbath, or even a wide bowl with proper drainage. The project is small enough to finish in an afternoon, but creative enough to keep changing for months. That makes “My First Fairy Garden” more than a cute craft. It is a tiny lesson in design, plant care, patience, and the serious art of not overwatering something the size of a teacup.
What Is a Fairy Garden?
A fairy garden is a miniature garden designed to look like a tiny magical landscape. It usually combines small plants, natural materials, and miniature accessories such as fairy houses, doors, fences, bridges, chairs, signs, lanterns, shells, pebbles, and figurines. Some fairy gardens are made for indoor display, while others live outdoors on patios, porches, balconies, or shady garden corners.
The best fairy gardens feel like a story paused at the perfect moment. Maybe a fairy has just left a cup of tea on a stump table. Maybe a pebble road leads to a door at the base of a fern. Maybe a tiny ladder leans against a succulent, suggesting somebody is about to perform roof maintenance on a leaf. The magic comes from scale. Everything is small, but the imagination behind it is huge.
Why Start With a Fairy Garden?
Traditional gardening can feel intimidating to beginners. You may worry about soil tests, sunlight levels, spacing, pruning, pests, plant hardiness zones, and whether your basil is judging you. A first fairy garden lowers the pressure. It gives you a manageable space where you can practice basic gardening skills while creating something decorative and personal.
Fairy gardens are also excellent for small spaces. Apartment dwellers, renters, kids, busy homeowners, and anyone without a full backyard can still enjoy the satisfaction of planting and designing. Because the garden is miniature, it fits on a patio table, windowsill, porch step, balcony ledge, or sunny kitchen counter. It is gardening with training wheels, except the wheels are probably tiny and attached to a fairy wagon.
Choosing the Right Container
Your container is the foundation of your first fairy garden. It sets the size, mood, and maintenance level of the project. A shallow bowl works well for a tabletop scene. A broken terra-cotta pot creates dramatic levels and little stair-step terraces. A wide planter gives plants more root room. A vintage wheelbarrow makes a moveable outdoor fairy village. A wooden box offers rustic cottage charm.
Look for Drainage First
The most important container feature is drainage. Plants may look delicate and poetic, but their roots are practical little creatures. They need oxygen as much as moisture. A container with drainage holes allows extra water to escape, which helps prevent soggy soil and root problems. If your dream container does not have holes, either drill them carefully or place plants in smaller nursery pots inside the decorative container so you can remove them for watering.
Match the Container to Your Location
For an outdoor fairy garden, choose durable materials such as terra-cotta, resin, metal, stone, or treated wood. For an indoor fairy garden, lighter containers are easier to move and clean. Glass terrariums can be beautiful, but beginners should be careful: enclosed glass holds humidity and may not suit plants that prefer dry conditions. If you are new to plant care, an open container is usually easier than a sealed miniature rainforest.
Picking Plants for My First Fairy Garden
The secret to a successful fairy garden is choosing plants that stay small, grow slowly, or tolerate trimming. You want plants that look like miniature versions of full-sized trees, shrubs, lawns, and flowers. This creates the illusion that your tiny world has real landscaping rather than one enthusiastic plant trying to become the mayor.
Great Plant Choices for Beginners
Good beginner plants include baby tears, Irish moss, spike moss, creeping thyme, sedum, hens and chicks, miniature ferns, polka-dot plant, fittonia, small peperomia, dwarf mondo grass, and compact succulents. For sunny outdoor fairy gardens, succulents and sedums are popular because they stay tidy and tolerate drier conditions. For shady or indoor gardens, moss-like plants, ferns, fittonia, and peperomia can create a lush woodland effect.
Choose plants with similar light and water needs. This is where many first fairy gardens go slightly off the rails. A succulent that wants dry soil will not be thrilled sharing a tiny neighborhood with a fern that wants consistent moisture. They may look adorable together at the garden center, but plant compatibility matters. Think of it as roommate screening, but with roots.
Use Scale Like a Designer
Scale is what makes a fairy garden believable. A plant with small leaves often looks more realistic in a miniature setting than a plant with large leaves. Fine-textured greenery can become a lawn. Upright tiny plants can look like trees. Trailing plants can soften the edge of a pot or create the effect of vines spilling over a cottage wall.
Soil, Pebbles, and the Tiny Science of Not Making Mud Soup
Use a quality potting mix rather than heavy garden soil. Potting mix is lighter, drains better in containers, and gives roots a more comfortable growing environment. Garden soil can compact in a pot, making it harder for water and air to move through the container. For succulents, use a cactus or succulent mix. For tropical indoor plants, use a standard indoor potting mix that holds some moisture but still drains well.
Many people add pebbles to the bottom of a container because it looks like it should improve drainage. In reality, drainage holes and the right potting mix matter more. Pebbles are still useful on top of the soil as decorative paths, patios, dry creek beds, or mulch-like finishing details. They hide bare soil and make the scene look polished. Just do not bury your plants under gravel like they missed a payment to the fairy bank.
Planning the Design Before You Plant
Before adding soil and plants, sketch a simple layout or arrange accessories in the empty container. Decide where the house, path, seating area, pond, fence, or “mysterious tiny door” will go. A good fairy garden often has three zones: a focal point, a path, and planted areas.
Create a Focal Point
The focal point is the first thing people notice. It might be a fairy house, a miniature door, a small bridge, a tiny chair, a birdbath, a mushroom cluster, or a handmade twig hut. Place it slightly off-center for a more natural look. Centered designs can work, but off-center placement usually feels more like a real landscape and less like a fairy real estate brochure.
Add a Path
A path gives your fairy garden movement. Use pea gravel, small stones, sand, bark chips, tiny shells, broken pottery pieces, or flat beads. Curved paths feel more whimsical than straight ones. A path that disappears behind a plant or house suggests a larger world beyond the container, which is a clever trick when your entire garden is smaller than a salad bowl.
Layer the Plants
Place taller plants toward the back or side, medium plants near the focal area, and low-growing plants near paths and edges. This creates depth. In a round container, rotate the pot as you design so it looks interesting from multiple angles. In a wall-facing planter, build the scene like a stage set, with the tallest pieces in the back.
How to Make My First Fairy Garden Step by Step
Step 1: Gather Your Supplies
You will need a container with drainage, potting mix, small plants, pebbles or decorative gravel, miniature accessories, a spoon or small trowel, scissors or pruners, and a watering can with a gentle spout. Optional items include moss, bark, twigs, shells, craft sticks, small stones, acorn caps, buttons, and waterproof glue for handmade accessories.
Step 2: Add Potting Mix
Fill the container with potting mix, leaving about an inch of space below the rim. This prevents water and soil from spilling over the edge. Lightly press the mix so it settles, but do not pack it tightly. Roots appreciate breathing room, even in a fantasy neighborhood.
Step 3: Place the Largest Features
Set the fairy house, door, bridge, or main accessory first. This helps you avoid planting everything beautifully and then realizing your fairy cottage has no legal place to stand. If the accessory is heavy, place a flat stone or tile beneath it to keep it stable.
Step 4: Plant the Greenery
Remove each plant gently from its nursery pot. Loosen the roots slightly if they are tightly packed. Dig a small hole, set the plant at the same depth it was growing before, and firm the soil around it. Avoid burying the crown of the plant. Planting too deep can cause trouble, especially in small containers.
Step 5: Build Paths and Details
Add pebbles for paths, moss for soft ground cover, twigs for fences, and shells or beads for decorative accents. Use a spoon, chopstick, or paintbrush to place small materials neatly. A paintbrush is especially useful for sweeping soil off tiny patios, because apparently even fairies deserve curb appeal.
Step 6: Water Gently
Water slowly and carefully. A strong stream can wash away your pebble path and turn the garden into a tragic fairy flood documentary. For small gardens, a squeeze bottle, turkey baster, or small watering can gives better control. Water until the potting mix is evenly moist, then let excess water drain.
Indoor vs. Outdoor Fairy Gardens
An indoor fairy garden is perfect for year-round enjoyment. It works well with houseplants that like bright indirect light. Place it near a window but avoid harsh direct sun if the plants are tropical. Indoor gardens usually need less frequent watering than outdoor ones because they are protected from wind and heat.
An outdoor fairy garden can feel more alive because it changes with the weather and seasons. Rain, sunlight, and real garden surroundings make the miniature scene blend into nature. Outdoor gardens need more durable accessories and closer attention to watering. Small containers dry out quickly in hot weather, especially on sunny patios.
Fairy Garden Themes for Beginners
The easiest theme is a woodland cottage. Use moss, ferns, bark, twigs, acorns, and a small house or door. For a beach fairy garden, use sand-colored gravel, shells, blue glass pebbles, and tiny driftwood. A farmhouse fairy garden can include a miniature fence, tiny wheelbarrow, small animals, and herbs. A tea party garden uses small chairs, a table, and flowering plants. A dinosaur fairy garden is also allowed, because nobody said fairies cannot have dramatic neighbors.
Seasonal Themes
One of the joys of a fairy garden is updating it through the year. In spring, add tiny eggs, pastel stones, and fresh flowers. In summer, use beach shells, miniature lemonade stands, or picnic scenes. In fall, add tiny pumpkins, acorns, and warm-colored leaves. In winter, decorate with faux snow, small evergreens, silver stones, and a miniature lantern.
Common Mistakes to Avoid
The first mistake is overplanting. Tiny plants grow. Leave room between them so the garden can mature without turning into a jungle where the fairy house disappears and is later discovered by archaeologists. The second mistake is mixing plants with different care needs. Keep dry-loving plants together and moisture-loving plants together.
The third mistake is using accessories that cannot handle the environment. Paper, untreated cardboard, and delicate indoor craft items may not survive outdoor moisture. Seal handmade pieces when possible or keep them in indoor gardens. The fourth mistake is overwatering. Check the soil before watering. If the top layer is still moist, wait. Fairy gardens like charm, not swamp conditions.
How to Care for a Fairy Garden
Care depends on the plants, location, and container size. Check moisture regularly by touching the soil. Trim plants when they outgrow the scene. Remove dead leaves so the garden stays tidy. Rotate indoor containers every week or two so plants grow evenly toward the light. Refresh gravel paths when soil splashes onto them. Clean accessories gently with a dry brush or damp cloth.
Fertilize lightly, if needed, during the growing season. Small containers do not need heavy feeding, and too much fertilizer can push plants to grow faster than you want. The goal is a balanced miniature landscape, not a botanical bodybuilder competition.
Budget-Friendly Fairy Garden Ideas
You do not need to buy a full set of miniature accessories. Some of the best fairy garden details come from everyday materials. Use craft sticks for fences, bottle caps for stepping stones, twigs for ladders, acorn caps for bowls, small rocks for stools, bark for roofs, buttons for plates, and shells for birdbaths. Broken pottery can become stairs or retaining walls. A small piece of mirror can suggest a pond.
Thrift stores, yard sales, craft drawers, and nature walks are treasure hunts for fairy garden supplies. Just make sure natural materials are clean and safe before placing them around plants. Avoid collecting from protected natural areas, and never use anything sharp where children may handle the garden.
Why Fairy Gardens Are Great for Kids and Families
A first fairy garden is a wonderful family project because it combines gardening, crafting, storytelling, and responsibility. Children can help choose plants, arrange stones, create tiny houses, and water carefully. The miniature scale encourages close observation. Kids notice leaf shapes, soil texture, root growth, and how plants respond to light and water.
It also invites imaginative play. A child may invent stories about who lives in the garden, why the path curves around the moss, or why the tiny chair is facing a pebble pond. That storytelling makes the garden feel personal. Adults may pretend they are supervising, but let us be honest: adults also enjoy deciding whether a fairy needs a mailbox.
Adding Personal Meaning to My First Fairy Garden
The best fairy gardens include details that mean something to the maker. Add a shell from a beach trip, a pebble from a favorite walking path, a tiny sign with a family name, or a miniature version of a beloved hobby. A reader who loves books might create a fairy reading nook. A gardener who loves cooking might plant thyme and make a tiny outdoor kitchen. A pet lover might add a little paw-print path.
Personal touches turn a cute decoration into a memory garden. Every tiny object becomes part of the story. Even a crooked fence can be charming because it says, “A real person made this, and possibly fought bravely with glue.”
My First Fairy Garden Experience: What I Learned From a Tiny World
My first fairy garden taught me that small projects have a funny way of revealing big truths. I started with a shallow container, three small plants, a bag of pebbles, and a miniature chair that looked like it had been designed by a very optimistic carpenter. At first, I thought the project would take thirty minutes. Then I spent twenty minutes deciding where the chair should face. Toward the tiny path? Toward the moss? Toward the imaginary sunrise? This is how fairy gardens get you. They begin as a simple craft and suddenly you are an urban planner for beings who may or may not exist.
The first lesson was restraint. I wanted to add everything: a house, a bridge, a pond, a fence, a bench, a sign, a mushroom, a lantern, and possibly a miniature bakery because fairies deserve carbs. But the container was small. When I placed too many accessories in it, the garden looked crowded instead of magical. I removed half the pieces, and suddenly the design improved. Empty space made the tiny path more important. The plants had room to breathe. The fairy chair finally looked intentional instead of lost in a yard sale.
The second lesson was that plants are living design elements. They do not stay exactly where you put them. One little trailing plant began creeping over the pebble path within a few weeks. At first, I considered trimming it immediately. Then I realized it looked like nature was gently reclaiming the walkway, which made the whole scene more believable. A fairy garden should not look frozen. It should look quietly alive.
The third lesson was watering discipline. I loved the garden so much that I wanted to care for it constantly, which is a dangerous emotional state for container plants. Too much love from a watering can is still too much water. After one slightly soggy week, I learned to check the soil first. If it felt damp, I waited. This simple habit made the plants healthier and saved the garden from becoming a miniature marshland.
The fourth lesson was that handmade details have more charm than perfect store-bought pieces. I made a tiny fence from twigs, and it was not straight. In fact, one section leaned like it had heard bad news. But that little imperfect fence made the garden feel personal. A polished accessory can be beautiful, but a handmade detail carries a story. The same goes for pebble paths, bark roofs, acorn bowls, and tiny signs written with a marker that suddenly feels enormous.
The final lesson was the most surprising: a fairy garden makes you slow down. You notice small things. You see how moss changes after watering, how a tiny leaf unfurls, how light moves across the container in the afternoon. In a world full of large screens and loud schedules, a miniature garden gives your eyes a quieter place to land. It is playful, yes, but it is also peaceful. My first fairy garden did not turn me into a perfect gardener. It did something better. It made me curious enough to keep going.
Conclusion
My first fairy garden is the perfect beginner project for anyone who wants to try gardening without feeling overwhelmed. It blends container gardening, miniature design, plant care, and creativity into one delightful little world. Start with a container that drains well, choose small plants with similar needs, build a simple path, add one charming focal point, and leave room for the garden to grow. The result does not need to be perfect. In fact, a little wonkiness often makes it better.
A fairy garden is proof that you do not need acres of land to enjoy gardening. Sometimes all you need is a pot, a few plants, a handful of pebbles, and the willingness to believe that a tiny chair can change the emotional atmosphere of an entire afternoon.
Note: This article was created from synthesized, real-world gardening guidance on fairy gardens, miniature plants, container gardening, drainage, potting mix, kids’ gardening, and small-space garden design, rewritten in original American English for web publication.