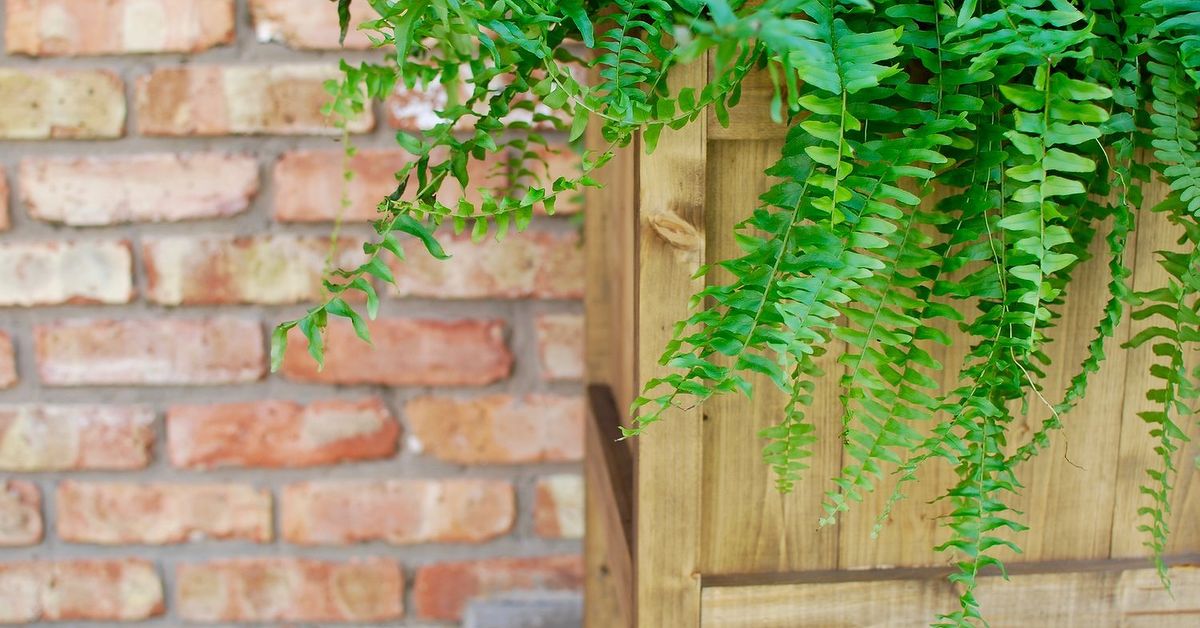
If your outdoor space could use a little charm, but your wallet is currently practicing minimalism, a DIY wood planter is one of the smartest weekend projects you can tackle. It is practical, attractive, beginner-friendly, and far less dramatic than assembling a shed with “extra parts” left over. Even better, a simple wood planter can be built for about $20 if you keep the design compact, choose budget-friendly lumber, and skip the fancy extras that make your shopping cart cry.
This guide shows you exactly how to make an easy wood planter that looks polished without requiring advanced carpentry skills. You will learn what wood to use, how to keep the planter from rotting too fast, how to add drainage the right way, and how to make the whole thing feel custom even when the budget says “absolutely not.”
Why This $20 DIY Wood Planter Actually Works
The secret is not magic. It is scale, smart lumber choices, and a build that avoids unnecessary complexity. A small planter box for herbs, flowers, lettuce, or strawberries does not need thick hardwood, ornate trim, or complicated joinery. In fact, the easiest wood planter ideas are usually the best looking because the lines stay clean and the build stays manageable.
A compact planter in the range of 24 inches long, 10 to 12 inches wide, and about 10 to 12 inches deep is large enough to feel useful but small enough to keep material costs low. This size also works well on a porch, front step, balcony, patio, or windowside table. In other words, it is the Goldilocks zone of DIY planters: not too big, not too tiny, and not likely to make you question your life choices halfway through assembly.
Budget Breakdown for an Easy Wood Planter
Prices vary by store and region, but a realistic budget for a small DIY wood planter usually looks something like this:
- 3 cedar fence pickets or budget common boards: about $12 to $14
- Small box of exterior screws: about $5 to $6
- Landscape fabric or liner material: about $1 to $3 if bought small, or free if you use scraps
- Optional stain or sealer: extra, and easy to skip on day one
If you already have screws, leftover stain, scrap liner fabric, or even a few offcuts in the garage, the total cost gets even friendlier. That is why this project is such a favorite among budget DIY fans: it looks far more expensive than it is.
Tools and Materials
Materials
- 3 wood fence pickets or similar thin exterior-friendly boards
- Exterior-grade screws, preferably 1-1/4 inch to 1-5/8 inch
- Landscape fabric, coco liner, or a breathable planter liner
- Potting mix
- Plants, herbs, or flowers
- Optional exterior stain, paint, or water-resistant finish for the outside only
Tools
- Tape measure
- Pencil
- Saw
- Drill or driver
- Drill bit for pilot holes
- Sandpaper or a sander
- Safety glasses
- Square or straight edge
Best Wood Choices for a Budget Planter
If you want the short answer, cedar is the crowd favorite. It naturally resists decay better than many cheaper woods, it is widely available in fence picket form, and it ages gracefully outdoors. Redwood is also a strong option, but it usually costs more. Pine is the budget hero if you want to spend the least, though it generally will not last as long as cedar unless you protect it well and avoid letting it stay soggy for long periods.
For a planter that will hold edible plants, many DIYers prefer cedar or untreated wood with a liner. For flowers and decorative plants, you have more flexibility. Either way, the smartest move is to reduce direct, constant contact between wet soil and bare wood. A breathable liner and solid drainage can make a cheap planter last much longer.
Choose Your Size Before You Cut Anything
For an easy beginner build, aim for this approximate size:
- Length: 24 inches
- Width: 10 to 11 inches
- Height: 10 to 11 inches
That size is excellent for basil, parsley, lettuce, marigolds, petunias, shallow-rooted greens, and even a compact strawberry display. It also keeps the project light enough to move when needed. If you plan to use a plastic liner or nursery container inside the box, measure that first and build the wood planter around it. That trick makes the project easier and extends the life of the wood because the wettest soil stays separated from the boards.
How to Make a DIY Easy Wood Planter for $20
Step 1: Measure and cut your boards
For a simple rectangular planter, cut pieces for the front, back, ends, and bottom. The exact dimensions can shift depending on your lumber thickness, but the basic idea is simple: two longer sides, two shorter ends, and several slats for the bottom.
A very beginner-friendly approach is to stack two boards for each long side and two boards for each short side, creating a planter about 10 to 11 inches tall. Then use three bottom slats with small gaps between them so water can escape easily.
Do not stress if your measurements are off by a hair. This is a planter, not a moon rocket. A snug, square box matters more than perfection worthy of a museum label.
Step 2: Sand rough edges
Fence pickets and budget boards can be a little splinter-happy. Run sandpaper over cut edges, corners, and any rough spots before assembly. This step makes the finished planter look better, feel better, and reduce the chance that your project ends with a surprise splinter handshake.
Step 3: Pre-drill to prevent splitting
Thin wood, especially pickets, can split if you drive screws too aggressively. Pre-drill pilot holes near the ends of your boards. It takes a few extra minutes, but it saves the project from becoming modern art.
Step 4: Build the side panels
Lay out the boards for each side panel on a flat surface. Join them using screws and simple overlap joints, or attach them to small scrap support blocks on the inside if you have leftovers. The goal is a sturdy wall, not complicated joinery. Keep checking for square as you go.
If you are using a plastic liner insert, you can build the wood box more like a sleeve and worry less about the bottom holding wet soil. If it will be a full soil-filled planter, make sure the bottom assembly is secure and the gaps are even.
Step 5: Assemble the box
Once the side panels are ready, attach the front and back to the end panels. Set the box upright and confirm that it sits flat. Small wobble? Loosen, adjust, and re-tighten before moving on. Your future self will thank you every time the planter does not rock like a nervous restaurant table.
Step 6: Add the bottom slats and drainage
Attach the bottom slats with small spaces between them. Those gaps help water move through rather than collecting at the base. After that, drill several drainage holes if your bottom is more solid or if you are using an inner liner. You want water to leave the planter easily. Plant roots enjoy moisture, but they do not enjoy swimming lessons.
If you use liner fabric, keep it breathable and do not seal the bottom like a bucket. A planter should drain, not trap moisture and create a swampy surprise.
Step 7: Protect the outside, not the inside
You can leave cedar natural, which many people do because it weathers into a soft silvery tone. If you are using pine, consider painting or staining the exterior to help it last longer. Focus on the outside surfaces and top edge. Avoid turning the interior into a sealed moisture trap. The goal is protection, not making the planter feel like it was wrapped in a raincoat from the inside out.
Step 8: Line it, fill it, and plant it
Add landscape fabric, a coco liner, or a fitted plastic insert with drainage. Then fill the planter with quality potting mix, not garden soil scooped straight from the yard. Potting mix is lighter, drains better, and helps container roots stay healthier. Once filled, add your plants, water thoroughly, and admire your work like the extremely capable weekend builder you are.
What to Plant in a Small Wood Planter
This kind of planter is ideal for:
- Herbs like basil, thyme, oregano, mint, and parsley
- Lettuce and shallow greens
- Strawberries
- Compact flowers such as petunias, marigolds, and calibrachoa
- Small decorative arrangements for porches and patios
If you want to grow bigger crops like tomatoes or peppers, make the planter deeper and wider. Small planters dry out faster and simply do not give large plants enough root room to thrive. There is nothing wrong with ambition, but a tiny box is not the best home for a tomato plant with main-character energy.
Common DIY Planter Mistakes to Avoid
Skipping drainage
This is the classic mistake. Without drainage, roots stay too wet and wood stays damp longer. Both plants and lumber hate that arrangement.
Using garden soil instead of potting mix
Garden soil compacts in containers, drains poorly, and can suffocate roots. Save it for the ground where it belongs.
Building too large on a tiny budget
The bigger the planter, the higher the lumber cost, soil cost, and weight. Stay compact if your goal is a cheap, easy build.
Ignoring sun and placement
Before you fill the planter, decide where it will live. A loaded planter gets heavy fast. Put it in place first unless you enjoy awkward lifting and impromptu workouts.
Choosing looks over longevity
A fancy design means nothing if the planter traps water, wobbles, or starts failing after one season. Clean and simple usually wins.
Simple Upgrades If You Want It to Look More Expensive
- Add a top trim board for a more finished edge
- Use black exterior screws for a modern look
- Apply a medium walnut or natural cedar-toned stain
- Set the planter on small feet so the base can dry faster
- Group two or three planters together for a custom garden feel
These upgrades are optional, but they can take a basic wood planter from “cute DIY project” to “wait, you made that?” which is honestly one of the great joys of home improvement.
Extra Experience and Real-World Lessons From Building Budget Wood Planters
One of the funniest things about building a cheap wood planter is how often the easiest version turns out to be the best version. Many first-time DIYers assume a planter has to be complicated to look good, so they start sketching elaborate trim, feet, shelving, decorative cross braces, and enough extra pieces to accidentally build patio furniture. Then reality arrives wearing sawdust and asking why a basic herb box somehow requires sixteen cuts and a mild emotional breakdown. In practice, the clean rectangular planter almost always wins. It is faster to build, easier to paint or stain, and much more forgiving when your cuts are not perfect.
Another lesson that shows up quickly is that wood planters teach patience better than they teach carpentry. The actual cutting and screwing together is usually straightforward. The part that separates a satisfying build from an annoying one is taking a little extra time to pre-drill, square the corners, and check the fit before driving in every screw with full confidence and zero evidence. That pause matters. A planter box can look wonderfully simple, but simple projects are the least forgiving when the lines go crooked. There is nowhere for mistakes to hide. The upside is that once you finish one planter, your second one feels much easier because you suddenly understand the rhythm of the build.
There is also a very real budget lesson hidden in this project. Spending less does not always mean buying the absolute cheapest wood. Sometimes the smarter move is choosing cedar fence pickets or slightly better boards so the planter lasts longer and looks better from day one. Cheap lumber with bad warping can turn a simple project into a wrestling match. A board that twists like it is trying out for a dance competition will not save you money if it wastes time, causes frustration, and leaves you with a lopsided result. Many experienced DIYers learn to look for the straightest boards they can find within budget, even if that means standing in the aisle inspecting lumber like a very picky game show judge.
The planting side has its own learning curve. A beautiful wood planter will still fail if it becomes a soggy box of regret. People often put tremendous effort into the woodworking part and then sabotage the whole thing by skipping drainage or stuffing it with heavy garden soil. The planter ends up holding too much water, the roots sulk, and the wood stays wet longer than it should. Once you have seen that happen once, you never forget the importance of drainage gaps, liner choices, and good potting mix. Healthy plants make the planter look expensive. Struggling plants make even a gorgeous box look tired.
Perhaps the best part of the experience is how quickly a small wood planter changes a space. A plain porch corner suddenly feels intentional. A balcony looks more lived-in. A front step becomes warmer and more welcoming. Even a tiny planter with herbs can make a home feel cared for. That is why this project stays popular year after year. It is inexpensive, useful, and gives you one of the best DIY rewards available: visible improvement without needing a contractor, a giant budget, or a dramatic recovery period. It is just you, some boards, a few screws, and the deeply satisfying moment when a humble box starts looking like something you would happily show off.
And yes, once you build one, you will probably start planning a second. That is how the planter life gets you. First it is one little herb box. Then it is a matching pair. Then a larger one for flowers. Then suddenly you are discussing stain colors with unusual seriousness and wondering whether the patio needs a whole coordinated planter collection. It happens fast. Consider yourself warned.
Final Thoughts
If you want a project that is low-cost, high-impact, and beginner-friendly, a DIY easy wood planter for $20 is hard to beat. It gives you useful planting space, adds charm to almost any outdoor area, and lets you create something custom without spending a fortune. Keep the design simple, use decent wood, add real drainage, and fill it with quality potting mix. Do that, and your planter will look good, function well, and avoid the sad fate of becoming a soggy wooden rectangle with commitment issues.
In other words, build small, build smart, and let the plants do the bragging.