Note: This guide focuses on mechanical front derailleurs commonly found on road, hybrid, touring, and mountain bikes. Electronic systems such as Shimano Di2 or SRAM AXS may require app-based micro-adjustment or brand-specific setup tools, so check the manufacturer’s manual when in doubt.
Why Front Derailleur Adjustment Matters
A front bicycle derailleur has a simple job: move the chain between the front chainrings. Unfortunately, it sometimes performs that job with the grace of a shopping cart with one bad wheel. One minute your bike shifts smoothly; the next, the chain rubs, hesitates, or makes a dramatic leap off the chainring like it has somewhere more important to be.
The good news is that most front derailleur problems come down to a few fixable things: cage height, cage angle, low limit screw, high limit screw, and cable tension. Once you understand how these pieces work together, adjusting a front derailleur becomes less mysterious and much less likely to involve muttering at your bike in the garage.
This step-by-step guide explains how to adjust a front bicycle derailleur in a practical, beginner-friendly way. You will learn how to diagnose chain rub, set the derailleur limits, tune cable tension, test shifting, and avoid common mistakes that make front shifting feel clunky. Grab a screwdriver, a hex key, and a little patience. Your bike is about to become a better conversationalist.
What a Front Derailleur Actually Does
The front derailleur is the small metal cage mounted above your front chainrings. When you press or twist your left shifter, the cable pulls the derailleur cage outward or releases it inward. That cage nudges the chain from one chainring to another.
Unlike a rear derailleur, which moves across many gears in small increments, a front derailleur usually shifts between two or three chainrings. That sounds easier, but the front derailleur has a tougher shove to make. It must push the chain sideways under pedaling load and land it cleanly on a much larger or smaller ring. This is why tiny setup errors can create big noises.
Common Signs Your Front Derailleur Needs Adjustment
You probably need a front derailleur adjustment if your chain rubs the derailleur cage, refuses to shift to the big ring, drops toward the frame, falls off the outside chainring, shifts slowly, or needs an awkward amount of pressure at the shifter. A properly adjusted front derailleur should shift with a firm but smooth click, keep the chain contained, and stay quiet in normal gear combinations.
Tools You Need Before Starting
You do not need a professional workshop to adjust a front derailleur. A basic home setup is enough for most riders. A bike repair stand is helpful, but you can also ask a friend to lift the rear wheel while you pedal by hand. If you are alone, carefully turning the bike upside down can work, though it is less convenient and may scuff the saddle or handlebar grips.
- Phillips screwdriver or small hex key for limit screws
- 4 mm or 5 mm hex key for the cable anchor bolt and derailleur clamp
- Needle-nose pliers or cable puller
- Clean rag and light lubricant
- Good lighting
- Optional: bike repair stand
Before adjusting anything, inspect the shift cable and housing. If the cable is rusty, frayed, kinked, or sticky, adjustment alone may not fix the problem. A worn cable is like trying to play guitar with a shoelace: technically possible, but nobody is going to enjoy the result.
How to Adjust a Front Bicycle Derailleur: 15 Steps
Step 1: Shift to the Smallest Front Chainring
Start by shifting the chain onto the smallest front chainring and the largest rear cog. This gear combination places the chain at its most inward position. It is the correct starting point for setting the low limit screw because the derailleur cage must sit close to the chain without pushing it off toward the frame.
Pedal gently while shifting. Never force the shifter while the bike is stationary. Bicycle drivetrains prefer movement, and unlike some humans before coffee, they cooperate better when things are turning.
Step 2: Identify the Low and High Limit Screws
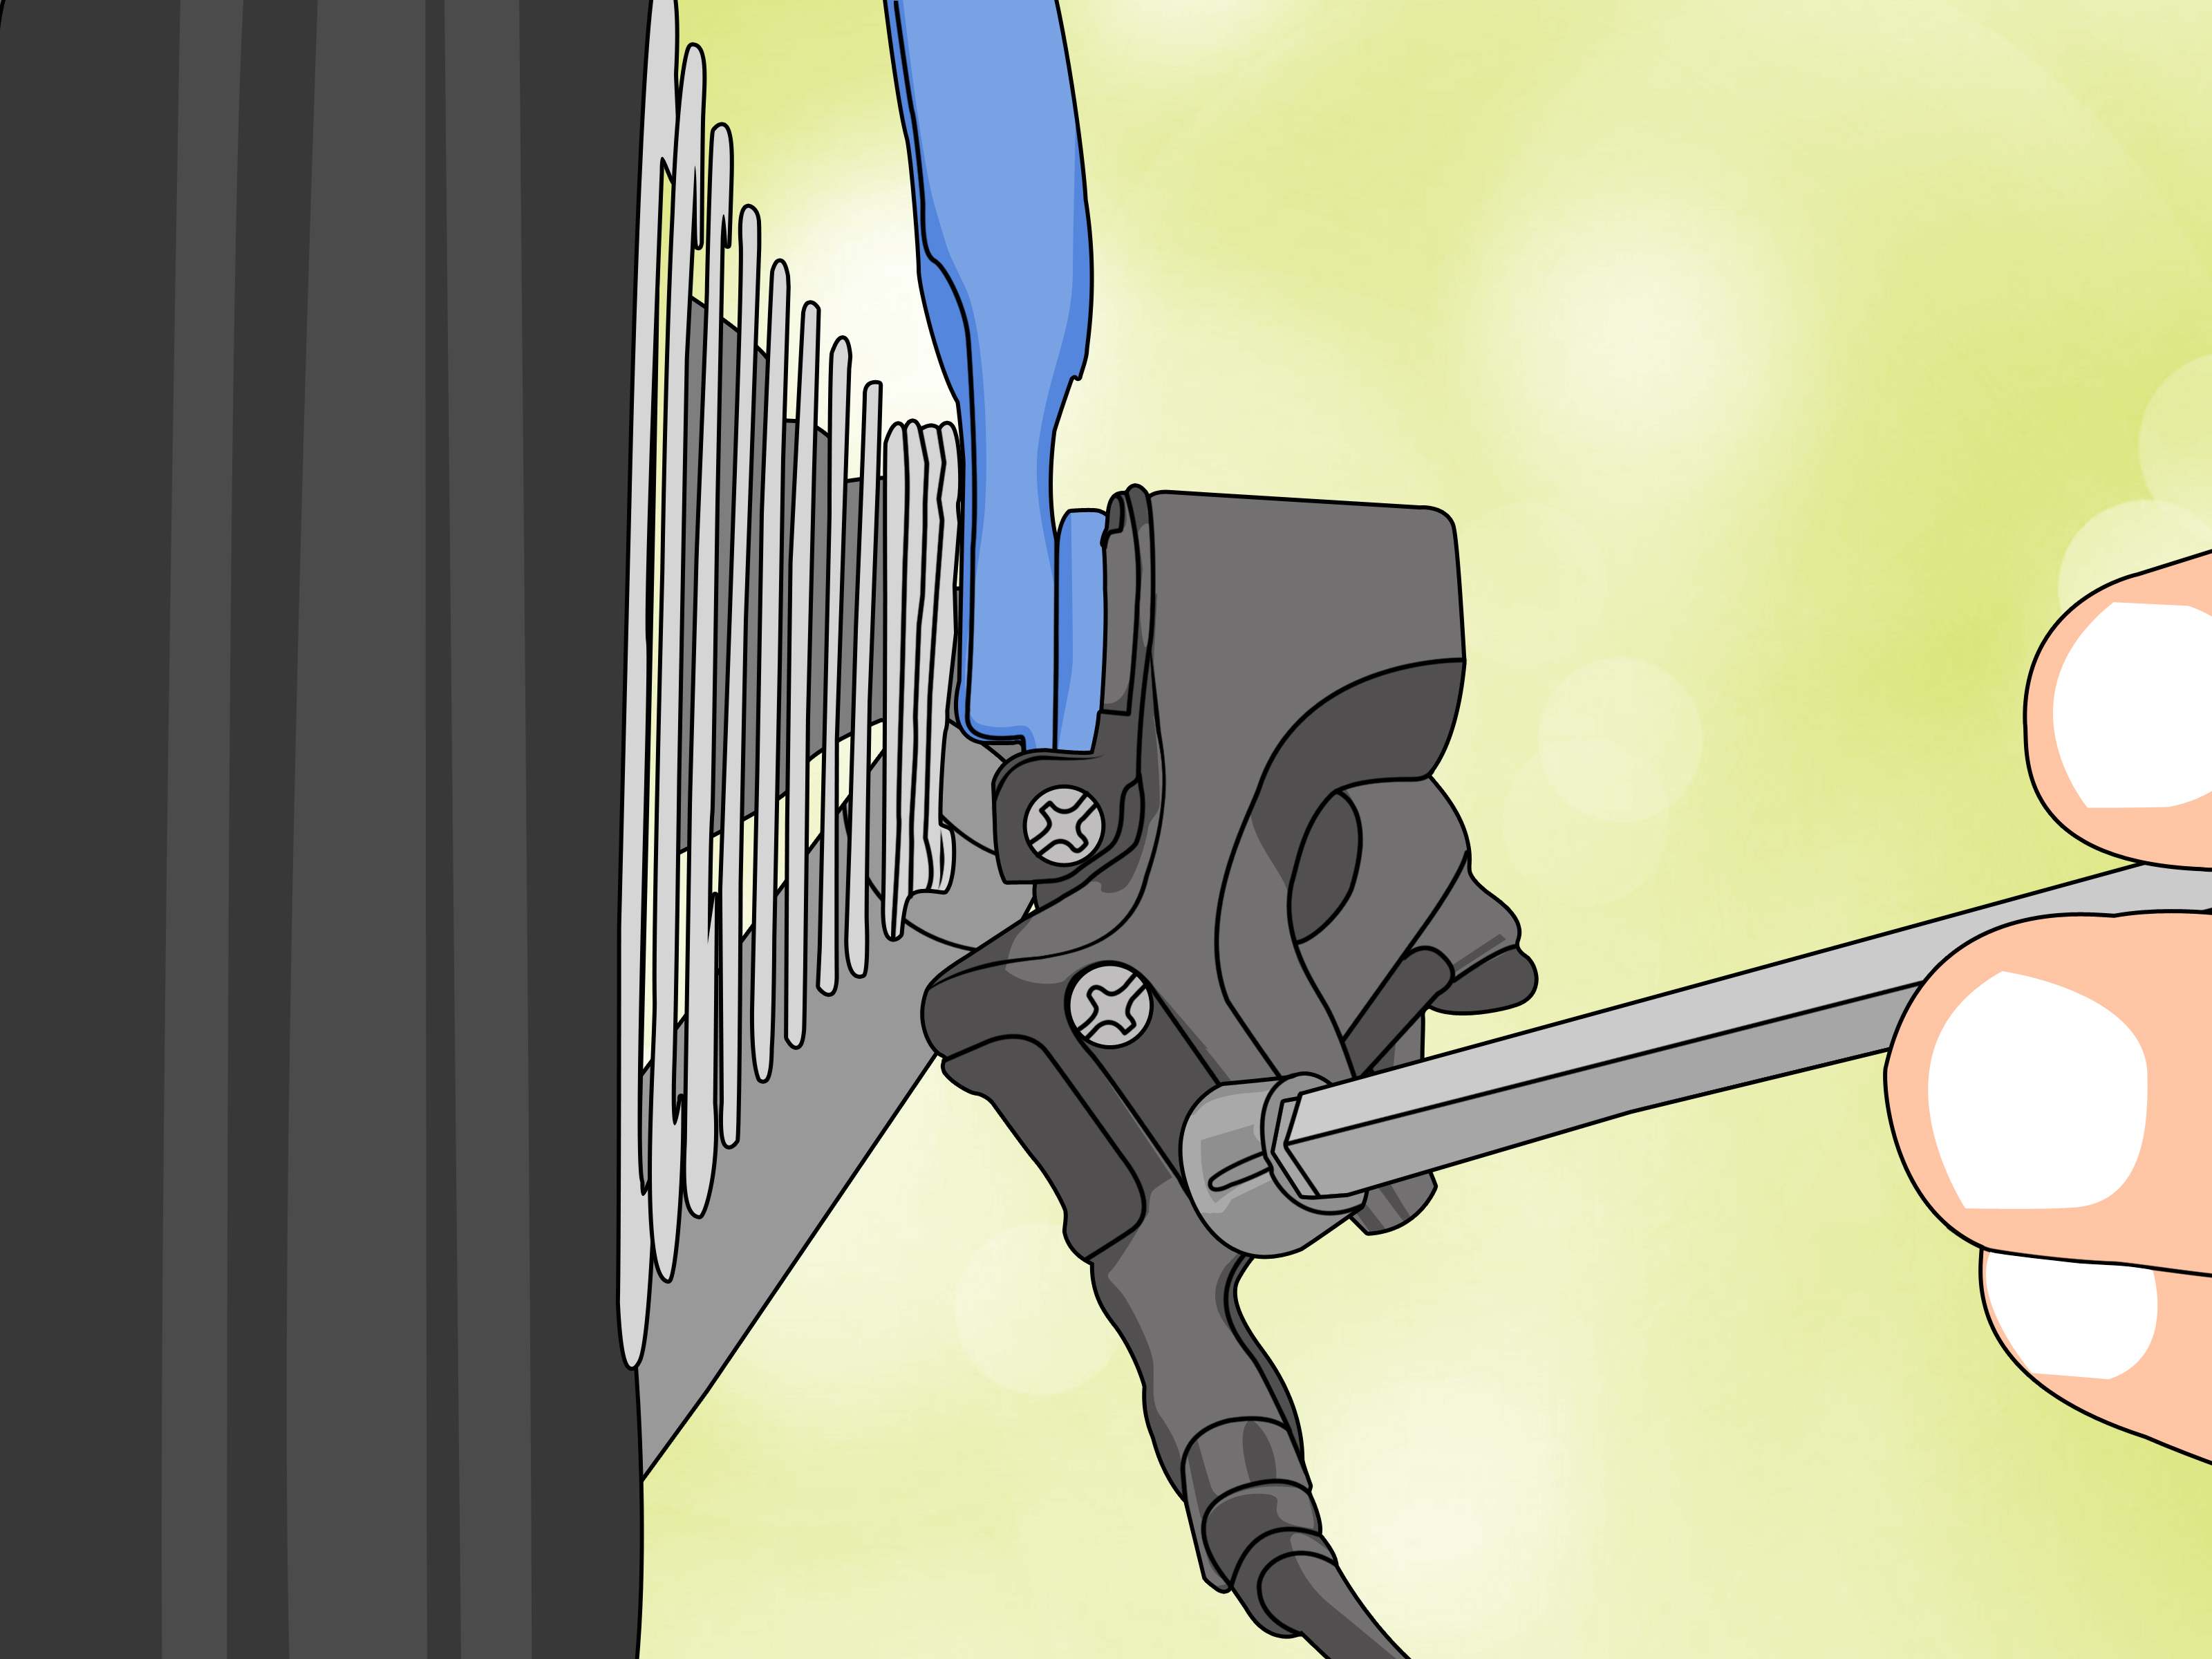
Most front derailleurs have two small limit screws labeled “L” and “H.” The L screw controls how far the derailleur moves inward toward the frame. The H screw controls how far it moves outward toward the crank arm. On some models the screws are not clearly labeled, and their position may vary by brand or generation.
If you are unsure which screw is which, turn one screw a quarter turn while watching the derailleur cage. Make tiny changes only. A quarter turn can make a noticeable difference, and full turns can send your adjustment into the weeds faster than a squirrel crossing a bike path.
Step 3: Release Cable Tension
For accurate low limit adjustment, the cable should not be pulling the derailleur outward. If the cable is tight, turn the barrel adjuster clockwise to reduce tension. If that is not enough, loosen the cable anchor bolt so the derailleur can rest naturally at its inward stop.
This step matters because cable tension can disguise the true position of the derailleur. You want to set the limit screw first, then tune cable tension afterward. Mixing those two steps is one of the most common reasons people chase the same shifting problem for an hour.
Step 4: Set the Low Limit Screw
With the chain on the smallest chainring and largest rear cog, look at the gap between the chain and the inner plate of the derailleur cage. The cage should sit close to the chain without rubbing. A small visible gap is ideal.
If the chain rubs the inner plate, turn the L screw counterclockwise in small increments to let the cage move slightly inward or outward depending on your derailleur design. If the gap is too wide and the chain struggles to shift down to the small ring, turn the L screw the opposite direction. The goal is simple: close, but not touching.
Step 5: Check Derailleur Cage Height
Shift the derailleur outward by hand or move the chain toward the large chainring position so you can check cage height. The outer plate of the derailleur cage should sit just above the tallest teeth of the largest chainring. A common target is roughly 1 to 3 mm of clearance.
If the cage is too high, shifting can feel slow and sloppy. If it is too low, the cage may hit the chainring teeth. Either problem can make your bike sound like it is auditioning for a percussion section.
Step 6: Adjust Derailleur Height if Needed
If the derailleur cage height is wrong, loosen the derailleur clamp bolt slightly. Move the derailleur up or down on the seat tube until the outer cage plate clears the large chainring teeth by a small, even gap. Retighten the clamp bolt just enough to hold the position while you check alignment.
Be careful not to scratch the frame or over-tighten the clamp, especially on carbon frames. If your bike uses a braze-on mount, the vertical adjustment range may be limited. In that case, set it as close as the mount allows.
Step 7: Align the Derailleur Cage with the Chainrings
Look down from above the bike. The outer plate of the front derailleur cage should run parallel to the chainrings. If the tail of the cage points too far inward or outward, shifting can become noisy, slow, or inconsistent.
To correct the angle, loosen the clamp bolt slightly and rotate the derailleur until the cage lines up with the chainrings. Then retighten it. This small adjustment can dramatically improve front shifting because the chain needs a clean, straight guide from one ring to the next.
Step 8: Reattach and Pre-Tension the Cable
Make sure the shifter is still in the lowest front gear position. Pull the shift cable snug with your fingers or pliers, then tighten the cable anchor bolt. The cable should be firm but not guitar-string tight.
If the cable has a frayed end, replace it or at least install a cable end cap after trimming. A frayed cable can stab your hand, unravel inside the mechanism, or make future adjustments more annoying than they deserve to be.
Step 9: Shift to the Large Chainring
Pedal the bike by hand and shift from the small chainring to the large chainring. If the chain climbs smoothly, you are on the right track. If it hesitates, you may need more cable tension. If it refuses to move outward, either the cable is too loose or the high limit screw is blocking the derailleur.
Add tension gradually by turning the barrel adjuster counterclockwise. If your bike does not have a barrel adjuster for the front derailleur, loosen the anchor bolt and pull a little more cable through before tightening it again.
Step 10: Set the High Limit Screw
Shift the chain to the largest front chainring and the smallest rear cog. This puts the chain at its most outward position. Now inspect the gap between the chain and the outer plate of the derailleur cage.
The outer cage plate should sit very close to the chain without rubbing. If the derailleur moves too far outward, the chain may overshift and fall off the big chainring. Turn the H screw clockwise in small increments to limit outward travel. If the derailleur cannot move far enough to shift onto the big ring, turn the H screw counterclockwise slightly.
Step 11: Fine-Tune Cable Tension
Cable tension controls how quickly and cleanly the derailleur responds to the shifter. Too little tension makes the shift to the big ring slow or impossible. Too much tension can cause rubbing, poor downshifts, or make the derailleur sit too far outward.
Use the barrel adjuster in small quarter-turn changes. Turn it counterclockwise to add tension and help the derailleur move outward. Turn it clockwise to reduce tension and let the derailleur sit farther inward. After each adjustment, pedal and shift again before making another change.
Step 12: Test the Downshift
Shift from the large chainring back to the small chainring while pedaling lightly. The chain should drop cleanly without falling inside toward the frame. If it drops too far, tighten the low limit screw slightly. If it hesitates or refuses to drop, the low limit may be too tight or the cable tension may be too high.
Front downshifts are often smoother when you ease pedal pressure for a moment. You do not have to stop pedaling, but a softer pedal stroke helps the chain move without drama.
Step 13: Check for Chain Rub Across Rear Gears
Shift through the rear cassette while the chain is on the small front ring, then repeat with the chain on the big front ring. Listen for rubbing against the derailleur cage. Some extreme gear combinations may create slight rub, especially on older drivetrains or triple cranksets.
Avoid cross-chaining whenever possible. That means small front chainring with smallest rear cog, or large front chainring with largest rear cog. These combinations place the chain at a sharp angle, increasing noise and wear. Your bike can do it, but it may complain loudly, and honestly, it has a point.
Step 14: Use Trim Positions if Your Shifter Has Them
Many road shifters and some flat-bar shifters include trim positions. A trim click moves the front derailleur cage slightly without completing a full shift. This helps eliminate chain rub as you move across the rear cassette.
If you hear light rubbing after a rear shift, try a small trim click before changing the limit screws. Trim is not a repair for bad setup, but it is a normal part of using many front derailleurs. Think of it as the derailleur politely scooting its chair in so the chain can pass.
Step 15: Take a Careful Test Ride
Once the bike shifts well in the stand, take it for a short test ride in a safe area. Shift under light to moderate pedaling pressure. Test small-to-large shifts, large-to-small shifts, and several rear gear combinations.
If the chain shifts cleanly, does not fall off, and stays reasonably quiet, your front derailleur adjustment is complete. If the problem returns under real riding load, make one small adjustment at a time. Bike tuning rewards patience. It does not reward panic-twisting every screw like you are cracking a safe in an action movie.
Troubleshooting Front Derailleur Problems
The Chain Will Not Shift to the Big Ring
If the chain refuses to climb to the largest chainring, check cable tension first. Add tension with the barrel adjuster. If that does not help, the H limit screw may be too tight and blocking outward derailleur movement. Loosen it slightly and test again.
The Chain Falls Off the Outside
If the chain overshifts beyond the big ring, the H limit screw is allowing too much outward travel. Turn it clockwise in small increments until the derailleur stops just outside the chain without throwing it.
The Chain Falls Toward the Frame
If the chain drops between the small chainring and the frame, the L limit screw allows too much inward movement. Tighten the L screw slightly. A chain catcher can add extra protection on road bikes, but it should not be used as a substitute for proper adjustment.
The Chain Rubs in Several Gears
Persistent chain rub can come from poor cage alignment, wrong cable tension, a bent derailleur cage, worn chainrings, or cross-chaining. Start with alignment and limit screws, then inspect drivetrain wear if the noise remains.
Common Mistakes to Avoid
The biggest mistake is adjusting cable tension before setting the low limit. Another common mistake is turning the limit screws too much at once. Front derailleurs respond best to tiny changes. Quarter turns are usually enough.
Also avoid adjusting the derailleur while pedaling hard. Front shifts need a little kindness. Ease off the pressure for half a second when shifting, especially on hills. Your chain will move more smoothly, and your drivetrain will last longer.
Finally, do not ignore compatibility. A derailleur designed for a certain chainring size, chainline, cable pull, or number of speeds may not work well outside its intended range. If your bike has mismatched parts, adjustment may improve shifting but never make it perfect.
Maintenance Tips for Better Front Shifting
Clean your chain regularly and lubricate it lightly. A dirty chain shifts poorly because grit increases friction between the chain, chainrings, and derailleur cage. Wipe off excess lube after applying it; the goal is lubrication, not creating a mobile dust magnet.
Inspect your chainrings for worn or shark-fin-shaped teeth. Worn teeth can make the chain hesitate, skip, or shift inconsistently. Also check the shift cable and housing every few months. Fresh cable housing can make an old shifter feel surprisingly young again, like giving your bike a tiny spa day.
Real-World Experience: What Adjusting a Front Derailleur Teaches You
Adjusting a front bicycle derailleur is one of those repairs that seems intimidating until you do it a few times. The first attempt often feels like solving a tiny mechanical riddle. The second attempt feels more logical. By the third, you begin to understand that the derailleur is not being difficult for personal reasons. It is simply obeying the position of the cage, the pull of the cable, and the limits set by two small screws.
One useful lesson from real-world bike maintenance is that most front shifting problems are not solved by one heroic adjustment. They are solved by a sequence. The cage must be at the right height. It must be parallel to the chainrings. The low limit must stop the chain from falling inward. The cable must have enough tension to move the cage outward. The high limit must stop the chain from flying off the big ring. When these details work together, the shift feels almost effortless.
Another experience many riders share is the “almost fixed” stage. The chain shifts to the big ring, but it rubs in one rear gear. Or it downshifts beautifully, but the upshift feels lazy. This is where patience matters. Instead of changing three things at once, make one tiny adjustment, test it, and observe what changed. A quarter turn on a barrel adjuster can be the difference between a noisy ride and a smooth one.
It also helps to learn the sound of your drivetrain. A light tick-tick-tick usually means the chain is brushing the cage. A harsh grind may suggest cross-chaining or serious misalignment. A sudden clunk followed by silence may mean the chain has dropped, which is never the soundtrack anyone requested. Listening carefully helps you diagnose problems before they become roadside repairs.
On older bikes, you may discover that adjustment has limits. A rusty cable, bent cage, worn chain, or damaged chainring can make perfect tuning impossible. In that case, replacing a small part may do more than another hour of screw turning. This is not failure. It is mechanical honesty. Sometimes the bike is not asking for adjustment; it is asking for a new cable and perhaps a little dignity.
For commuters, learning front derailleur adjustment can save time and money. A noisy chain on Monday morning can become a five-minute tune-up instead of a shop visit. For weekend riders, it builds confidence. You begin to understand your bike as a system rather than a mysterious collection of metal tubes and emotional sounds. For long-distance cyclists, this skill can be the difference between finishing a ride comfortably and spending miles avoiding half your gears.
The best practical habit is to test your shifting before a big ride. Run through the front chainrings, check for rub, and make sure the chain does not overshift. Small problems are much easier to fix at home than beside a road while mosquitoes treat you like a buffet. A front derailleur does not need constant attention, but it does appreciate occasional inspection.
In the end, adjusting a front derailleur is about control. You are setting boundaries for the chain, guiding it from one ring to another, and giving it just enough room to move without escaping. That sounds suspiciously like life advice, but let us not give the derailleur too much credit. It is still a little metal cage. A very useful little metal cage, but a cage nonetheless.
Conclusion
Learning how to adjust a front bicycle derailleur gives you smoother shifting, fewer chain drops, quieter rides, and a better understanding of your bike. The process is not about guessing. It is about following the correct order: inspect the cable, set the cage height and angle, adjust the low limit, secure the cable, tune cable tension, set the high limit, and test everything carefully.
Take your time, make small changes, and listen to what the drivetrain tells you. A well-adjusted front derailleur will not make you faster by magic, but it will make your bike feel cleaner, calmer, and more reliable. And sometimes, fewer weird noises from the bike is exactly the kind of luxury we deserve.