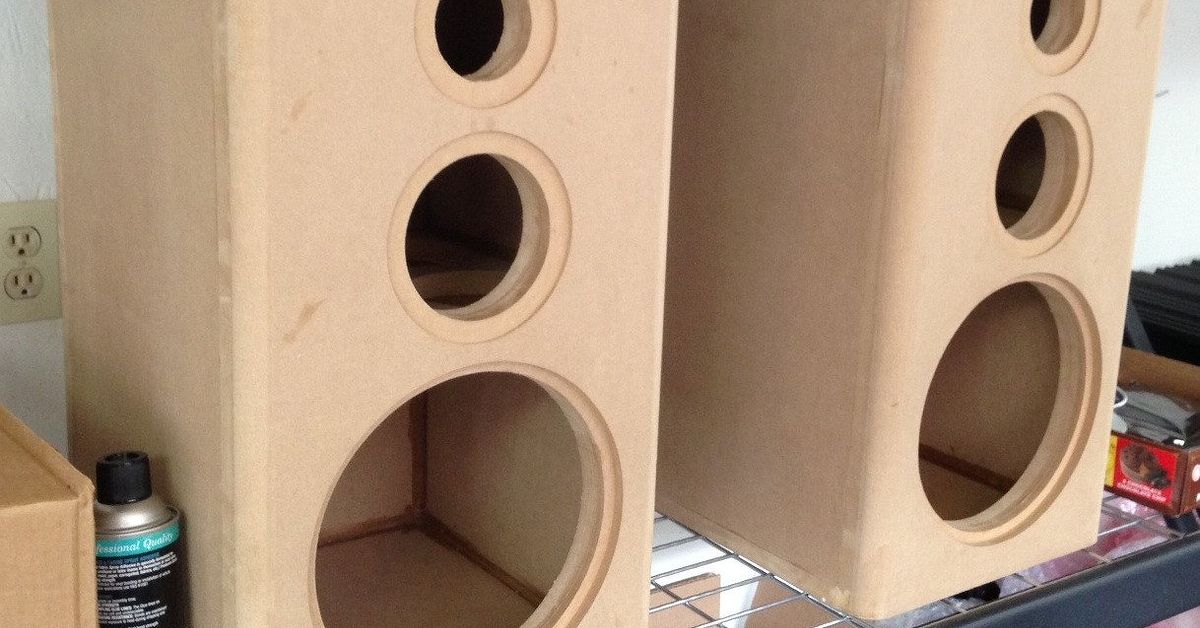
Note: This guide is written for hobbyists who want to build a practical, great-sounding audio speaker box at home. Always follow your speaker driver manufacturer’s recommended enclosure volume, power handling, and wiring instructions before cutting wood or connecting an amplifier.
Introduction: Why Build Your Own Speaker Box?
Building an audio speaker box is one of those DIY projects that looks intimidating until you realize it is mostly careful measuring, patient cutting, and a healthy respect for wood glue. Yes, sound science is involved. No, you do not need to wear a lab coat, although safety glasses are strongly recommended unless you enjoy explaining sawdust to your eyeballs.
A well-built speaker enclosure does more than hold a speaker driver in place. It controls air movement, reduces unwanted vibration, supports bass response, and helps your speaker perform the way it was designed to perform. A poor box can make a good driver sound thin, boomy, muddy, or oddly “boxy.” A solid box, on the other hand, can make an affordable driver sound surprisingly polished.
In this DIY guide, you will learn how to build an audio speaker box from planning to final testing. We will cover speaker enclosure types, materials, tools, measurements, cutting, assembly, sealing, damping, finishing, and common mistakes. Whether you are making a bookshelf speaker, a small Bluetooth speaker cabinet, a car audio subwoofer box, or a home theater enclosure, the same basic principles apply: correct volume, rigid construction, airtight joints, and smart driver placement.
What Is an Audio Speaker Box?
An audio speaker box, also called a speaker enclosure or cabinet, is the structure that houses the speaker driver. The driver moves back and forth to create sound waves. Without an enclosure, the sound from the back of the driver can interfere with the sound from the front, especially at lower frequencies. That interference weakens bass and makes the speaker sound less controlled.
The box manages that rear sound energy. In a sealed design, the air inside the box acts like a spring, helping control cone movement. In a ported design, a tuned opening reinforces bass output at certain frequencies. In both cases, the enclosure is not just furniture for your speaker. It is part of the acoustic system.
Sealed vs. Ported Speaker Boxes
A sealed speaker box is the simplest enclosure to build. It is airtight, compact, forgiving, and known for tight, accurate bass. If you are a first-time builder, a sealed box is often the friendliest path. It is like the reliable friend who shows up on time and does not bring drama.
A ported speaker box uses a tube or slot opening to increase bass output. It can sound louder and deeper when designed correctly, but it requires more careful tuning. The port length, port area, box volume, and driver parameters must work together. If they do not, the bass can become noisy, boomy, or uncontrolled.
For beginners, sealed boxes are usually easier. For builders chasing more output from a subwoofer or larger woofer, ported boxes can be excellent, but they reward accuracy and punish guesswork.
Tools and Materials You Will Need
Before building your DIY speaker enclosure, gather your tools and materials. Nothing ruins project momentum faster than realizing you forgot clamps while holding two glued MDF panels together like a stressed-out sandwich artist.
Recommended Tools
- Table saw, circular saw, or track saw
- Jigsaw or router with circle-cutting jig
- Drill and drill bits
- Countersink bit
- Clamps
- Tape measure and carpenter’s square
- Pencil or marking knife
- Wood file or sanding block
- Router with roundover bit, optional but helpful
- Safety glasses, dust mask, and hearing protection
Recommended Materials
- 3/4-inch MDF or quality plywood
- Wood glue
- Wood screws or brad nails
- Speaker driver
- Speaker terminal cup or binding posts
- Speaker wire
- Acoustic damping material, such as polyfill or foam lining
- Silicone caulk or speaker-safe sealant
- Gasket tape
- Paint, veneer, carpet, vinyl wrap, or clear finish
MDF is popular for speaker boxes because it is dense, consistent, and relatively easy to machine. Baltic birch plywood is stronger and lighter, making it a great choice for portable cabinets or pro-style builds. Avoid thin plywood, particleboard, and soft solid wood for serious speaker boxes. Solid wood may look beautiful, but it moves with humidity and can resonate in ways that do not help your sound.
Step 1: Choose the Right Speaker Driver
The driver determines much of the speaker box design. You cannot pick random dimensions, screw in a woofer, and expect studio-quality sound. That approach is called “hope-based acoustics,” and it has a very low success rate.
Look for the driver’s specification sheet. Important details include:
- Fs: The driver’s free-air resonance frequency.
- Vas: The equivalent air volume related to suspension compliance.
- Qts: A value that helps determine whether the driver works better in sealed or ported enclosures.
- Xmax: How far the cone can move safely.
- Power handling: How much amplifier power the driver can handle.
- Sensitivity: How loud the driver plays with a given amount of power.
- Recommended enclosure volume: The manufacturer’s suggested box size.
These values are often called Thiele/Small parameters. They help you design a speaker enclosure that matches the driver instead of forcing the driver into a box that makes it miserable. For a simple DIY build, use the manufacturer’s recommended enclosure volume whenever possible.
Step 2: Decide on the Speaker Box Type
Sealed Box
Choose a sealed box if you want easier construction, compact size, strong cone control, and clean bass. Sealed boxes are excellent for bookshelf speakers, studio-style monitors, and many car audio subwoofer builds. They are also more forgiving if your final internal volume is slightly off.
Ported Box
Choose a ported box if you want more bass output and are willing to calculate port dimensions carefully. A ported enclosure can deliver impressive low-end performance, but the port must be tuned correctly. Too small a port may create chuffing noise. Too long or poorly placed a port can be difficult to fit inside the box.
Passive Radiator Box
A passive radiator enclosure uses an unpowered diaphragm instead of a port. This design is common in compact Bluetooth speakers where a traditional port would be too long. It can work very well, but you need compatible parts and careful tuning.
Step 3: Calculate Internal Volume
Speaker box volume means the usable air space inside the enclosure. External dimensions are not enough because panel thickness takes up space. For a rectangular box, calculate internal volume like this:
Internal width × internal height × internal depth = internal volume
If your outside box is 14 inches wide, 20 inches tall, and 12 inches deep, and you use 3/4-inch material, subtract 1.5 inches from each dimension because there are two panels per direction. The internal dimensions become 12.5 inches wide, 18.5 inches tall, and 10.5 inches deep.
Then multiply:
12.5 × 18.5 × 10.5 = 2,428.125 cubic inches
To convert cubic inches to cubic feet, divide by 1,728:
2,428.125 ÷ 1,728 = about 1.41 cubic feet
Remember to subtract the displacement of the driver, internal braces, port, and terminal cup. These parts reduce the actual air volume. A small difference may not ruin a sealed box, but ported boxes are more sensitive to volume changes.
Step 4: Design the Cut List
Once you know your target internal volume, create a cut list. For a simple rectangular speaker box, you need six main panels:
- Front baffle
- Back panel
- Left side panel
- Right side panel
- Top panel
- Bottom panel
The front baffle is the panel that holds the speaker driver. Many builders use a double-thick front baffle for subwoofers or heavy woofers because it adds strength and reduces flex. If you are building a small bookshelf speaker, a single 3/4-inch baffle is usually fine. For a subwoofer, a 1.5-inch laminated baffle can be a very good idea.
Keep the design simple for your first build. Fancy angled cabinets look cool, but square panels are easier to cut, clamp, seal, and troubleshoot. Your ears will thank you more for airtight joints than for a shape that resembles a futuristic toaster.
Step 5: Cut the Panels Accurately
Accurate cuts make assembly easier and improve the final seal. Measure twice, cut once, and then measure again because wood has a sneaky way of becoming shorter when confidence is too high.
Use a table saw or track saw for straight cuts. If you use a circular saw, clamp a straightedge guide to the panel. Label each piece as you cut it. Mark the inside faces so you know where glue and braces will go.
For the speaker hole, use a router with a circle-cutting jig if possible. A jigsaw works too, but it may require more sanding. The driver should fit snugly without forcing. If the hole is too large, the mounting screws may have weak support and the gasket may not seal properly.
Step 6: Add Bracing for Strength
Speaker cabinet panels vibrate when the driver plays. Those vibrations can color the sound, especially in larger boxes. Bracing ties panels together and makes the enclosure more rigid.
Common bracing methods include window braces, shelf braces, dowel braces, and corner blocks. A window brace is a panel with large cutouts that allows air to move while stiffening the box. For a medium or large enclosure, place braces between opposite panels, especially side-to-side and front-to-back.
Do not completely block airflow inside the cabinet. The goal is stiffness, not turning the inside of the box into a wooden maze. Also remember that braces take up internal volume, so include their displacement in your calculations if the box is small or precisely tuned.
Step 7: Dry Fit Before Gluing
Dry fitting means assembling the panels without glue to check alignment. This step takes a few minutes and can save you from a crooked box that looks like it was assembled during an earthquake.
Clamp the panels together and check the corners with a square. Make sure the front baffle fits cleanly. Confirm that braces do not interfere with the driver, port, terminal cup, or wiring. If everything lines up, disassemble and prepare for glue.
Step 8: Glue and Assemble the Speaker Box
Wood glue is stronger than screws when the joints fit well. Apply a continuous bead of glue along each mating edge. Clamp the panels firmly, but do not squeeze out every bit of glue. You want a thin, even glue line.
Screws or brad nails can help hold panels while the glue dries. Predrill screw holes in MDF to reduce splitting and mushrooming. Countersink the screws so the heads sit below the surface. Wipe away excess glue with a damp cloth before it hardens.
Build the box in stages if needed. Many builders assemble the sides, top, bottom, and back first, then add bracing, wiring, damping, and finally the front baffle. This makes the inside easier to access.
Step 9: Seal Every Internal Joint
An airtight seal is critical, especially for sealed speaker boxes. Air leaks can cause weak bass, whistling noises, and strange distortion. After the glue dries, run a bead of silicone caulk or sealant along all internal seams.
Let the sealant cure fully before installing the driver. Some sealants release fumes while curing, and you do not want those trapped inside with your speaker components. Use gasket tape around the driver opening and terminal cup to prevent small leaks.
Step 10: Install the Port or Terminal Cup
If you are building a sealed box, install the terminal cup or binding posts on the back panel. Solder or crimp the internal speaker wires securely. Keep wires long enough to reach the driver comfortably, but not so long that they rattle inside the cabinet.
If you are building a ported box, install the port according to your design. A round port can be made from a commercial port tube or PVC pipe. A slot port is built into the cabinet structure. Avoid sharp edges at the port opening when possible because rounded edges help reduce airflow noise.
Make sure the port has enough clearance inside the box. As a practical rule, leave space between the inside end of the port and the nearest wall so air can move freely.
Step 11: Add Damping Material
Damping material reduces internal reflections and standing waves. In sealed boxes, polyfill or acoustic stuffing can be used more generously. In ported boxes, use lining on the walls but avoid blocking the port or stuffing the entire enclosure unless the design specifically calls for it.
For a basic speaker box, line the back, sides, top, and bottom with acoustic foam, felt, fiberglass substitute, or polyester batting. Keep material away from the driver’s moving parts. Secure it with spray adhesive, staples, or hot glue, depending on the material and cabinet type.
Step 12: Mount the Speaker Driver
Before mounting the driver, check polarity. The positive amplifier terminal should connect to the positive speaker terminal. Reversed polarity can cause weak bass, poor imaging, or phase issues when multiple speakers are used together.
Place gasket tape around the driver cutout if the driver does not include a gasket. Set the driver into the opening and tighten screws gradually in a crisscross pattern. Do not overtighten. MDF can strip if you attack it with a drill like you are tightening lug nuts on a race car.
For heavier drivers, consider threaded inserts or T-nuts. They provide stronger mounting than wood screws and allow you to remove the driver later without damaging the baffle.
Step 13: Test for Air Leaks and Rattles
Start testing at low volume. Play a bass sweep, familiar music, or a test tone. Listen for buzzing, rattling, whistling, or air leaks. Move your hand around seams, the terminal cup, port, and driver gasket to feel for escaping air.
If you hear rattling, check loose wires, screws, braces, and damping material. If bass sounds weak in a sealed box, check for leaks. If a ported box sounds noisy, the port may be too small, too sharp-edged, blocked, or incorrectly tuned.
Step 14: Sand and Finish the Cabinet
Once the speaker box works properly, finish the outside. Sand rough edges and fill screw holes with wood filler. MDF edges absorb paint heavily, so seal them with sanding sealer, primer, or diluted wood glue before painting.
Popular finishes include:
- Durable black paint for a clean studio look
- Truck bed liner for rugged subwoofer boxes
- Carpet for car audio enclosures
- Wood veneer for furniture-grade speakers
- Vinyl wrap for colorful custom builds
If you want a polished home speaker, round over the front edges with a router. Rounded edges can also reduce diffraction effects slightly and make the box look less like a cube that wandered out of a math textbook.
Common Mistakes to Avoid
Guessing the Box Size
The most common mistake is building a box based on what “looks right.” Speaker drivers need specific air volume. Always check the manufacturer’s recommended enclosure size or use speaker design software.
Ignoring Panel Thickness
External measurements are not internal volume. Subtract panel thickness before calculating volume. This is especially important with 3/4-inch MDF.
Skipping Bracing
Large unbraced panels can vibrate and muddy the sound. Add braces when building medium or large enclosures.
Leaving Air Leaks
Even tiny leaks can hurt performance. Seal internal seams, terminal cups, and driver mounting surfaces.
Using the Wrong Material
Thin plywood, weak particleboard, and soft wood are poor choices for most serious speaker boxes. Use MDF or high-quality plywood.
Overstuffing a Ported Box
Ported enclosures need airflow. Keep damping material away from the port and follow the design plan.
Example DIY Speaker Box Plan
Here is a simple example for a sealed subwoofer-style speaker box. This is not a universal design, but it shows how planning works.
Example Goal
- Driver: 10-inch woofer
- Box type: sealed
- Target internal volume: 1.0 cubic foot
- Material: 3/4-inch MDF
- Use: music and home theater bass support
Example Internal Dimensions
A 12-inch by 12-inch by 12-inch internal space equals 1,728 cubic inches, or exactly 1.0 cubic foot. With 3/4-inch MDF, the outside dimensions would be about 13.5 inches by 13.5 inches by 13.5 inches before accounting for driver displacement and bracing. If the driver and brace take up space, you may need to slightly increase one dimension.
Example Build Notes
Use a double front baffle if the woofer is heavy. Add one window brace or two dowel braces. Seal all seams. Line the inside walls with polyfill or acoustic batting. Use gasket tape under the woofer. Test at low volume before final finishing.
Safety Tips for Building a Speaker Box
MDF dust is fine and unpleasant, so wear a dust mask or respirator when cutting and sanding. Use hearing protection when operating saws and routers. Clamp panels securely before cutting or drilling. Keep hands away from blades, and do not rush the router when cutting circles.
On the electrical side, match speaker impedance to your amplifier. Do not connect a speaker load that your amplifier cannot safely handle. If you are wiring multiple drivers, calculate the final impedance before turning on the system. When in doubt, check the amplifier manual and driver specifications.
Extra Experience: Lessons From Real DIY Speaker Box Builds
The first thing most DIY builders learn is that a speaker box rewards patience more than bravery. You can buy a beautiful driver, choose premium MDF, and still end up with disappointing sound if you rush the layout. The box does not care how excited you are. It only cares whether the air volume is correct, the seams are sealed, and the panels are stiff enough to avoid singing along with the music.
One practical experience is to cut slightly oversized panels when possible, then trim or sand them to final fit. Perfectly flush edges make gluing easier and reduce the amount of filler needed later. Another useful habit is labeling every panel. Write “inside,” “top,” “front,” and “left” directly on the wood in pencil. It feels unnecessary until you rotate three identical MDF rectangles on your workbench and suddenly wonder which one was supposed to receive the terminal cup.
Clamping is another area where experience matters. More clamps usually make the project better, but only if the box stays square. If you tighten one side too aggressively, the cabinet can shift. A good approach is to apply moderate pressure, check the corners with a square, adjust, and then tighten a little more. Glue squeeze-out is normal. Wild glue waterfalls are a sign you may have used enough adhesive to assemble a small boat.
During one typical beginner build, the cabinet may look perfect from the outside but produce a faint whistle during bass-heavy tracks. That usually points to an air leak around the driver gasket, terminal cup, or a poorly sealed corner. The fix is often simple: remove the driver, apply gasket tape, reseal internal seams, and test again. This is why you should test before final paint. Nothing builds character like sanding through a finished surface because you skipped leak testing.
Another lesson is that finishing takes longer than expected. MDF edges drink primer like they have been wandering through the desert. Seal the edges before painting, sand between coats, and do not expect one quick spray session to look professional. If you use veneer, practice on scrap first. If you use carpet or vinyl wrap, plan your seams so they appear on the back or bottom, not across the front like a decorative accident.
Finally, the best experience comes from listening critically after the build. Play music you know well. Listen for tightness, clarity, rattles, and balance. Move the speaker around the room because placement affects bass dramatically. Sometimes the box is fine, but the corner placement is making the bass too boomy. Sometimes a small amount of extra damping improves the sound. DIY audio is part science, part craft, and part polite negotiation with physics. Build carefully, test honestly, and your speaker box will teach you something useful every time you play it.
Conclusion: Build the Box, Then Let It Sing
Learning how to build an audio speaker box is a satisfying project because it combines woodworking, acoustics, electronics, and a little creative pride. The most important steps are choosing the right driver, using the correct internal volume, building a rigid enclosure, sealing every joint, and testing before finishing. You do not need the most expensive tools or exotic materials to make a good speaker box. You need accuracy, patience, and a willingness to respect the design process.
For your first DIY speaker enclosure, keep the design simple. A sealed box with quality MDF, good bracing, careful sealing, and proper damping can sound excellent. Once you understand the basics, you can experiment with ported designs, passive radiators, custom finishes, and more advanced crossover layouts. Start with the fundamentals, and your speaker box will do what every good speaker should do: disappear into the music while making you smile at the fact that you built it yourself.