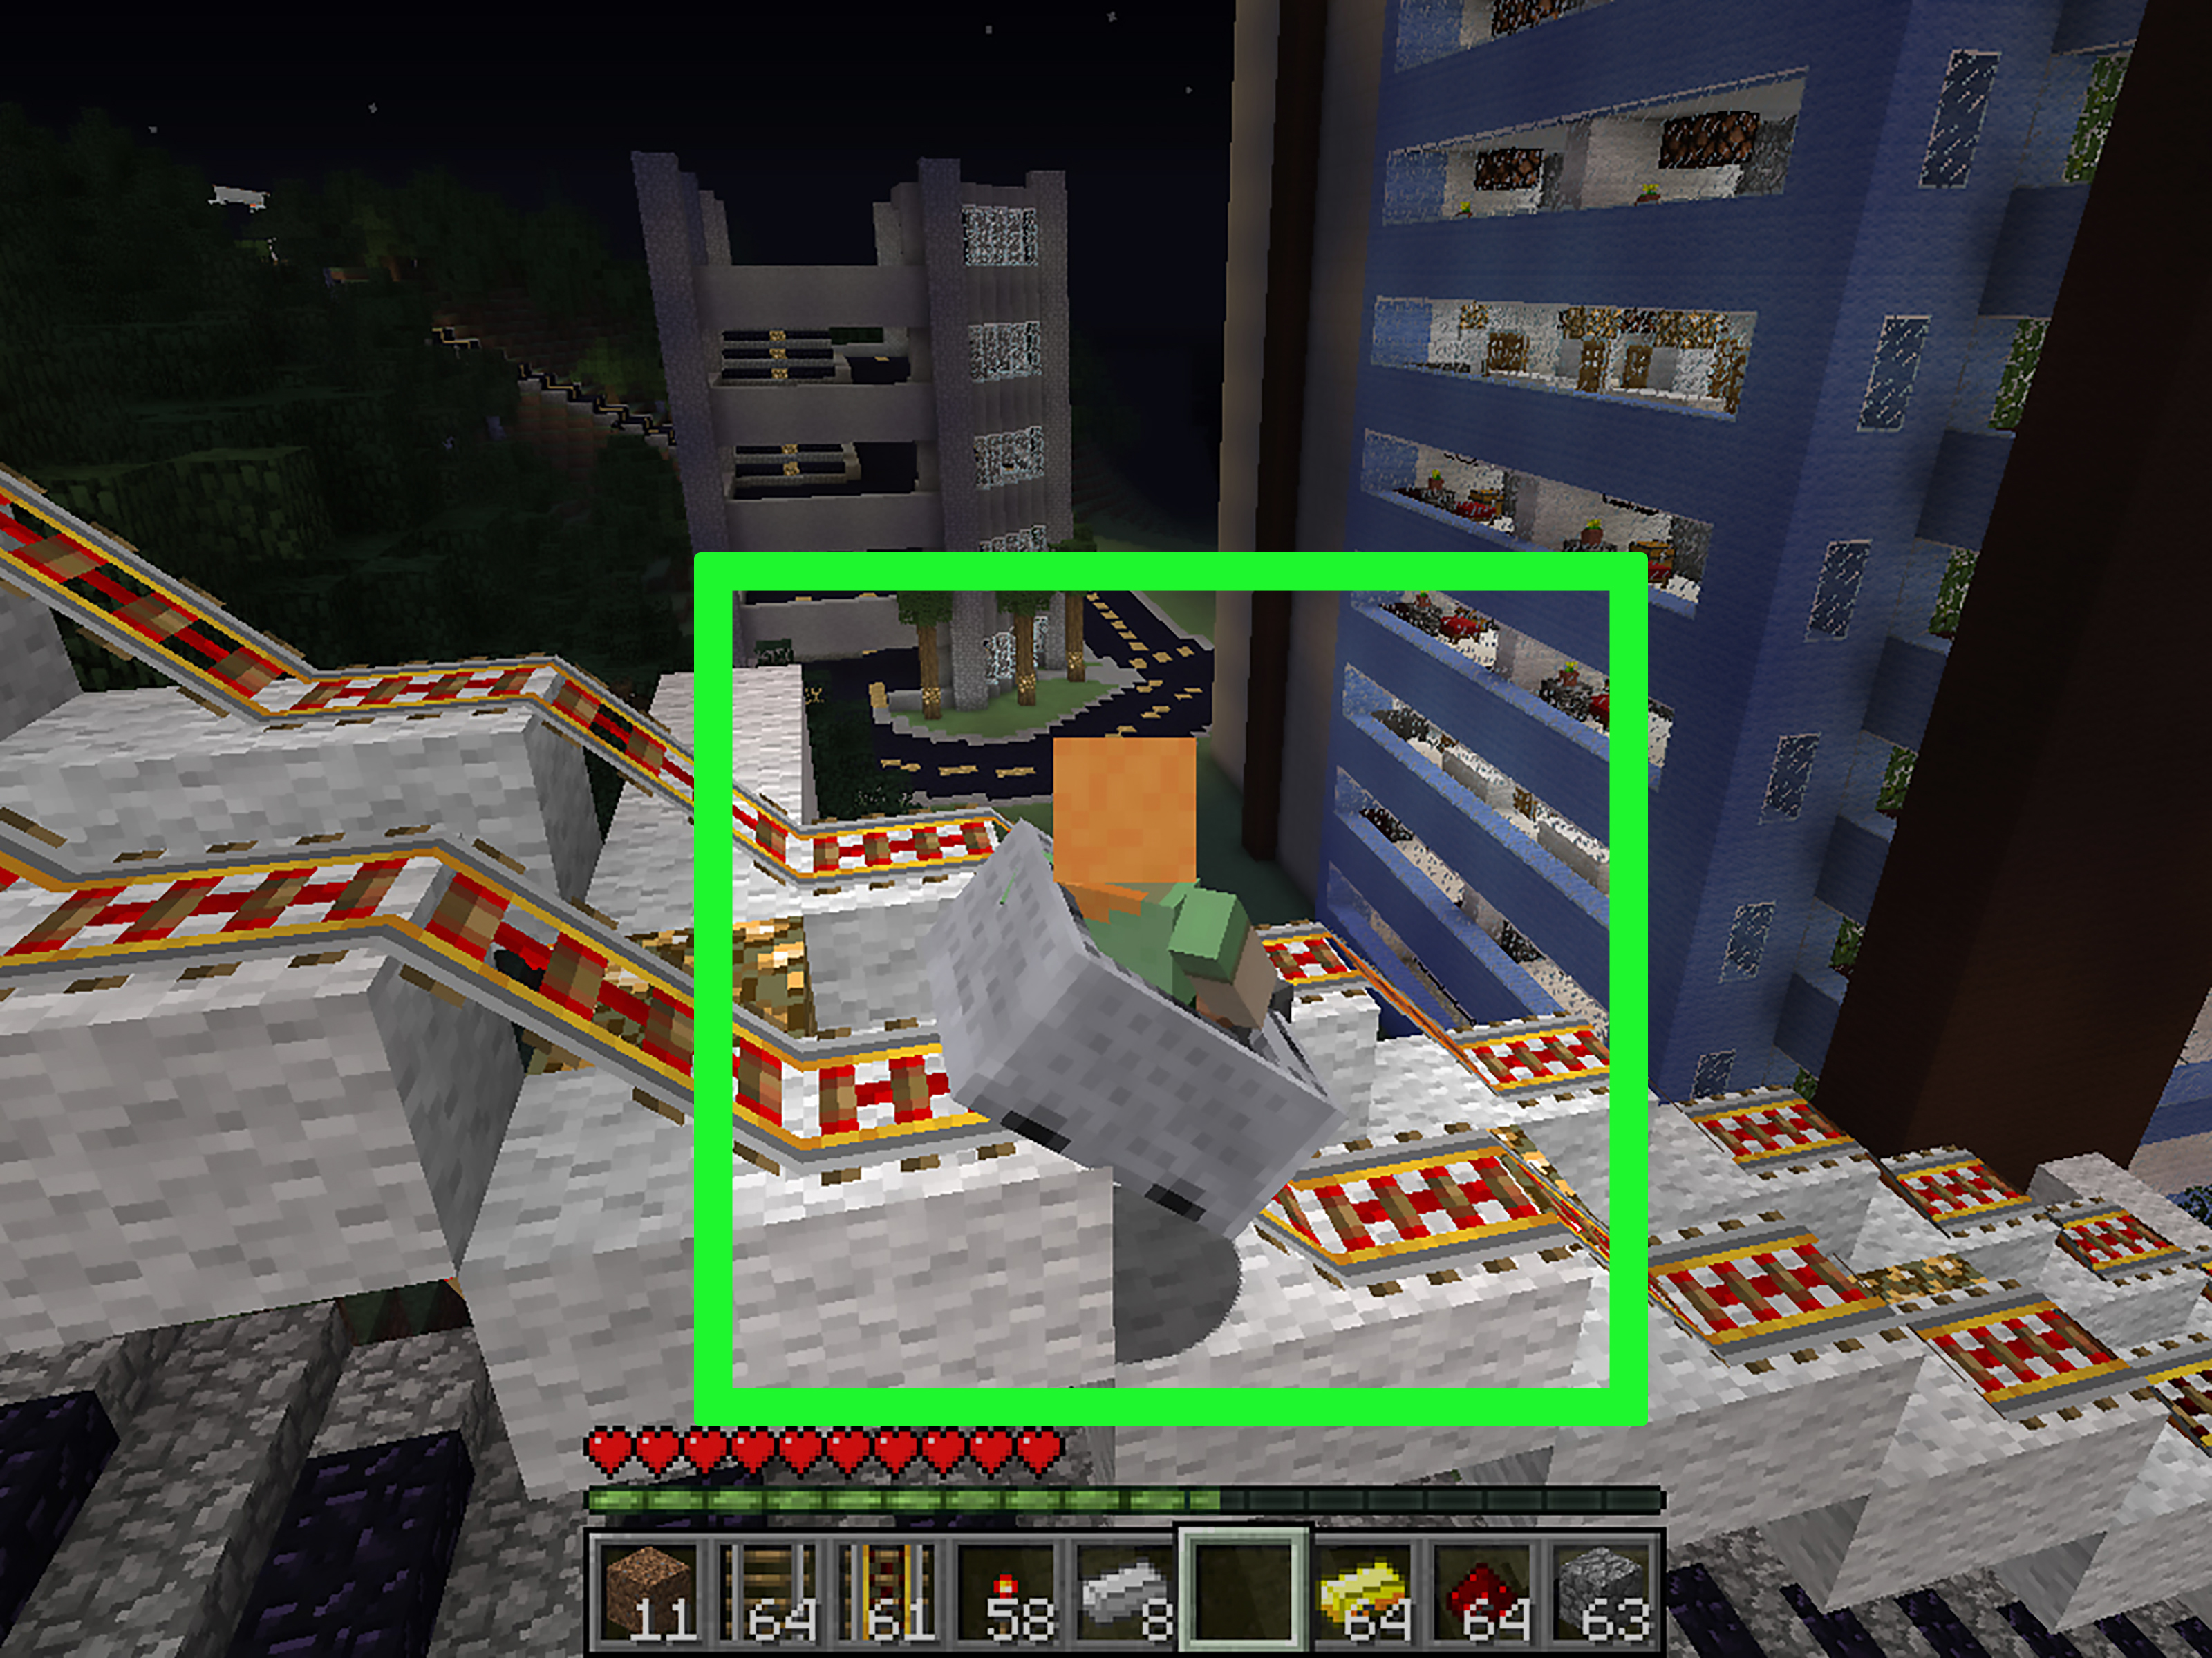
Building a railway system in Minecraft is one of those projects that starts with, “I just need a quick track to my mine,” and ends with a cross-continental transit empire, three underground stations, a redstone ticket gate, and a sheep named Kevin somehow riding in circles forever. That is the magic of Minecraft railways: they are practical, stylish, and just complicated enough to make you feel like a blocky transportation engineer.
Whether you are linking your starter base to a village, creating a minecart route to a strip mine, moving items across a farm, or building a full server-wide train network, this guide will show you how to build a railway system in Minecraft from the ground up. You will learn which rails to use, how powered rails work, how to plan stations, how to avoid common mistakes, and how to make your railway look less like a panicked iron noodle across the landscape.
What Is a Minecraft Railway System?
A Minecraft railway system is a connected track network that uses rails and minecarts to move players, mobs, or items between locations. At its simplest, it can be a straight line from your house to your mine. At its best, it can become a full transportation grid with stations, intersections, item loaders, tunnels, bridges, automatic stops, and redstone-powered launch systems.
The basic idea is simple: place rails, put a minecart on them, and ride. The real fun begins when you add powered rails, redstone, slopes, stations, and design details. A good railway does three things well: it gets you where you want to go, it keeps carts moving smoothly, and it does not look like it was installed by a creeper with a clipboard.
Materials You Need to Build a Railway System
Before you start laying track, gather your supplies. The exact amount depends on the distance you want to cover, but the core materials are usually the same.
Essential Railway Materials
- Rails: The standard track pieces used for most of your route.
- Powered rails: Special rails that speed up minecarts when powered by redstone.
- Minecarts: The vehicles that travel along your railway.
- Redstone torches, levers, buttons, or redstone blocks: Used to power powered rails.
- Blocks: Used for bridges, tunnels, platforms, station walls, and safety barriers.
- Lighting: Torches, lanterns, glowstone, or other light blocks keep mobs from turning your commute into a horror movie.
Optional Advanced Materials
- Detector rails: Rails that send a redstone signal when a minecart passes over them.
- Activator rails: Rails that can eject passengers, activate TNT minecarts, or affect hopper minecarts.
- Hopper minecarts: Useful for automatic item collection and transport.
- Chests, hoppers, and droppers: Great for item stations and storage systems.
- Signs or item frames: Helpful for labeling stations and routes.
Understanding the Four Main Rail Types
If you want to build a railway system in Minecraft that actually works, you need to understand the different rail types. Each one has a job, and mixing them correctly is the secret to smooth travel.
1. Standard Rails
Standard rails are the backbone of your railway. They are inexpensive compared with powered rails and are used for most flat paths, curves, and slopes. A standard rail recipe uses iron ingots and a stick, producing multiple rails at once, which makes it the most practical choice for long-distance construction.
Use standard rails for straight sections, gentle curves, and downhill routes. However, do not expect them to keep a minecart moving forever. Without powered rails or gravity, a minecart gradually slows down and stops. Minecraft physics may be charming, but it is not giving you free public transportation.
2. Powered Rails
Powered rails are the engine of your railway system. When powered by redstone, they boost minecarts and help them maintain speed. When unpowered, they act like brakes and slow carts down dramatically. This makes powered rails useful for both acceleration and controlled stopping.
Powered rails are crafted with gold ingots, a stick, and redstone dust. Because they require gold, you should use them strategically rather than placing them everywhere. On flat routes, place powered rails at regular intervals to keep carts moving. On uphill slopes, use them more often because minecarts lose speed quickly while climbing.
3. Detector Rails
Detector rails are like pressure plates for minecarts. When a cart rolls over one, the detector rail emits a redstone signal. This can activate lamps, doors, pistons, powered rails, note blocks, or station controls. If you want automatic systems, detector rails are your best friend.
For example, you can place a detector rail before a station entrance so it lights up a redstone lamp, opens a gate, or powers a short booster section. It is a small detail, but it makes your railway feel alive, like your base finally hired a station manager.
4. Activator Rails
Activator rails are more specialized. When powered, they can eject players or mobs from regular minecarts, ignite TNT minecarts, and affect hopper minecarts. Most beginner passenger railways do not need them, but they are useful for advanced farms, mob transport systems, and redstone builds.
If your goal is a simple player railway, focus first on standard rails, powered rails, and basic redstone. Add activator rails later when your railway grows into something more technical.
Step-by-Step Guide: How to Build a Railway System in Minecraft
Step 1: Choose Your Route
Start by deciding where your railway begins and ends. Good first routes include your base to a mine, your base to a village, your storage room to a farm, or your Nether portal to a remote biome. Do not start by building a massive world-spanning rail empire unless you enjoy realizing halfway through that a mountain, ocean, and lava lake all filed complaints against your plan.
Walk the route before placing rails. Look for hills, rivers, caves, forests, ravines, and dangerous mob areas. Decide whether you want to go around obstacles, tunnel through them, bridge over them, or decorate them into part of the railway. A scenic bridge over a river is often better than a cramped tunnel that looks like a dirt hallway with commitment issues.
Step 2: Prepare the Ground
Clear blocks where the track will go. For a clean route, make a path at least one block wide, though two or three blocks wide is better if you want guardrails, lighting, or decoration. Flatten rough terrain where possible, but do not be afraid of slopes. Rails can climb and descend as long as you plan powered rails correctly.
If the route passes through dangerous areas, add walls, fences, or glass barriers. Creepers and minecarts are not a good combination. A single explosion can turn your efficient railway into modern art.
Step 3: Place Standard Rails
Lay standard rails along most of your route. Rails automatically connect to nearby rails, forming straight tracks, curves, and slopes. For long straight paths, place rails continuously in the direction you want to travel. For turns, place rails at corners and let the game connect them.
Be careful with intersections. Rails sometimes curve in a direction you did not intend, especially when multiple rails connect nearby. Test each intersection with a minecart before you decorate around it. It is easier to fix a bad curve early than after you have built a luxury station with banners, lamps, and a roof shaped like a dragon.
Step 4: Add Powered Rails for Speed
Now add powered rails. A common beginner setup is to place a powered rail every 8 to 12 blocks on flat ground for consistently smooth travel. If you want to save gold, you can place them farther apart, especially once the minecart is already moving fast. For uphill sections, place powered rails much closer together. On steep climbs, use powered rails frequently or even for most of the slope.
To power a powered rail, place a redstone torch beside or beneath it, use a lever nearby, place a redstone block under it, or connect it to redstone dust. Redstone torches and redstone blocks are popular because they keep the rail powered automatically. Buttons are great for launch stations because they give a short burst of power when you are ready to depart.
Step 5: Build a Starting Station
A good station makes your railway easier to use. For a simple launch station, place a powered rail at the start of the track against a solid block. Put a button on the block, then place a minecart on the powered rail. When you sit in the cart and press the button, the powered rail activates and launches you forward.
This design is cheap, reliable, and beginner-friendly. The solid block behind the powered rail helps the cart start in the correct direction. Without it, your minecart may sit there awkwardly, like it forgot why it came to the station.
Step 6: Create Stops and Arrival Stations
At the end of a route, you need a way to stop safely. One simple method is to use an unpowered powered rail followed by a solid block. The unpowered powered rail slows the cart, and the block prevents it from rolling away. If you want a smoother station, build a platform beside the track and add signs, lights, and a chest for spare minecarts.
For multi-stop systems, add side platforms and use buttons or levers to control whether a cart continues or stops. Detector rails can also help automate station behavior. For example, a detector rail can trigger a redstone lamp when a cart arrives or activate a powered rail after a delay.
Step 7: Test the Entire Route
Testing is not optional. Ride the railway from start to finish, then ride it back if it is a two-way route. Watch for slow sections, broken curves, unpowered powered rails, missing lights, and places where mobs can wander onto the track.
If the cart slows too much, add more powered rails. If it stops on hills, add powered rails to the climb. If it flies into a wall, congratulations: you have invented the Minecraft concussion simulator. Adjust the track and test again.
Step 8: Decorate and Protect the Railway
Once the railway works, make it look good. Add tunnels with stone brick walls, bridges with fences and lanterns, station signs, glass windows, and themed platforms. Match the railway style to your world. A medieval base might use stone bricks, chains, and lanterns. A modern city might use concrete, glass, and sea lanterns. A Nether railway should use blast-resistant materials where possible, because ghasts treat exposed infrastructure as a personal invitation.
Best Railway Designs for Different Uses
Simple Base-to-Mine Railway
This is the best starter railway. Build a straight or gently sloped track from your base to your mining area. Use standard rails for most of the route and powered rails every few blocks where needed. Add a launch button at each end. This saves time and makes hauling resources much less annoying.
Village Connection Railway
A railway to a village is useful for trading, transporting villagers, and moving supplies. Protect the line with fences or walls, especially near the village. Villagers, mobs, and minecarts can create chaos if your station is open. Build a proper platform and consider using gates so villagers do not wander onto the track like tiny unemployed conductors.
Underground Subway System
An underground railway is clean, safe, and easy to expand. Dig a tunnel two or three blocks high, add tracks, light everything well, and build stations under important areas. This works especially well in survival worlds where the surface is crowded with farms, houses, and “temporary” dirt towers that have been there for six months.
Nether Railway
A Nether railway is excellent for long-distance travel because movement in the Nether corresponds to much greater distances in the Overworld. Build carefully, protect the track from ghasts, and use sturdy blocks around exposed areas. Add walls, ceilings, and lighting. The Nether is not the place for an open-air luxury commute unless your hobbies include screaming.
Item Transport Railway
Railways are not only for players. Hopper minecarts can collect items from farms and move them to storage systems. Use powered rails to keep the cart moving and hoppers to unload items at the destination. This is useful for farms that produce crops, bamboo, sugar cane, cactus, or mob drops.
Common Mistakes to Avoid
Using Too Few Powered Rails
If your minecart keeps slowing down, you probably need more powered rails. Flat routes can be efficient with spaced boosters, but hills need extra power. Do not be stingy on climbs. Gravity is not impressed by your gold-saving strategy.
Forgetting to Power Powered Rails
A powered rail without redstone power becomes a brake. This is useful at stations but terrible in the middle of a long route. If your cart stops suddenly, check whether a powered rail is actually powered.
Making Unsafe Tracks
Open tracks near cliffs, lava, or hostile mobs are risky. Use barriers, walls, glass, or fences. A railway should reduce travel stress, not turn every ride into a theme park designed by skeletons.
Skipping Lighting
Dark tunnels invite mobs. Place lights regularly along underground routes and stations. Nothing ruins a peaceful railway ride like arriving at your stop and being greeted by three zombies and a spider with customer service issues.
Not Labeling Stations
Once your railway expands, label everything. Use signs, item frames, banners, or colored blocks. A station named “North Mine,” “Village,” or “Nether Hub” is much better than guessing and accidentally taking a 900-block ride to your old sheep farm.
Advanced Tips for a Better Minecraft Railway
Use Redstone Blocks Under Powered Rails
Redstone blocks are clean and compact. Place them under powered rails to keep boosters active without visible torches. This is especially useful for modern builds or polished stations where you want the mechanics hidden.
Add Detector Rail Automation
Detector rails can trigger lights, doors, powered rails, or pistons. Place one before a station entrance to announce arrivals or activate a short booster. With a little redstone, you can make your railway feel like a real transit system instead of a line of metal strips across the grass.
Build Two-Way Tracks Carefully
For short routes, one track can work both ways if you place launch stations at both ends. For busy systems, especially on multiplayer servers, consider separate tracks for each direction. This prevents minecart traffic jams, which are somehow both hilarious and deeply frustrating.
Use Stations as Landmarks
Do not treat stations as boring stops. Make them landmarks. Add waiting platforms, maps, storage chests, minecart dispensers, clocks, banners, and decorative roofs. A beautiful station makes the whole railway feel intentional.
Personal Railway-Building Experience: Lessons from the Tracks
The first time I built a serious Minecraft railway, I made the classic beginner mistake: I underestimated distance. I thought my base and mine were “pretty close,” so I crafted a stack of rails, grabbed a minecart, and started placing track with the confidence of someone who absolutely had not measured anything. About halfway there, I ran out of rails, ran out of iron, and had to walk back home in the dark while a skeleton used me for target practice. Lesson one: always bring more rails than you think you need.
My second mistake was building without testing. I laid a beautiful track over hills, around trees, and through a cave. It looked great from the outside. Then I placed the minecart, pressed the button, and proudly watched it crawl uphill at the speed of a tired potato before rolling backward into my face. That was when I learned how important powered rails are on slopes. Flat routes can survive with occasional boosters, but hills are greedy. They want power, and they want it often.
After that, I started building stations first instead of last. This changed everything. A simple station with a powered rail, a button, a backstop block, and a small platform made the railway feel organized immediately. Later, I added spare minecarts in a chest, signs for destinations, lanterns, and a roof. It went from “track on the ground” to “official transportation system,” which made me feel far more professional than someone wearing diamond boots and carrying 47 baked potatoes should feel.
One of the best tricks I learned was to decorate as I go, but not too much. If I fully decorate a route before testing it, I usually end up breaking half the walls to fix rail curves or add powered rails. Now I build in layers: first the path, then the rails, then the power, then the testing, and only after that the fancy stone bricks, glass, lanterns, and dramatic tunnel entrances. This saves materials and sanity.
Another lesson is that railways are better when they follow the personality of the world. In a survival village, I like cozy stations with oak, stone brick, lanterns, and flower boxes. In a mountain base, I prefer tunnels with glass viewing sections overlooking cliffs. In the Nether, I build enclosed railways like my life depends on it, because it usually does. A ghast fireball can turn a lazy commute into a very fast lesson about blast protection.
Finally, I learned that a railway system is never truly finished. You will always find a new place to connect: a stronghold, a desert temple, a trading hall, a mob farm, a mushroom island, or that one random area where you left a horse and now feel emotionally responsible for it. Start small, build clean, label everything, and leave room for expansion. The best Minecraft railway is not just a track; it is a growing map of your adventures.
Conclusion
Learning how to build a railway system on Minecraft is one of the most rewarding survival projects because it combines transportation, redstone, planning, and creativity. Start with a clear route, use standard rails for the main path, add powered rails for speed, build simple launch stations, test everything, and then decorate the system to match your world. Once your first line works, expanding becomes addictive. Before long, your base, farms, mines, villages, and Nether hub can all be connected by a railway that saves time and looks fantastic.
A great Minecraft railway does not need to be complicated on day one. Build a reliable track first, then improve it with stations, lighting, automation, item transport, and scenic design. With enough rails and a little redstone, your world becomes easier to explore, easier to manage, and much more fun to travel through. Just remember to keep spare minecarts handy, power your boosters, and never trust a dark tunnel.