A beautiful geometric rug can make an ordinary room look as though an interior designer stopped by, rearranged three pillows, and charged a consultation fee. Unfortunately, designer rugs can also make a checking account quietly crawl under the bed. A DIY painted rug offers a more affordable alternative: start with a simple flatwoven rug or canvas floor cloth, add a carefully planned geometric pattern, and create a West Elm-inspired statement piece for a fraction of the retail cost.
This project works especially well in an entryway, home office, covered patio, reading corner, or low-traffic bedroom. The secret is not artistic genius. It is thoughtful preparation, accurate measuring, flexible paint, several thin coats, and enough patience to let everything dry properly. In other words, the hardest part may be resisting the urge to peel off the painter’s tape after twelve minutes.
What Is a West Elm-Inspired Painted Rug?
West Elm is known for modern furnishings and rugs that use restrained colors, abstract shapes, bold lines, distressed effects, and globally influenced geometry. A DIY West Elm-inspired rug borrows that contemporary visual language without attempting to duplicate a specific commercial product. The goal is to create an original design with diamonds, stepped shapes, triangles, stripes, and negative space arranged in a balanced pattern.
The phrase “Aztec inspired” is commonly used in home décor to describe angular geometric prints. However, authentic Mexica, Southwestern Indigenous, Diné, Pueblo, and other Native textile traditions are distinct cultural practices rather than one interchangeable decorating category. Museums have documented how twentieth-century American textile manufacturers borrowed Indigenous imagery and marketed generalized patterns under labels such as “Aztec.” For a respectful DIY project, use an original modern geometric arrangement rather than copying a culturally significant historic textile or ceremonial symbol.
Why Paint a Rug Instead of Buying One?
You control the size and color palette
Store-bought rugs have an annoying habit of being perfect except for one detail. The pattern is right but the color is wrong. The color is right but the rug is the approximate size of a postage stamp. Painting your own rug allows you to coordinate it with your walls, furniture, curtains, artwork, or that mysteriously specific shade of green in your favorite throw pillow.
The project can be budget-friendly
A plain cotton rug, inexpensive indoor-outdoor rug, or heavy canvas drop cloth usually costs less than a patterned designer rug of the same size. Canvas drop cloths are durable, reusable, and adaptable to craft projects, which makes them a practical foundation for a homemade floor cloth.
Imperfections suit the style
A slightly distressed finish can make the pattern look printed, woven, or gently aged. Small variations are often more attractive than a perfectly mechanical surface. This is excellent news for anyone whose straight lines become emotionally complicated after the third cup of coffee.
Materials and Tools
Choose products according to whether the finished rug will be used indoors, outdoors, or in a washable area. Read every paint label because drying, curing, heat-setting, ventilation, and cleaning instructions vary by formula.
- One plain low-pile cotton rug, flatwoven rug, canvas floor cloth, or heavy canvas drop cloth
- Acrylic paint or fabric paint in two to four colors
- Fabric painting medium, when recommended for the selected acrylic paint
- Low-tack painter’s tape in one or two widths
- Tape measure or metal ruler
- Yardstick or long straightedge
- Washable pencil, tailor’s chalk, or disappearing fabric marker
- Small foam rollers
- Flat brushes and stencil brushes
- Paint tray or disposable plates
- Cardboard, plastic sheeting, or a protective drop cloth
- Scissors or a craft knife
- Small stencil, optional
- Non-slip rug pad
- Clear fabric-compatible protective product, optional and only when recommended by the paint manufacturer
Choosing the Best Rug Base
Flatwoven cotton rug
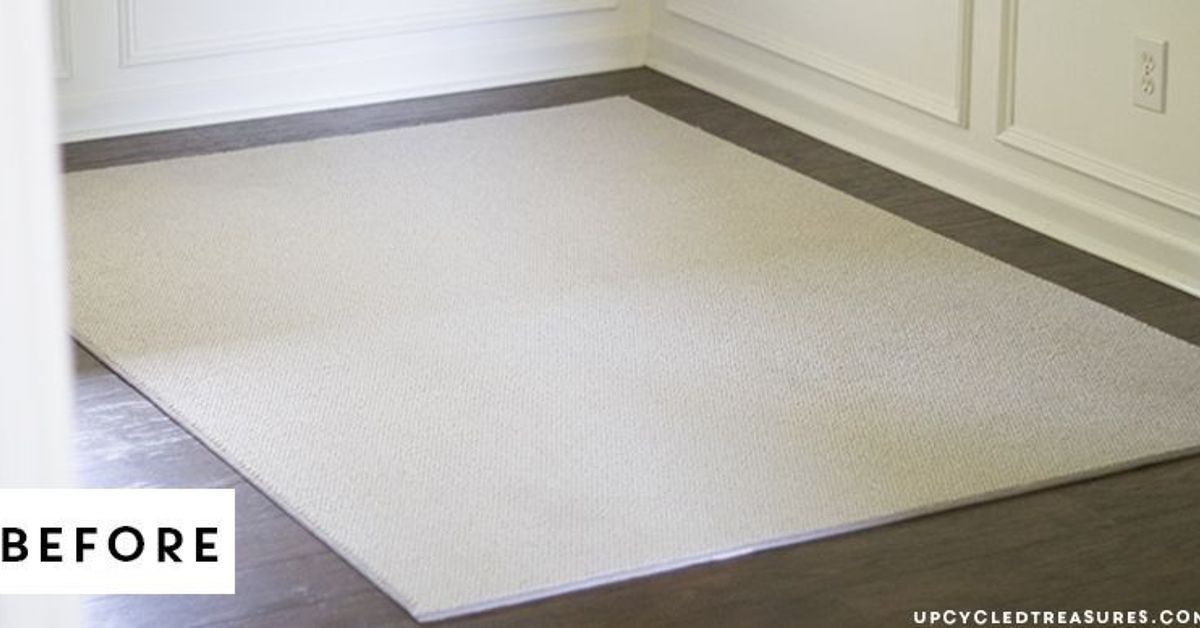
A flatwoven cotton rug is one of the easiest surfaces to paint. The low, tight texture supports cleaner edges than a fluffy pile, and the material generally accepts fabric-compatible paint well. Choose a light neutral color such as ivory, cream, tan, or pale gray so the painted colors remain visible without requiring excessive coats.
Canvas drop cloth
Canvas is affordable and easy to cut to a custom dimension. A drop cloth may need hemming, edge binding, or a folded-and-glued border to prevent fraying. It can also shrink, so prewashing may be appropriate when the manufacturer permits it. Expect paint to bleed through the weave; always protect the work surface underneath.
Indoor-outdoor or sisal-style rug
A smooth, low-pile outdoor rug can be an effective base for porches and patios. Better Homes & Gardens recommends a smooth, low-pile surface for sharper painted lines and demonstrates using painter’s tape to build a repeating chevron design. Textured rugs require more dabbing and less brushing because paint must reach the recessed fibers without becoming a thick plastic crust.
Rugs to avoid
Skip deep shag, loose loops, extremely soft chenille, expensive wool, and heavily stain-resistant rugs unless the paint manufacturer specifically confirms compatibility. Thick pile hides the pattern and demands too much paint. A handmade heirloom rug is also a poor candidate. Your grandmother’s treasured runner should not become the testing ground for “maybe this paint will work.”
Planning the Aztec-Inspired Geometric Pattern
Choose a limited color palette
For a clean West Elm-inspired look, use one neutral base and two or three accent colors. Black, charcoal, cream, rust, clay, mustard, muted teal, dusty blue, and warm brown work especially well. A monochromatic palette can look sophisticated, while a high-contrast black-and-white pattern makes a stronger graphic statement.
Test the colors together on scrap canvas before painting the rug. Wet paint may appear lighter or darker after drying, and fabric medium can subtly change its transparency. A sample also reveals whether the paint feels flexible or unpleasantly stiff.
Build the pattern around a centerline
Measure the rug’s length and width, then mark its horizontal and vertical centers. A centered design is easier to balance than one started from a random corner. Use a yardstick to establish a primary centerline and build diamonds, triangles, and stepped bands outward from that point.
Repeat a simple module
Complex-looking patterns are usually collections of simple repeated units. Create one diamond, arrow, stepped rectangle, or pair of opposing triangles, then repeat it at regular intervals. A five-inch module repeated accurately will look more professional than twenty unrelated shapes having a small argument across the floor.
Leave negative space
Do not fill every inch with paint. Unpainted areas make the design easier to read and preserve more of the rug’s original softness. Negative space also helps the finished piece resemble a woven textile rather than a floor-sized coloring book.
How to Make a DIY Painted Rug
Step 1: Prepare the rug
Vacuum the rug thoroughly. If the manufacturer allows washing, clean it without fabric softener, starch, or dryer sheets, then let it dry completely. Iron or steam a removable canvas base when necessary so folds do not distort the pattern. Fabric-painting guidance generally recommends starting with clean, dry material and testing the paint in an inconspicuous area before beginning the full project.
Step 2: Protect the work surface
Place cardboard, plastic sheeting, or a second drop cloth beneath the rug. Paint can pass through cotton and canvas even when the top surface does not look saturated. Work on a flat floor or large table, not on carpet. Smooth the rug and secure its corners so it cannot shift while you measure.
Step 3: Create a paper sketch
Draw the rug as a scaled rectangle on graph paper. Mark the center, border, major bands, and repeating shapes. Assign a color to each section. This five-minute sketch prevents the classic DIY moment when you discover that the final diamond is supposed to occupy negative three inches.
Step 4: Mark the center and border
Use a tape measure and chalk to mark the center point. Add a border two to four inches from the rug’s edge. A border visually contains the pattern and gives you space to correct small alignment problems. Check measurements from several locations rather than assuming the rug is perfectly square.
Step 5: Apply the painter’s tape
Lay the tape gently along the measured guidelines without stretching it. Stretching can cause the tape to lift or curve. Press the edges firmly with a clean finger, plastic card, or putty knife. Clean, dry surfaces help tape adhere, and firm edges improve the chance of getting sharp lines. Long continuous pieces are generally better than several overlapping fragments.
Step 6: Mix the paint
When using ordinary acrylic paint, mix it with a compatible fabric medium according to the manufacturer’s directions. Fabric medium is intended to improve flexibility and help acrylic paint bond to textile fibers. Some specialty formulas require heat-setting after drying, while others do not, so the product labelnot internet folkloregets the final vote.
Step 7: Seal the tape edges with the base color
For especially crisp shapes, brush a very thin coat of the rug’s base color along the inside edge of the tape. Any seepage will match the background. Let this coat become dry to the touch before applying the accent color. This step is optional on very textured rugs but highly useful on smooth canvas.
Step 8: Apply the first color
Use a nearly dry foam roller or stencil brush. Apply paint from the tape toward the center of the shape rather than forcing paint against the edge. Several thin coats are better than one heavy coat. Thick paint can make the rug stiff, emphasize brush marks, and encourage seepage beneath the tape.
Step 9: Add additional coats
Let each coat dry according to the paint instructions. Add only enough paint to produce the desired opacity. A slightly weathered finish can look more textile-like than solid wall-paint coverage. On textured material, use an up-and-down dabbing motion to distribute color among the fibers.
Step 10: Remove the tape carefully
Remove painter’s tape slowly, pulling it back over itself rather than lifting it straight upward. Many painting guides recommend removing tape after the paint becomes dry to the touch, but the correct timing depends on the specific product and surface. If a paint bridge has formed across the tape edge, score it lightly with a craft knife before peeling.
Step 11: Re-tape for overlapping colors
Wait until the first color has cured enough to accept low-tack tape. Apply the second set of shapes and repeat the process. Start with the lightest color and finish with the darkest; darker paint usually covers small mistakes more effectively. Cricut-style removable stencil film can be useful for small repeated motifs when it adheres properly without leaving residue.
Step 12: Cure the finished rug
Place the completed rug in a clean, undisturbed area and allow it to cure for the full period specified by the manufacturer. Dry to the touch does not always mean fully cured. Keep shoes, pets, furniture, and enthusiastic children away during this stage. A curious cat can add a surprise paw-print border faster than any professional stencil machine.
How to Create Crisp Geometric Lines
- Test the tape on a corner before covering the entire rug.
- Use a metal straightedge for long lines.
- Measure from the center instead of repeatedly measuring from an uneven edge.
- Press down the tape immediately before painting.
- Keep the roller lightly loaded.
- Paint away from the tape edge.
- Use thin coats and let them dry properly.
- Remove tape slowly and at a low angle.
- Correct tiny gaps with a small artist’s brush after the main design dries.
Common Painted Rug Mistakes
Using too much paint
Heavy paint creates a stiff, crunchy surface that may crack where the rug bends. Load the brush lightly and build color gradually. Fabric medium can improve flexibility, but it cannot rescue a rug buried under half a gallon of paint.
Choosing a rug with too much pile
Long fibers blur the edges and hide detailed motifs. Use broad shapes on moderately textured rugs and reserve intricate stencils for canvas or tightly woven cotton.
Skipping the test patch
Different fibers respond differently to paint. A hidden test reveals adhesion, color, texture, drying time, and whether the tape damages the surface.
Moving the rug too soon
Rolling, folding, or placing furniture on uncured paint can transfer color or create permanent creases. Let the rug rest flat until curing is complete.
Applying the wrong protective coating
A hard floor sealer may crack on flexible fabric or make the surface dangerously slick. Use a topcoat only when it is explicitly approved for the rug fiber, selected paint, and intended location.
Indoor and Outdoor Paint Considerations
For an indoor cotton rug, fabric paint or acrylic paint mixed with fabric medium is usually the most flexible approach. For a covered patio, choose a paint labeled for outdoor fabric or the specific rug material. Some outdoor fabric paints are designed to remain flexible while providing resistance to weather and ultraviolet exposure. Follow the temperature, humidity, ventilation, drying, and safety directions printed on the container.
Spray paint can cover textured outdoor fibers, but it also creates overspray and requires appropriate ventilation and protective equipment. Brushing or rolling offers more control for indoor work. Never use aerosol paint in an enclosed room, and keep flames and ignition sources away from paint vapors.
How to Care for a Painted Rug
Vacuum with low suction and avoid aggressive rotating brushes if they catch the painted fibers. Blot spills promptly with a clean cloth instead of scrubbing. Use mild soap only after confirming that it is compatible with the paint and rug material. Do not machine-wash the rug unless both the original rug and the completed painted finish are specifically washable.
Rotate the rug periodically to distribute traffic and sunlight exposure. Use furniture protectors beneath heavy legs to reduce crushing, and avoid prolonged direct sunlight when the paint or rug manufacturer recommends it. West Elm similarly advises protecting rugs from continuous direct sunlight and using protectors beneath heavy furniture.
Place a non-slip rug pad beneath the entire rug, particularly on hardwood, tile, or laminate. A proper underlay helps reduce slipping, bunching, and curled edges while adding a little comfort underfoot. Confirm that the pad material is compatible with the flooring finish.
Design Variations to Try
Black and cream
Paint thick black diamonds and narrow horizontal stripes on a natural canvas base. Leave generous unpainted space for a minimalist, high-contrast look.
Desert sunset palette
Combine terracotta, muted mustard, dusty rose, and warm brown. Use the darkest shade sparingly to outline larger shapes.
Soft modern neutrals
Layer taupe, greige, charcoal, and off-white in broad stepped bands. This palette complements Scandinavian, modern farmhouse, and contemporary interiors.
Distressed ombré geometry
Apply less paint toward the center of each shape to create intentional fading. A dry brush can soften selected areas, producing a printed or timeworn effect.
Border-only design
Keep the center plain and paint a repeating geometric border around the perimeter. This is faster, uses less paint, and works well beneath a dining table where the center pattern would mostly be hidden anyway.
Experience-Based Lessons From Making a Painted Geometric Rug
The most important lesson in a DIY painted rug project is that preparation takes longer than painting. This initially feels unfair. You buy paint because you would like to paint, not because you have always dreamed of spending an evening measuring diamonds. Nevertheless, the accuracy of the layout determines whether the completed pattern appears intentional.
A useful approach is to tape only one major section at a time. Covering the entire rug with dozens of intersecting tape lines may look efficient, but it becomes difficult to remember which spaces receive which colors. Working in controlled stages makes mistakes easier to spot. It also prevents loose tape from collecting dust while other sections dry.
Paint consistency is another major factor. A mixture that is too thick sits on top of the fibers and produces a stiff finish. A mixture that is excessively thin travels underneath the tape. The ideal consistency depends on the rug, paint, and medium, which is why a test swatch is so valuable. On flat canvas, a small foam roller produces even coverage. On a woven surface, a stencil brush reaches the texture more effectively.
One common surprise is how much the base color affects the final palette. Rust paint may appear rich and earthy on cream canvas but dull and brown on gray fabric. White paint may require several coats over a dark rug, while charcoal can cover a light base quickly. Testing the dried colors together prevents expensive disappointment.
Another practical lesson is to step back frequently. A shape may look crooked when viewed from twelve inches away but perfectly balanced from across the room. The reverse is also possible. After taping each major band, stand at the far end of the rug, take a photograph, and examine the pattern on the phone screen. The smaller view makes asymmetry surprisingly obvious.
Tape removal is usually the most satisfying stage, but it is not a competitive sport. Pulling quickly can lift dried paint, fray the fibers, or drag wet color across an unpainted section. Slow removal at a low angle provides more control. Keep a small brush nearby for touching up corners, but do not chase every tiny irregularity. A rug is viewed from standing height, not inspected with laboratory equipment.
The curing period also deserves respect. A painted surface may feel dry after a few hours while remaining soft underneath. Placing furniture on it too early can leave impressions, and rolling the rug can cause painted sections to stick together. Leaving it flat for the recommended curing period is inconvenient, especially when the rug occupies half the living room, but it is much less inconvenient than repainting it.
In everyday use, the best locations are usually low- or moderate-traffic areas. A home office, guest room, covered porch, dressing area, or reading corner allows the pattern to remain attractive longer. A busy mudroom shared by three children, two dogs, and a family member who repairs motorcycles indoors may not be the ideal debut.
Finally, the most successful DIY painted rugs do not pretend to be factory-perfect. Their charm comes from custom colors, handmade variation, and the fact that the design fits the room. A small faded patch or slightly irregular line can make the piece feel more like a textile and less like a sheet of vinyl. Once the rug is placed beneath furniture and styled with the rest of the space, minor flaws tend to disappear while the overall pattern becomes the star.
The experience is a useful reminder that high-impact décor does not always require expensive materials or advanced artistic skills. Careful measuring, a restrained palette, and patient layering can turn a plain floor covering into an original focal point. The result may not have arrived in a designer delivery truck, but it can still make the room look polishedand it comes with considerably fewer mysterious freight charges.
Final Thoughts
A DIY Painted Rug Aztec Inspired West Elm project combines practical decorating with just enough geometry to make a ruler feel important. Begin with a clean, low-pile base, design an original repeating pattern, select fabric-compatible paint, and apply several light coats. Give special attention to tape placement and curing time, because those two stages have an outsized effect on the final result.
The finished rug should complement the room rather than overwhelm it. Limit the palette, preserve negative space, and choose motifs large enough to remain clear from a distance. Add a non-slip rug pad before use, clean the surface gently, and accept small variations as part of the handmade finish.
Note: Test all paints, mediums, tapes, cleaners, and protective products on a hidden section before completing the rug. Follow the rug and paint manufacturers’ instructions. This design approach is inspired by contemporary geometric décor and should not be presented as a reproduction of a specific Indigenous cultural textile.
Editorial research note: The practical recommendations in this guide synthesize care, painting, textile-medium, masking, stencil, rug-underlay, and design information from established home-improvement brands, art-material manufacturers, retailers, and museum collections in the United States.