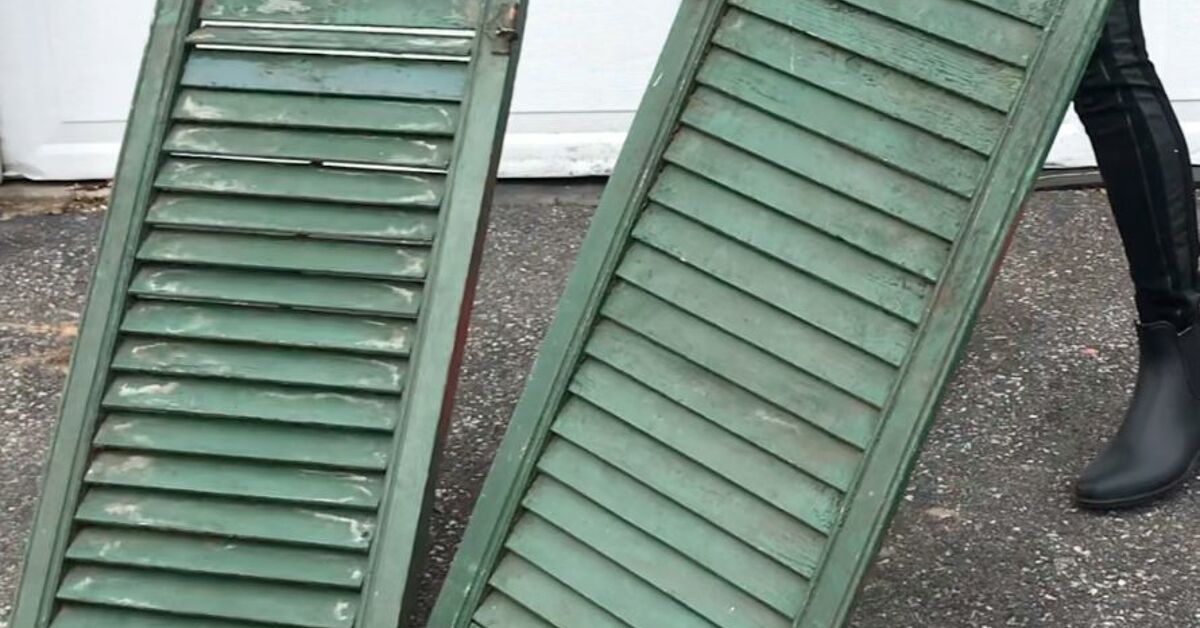
Old window shutters have an unusual superpower: even when they are no longer qualified to guard a window, they still look as though they have an interesting story to tell. A chipped louver, faded paint, rusty hinge, or carved marking can give a room more personality than a cart full of brand-new decorations.
Better yet, learning how to upcycle old window shutters does not require a professional woodworking shop or a television crew dramatically revealing the finished project after a commercial break. With thoughtful preparation, basic tools, and a little imagination, shutters can become headboards, wall organizers, privacy screens, cabinet doors, garden accents, or functional storage.
This guide explains how to evaluate, clean, repair, finish, and repurpose vintage shutters safely. It also includes practical project ideas for different skill levels, from “I own a screwdriver” to “I have strong opinions about pocket-hole joinery.”
Why Old Shutters Are Excellent Upcycling Material
Traditional shutters were built to control light, improve privacy, protect windows, and allow ventilation. Many older wooden shutters were made for a specific opening, which is why salvaged pieces sometimes have numbers or markings identifying their original location. Their sturdy frames, decorative louvers, and weathered surfaces make them useful far beyond their original purpose.
Shutters also offer ready-made architectural detail. Instead of building a decorative panel from scratch, you begin with an object that already has texture, proportion, and character. A single shutter can become wall decor, while a matched pair can create furniture doors or a symmetrical headboard. Three or four hinged panels can form a folding screen.
Upcycling keeps usable building materials in circulation. Habitat for Humanity ReStores and architectural salvage businesses sell donated doors, shutters, hardware, furniture, and construction materials that might otherwise be discarded. These locations are often better sources than ordinary home-decor stores because every piece is different.
Inspect the Shutters Before Starting
Identify the Material
Most vintage shutters are wood, but newer ones may be vinyl, composite material, or aluminum. Material determines which cleaners, primers, paints, fasteners, and adhesives will work.
- Wood shutters are easy to cut, drill, patch, stain, and paint.
- Vinyl shutters are lightweight but can expand and contract with temperature changes.
- Composite shutters resist moisture but may not accept every type of coating.
- Metal shutters require rust treatment and a metal-compatible primer.
Do not assume that a product labeled “paint and primer” will bond to every material. Check the coating manufacturer’s instructions and test the finish in an inconspicuous area.
Check the Frame and Louvers
Place each shutter on a flat surface and look for twisting, loose joints, cracked rails, missing louvers, insect damage, and soft or crumbling wood. Press suspicious areas gently with a screwdriver. Sound wood should resist pressure; rotten wood may feel spongy.
A slightly warped shutter can still become wall art, a garden backdrop, or a decorative sign. A badly weakened shutter should not become a headboard, shelf support, cabinet door, or freestanding screen until it has been repaired.
Take Old Paint Seriously
Vintage paint may contain lead. In the United States, painted items associated with buildings constructed before 1978 should be treated cautiously unless testing confirms that the coating is lead-free. Sanding, scraping, sawing, or drilling painted surfaces can create hazardous dust and chips. The EPA recommends determining whether lead is present, containing the work area, minimizing dust, wearing appropriate protection, and cleaning thoroughly.
Do not attack unknown old paint with a power sander just because the internet promised a “quick farmhouse makeover.” Consider using an EPA-recognized lead test, consulting a certified professional, or sealing an intact finish without disturbing it. If paint is peeling heavily, especially in a home with children or pregnant occupants, professional assessment is the safer choice.
Tools and Supplies You May Need
Your exact list will depend on the project, but most shutter upcycling projects use a combination of the following:
- Work gloves, safety glasses, and a suitable respirator
- Drop cloths or plastic sheeting
- Soft brush, vacuum, mild detergent, and clean rags
- Screwdrivers, pliers, and an adjustable wrench
- Tape measure, pencil, level, and square
- Hand-sanding sponge or sandpaper for confirmed lead-free surfaces
- Wood glue, clamps, wood filler, or two-part wood repair epoxy
- Drill, bits, screws, anchors, and pilot-hole bit
- Material-compatible primer and paint
- Clear water-based protective finish
- Hinges, knobs, hooks, brackets, picture wire, or French cleats
Buy hardware according to the shutter’s weight and final use. Tiny picture hooks may be perfectly happy holding a framed photograph, but an old solid-wood shutter can weigh considerably more. Use wall studs or correctly rated anchors for large projects.
How to Prepare Old Window Shutters
1. Remove Loose Dirt and Hardware
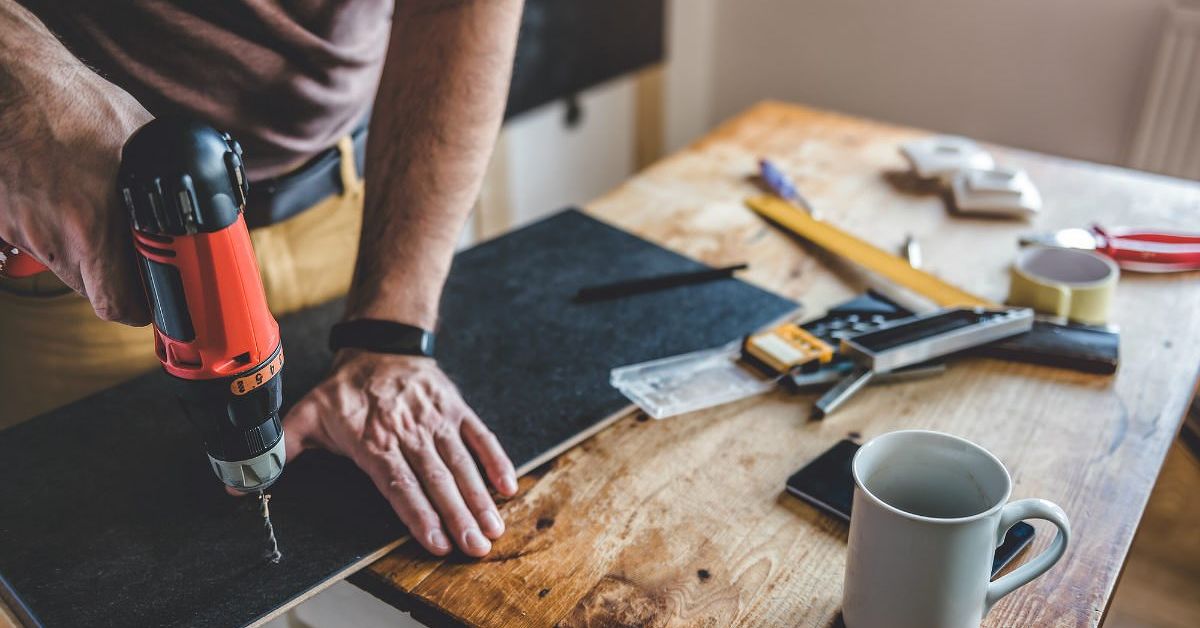
Vacuum dust from the corners and louvers using a brush attachment. Then wash the surface with a mild detergent solution and a damp cloth. Avoid soaking old wood, which may swell or loosen glued joints.
Remove knobs, hinges, latches, and brackets that interfere with the new design. If you want to preserve vintage hardware, label each part and store its screws in a small bag. Score around painted-over hinges before lifting them to reduce splintering. This Old House recommends working carefully around hinge mortises when converting shutters into cabinet doors.
2. Repair Structural Problems
Apply wood glue to loose joints and clamp them until fully cured. Replace missing fasteners with corrosion-resistant screws. Fill cosmetic holes only after deciding whether they contribute to the aged appearance. Not every dent needs therapy.
If a louver is missing, you can install a replacement strip, remove several louvers to create an intentional opening, or cover that section with a chalkboard, mirror, cork panel, fabric, or thin plywood insert.
3. Preserve or Change the Finish
You have three basic finishing options:
- Preserve the patina: Clean the shutter and seal a stable finish with a compatible clear coating.
- Refresh the existing color: Remove only loose material using safe methods, prime exposed areas, and apply a similar color.
- Create a complete makeover: Prepare the surface properly and repaint it in a color suited to the room or outdoor setting.
Historic-wood guidance emphasizes diagnosing the cause of paint failure, correcting moisture problems, and removing only paint that is no longer sound rather than aggressively stripping every layer. Overly abrasive treatment can damage old wood and erase details that make it valuable.
For exterior projects, use coatings specifically approved for outdoor wood, shutters, trim, or furniture. Exterior formulas are designed to withstand weather and are sold for surfaces including wood, vinyl, doors, windows, and shutters.
12 Creative Ways to Upcycle Old Window Shutters
1. Make a Wall-Mounted Mail Organizer
Turn a narrow louvered shutter so the slats angle upward. Letters, postcards, invitations, and lightweight folders can slide between the louvers. Add hooks along the lower rail for keys, dog leashes, or reusable shopping bags.
Mount the organizer near an entryway or home office. Apartment Therapy has featured old shutters reused as mail carriers, demonstrating how naturally louvers function as sorting slots.
2. Build a Shutter Headboard
Arrange two to four shutters behind a bed, either vertically or horizontally. Matching shutters create a tailored appearance, while mismatched pieces feel more collected and relaxed.
Secure the shutters to one another with mending plates or wooden battens attached across the back. Mount the assembly to wall studs or use a properly rated French cleat. Lowe’s and HGTV both include salvaged shutters among practical headboard and upcycled furniture ideas.
3. Convert Shutters Into Cabinet Doors
A matched pair of shutters can replace plain doors on a media console, bathroom cabinet, pantry, or freestanding cupboard. Louvers add texture and may provide ventilation for electronics or linens.
Measure the cabinet opening carefully, repair the shutter frames, and position hinges where the wood is solid. Add magnetic catches so the doors remain closed. This project is most successful when the shutters are square and similar in thickness.
4. Create a Folding Room Divider
Connect three or four full-height shutters with hinges, alternating the hinge direction so the panels fold accordion-style. Use at least three hinges per joint for tall, heavy shutters.
A folding screen can conceal exercise equipment, divide a studio apartment, disguise a utility area, or serve as a changing screen. Shutter dividers provide privacy without looking as visually heavy as a solid wall, especially when adjustable louvers still work.
5. Add Privacy to a Patio or Balcony
Mount shutters to a sturdy frame, fence, pergola, or railing to block an unattractive view. Hinged panels can remain adjustable, while stationary panels are simpler to install.
Use exterior-rated screws, hinges, primer, and paint. Leave enough clearance beneath wooden panels to prevent them from sitting in standing water. HGTV has highlighted old shutters as practical privacy screens for patios, decks, and fences.
6. Make a Garden Trellis or Planter Backdrop
Lean or mount a shutter behind a planter and guide lightweight vines along the louvers. Small pots can also hang from S-hooks attached to sound slats.
Do not place edible plants directly against deteriorating unknown paint. Use sealed, lead-free shutters and keep growing containers separate from questionable vintage coatings. For a longer-lasting project, raise the shutter above soil level and protect the bottom edge from moisture.
7. Turn a Shutter Into a Mirror
Attach a mirror to the front of a solid-paneled shutter or mount mirrored acrylic behind an opening where louvers have been removed. A shutter mirror works well in an entryway, powder room, or narrow hallway.
Use mirror clips or adhesive specifically approved for mirrors. Ordinary construction adhesive can damage a mirror’s backing. Salvaged shutters have also been used as frames with louvers that hold notes, photographs, and small keepsakes.
8. Design a Photo and Greeting-Card Display
Tuck photographs and cards between upward-facing louvers, or stretch thin wire across the frame and attach items with miniature clothespins. This is one of the easiest projects because the shutter’s original finish can remain intact.
Change the display throughout the year: family photos in summer, recipe cards in fall, holiday greetings in winter, and suspiciously ambitious gardening plans in spring.
9. Make an Entryway Rack
Attach sturdy coat hooks or vintage knobs to the shutter’s rails and mount it horizontally. Add a narrow shelf above the frame for sunglasses, small baskets, or decorative objects.
Fasten hooks through solid frame members rather than thin louvers. If the rack will hold coats or bags, mount it directly into studs. Decorative knobs are charming; knobs pulling an entire shutter out of drywall are less charming.
10. Create a Decorative Window Treatment
Old exterior shutters can become interior shutters, side panels, or decorative valances. A pair mounted beside a window adds architectural interest even when it does not close across the glass.
For functioning shutters, measure the opening in several places because older windows are not always square. Use hinges and handles suited to repeated movement. Better Homes & Gardens recommends pilot holes, careful hardware placement, and customizable paint or stain when installing farmhouse-style shutters.
11. Build a Small Shelf or Display Ledge
Mount a shutter vertically and attach one or two shallow shelves across its lower rails. Use the finished piece to display small plants, framed photos, or lightweight collectibles.
The shutter should act as a decorative back panel, not the sole structural support. Secure shelf brackets to the shutter’s thick frame and anchor the complete unit into the wall.
12. Make Seasonal Porch Decor
A single shutter can become a reusable porch sign. Add a small wreath, removable wooden letters, a metal house number, or a hanging basket. Change the accessories instead of repainting the entire shutter for every season.
Lowe’s suggests using flowers, ribbons, signs, and decorative hardware to adapt shutters to different styles. Repurposed pieces also fit the broader “modern heirloom” approach of combining storied surfaces with refreshed colors and handmade details.
Indoor Versus Outdoor Shutter Projects
Indoor shutters experience relatively stable temperatures and limited moisture. A cleaned, repaired shutter may need only a clear protective finish or ordinary interior paint.
Outdoor projects require more preparation. Seal exposed end grain, fill cracks that trap water, use corrosion-resistant hardware, and apply an exterior-rated coating. Inspect outdoor shutters every season for peeling paint, loose screws, rot, and insect damage.
Vinyl shutters need room for thermal movement. Installation guidance commonly recommends avoiding overtightened fasteners and allowing appropriate spacing because vinyl expands and contracts as temperatures change.
Common Shutter Upcycling Mistakes
Disturbing Old Paint Without Testing
Dry sanding unknown vintage paint is the most serious mistake. Test first and follow lead-safe practices whenever the age or coating history is uncertain.
Ignoring the Direction of the Louvers
Louvers intended to hold mail, photographs, or cards must angle upward. Check the orientation before drilling mounting holes. Otherwise, your family correspondence will slide gracefully onto the floor.
Using Weak Wall Anchors
Solid-wood shutters may be heavier than they appear. Weigh the completed project, account for anything that will hang from it, and choose anchors with an adequate load rating.
Painting Over Dirt or Loose Finish
Paint cannot correct grease, chalky residue, peeling layers, or rotten wood. Clean and stabilize the surface before opening the paint can.
Forcing Every Shutter Into a “Rustic” Look
Old shutters do not have to be distressed white. Deep green, navy, terracotta, black, natural wood, and warm neutral finishes can make them work in traditional, coastal, industrial, cottage, or modern interiors. Upcycled antiques often look best when their age is balanced by clean surroundings and intentional styling rather than a room full of competing weathered objects.
Experience-Based Lessons From Upcycling Old Shutters
The most useful lessons rarely come from the glamorous final photograph. They come from the moment you discover that the “perfectly straight” shutter is shaped slightly like a banana, the original screws have fused themselves to the hinges, and one louver has apparently been held in place by optimism.
The Best Project Is Chosen After Inspection
A common beginner mistake is deciding on a project before examining the shutter. For example, a tall pair may seem ideal for cabinet doors. Once placed side by side, however, one may be wider, thicker, or noticeably warped. Instead of forcing the pair onto a cabinet, those same shutters may work beautifully as independent wall panels or garden accents.
The practical lesson is to let the condition of the material guide the design. Straight, strong shutters suit moving parts such as doors and screens. Warped shutters are safer as stationary decor. Small shutters make excellent organizers and signs. Large matched sets have enough visual weight for headboards and room dividers.
A Five-Minute Hardware Test Saves an Hour
Before removing every hinge, test one screw. If it turns easily, continue. If the head begins to strip, stop and apply penetrating oil, use the correct screwdriver bit, and give it time to work. Painted-over flathead screws are particularly talented at testing a DIYer’s vocabulary.
Old hardware may be worth preserving even when it is not reused on the final project. Decorative hinges and latches can be cleaned and displayed, installed on another piece, or stored with the shutter’s history. When replacement hardware is needed, choosing a similar finish helps the new components feel intentional.
Color Samples Look Different on Louvers
Paint colors behave differently on textured shutters than they do on a flat sample card. Louvers create alternating highlights and shadows, making dark colors look deeper and pale colors appear more varied.
Apply sample paint to a removable slat, the back of the shutter, or a small lower section. View it in morning light, evening light, and the room where the shutter will live. A muted blue that looks calm outside may appear gray indoors. A creamy white may turn surprisingly yellow under warm bulbs.
This testing step is especially valuable when several shutters will form a large headboard or screen. Once four panels are painted, a small color surprise becomes a very large color surprise.
Mounting Deserves as Much Attention as Decorating
Many attractive shutter projects fail at the installation stage. A wall organizer may be decorated with hooks, baskets, and framed photos before anyone checks whether the wall has a conveniently located stud. A headboard may be assembled on the floor only to reveal that the baseboard prevents it from sitting flat.
Experienced DIYers solve the mounting plan early. They locate studs, identify electrical wires and plumbing risks, select anchors, measure clearances, and decide whether the project should be removable. A French cleat is particularly useful for wide, heavy assemblies because it distributes weight and allows the piece to be lifted off the wall later.
Preserving Imperfections Usually Looks Better Than Inventing Them
Authentic wear has irregularity: edges soften where hands touched them, paint fades more on exposed areas, and hardware leaves natural shadows. Artificial distressing often looks repetitive because the same sanding pressure is applied to every corner.
When an old shutter already has attractive patina and its coating is stable and safe, gentle cleaning and sealing may produce a better result than aggressive refinishing. Preserve the story where possible, but repair anything that affects strength, safety, or cleanliness.
The goal is not to make the shutter look brand-new or theatrically ancient. The goal is to make it useful, secure, and appropriate for its new setting. That balance is what turns architectural salvage into a finished piece rather than an object that appears to have wandered in from the garage.
Conclusion
Learning how to upcycle old window shutters begins with careful inspection, not immediate decoration. Identify the material, evaluate the structure, test questionable paint, and decide whether the existing finish should be preserved or replaced. Once the shutter is clean and stable, its original construction offers dozens of possibilities.
Louvers become mail slots, photo holders, ventilation panels, and trellises. Strong frames become cabinet doors, headboards, screens, racks, mirrors, and porch decor. Even an imperfect shutter can find a second career when the project matches its condition.
The best upcycled shutter is not necessarily the most elaborate one. It is the piece that functions safely, suits the space, and retains enough character to make guests ask, “Where did you find that?” You may answer modestlyor provide the full story, complete with the stubborn hinge, three paint samples, and the screw that rolled beneath the workbench.
Note: Before sanding, drilling, scraping, or cutting a vintage painted shutter, determine whether lead-based paint may be present and follow current EPA lead-safe guidance. Project requirements may also vary according to the shutter material, wall construction, climate, coating manufacturer, and local regulations.