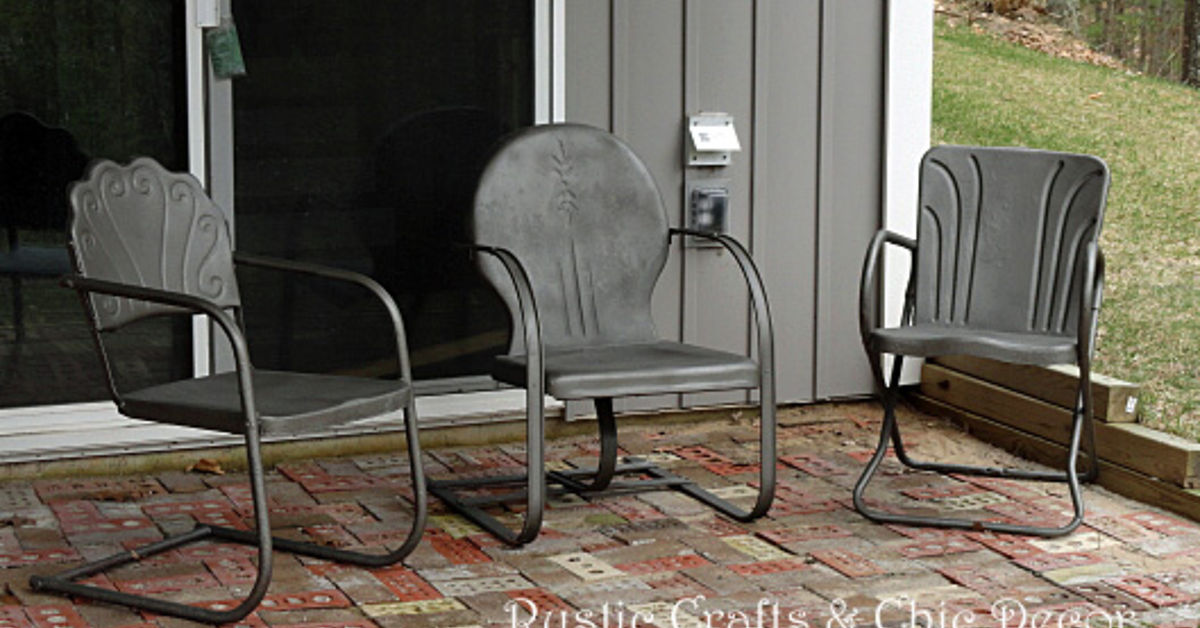
Old metal patio chairs rarely retire gracefully. First comes a tiny paint chip, then an orange rust spot, and eventually the chair looks as though it spent the winter at the bottom of a lake. Fortunately, surface rust and peeling paint do not automatically mean your furniture belongs at the curb.
With careful inspection, thorough preparation, and paint formulated for exterior metal, you can restore many steel and wrought-iron chairs for years of additional service. The painting itself is usually the quickest part. Cleaning, rust removal, and patient drying are what separate a durable finish from one that flakes off before the next backyard barbecue.
Can Your Rusty Metal Chairs Be Saved?
Begin by determining whether the damage is cosmetic or structural. Surface rust generally appears as orange discoloration, small bubbles beneath the paint, or shallow pitting. These problems are usually repairable. Deep corrosion, cracked welds, broken joints, or metal that bends and crumbles under light pressure can make a chair unsafe.
Inspect the legs, seat supports, welds, bolt holes, and underside of the frame. Sit in the chair only after confirming that it is stable. If a load-bearing section has rusted through, painting it will merely give the problem a fashionable outfit. Repair or replace the damaged component before refinishing the chair.
Identify the Type of Metal
Steel and wrought iron contain iron and can develop reddish-brown rust. They are often heavy, and a magnet will usually stick to them. Aluminum is lighter and does not produce conventional iron rust, although it can develop a chalky white or gray layer of oxidation. Aluminum requires gentler abrasion and a coating system specifically approved for non-ferrous metal.
Also identify any nonmetal components. Fabric slings, plastic feet, vinyl straps, wood armrests, and rubber glides may need to be removed or carefully masked. Paint intended for steel may not bond properly to these materials.
Tools and Materials You May Need
- Safety glasses, chemical-resistant gloves, and protective clothing
- A suitable particulate respirator for sanding
- Respiratory protection specified on the paint label or safety data sheet
- Drop cloths, cardboard, or plastic sheeting
- Mild dish soap or a metal-safe degreaser
- Rags, sponges, and a soft cleaning brush
- A wire brush for steel or wrought iron
- A scraper and sanding blocks or sanding sponges
- Coarse, medium, and fine sandpaper
- Rust remover or rust converter, if necessary
- Exterior rust-inhibiting metal primer
- Exterior paint formulated for the specific metal
- Painter’s tape and masking paper
- Optional exterior clear coat compatible with the paint
Spray products are convenient for curved legs, mesh seats, scrollwork, and narrow gaps. Brush-on or direct-to-metal paint can be economical for a large set and gives you more control over overspray. A small fine-finish roller works well on broad, flat surfaces.
How To Paint Old And Rusty Metal Outdoor Chairs Step by Step
1. Choose the Right Working Conditions
Work outdoors or in a genuinely well-ventilated open area, away from flames, pilot lights, sparks, vehicles, and anything else that can ignite paint vapors. Protect the ground and nearby objects from dust and overspray. A calm, dry day makes spray painting considerably easier.
Follow the temperature and humidity limits printed on your products. Many coatings perform well in moderate temperatures with relatively low humidity, but the label is the final authority. Avoid painting wet metal, hot furniture sitting in direct sun, or a chair that may be rained on before it cures.
2. Remove Cushions, Glides, and Loose Hardware
Take off cushions, fabric, plastic caps, and removable armrests. Tighten loose fasteners and replace badly corroded bolts. Keep small parts in a labeled container unless you enjoy turning furniture assembly into an archaeological expedition.
Mask anything that must remain unpainted. Check drainage holes in tubular frames and clear any blockage. Trapped water is one of rust’s favorite vacation homes.
3. Wash and Degrease the Chair
Remove cobwebs, soil, pollen, bird droppings, oil, and sunscreen residue with warm water and mild detergent. Use a metal-safe degreaser on stubborn grime, following its instructions carefully. Rinse away all soap and chemical residue.
Cleaning before sanding keeps grease from being ground into the surface. Allow the chair to dry completely, including joints and hollow tubes. Painting over hidden moisture can encourage corrosion beneath the new finish.
4. Remove Loose Paint and Rust
On steel or wrought iron, scrub rusty areas with a stiff wire brush. A scraper can lift curling paint, while a drill-mounted wire wheel may speed up work on severe corrosion. Power tools require extra control, eye protection, and respiratory protection; aggressive grinding can gouge thin tubing or weaken decorative details.
Use coarse sandpaper, often around 80 grit, where substantial rust or failing paint must be removed from ferrous metal. Move to a medium grit to feather the edges between bare metal and sound paint. Finish with a finer abrasive where a smoother appearance matters.
For aluminum, avoid an aggressive steel wire brush. Clean it and dull the surface with an appropriate sanding sponge or medium-to-fine abrasive, commonly in the 180- to 220-grit range. Follow the coating manufacturer’s preparation instructions because aluminum primers and direct-to-metal products vary.
You do not necessarily need to strip every inch to bare metal. Firmly bonded paint may remain if it is clean, dull, and compatible with the new coating. Remove everything that is loose, bubbling, chalking, or poorly attached.
5. Treat Rust You Cannot Completely Remove
Rust hiding in pits, seams, and ornate joints can be difficult to reach. A compatible rust remover may dissolve it, while a rust converter chemically stabilizes residual corrosion and creates a paintable surface. These products are not interchangeable, so read the directions rather than improvising a backyard chemistry experiment.
Apply the treatment only to approved metals and allow the required reaction and drying time. Some converters leave a dark protective layer; others must be rinsed or lightly brushed afterward. Never combine products unless their manufacturers confirm compatibility.
6. Remove Every Trace of Dust
Vacuum sanding debris and wipe the chair with a clean, lint-free cloth. If you use a final cleaner, make sure it is compatible with the existing finish and upcoming primer. Strong solvents can soften old paint and cause the new coating to wrinkle.
The ideal surface is clean, completely dry, dull, and free from loose rust. Run a clean cloth across the frame. If it comes away covered in orange or gray powder, the chair is not ready.
7. Apply a Rust-Inhibiting Metal Primer
Use an exterior primer labeled for the chair’s metal and for the chosen topcoat. A rusty-metal primer is useful on properly prepared steel or wrought iron with remaining pitting. Aluminum, galvanized metal, and other non-ferrous surfaces may require a bonding or self-etching primer.
Shake or stir the primer exactly as directed. When spraying, begin each pass just beyond the chair, move steadily across it, and release the nozzle after passing the opposite edge. Hold the can at the distance stated on its label and overlap each pass slightly.
Apply light, even coats instead of one heavy coat. Prime the underside, joints, welds, feet, and edges as carefully as the visible areas. Rust rarely respects the parts guests can see. Allow the primer to dry and recoat within the manufacturer’s specified window.
8. Paint the Chair With Thin Coats
Select exterior acrylic, alkyd enamel, or another coating specifically formulated for metal outdoor furniture. Acrylic products often dry faster and retain color well. Alkyd coatings generally produce a hard, glossy, abrasion-resistant film. Product compatibility matters more than choosing a paint based on one feature alone.
Turn the chair upside down and paint the underside first. After the coating reaches the appropriate handling stage, rotate the chair and finish the top and sides. Raising it on blocks or sawhorses provides easier access and helps prevent freshly painted feet from sticking to the drop cloth.
Apply two or more light coats as directed. Keep a spray can moving to prevent puddles, runs, and thick buildup in mesh openings. With brush-on paint, use the appropriate bristle type and spread the coating into a thin, uniform film. Do not keep brushing paint after it begins to set.
Honor the recoat window printed on the container. Some paints must receive another coat within a short period or only after a much longer waiting period. Painting during the wrong interval can cause lifting or wrinkling.
9. Decide Whether You Need a Clear Coat
A clear exterior topcoat is optional when the color coat already provides adequate weather and corrosion resistance. Clear coating can add protection or alter the sheen, but it can also create adhesion problems, yellowing, or an uneven appearance if the products are incompatible.
If you use one, choose a clear coat approved for exterior painted metal and confirm that it can be applied over your specific paint. Test it in an inconspicuous location and follow its timing instructions.
10. Let the Finish Cure Before Use
Dry-to-touch, safe-to-handle, and fully cured are different milestones. A chair may feel dry while its coating remains soft enough to collect fingerprints or stick to a cushion. Follow the longest applicable curing recommendation before sitting on it, stacking it, or reinstalling fabric components.
Keep the chair sheltered from dew and rain during early curing. Set it on a clean surface so grit does not become permanently embedded in the feet.
Common Metal Chair Painting Mistakes
Painting Directly Over Flaking Rust
Paint cannot strengthen loose material. Rust scale and failing paint continue separating from the chair, taking the new finish with them. Remove loose corrosion and feather damaged edges before applying primer.
Using Interior or General-Purpose Paint
Outdoor chairs face rain, temperature changes, abrasion, and ultraviolet exposure. Choose a coating labeled for exterior use and compatible with the metal. Ordinary wall paint is not a substitute for a corrosion-resistant metal system.
Applying One Thick Coat
Heavy coats develop runs, blocked mesh openings, slow curing, and a skin that may remain soft underneath. Several thin coats create a more uniform film and usually look more professional.
Ignoring the Underside
Water collects around feet, welds, fasteners, and seat supports. Leaving those areas unprotected gives corrosion an easy route beneath the visible finish.
Confusing an N95 With Vapor Protection
A particulate respirator can help control sanding dust when properly selected and fitted, but it does not protect against organic vapors from many aerosol and solvent-based coatings. Follow the product’s safety data sheet and use the respiratory protection it specifies.
How To Keep Repainted Metal Chairs From Rusting Again
Wash the chairs periodically with mild soap and water, then dry them. Remove bird droppings, tree sap, and other deposits promptly because they can damage the protective film. Inspect the frames at the beginning and end of each outdoor season.
Touch up chips before exposed steel develops significant rust. Lift chairs rather than dragging them across concrete, and avoid stacking them without padding between painted surfaces. Use breathable, well-fitted furniture covers or move the chairs into dry storage during harsh weather. Covers should not trap standing water against the frames.
Keep drainage openings clear and replace missing foot caps. In coastal environments or areas with frequent rain, inspect the furniture more often because moisture and salt accelerate corrosion.
Practical Restoration Experience: Lessons That Improve the Result
The most important practical lesson is that a chair often looks ready for paint long before it actually is. After the obvious rust has been brushed away, orange powder commonly remains in textured areas and around welds. Wiping the frame with a white cloth is a useful final test. Continued discoloration means more cleaning is needed.
Another recurring issue is poor access. Painting a chair while it sits normally on the ground encourages missed areas under the seat and behind the legs. Turning it upside down first exposes the places where corrosion frequently starts. Small wooden blocks or screws driven partway into a scrap board can support the feet while their bottoms are painted.
Color also affects the experience. Gloss black creates a classic wrought-iron appearance, but its reflective surface reveals dents, sanding scratches, and runs. Satin charcoal is more forgiving while still looking polished. Hammered or textured finishes can visually soften shallow pitting, although they cannot repair weakened metal. Light colors stay cooler in direct sun, an underappreciated benefit when the furniture lives in an exposed yard.
Mesh chairs reward restraint. A heavy spray pass can bridge small openings and create droplets on the back. Approaching the mesh from several angles with very light coats produces better coverage. The same method works on scrollwork: move around the chair rather than trying to flood every crevice from one position.
Patience between cleaning and priming matters just as much as patience between paint coats. Water hides inside bolt holes and tubular frames after washing. Starting too soon can trap moisture, which may later emerge as bubbles or rust stains. Giving the chair additional drying time is far easier than repeating the entire project.
It is also wise to buy all primer and paint at once, particularly when several chairs must match. Spray coverage varies dramatically with frame design, and ornate chairs consume more paint than their apparent size suggests. Running out halfway through a coat can produce differences in sheen or texture, especially if a replacement can comes from another production batch.
Finally, resist the temptation to use the furniture as soon as it feels dry. Fresh paint is vulnerable to fingernails, buttons, stacked chair legs, and cushion ties. A longer cure in a protected location allows the coating to harden. That quiet waiting period is often what turns a weekend makeover into a finish that survives multiple seasons.
Conclusion
Painting old and rusty metal outdoor chairs is less about artistic talent than disciplined preparation. Confirm that the frame is structurally sound, identify the metal, remove unstable rust and paint, clean away every contaminant, and build the new finish with compatible primer and thin topcoats. Give the coating time to cure, then protect it from chips and standing moisture.
Done properly, the project saves useful furniture, refreshes the patio, and delivers the peculiar satisfaction of defeating rust with sandpaper and patience. Your chairs may not become family heirlooms, but they can at least stop looking like props from an abandoned amusement park.