If regular ribbon is the free spirit of the craft world, wired ribbon is the one who actually remembers the plan. It bends, holds its shape, and gives your bows that full, polished look that screams, “Yes, I absolutely have my life together,” even if you are making holiday decor in pajama pants with one coffee going cold beside you.
Learning how to make a bow with wired ribbon is one of those surprisingly useful DIY skills that pays off all year. You can top gifts, upgrade wreaths, decorate Christmas trees, dress up garlands, style floral arrangements, or make a basic basket look like it came from a boutique instead of aisle seven. The best part is that wired ribbon is forgiving. If a loop looks crooked, fluff it. If a tail looks sad, trim it. If the whole bow looks dramatic, congratulations, you’re doing it right.
In this guide, you’ll learn four easy and attractive bow styles: a classic florist bow, a layered boutique bow, a rosette-style bow, and a scalloped wreath bow. Each one uses slightly different techniques, but all of them start with the same secret weapon: wired ribbon that listens when you tell it to behave.
Why Wired Ribbon Works So Well
Wired ribbon is ideal for bow making because the thin wire along the edges lets you shape the loops and tails exactly the way you want. Instead of drooping like overcooked pasta, the ribbon stays lifted and crisp. That makes it especially helpful for wreaths, trees, garlands, oversized gifts, and any project where you want the bow to hold up for more than five heroic minutes.
It also gives beginners a major advantage. A bow made with satin or soft fabric ribbon can look flat if your loops are uneven. Wired ribbon hides a multitude of crafting sins. You can bend, adjust, puff, widen, and re-angle the loops until the bow looks balanced. In other words, wired ribbon is the crafting equivalent of forgiving lighting.
What You’ll Need
Before you start, gather a few basics:
- Wired ribbon, usually 1.5 to 4 inches wide depending on the bow size
- Sharp scissors
- Chenille stems, floral wire, or thin craft wire
- A ruler or tape measure
- Optional hot glue for layered designs
- Optional extra ribbon for mixing colors, patterns, or textures
A quick sizing tip: narrower ribbon works well for small gifts and floral accents, while wider ribbon is better for wreaths, tree decor, porch displays, and statement bows. If you want the bow to look lush and full, do not be stingy with ribbon. This is not the moment for a minimalist lifestyle.
Method 1: The Classic Florist Bow
Best for gifts, baskets, bouquets, and beginner-friendly projects
The florist bow is the foundation style every ribbon lover should know. It is simple, elegant, and easy to customize. Once you get comfortable with the twist-and-loop rhythm, you can make this bow almost on autopilot.
How to make it
Start by leaving a tail about 6 to 10 inches long, depending on how large you want the finished bow. Pinch the ribbon at the point where the center of the bow will be. Make your first loop with the pretty side facing out, then twist the ribbon once at the center pinch so the front side shows again on the next loop.
Create a second loop on the opposite side, keeping it roughly the same size as the first. Continue alternating sides, twisting at the center each time, until you have four, six, or eight loops total. More loops create a fuller bow, while fewer loops make it look cleaner and more tailored.
Once the bow looks full enough, cut the ribbon and leave a second tail that matches the first. Wrap floral wire or a chenille stem tightly around the center pinch and twist to secure it. Then fluff each loop by gently pulling it outward and slightly upward. The goal is not flat bunny ears. The goal is fullness, dimension, and a little drama.
Pro tip
If your loops look uneven, do not panic and do not declare the ribbon your enemy. Wired ribbon can be reshaped easily. Spread the loops apart, adjust the widths, and angle them so the bow looks rounded rather than compressed.
Method 2: The Layered Boutique Bow
Best for front-door wreaths, gift toppers, and polished decorative accents
If the florist bow is classic, the layered boutique bow is the overachiever. This style uses separate ribbon pieces or multiple ribbon widths stacked together for a fuller, more designer-inspired result.
How to make it
Cut two strips of wired ribbon, one slightly longer than the other. For a medium bow, try one 14-inch strip and one 12-inch strip. Form each strip into a loop by overlapping the ends and securing them with a dab of hot glue or a small piece of wire. Flatten each loop so the seam sits at the back.
Place the larger loop on the bottom and the smaller loop on top. Then take a third ribbon strip and accordion-fold it across the center to create a classic bow shape underneath the stacked loops. Pinch everything together in the middle and wrap it tightly with wire or a chenille stem.
To finish, cut a short narrow strip of ribbon and wrap it around the center to hide the wire. Secure that strip on the back with glue if needed. Add two long tails, then trim the ends into neat dovetails for a more finished look.
Why this style works
The layered structure creates depth. You get a fuller look without needing endless loops, and it is a smart way to combine patterned ribbon with a solid color. For example, pair plaid with velvet, burlap with satin, or metallic gold with deep green. The result feels more custom and less “I found this in a last-minute gift bag emergency.”
Method 3: The Rosette or Pom-Pom Bow
Best for holiday decorating, oversized gifts, wreath centers, and statement pieces
This bow looks fancy, but it is mostly repetition and confidence. Lots of loops, a strong center tie, and a good fluffing session turn simple ribbon into a full, rounded bow that can steal the whole show.
How to make it
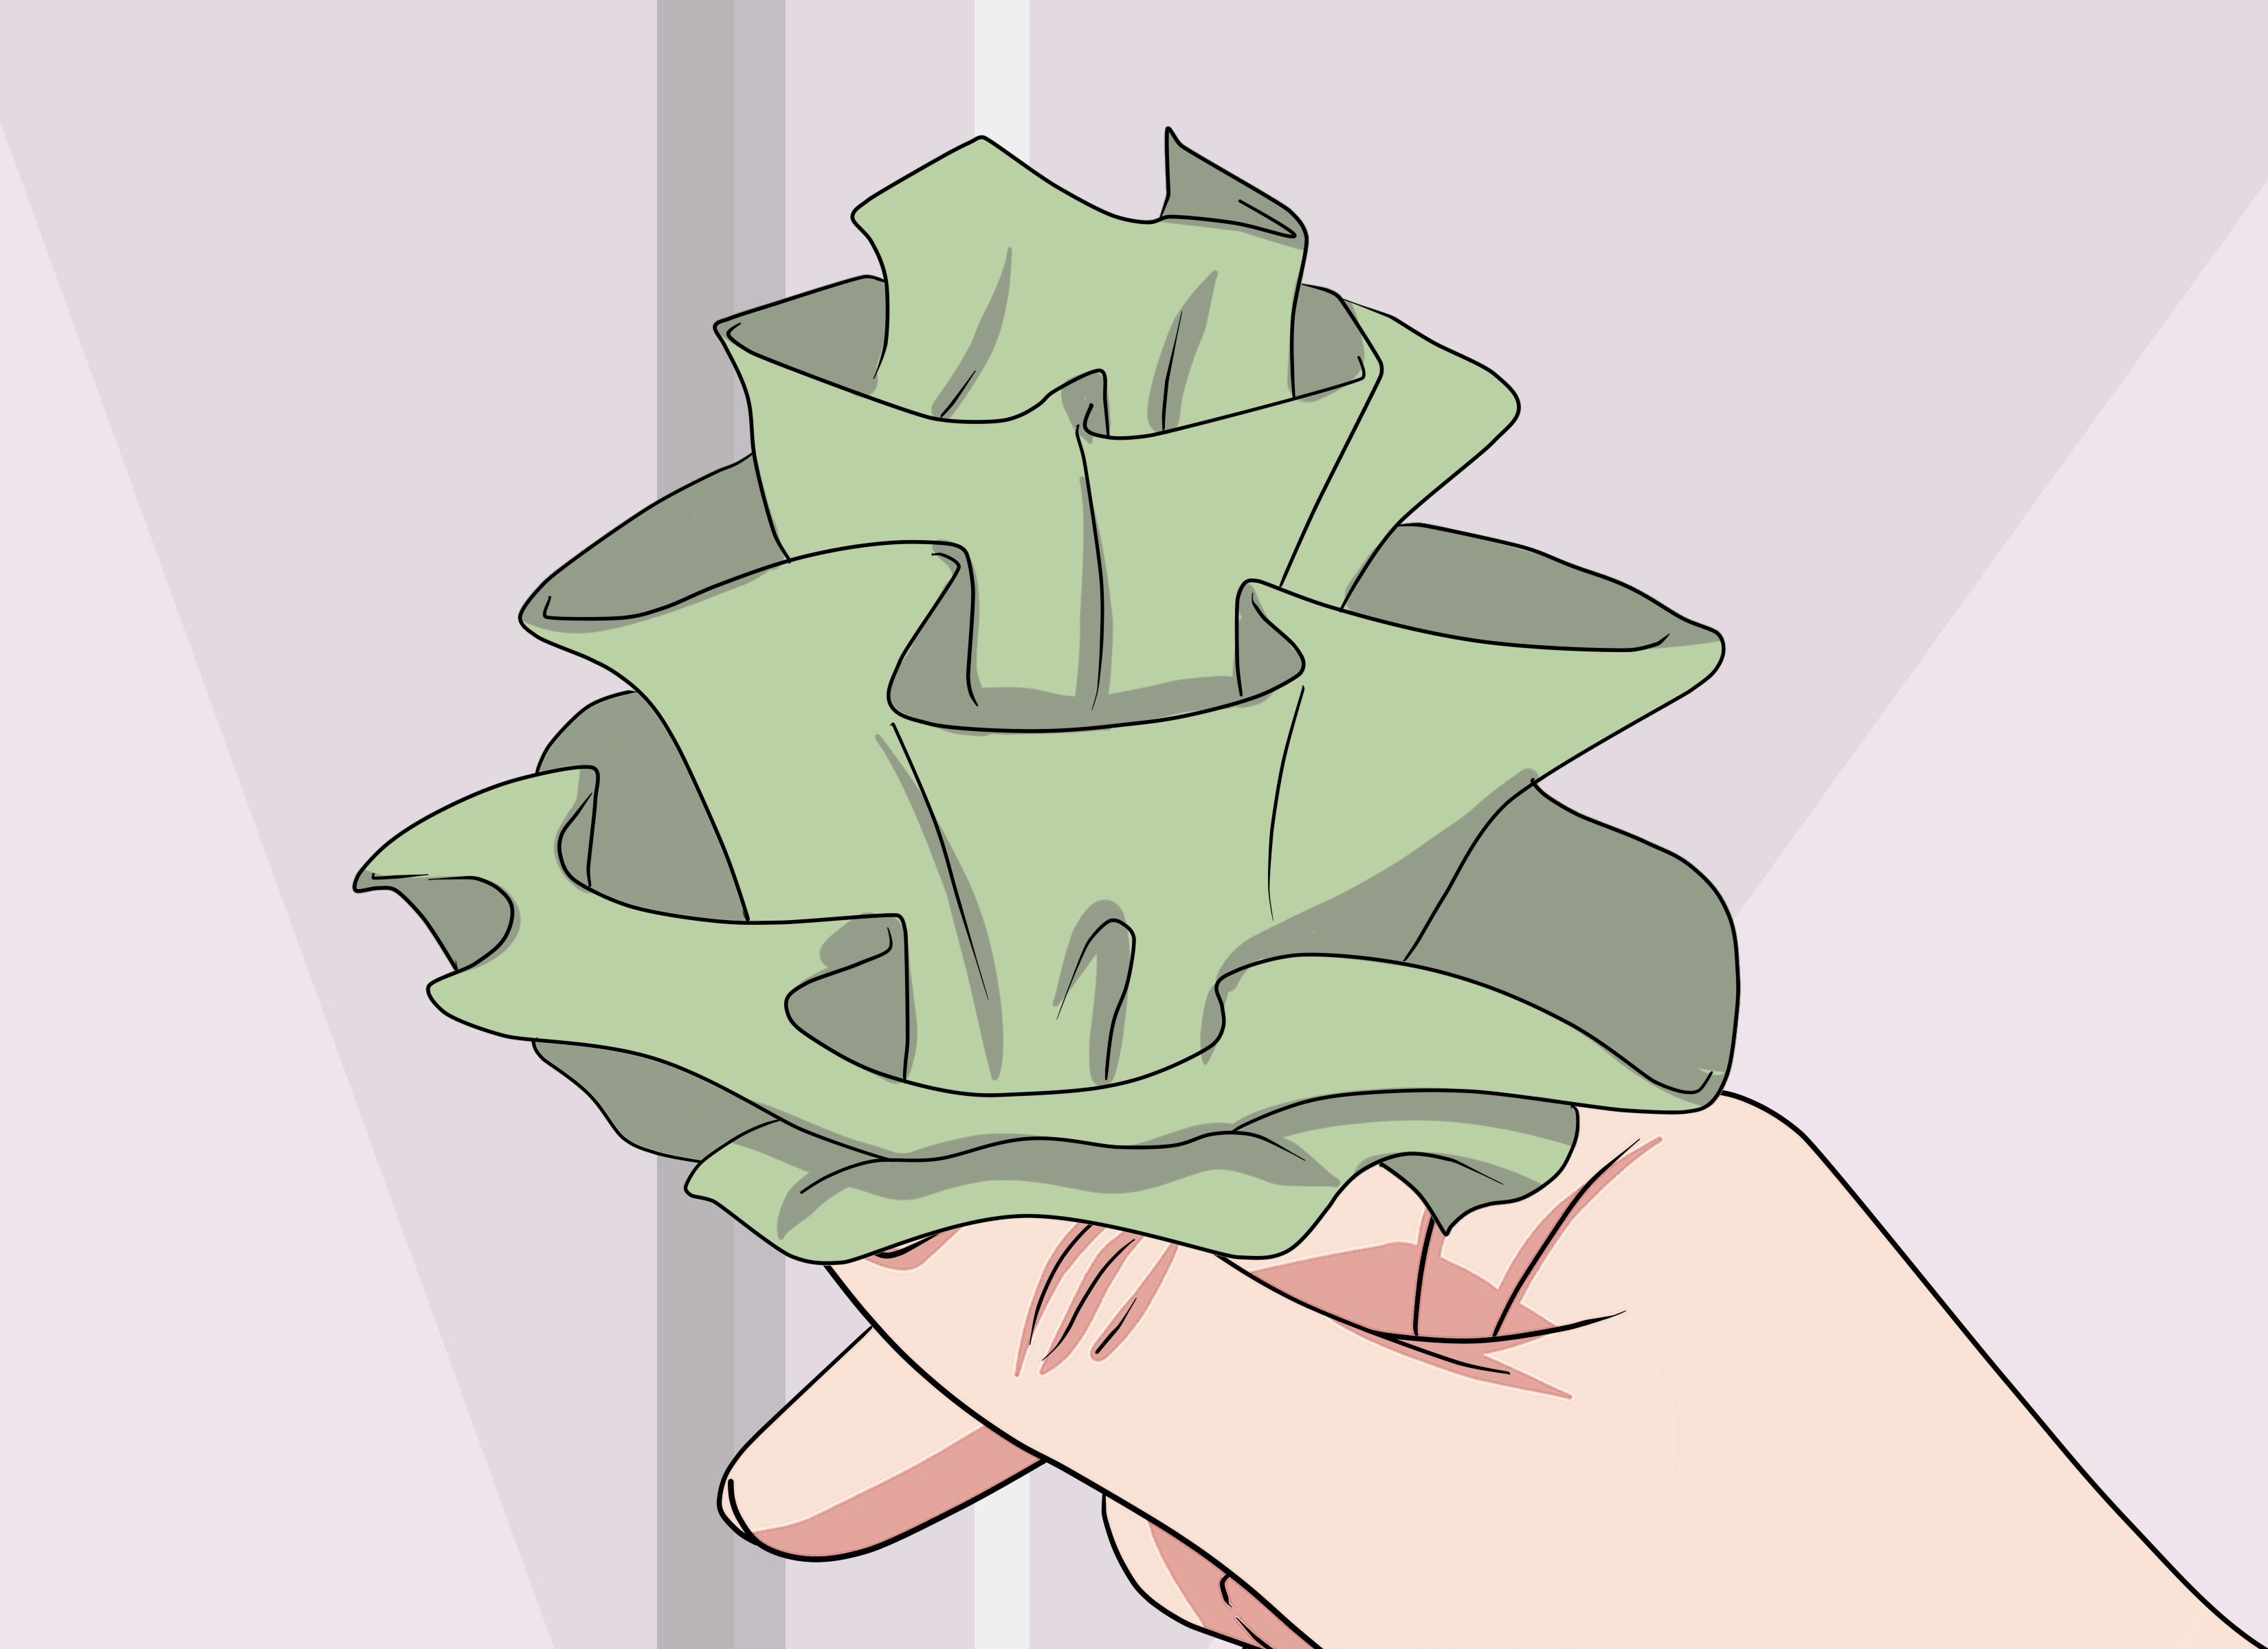
Take a long piece of wired ribbon and form it into a flat stack of even loops, almost like making a figure-eight over and over or folding the ribbon back and forth in equal sections. Aim for about 5 to 7 inches per loop for a medium rosette bow, or larger if you want real front-porch energy.
When you have a thick stack, trim tiny diagonal notches on both sides of the center of the folded ribbon stack. Be careful not to cut all the way through. Wrap floral wire tightly around those notches and twist securely. This creates the bow’s center point.
Now for the fun part: pull the loops apart one by one, alternating directions as you go. Rotate them gently around the center so the bow forms a rounded, fluffy shape. If the loops seem chaotic at first, keep going. Rosette bows often pass through an awkward stage before they become glorious.
When to use it
This is the bow for when “cute” is not enough and you want “who made that?” It looks fantastic on wreaths, tree tops, large gift boxes, stair railings, garlands, and holiday centerpieces. It is especially effective with wide wired ribbon that has shine, texture, or a festive pattern.
Method 4: The Scalloped Wreath Bow
Best for wreaths, garlands, lantern swags, porch decor, and seasonal displays
The scalloped bow is slightly more decorative and architectural. Instead of standard loops, it features fan-like sections that add width and visual movement. If you want a wreath bow that reads from across the porch, this is your moment.
How to make it
Cut about 2 feet of wired ribbon. Start from the center and shape three soft scallops or fans on one side, then three on the other, keeping the bottom center pinched. The fans should spread like little semi-circles rather than tight loops.
Once both sides are shaped, staple or tightly wire the base at the center pinch so the scallops hold together. Add separate ribbon tails behind the bow if you want more movement. Trim the tail ends into V-shapes or dovetails for a clean finish.
After securing the center, gently spread each scallop outward so the bow looks full and balanced. Attach it to a wreath, garland, or swag with floral wire. Because the ribbon is wired, the bow will keep that open, fan-like shape instead of collapsing into a sad strip of seasonal regret.
Design tip
This style looks especially pretty in glitter ribbon, plaid, velvet-backed ribbon, or wide holiday patterns. It is also a strong choice when you want a bow that looks more decorative than gift-like.
How to Make Any Wired Ribbon Bow Look Better
Fluff every loop
A bow fresh off the wire is only half finished. Pull the loops apart, angle them in different directions, and create air between them. Volume is the difference between “homemade” and “handcrafted.”
Trim the tails with intention
Dovetail cuts are a classic choice. Fold the tail in half lengthwise and cut diagonally from the folded edge up toward the open corners. You’ll get that clean V-cut that looks neat and festive.
Use odd numbers for visual interest
Odd numbers of loops or layered elements often look more natural and dynamic. Symmetry is nice, but a little variation makes the bow feel less stiff.
Mix ribbon thoughtfully
If you combine ribbons, vary either the width, texture, or pattern. Two ribbons that are almost the same but not quite can look accidental. Choose combinations that clearly complement each other.
Common Mistakes to Avoid
Not twisting the ribbon: This is the big one. If you skip the twist, the wrong side of the ribbon may show on alternate loops, and the bow loses its polished look.
Making every loop too tight: Wired ribbon needs room to breathe. Tight loops make the bow look pinched and flat.
Using dull scissors: Frayed edges make even a beautiful bow look messy. Sharp scissors are your friend.
Underestimating tail length: Short tails can make a big bow feel unfinished. When in doubt, leave them longer and trim later.
Skipping the final shaping: Even a well-made bow can look underwhelming until you spread, fluff, and adjust it.
Where to Use Wired Ribbon Bows
Once you know these four methods, you can use them nearly everywhere. Add a classic florist bow to a flower bouquet, a layered boutique bow to a wrapped gift, a rosette bow to a wreath, or a scalloped bow to a garland over the mantel. Wired ribbon bows also work beautifully on chairs for parties, lanterns on porches, seasonal baskets, wedding decor, and Christmas trees that need a little extra flair without a full ornament shopping spree.
And yes, they also work for those moments when the gift is fine but the wrapping needs to do some heavy emotional lifting.
Conclusion
Making a bow with wired ribbon is one of the easiest ways to elevate your decor and gift wrapping without needing advanced crafting skills. Start with the classic florist bow if you are new, then move into layered, rosette, and scalloped styles as your confidence grows. The beauty of wired ribbon is that it gives you structure, flexibility, and plenty of room to adjust until the bow looks just right.
Once you learn how to pinch, twist, wire, and fluff, you’ll never look at a plain wreath, gift box, or holiday garland the same way again. You’ll look at it and think, “You know what this needs?” And the answer will almost always be “a bow.”
Real-Life Experience: What Making Wired Ribbon Bows Actually Teaches You
After making a lot of wired ribbon bows over time, one thing becomes very clear: the bow is never just a bow. It is usually the final detail that makes everything else look intentional. A plain wreath becomes festive. A simple gift bag suddenly looks thoughtful. A tree branch with a few empty spots transforms into something styled instead of unfinished. That is why people get a little obsessed with ribbon. It is not because ribbon is magical, although on a good day it comes pretty close. It is because ribbon gives ordinary objects a finished personality.
The first real lesson most people learn is that the bow in your head and the bow in your hand are rarely identical on the first try. You imagine a grand, fluffy masterpiece. What you make at first may look more like a confused butterfly. That is normal. Wired ribbon rewards patience more than perfection. Once you start fluffing the loops, widening one side, twisting a tail, and pulling the center tighter, the bow starts to improve fast. It teaches you to keep adjusting instead of giving up too early, which is honestly a useful life skill beyond crafting.
Another experience that comes with bow making is discovering how much ribbon width matters. A narrow ribbon can look sweet and delicate, but it will not behave like a bold wreath bow. A wide ribbon, on the other hand, can look luxurious, structured, and dramatic, but only if you let it have enough space. Trying to force a giant ribbon into tiny loops is like putting a winter coat on a houseplant. It is technically possible, but no one looks comfortable.
People also learn very quickly that the center tie matters more than they expected. A loose wire wrap can ruin a beautiful design. A firm center hold gives the bow its backbone. Once the middle is secure, everything else becomes easier to shape. That is why seasoned crafters often spend more time on the center pinch than on the ribbon tails. The center is where the bow decides whether it wants to be elegant or collapse in protest.
There is also something unexpectedly satisfying about repetition. Make one florist bow, then another, then a rosette, then a layered bow, and your hands begin to remember the motions. Loop. Twist. Pinch. Secure. Fluff. It becomes rhythmic and almost relaxing. Not every craft has that quality. Some crafts feel like paperwork with glue. Ribbon bows feel more like quick wins.
And then there is the practical joy of reuse. A good wired ribbon bow can be stored, reshaped, and used again. That makes it a smart little decorating investment. You can move the same bow from a wreath to a tree, from a tree to a gift basket, and from a basket to a table centerpiece. Few craft projects work that hard without asking for snacks.
In the end, the experience of making wired ribbon bows is less about strict technique and more about learning how to see balance, shape, and style. The more bows you make, the faster you notice what a project needs. A little more height. Longer tails. Softer loops. A second ribbon for contrast. That confidence grows quickly, and once it does, you stop buying premade bows unless you absolutely have to. Because when you can make one yourself, exactly the size and style you want, it is hard to go back.