Some Easter decorations sit politely on the table and look pretty. This DIY Easter Bunny utensil holder actually earns its jelly beans. It keeps forks, spoons, knives, napkins, or paper straws organized while adding a cheerful bunny face to your Easter brunch, spring buffet, classroom party, or family dinner.
Better still, you can make it with an inexpensive container and ordinary craft supplies. The finished holder looks far more impressive than the effort involved, which is exactly what busy holiday hosts need. Nobody has to know your adorable table decoration began life as a coffee can, plastic tumbler, or lonely jar from the recycling bin.
Why Make an Easter Bunny Utensil Holder?
A utensil holder solves one of those small entertaining problems that becomes surprisingly annoying when guests arrive. Instead of leaving forks in a loose pile or stuffing spoons into a drinking glass, you can arrange everything upright in one festive container.
The bunny design also coordinates naturally with familiar Easter table decorations such as pastel eggs, folded napkins, spring flowers, baskets, wooden accents, and personalized place cards. Leading American home and craft publications frequently use bunny shapes, painted wood, paper ears, pom-poms, ribbons, and natural textures to create playful Easter tables without requiring elaborate materials.
This project is especially useful because it can be reused. Remove the utensils after the holiday and the bunny can hold paintbrushes, artificial flowers, wrapped candy, pencils, or craft tools. In other words, it does not have to disappear into a storage box the moment the last chocolate egg vanishes.
Project Overview
- Difficulty: Beginner-friendly
- Working time: Approximately 35 to 50 minutes
- Drying time: One to three hours, depending on the paint and adhesive
- Estimated cost: About $5 to $15
- Best for: Easter brunches, buffet tables, children’s tables, spring parties, and classroom celebrations
The basic technique is simple: prepare a sturdy container, cover or paint it, add bunny ears and facial details, attach a tail, and place a removable liner inside. The liner keeps utensils separated from paint, glue, glitter, felt fibers, and other decorative materials.
Materials and Supplies
For the Holder
- One clean, stable container measuring approximately 5 to 7 inches tall
- One removable food-grade plastic cup or tumbler that fits inside the container
- White acrylic craft paint or a sheet of white felt
- Pink felt, craft foam, or heavyweight cardstock
- White felt, craft foam, or cardstock for the bunny ears
- One medium white pom-pom for the tail
- One small pink pom-pom, wooden bead, or felt circle for the nose
- Black paint pen, permanent marker, or small pieces of black felt
- Ribbon, raffia, or a miniature bow
- Craft glue or a low-temperature hot-glue gun
Helpful Tools
- Scissors
- Pencil
- Ruler or flexible measuring tape
- Small paintbrush or foam brush
- Fine-grit sandpaper, if using unfinished wood or a glossy painted container
- Scrap paper for creating an ear template
- Clothespins or binder clips for holding glued pieces while they dry
Choosing the Best Container
A smooth-sided plastic tumbler is the easiest choice for a children’s table because it is lightweight and does not break. A wide-mouth glass jar looks more polished but should be placed where children cannot knock it over. A clean food can is inexpensive and sturdy, although the rim must be completely smooth and free from sharp edges.
You can also use a small unfinished wooden utensil box. Wood produces a charming farmhouse-style holder, but it benefits from light sanding before painting. DIY finishing guides generally recommend smoothing rough wood, removing dust, and allowing each coat to dry before adding another.
How to Make a DIY Easter Bunny Utensil Holder
Step 1: Clean and Prepare the Container
Wash the container with warm, soapy water and remove labels, adhesive residue, grease, and dust. Dry it completely before decorating.
If the surface is glossy, lightly scuff it with fine-grit sandpaper so paint or glue can grip more securely. Wipe away all sanding dust with a slightly damp cloth. Skip this step when covering the container with felt or when the product manufacturer says sanding is unnecessary.
Check the base by placing the empty holder on a flat table. It should sit level without wobbling. A tall, narrow container may look elegant, but it can become a utensil avalanche waiting to happen. A wider base is usually the calmer choice.
Step 2: Paint or Wrap the Bunny Body
For a painted holder, apply a thin coat of white acrylic craft paint with a foam brush. Let it dry, then add a second coat if the original surface remains visible. Several light coats usually look smoother than one thick coat, which tends to produce drips and suspicious-looking lumps.
For a no-paint version, measure the circumference and height of the container. Cut a rectangle of white felt to fit, leaving approximately 1/4 inch of overlap. Apply glue in narrow vertical lines, press the felt around the container, and place the seam at the back.
Do not apply paint or craft adhesive inside the removable liner. The decorative shell should remain separate from the utensils.
Step 3: Create the Bunny Ears
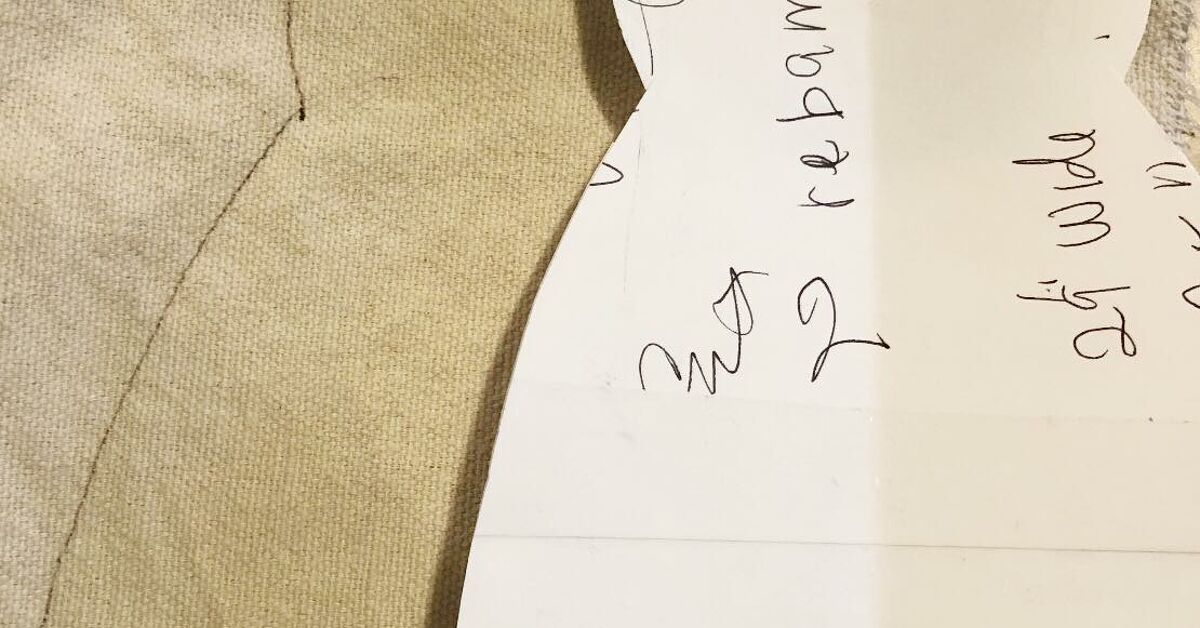
Draw one ear on scrap paper, approximately 5 inches tall and 1 1/2 inches wide. Give it a rounded tip and a slightly wider base. Cut out the paper template and use it to trace two matching ears on white felt, foam, or cardstock.
Next, create a smaller inner-ear template. Trace it twice on pink material and glue one pink piece to the center of each white ear.
For ears that stand upright, use doubled craft foam or glue felt around a cardstock center. You can also pinch the bottom of each ear into a shallow fold before gluing it. This creates a gentle curve and prevents the bunny from looking as though someone ironed its ears.
Simple traced templates, layered paper shapes, and oval ear pieces are widely used in beginner Easter crafts because they are easy to repeat and customize.
Step 4: Attach the Ears
Position the ears at the back of the container, leaving approximately 1 inch between them. Temporarily secure them with painter’s tape and view the holder from the front. Adjust the height and angle until the ears look balanced.
Glue the bottom 1 to 1 1/2 inches of each ear to the container. Hold the pieces in place with binder clips or clothespins while the adhesive sets. Make sure the ears do not lean so far forward that they interfere with the utensils.
Step 5: Add the Bunny Face
Draw two small oval eyes with a black paint pen. Position them slightly below the center of the container so the face remains visible when the holder is filled.
Glue a pink pom-pom or felt circle below the eyes for the nose. Draw a short vertical line beneath the nose, then add two curved lines to form the mouth. Three thin whiskers on each side complete the expression.
Keep the facial features simple. Tiny eyes, an oversized nose, and enormous whiskers can make the bunny look less “spring brunch” and more “rabbit who has seen things.” Practice the face on paper first if you are nervous.
Step 6: Attach the Tail
Turn the holder around and glue a white pom-pom near the lower center of the back. Press it firmly until secure.
A yarn pom-pom works well for a soft farmhouse look. A felt circle is flatter and stores more easily. For a reusable holder, avoid attaching the tail too close to the bottom because it may catch whenever the container is moved.
Step 7: Add a Bow or Collar
Tie a ribbon around the upper third of the holder or glue a small bow beneath the face. Gingham ribbon creates a country-style Easter decoration, velvet feels dressier, and raffia gives the bunny a relaxed garden-party personality.
If the utensil holder will sit beside patterned plates or a colorful centerpiece, use a plain ribbon. If the rest of the table is simple, choose stripes, polka dots, tiny flowers, or pastel plaid.
Step 8: Insert the Removable Liner
Place a clean food-grade plastic cup inside the finished holder. The liner should fit closely without becoming stuck. Its rim may sit slightly above the decorative container, but it should not cover the bunny’s face.
If the holder feels top-heavy, place a sealed bag containing a small amount of dry rice beneath the liner. This adds weight without allowing loose rice to mix with the utensils.
Step 9: Arrange the Utensils
Let all paint and glue cure completely before use. Arrange utensils with their handles pointing downward. Place taller items at the back and shorter pieces at the front so guests can see what they are grabbing.
For a large buffet, make three coordinating holders labeled “Forks,” “Spoons,” and “Knives.” Give each bunny a different ribbon color or facial expression. A trio looks intentional and prevents ten guests from excavating the same overcrowded container.
Three Design Variations
Farmhouse Bunny Holder
Use an unfinished wooden box, warm white paint, pink wooden beads, jute twine, and a yarn tail. Lightly distress the edges after the paint dries. Pair it with linen napkins, a neutral table runner, greenery, and speckled decorative eggs.
Pastel Party Bunny
Paint the container mint green, pale yellow, lavender, or blush pink instead of white. Add white ears with contrasting centers, a satin bow, and a few painted polka dots. Pastel colors, floral accents, eggs, and bunny motifs remain popular foundations for cheerful Easter tables.
Kid-Decorated Bunny
Cover a plastic cup with white cardstock and let children add washable-marker faces, foam stickers, paper flowers, or self-adhesive shapes. An adult should handle hot glue, sharp scissors, craft knives, and any preparation involving metal cans.
Write each child’s name on the back and use the holder for crayons before lunch. Replace the crayons with wrapped utensils when it is time to eat.
How to Style the Holder on an Easter Table
Place the bunny utensil holder near the beginning of a buffet line so guests collect flatware before reaching the food. Keep it beside a stack of napkins rather than hiding it behind a large floral arrangement.
Repeat one detail from the holder elsewhere on the table. A gingham bow can match the napkins. Pink inner ears can coordinate with tulips. A raffia collar can echo woven placemats or an Easter basket. Repetition makes an inexpensive craft look like part of a planned tablescape.
Avoid surrounding the holder with too many competing bunny decorations. One bunny utensil holder beside a bowl of eggs feels charming. Twelve rabbits staring at the mashed potatoes may begin to resemble a meeting.
Layered linens, natural materials, fresh flowers, egg accents, handmade garlands, and bunny collections are all common ways to build a cohesive spring table.
Common Problems and Easy Fixes
The Ears Keep Falling Forward
Reinforce each ear with a cardstock insert, a second layer of craft foam, or a short wooden craft stick attached behind it. Glue only the lower portion so the upper ear remains flexible.
The Paint Looks Streaky
Allow the first coat to dry completely before adding another. Use a soft foam brush and apply thin coats in the same direction. Do not repeatedly brush paint that has already started drying.
The Holder Tips Over
Use a wider liner, reduce the number of utensils, or add a sealed weight beneath the liner. Avoid loading all the knives on one side.
The Felt Seam Is Obvious
Place the seam at the back and disguise it with the pom-pom tail. You can also cover it with a narrow vertical strip of coordinating ribbon.
The Face Is Crooked
Turn the flaw into personality. Add one raised eyebrow, tilt the bow, and declare that this bunny has opinions. For a cleaner correction, cover the original features with a small oval of white felt and redraw them.
Cleaning and Storage
Remove the inner cup and wash it according to its manufacturer’s instructions. Dust the decorative outer holder with a dry or barely damp cloth. Do not soak felt, cardstock, pom-poms, or glued embellishments.
Before storing the bunny, make sure every surface is dry. Place tissue paper between the ears and store the holder upright in a box. Avoid crushing it beneath heavier holiday decorations. A loose plastic bag can help protect it from dust, but do not seal damp materials inside.
To save space, make the ears removable. Glue them to a strip of elastic or a removable paper collar that slides around the container. The bunny can then be stored flat and reassembled next spring.
Practical Experiences and Lessons From Making a DIY Easter Bunny Utensil Holder
The most useful lesson from this project is that the container matters more than the decorations. It is tempting to choose the tallest jar because long bunny ears look dramatic in photographs. Once that jar is packed with metal forks, however, it may behave like a very festive bowling pin. A shorter container with a wide base is usually more dependable, especially on a crowded buffet table.
A removable liner is another detail that seems optional until the holder is actually used. Holiday meals involve sticky fingers, buttery serving spoons, salad dressing, and at least one relative who somehow drops a fork into the gravy. A liner can be lifted out, washed, and returned without damaging the felt body or pom-pom tail. It also lets the decorative shell remain a craft item rather than pretending that hot glue is fine dinnerware.
The ears are generally the trickiest part. Thin paper ears may stand beautifully for ten minutes and then slowly droop as humidity, glue, and gravity form an alliance. Layered felt with cardstock inside is much more reliable. Craft foam is even easier because it has enough structure to stand while remaining flexible. Making both ears from the same template also prevents the bunny from looking as though one ear belongs to a completely different rabbit.
Another common discovery is that facial features need to be positioned lower than expected. Empty holders have plenty of visible space, but utensils cover the upper section. Before drawing the face, fill the liner temporarily with forks and spoons. Mark the lowest point reached by the utensil handles, remove them, and design the face beneath that line. This two-minute test prevents the bunny from spending Easter with only its chin visible.
Painted versions tend to look polished, but felt-covered holders are more forgiving. Felt hides scratches, label residue, seams, and imperfect surfaces. It also allows decorations to be moved before the glue dries. Paint is better when the goal is a clean modern finish or when several matching holders are being made. In either case, drying time should not be rushed. A fingerprint in half-dry paint has an extraordinary ability to become the only thing you notice forever.
When children participate, dividing the project into jobs keeps the activity manageable. Adults can prepare containers and handle hot glue. Children can trace ears, select ribbons, arrange facial pieces, and draw expressions on paper before transferring them to the holder. This gives them genuine creative control without turning the kitchen table into a small adhesive emergency.
Making several holders at once is often faster than making one. Create an assembly line: cut all ears, paint all containers, attach all noses, and add all tails. Minor differences make the group more charming. One bunny can smile, another can wink, and a third can wear glasses. Coordinating ribbon keeps the set visually connected even when the faces differ.
The final lesson is not to overdecorate. A bunny needs ears, a face, and a tail to be recognizable. Beyond that, every embellishment should earn its place. Too many flowers, stickers, rhinestones, bows, and glitter can bury the simple shape that makes the project appealing. Start with the basic bunny, set it on the table, and add only what the surrounding decorations need.
Once finished, the holder usually becomes more than a place for utensils. It acts as a centerpiece, a conversation starter, and a convenient piece of buffet organization. Guests may admire the ears, children may name the bunny, and someone will almost certainly ask where it was purchased. That is the pleasant magic of a successful holiday DIY: it looks special, works hard, and keeps its humble recycling-bin origin to itself.
Conclusion
A DIY Easter Bunny utensil holder combines practical organization with playful spring decorating. With a stable container, a washable liner, layered ears, simple facial details, and one fluffy tail, you can create a useful Easter table accessory in less than an afternoon.
Customize the holder with farmhouse textures, cheerful pastels, children’s artwork, personalized names, or coordinating ribbons. Make one for a small family brunch or create a full fluffle for a large buffet. Either way, your utensils will stay organized, your table will look festive, and your Easter bunny will finally contribute something besides hidden eggs.