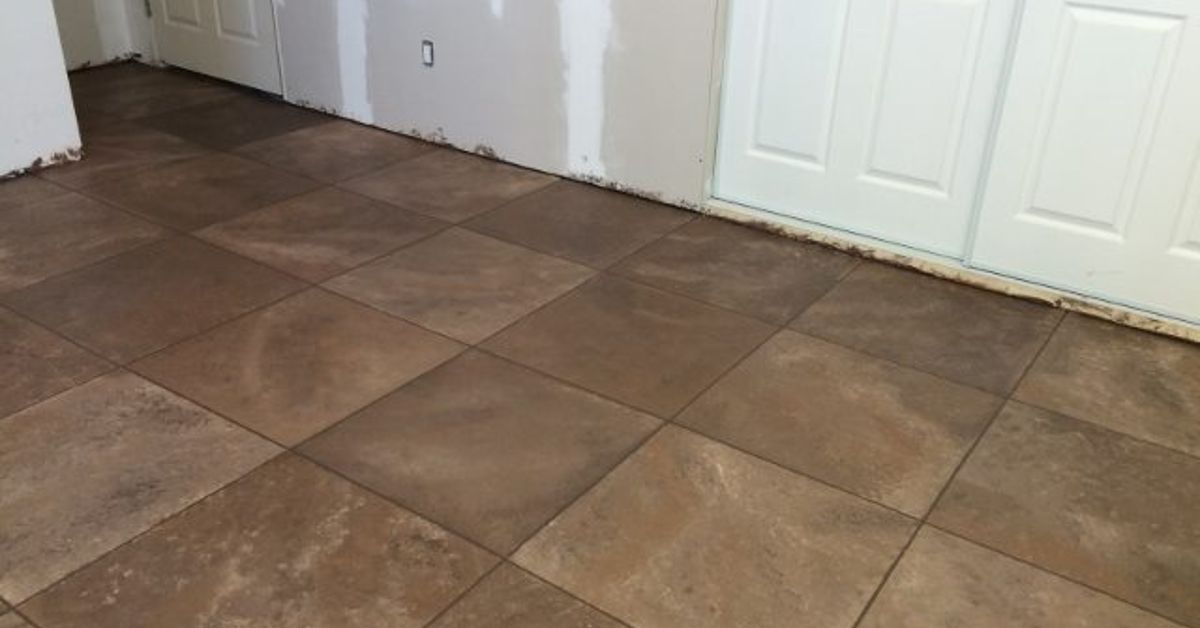
An outdated ceramic tile floor has a special talent: it can make an otherwise attractive bathroom or laundry room look as though it is still waiting for the return of avocado appliances. Replacing the tile would solve the problem, but demolition is noisy, expensive, dusty, and rarely kind to a weekend schedule.
Fortunately, a structurally sound tile floor can often be refreshed with specialty floor paint and a decorative stencil. The finished surface can imitate encaustic cement tile, vintage ceramic patterns, checkerboard flooring, or a custom geometric design without removing a single tile.
The secret is not artistic genius. It is preparation, compatible coatings, thin applications, and enough patience to let the floor cure before anyone marches across it wearing work boots. This guide explains how to paint a faux ceramic tile floor DIY style, from evaluating the original surface to applying the final protective coat.
Can You Really Paint a Ceramic Tile Floor?
Yes, but painted tile should be viewed as a decorative resurfacing project rather than a permanent replacement for new flooring. Tile is hard, glossy, and nonporous, which is wonderful when you are cleaning spilled coffee but less wonderful when you are asking paint to stick to it.
A successful finish depends on creating adhesion between the existing tile and the new coating. That generally requires aggressive cleaning, removal of contaminants, light sanding when required, a bonding primer or a dedicated floor-coating system, and a protective topcoat.
Some manufacturers offer two-step systems specifically formulated for tile, laminate, vinyl, linoleum, wood, and other difficult flooring surfaces. These may not require separate sanding or priming when the instructions are followed exactly. Traditional floor enamels, by contrast, usually need more surface preparation and a compatible primer.
Where Painted Tile Works Best
Painted ceramic tile is generally most practical in low- to moderate-traffic rooms, including:
- Guest bathrooms outside the shower enclosure
- Powder rooms
- Laundry rooms
- Small kitchens with manageable traffic
- Entryways that are not constantly wet or muddy
- Closets, craft rooms, and utility spaces
Use greater caution in shower floors, commercial spaces, heavily used mudrooms, or areas where standing water is common. Continuous moisture, abrasive dirt, pet claws, rolling furniture, and constant foot traffic can shorten the life of any painted finish. Even major paint manufacturers differ on the practice: some sell systems designed for floors, while others advise against coating floor tile because friction can cause premature wear.
Tools and Materials
Gathering everything before starting prevents the classic DIY crisis in which the floor is wet, the hardware store is closing, and your only clean paintbrush is approximately the width of a toothbrush.
- Vacuum, broom, and microfiber cloths
- Grease-cutting floor cleaner
- Nonmetallic scrub brush
- Tile or grout repair products
- 220- to 320-grit sandpaper, if required
- Orbital sander for a large area, if appropriate
- Respiratory protection, safety glasses, and gloves
- Painter’s tape and protective paper or plastic
- High-adhesion bonding primer
- Floor paint, tile paint, or a dedicated floor-coating system
- High-density foam roller or 1/4- to 3/8-inch nap roller
- Quality angled paintbrush
- Stencil sized to the existing tiles
- Stencil brush, foam pouncer, or small foam roller
- Low-tack stencil adhesive, optional
- Compatible clear protective topcoat, when required
- Small artist brushes for corrections
Do not automatically combine products from unrelated systems. A primer, decorative paint, and sealer can each perform beautifully alone yet react badly when stacked together. Choose products that their manufacturers identify as compatible, and test the full coating system on an inconspicuous tile before committing to the room.
Plan the Faux Tile Design
Measure the Existing Tiles
Measure the visible face of one tile rather than assuming it is exactly 8, 10, or 12 inches. Your stencil should fit inside the grout lines without needing to be stretched, folded, or emotionally negotiated with.
A stencil slightly smaller than the tile can leave a slim border that imitates a hand-painted ceramic design. A stencil matching the full tile face creates a continuous patterned appearance. Print or draw a paper sample first and place several copies on the floor to judge the scale from the doorway.
Choose a Simple Color Palette
Two colors are usually enough for a convincing faux ceramic tile floor. Try warm white with charcoal, cream with muted blue, pale gray with deep green, or sand with terracotta. A third accent color can add detail, but every additional shade increases drying time and the number of opportunities to lean an elbow into wet paint.
Use a lighter base coat to brighten a small room or a darker base to disguise grout lines and minor imperfections. Matte and low-luster colors often resemble handcrafted cement or unglazed ceramic tile more convincingly than a highly reflective finish. The protective topcoat will determine much of the final sheen.
How to Paint Faux Ceramic Tile Floors Step by Step
Step 1: Inspect and Repair the Floor
Paint cannot stabilize loose tiles, cure water damage, or persuade failing grout to remain in place. Walk across the entire floor and listen for hollow or moving tiles. Repair small chips, cracks, and missing grout with products suitable for the original material.
If numerous tiles are loose, the subfloor moves, moisture rises through the floor, or cracks continue across several tiles, solve the underlying problem before painting. A decorative coating hides color; it does not perform structural therapy.
Step 2: Deep-Clean and Degrease
Vacuum first, including corners and grout joints. Scrub the floor with a grease-cutting cleaner, paying extra attention to areas around toilets, appliances, cabinets, and doorways. Soap residue, body oils, cooking grease, wax, and silicone-based cleaning products can all interfere with adhesion.
Rinse with clean water until no cleaner remains, then let the floor dry completely. Cleaning residue can be almost as troublesome as the dirt it removed. For stubborn grout stains, use a nylon brush rather than a metal brush that may damage the grout or tile glaze.
Step 3: Scuff-Sand When the System Requires It
Many conventional coatings benefit from lightly sanding glossy tile with approximately 220- to 320-grit sandpaper. The goal is to dull the shine and create microscopic texture, not grind through the glaze or reshape the floor.
Wear appropriate protection, ventilate the room, and control dust. Vacuum thoroughly, wipe the surface with a clean damp microfiber cloth, and allow it to dry. Recheck grout joints and corners, where sanding dust enjoys hiding until the exact moment you begin painting.
Skip sanding only when the floor-coating manufacturer specifically instructs you to do so. Product directions take priority over generic DIY advice.
Step 4: Tape the Edges and Plan an Exit
Mask baseboards, cabinets, toilet bases, floor registers, and adjoining flooring. Press the edge of the tape firmly to reduce seepage.
Decide where you will finish before opening the paint. Begin at the point farthest from the doorway and work backward toward your exit. Otherwise, the final stage of the project may involve standing on a vanity and reconsidering several life choices.
Step 5: Apply Bonding Primer
When using a conventional system, apply a primer formulated for hard, glossy, nonporous surfaces. Cut in around walls, fixtures, and grout joints with a brush. Roll the larger sections in a thin, even layer.
A foam roller can produce a smooth finish, while a short-nap roller may reach textured tile and recessed grout more effectively. Avoid puddles in grout lines. Follow the label for drying time and apply a second coat only when recommended.
Some dedicated two-part floor-coating systems use a base coat that adheres directly to cleaned tile and therefore eliminate separate priming. Do not add primer beneath such a system unless the manufacturer permits it.
Step 6: Roll on the Base Color
Stir the coating thoroughly without whipping excessive air into it. Brush the perimeter and tight areas, then roll the main floor in manageable sections. Maintain a wet edge so adjacent sections blend rather than forming visible lap lines.
Apply thin coats. A heavy coat may look efficient, but it dries slowly, traps softness beneath the surface, and collects in grout joints. Two controlled coats generally look better than one enthusiastic swamp.
Allow each layer to dry according to the label. If the base color looks patchy after the first coat, add another rather than attempting to hide thin areas with the stencil.
Step 7: Position the Stencil
Wait until the base coat is sufficiently dry and firm. Center the stencil within the first full tile, usually in a visible area where alignment matters most. Secure it with painter’s tape or a very light application of repositionable stencil adhesive.
Before working on the floor, practice on cardboard. This reveals how much paint the tool carries and whether the chosen colors provide enough contrast.
Step 8: Apply the Decorative Pattern
Load a stencil brush, pouncer, or small foam roller with very little paint. Remove most of it on a paper towel or lint-free cloth. The tool should feel nearly dry. Excess paint is the main cause of bleeding beneath a stencil.
Use a straight up-and-down pouncing motion or several very light roller passes. Do not press hard. Lift the stencil vertically and inspect the result before moving it.
Work on alternating tiles so wet patterns are not disturbed. After the first group dries, return to fill the gaps. Clean the stencil periodically because paint buildup can distort edges. For partial tiles near walls and fixtures, bend the stencil carefully or complete the missing pattern with an artist brush.
Step 9: Correct Imperfections
Do not panic over small bleeds or uneven edges. Handmade ceramic and encaustic tiles are admired partly because they are not mechanically perfect. That said, obvious smudges can be corrected after the pattern dries.
Use a fine artist brush and the base color to sharpen outside edges. Restore missing sections with the stencil color. View the floor while standing before obsessing over a flaw visible only from three inches away. Your guests are unlikely to examine the floor with a jeweler’s loupe.
Step 10: Seal the Design
Apply the topcoat required by your chosen system. Some floor products include a dedicated clear second step that must be applied over the colored base. Other approaches use a compatible water-based clear floor finish.
Never assume an ordinary furniture polyurethane is suitable for glazed tile or for the paint beneath it. Some clear finishes can amber, become slippery, remain soft, or fail to bond. Confirm compatibility, sheen, recoat interval, and wet-slip characteristics before use.
Roll the finish in thin sections while maintaining a wet edge. Do not repeatedly roll an area that has begun to set. Apply additional coats only as directed, especially in doorways and other wear zones.
Step 11: Respect the Cure Time
Dry and cured are not interchangeable words. A floor may feel dry while the coating underneath remains vulnerable to pressure, water, cleaners, rugs, and furniture.
Depending on the product, light foot traffic may be permitted after about a day, furniture may require several days, and full cure may take a week or longer. Follow the exact schedule printed on the product. Keep pets away, avoid washing the floor, and lift rather than drag furniture when returning it to the room.
Common Mistakes to Avoid
Using Regular Wall Paint
Interior wall paint is designed to tolerate fingerprints and occasional cleaning, not shoes, grit, chair legs, and damp mops. Use a coating specifically identified for floors or tile.
Skipping the Test Patch
A small test confirms adhesion, color, sheen, and compatibility. Let the complete test system cure, then scratch it gently with a fingernail and place painter’s tape over it. Easy lifting is a warning to reconsider the preparation or products.
Leaving Cleaner on the Floor
Degreaser that is not rinsed away can form a film beneath the coating. Rinse with clean water and change the water frequently.
Loading the Stencil With Too Much Paint
The best stencil tool looks suspiciously underloaded. Several light passes produce cleaner lines than one juicy application.
Applying Thick Coats
Thick paint may wrinkle, remain soft, or dry unevenly in grout joints. Thin, uniform coats cure more predictably.
Putting Rugs Down Too Soon
Rubber-backed mats and rugs can trap moisture or bond to a finish that has not fully cured. Wait for the manufacturer-approved cure period and choose rug pads compatible with painted floors.
How to Maintain a Painted Faux Tile Floor
Sweep or vacuum regularly so sand and grit do not behave like tiny pieces of sandpaper. Clean spills promptly with a soft cloth. For routine washing, use a well-wrung microfiber mop and a mild cleaner approved for the coating.
Avoid abrasive powders, stiff scouring pads, harsh solvents, steam mops, and soaking the floor. Place felt pads beneath furniture and lift heavy items rather than dragging them. Keep a small sealed container of the base and stencil colors for future touch-ups.
Expect wear to appear first near thresholds, sinks, toilets, and major walking paths. A minor chip can often be cleaned, lightly sanded, touched up, and resealed before it grows into a larger peeling area.
Experience-Based Lessons From Faux Tile Floor Projects
The most useful lesson from successful painted-tile projects is that preparation feels disproportionately long because it is disproportionately important. The decorative pattern receives all the compliments, but cleaning and adhesion determine whether the compliments continue six months later. A floor that looks spotless can still hold invisible polish, grease, or soap residue. Cleaning twice is not excessive; it is cheaper than painting twice.
Another practical lesson is to complete a sample board using the exact primer, paints, stencil, and topcoat planned for the floor. Cardboard is helpful for practicing the stencil motion, but a spare tile is better for testing adhesion. A full sample also reveals whether the clear coat changes the color. Some deep shades become richer, while pale colors may look slightly warmer or glossier after sealing.
Stencil alignment becomes easier when the project follows the existing grout grid instead of fighting it. Begin with a complete tile in a visually important area and let minor compromises occur behind the toilet, beneath appliances, or along a less noticeable wall. Trying to force perfect symmetry everywhere can turn a cheerful weekend project into an advanced mathematics seminar.
It is also wise to own two identical stencils. While one is being cleaned and dried, the other can remain in use. A paint-covered stencil gradually loses its crisp shape, especially around fine details. Cleaning it before the buildup becomes thick is faster than repairing dozens of blurred motifs afterward.
Many beginners worry that the floor looks imperfect after the first few stenciled tiles. This is normal. Repeated patterns become convincing when viewed as a whole. Tiny differences create the handcrafted character associated with traditional ceramic or cement tiles. Correct obvious drips, but do not erase every variation.
Working in socks may reduce marks after the base coat has dried enough for stenciling, but the product directions should decide when the surface can be touched. Knee pads should also be tested carefully because textured foam or rubber can imprint a coating that feels dry but remains soft. A clean folded towel or smooth protective board may distribute pressure more safely, provided the manufacturer permits contact.
Scheduling is another major factor. The job is not merely a painting day. It includes cleaning time, drying time, primer intervals, base coats, stenciling, corrections, sealing, and curing. A small bathroom can require fewer active work hours than expected but occupy several calendar days. Arrange another bathroom, relocate laundry baskets, and prevent family members from entering the room on autopilot.
The final experience-based lesson is to accept that painted tile is maintainable rather than indestructible. A new ceramic installation can tolerate harder use, but it also costs considerably more and requires demolition. Painted flooring offers a stylish bridge when the tile is sound, the budget is limited, or a larger renovation is several years away. Keep leftover paint, document the product names, and treat minor touch-ups as normal maintenance rather than evidence that the project failed.
Final Thoughts
Learning how to paint faux ceramic tile floors DIY style can transform a dated room without the cost and disruption of demolition. The project works best when the original tile is secure, the space does not receive constant water exposure, and every coating is selected for adhesion and floor-level wear.
Clean more thoroughly than seems necessary, follow the product system instead of improvising, apply light stencil coats, and allow the finish to cure completely. With those fundamentals in place, an ordinary tile floor can become a convincing patterned feature that looks far more expensive than the collection of rollers, tape, and patience used to create it.
Note: Drying, recoating, ventilation, safety, and curing requirements vary by product. Always follow the current instructions supplied by the primer, floor coating, stencil paint, and topcoat manufacturers.